
Description:
Access to the LANCOM router is required for configuration and error analysis. If there is no remote maintenance available for accessing the device, it may be necessary to connect to the router from the Internet.
This article describes how to enable access by LANconfig / WEBconfig and SSH, and which IP addresses have to be set in order to enable remote access by LANCOM Systems Support.
In scenarios with an upstream router (plain Ethernet connection), port forwarding must be set up for the ports used to access the LANCOM router. By default these are the TCP ports 22 (SSH) and 443 (HTTPS).
If access by LANCOM Support is no longer required, LANCOM Systems recommends that you deactivate the remote access.
Requirements:
- LCOS as of version 9.24 (download latest version)
- LANtools as of version 9.24 (download latest version)
- SSH client for command-line access (e.g. PuTTY)
Procedure:
Allow access to the LANCOM router via HTTPS and SSH:
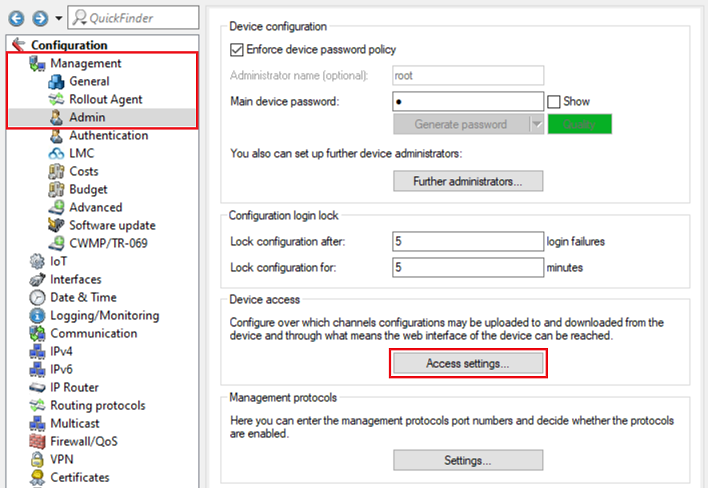
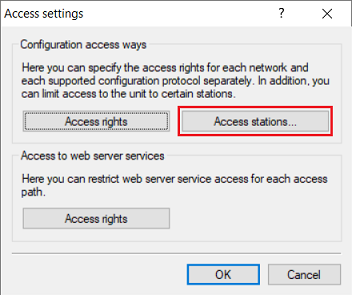
1) Open the configuration for the router in LANconfig and switch to the menu item Management → Admin → Access settings.
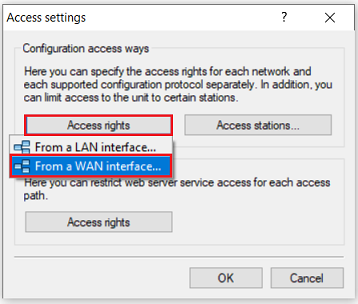
2) Under Configuration access ways open the menu Access rights → From a WAN interface.
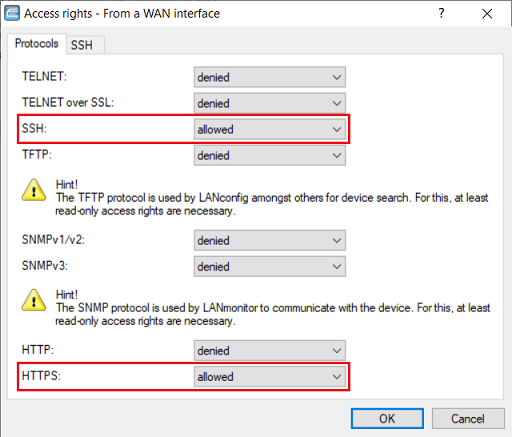
3) Under Protocols, use the drop-down menus to set the options SSH and HTTPS to allowed, which enables access to the router.
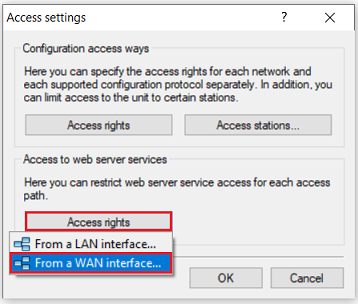
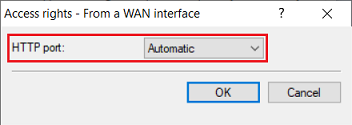
4) Under Access to web server services, open the menu Access rights → From a WAN interface.
5) Make sure that the HTTP port is set to the option Automatic, which means that the web server is active.
6) Go to the menu Access stations.
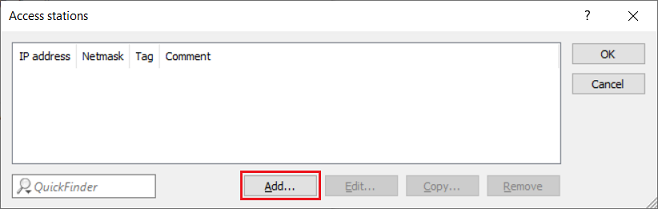
The access stations table is a whitelist. Access is only possible from the IP addresses or IP networks stored there.
The table Access stations needs to contain all of the IP networks or IP addresses from which access to the router should be allowed. Consequently, the internal networks must also be stored here. Otherwise access to the router will no longer be possible from the internal network!
7) Click on the Add button to create a new entry.
8) First enter the local network from which the router is to be accessed. Modify the following parameters:
- IP address: Enter the network address of the local network (in this example 192.168.1.0).
- Netmask: Enter the subnet mask of the local network (in this example 255.255.255.0).
- Routing tag: Leave the setting as the default value 0.
- Comment: Optionally enter a descriptive comment.
If necessary, repeat this step for further local networks.

9) Create a new entry for the LANCOM Support to access to the router via SSH and HTTPS. Modify the following parameters:
- IP address: Enter the IP address 212.117.89.9.
- Netmask: Enter the netmask 255.255.255.255. This stands for a single IP address.
- Routing tag: Leave the setting as the default value 0.
- Comment: Optionally enter a descriptive comment.

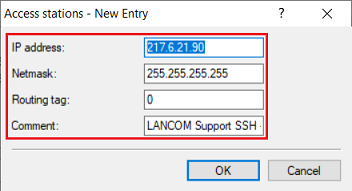
10) Create a new entry for the LANCOM Support to access to the router via SSH and HTTPS. Modify the following parameters:
- IP address: Enter the IP address 217.6.21.90.
- Netmask: Enter the netmask 255.255.255.255. This stands for a single IP address.
- Routing tag: Leave the setting as the default value 0.
- Comment: Optionally enter a descriptive comment.
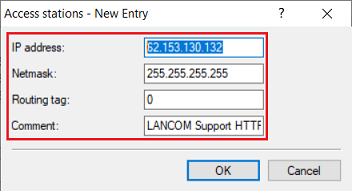
11) Create a new entry for the LANCOM Support to access to the router via HTTPS. Modify the following parameters:
- IP address: Enter the IP address 62.153.130.132.
- Netmask: Enter the netmask 255.255.255.255. This stands for a single IP address.
- Routing tag: Leave the setting as the default value 0.
- Comment: Optionally enter a descriptive comment.
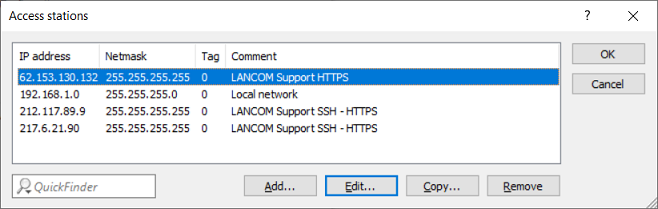
12) The Access stations table should then appear as shown below.
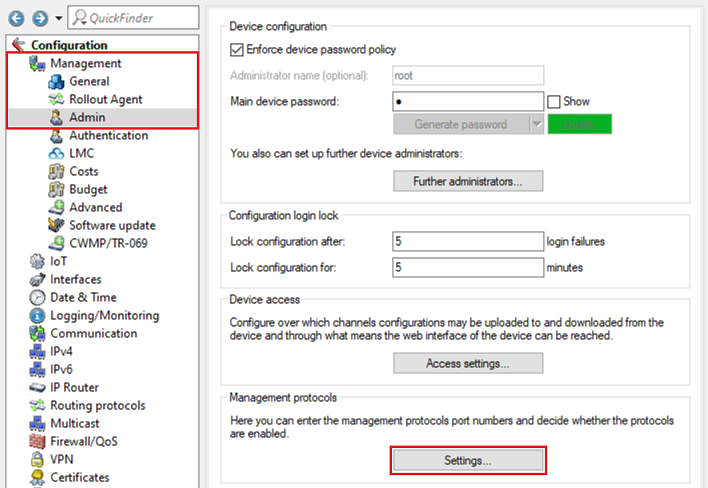
13) Navigate to the menu Management → Admin → Settings.
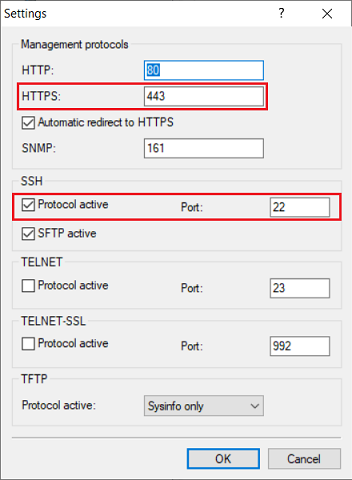
14) Make sure that under SSH there is a checkmark for Protocol active. Also check whether HTTPS uses a different port to 443 and whether SSH uses a different port to 22. If this is the case, please inform LANCOM Support.
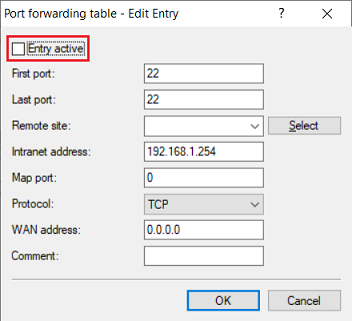
15) Under the menu IP router → Masqu. → Port forwarding table, please check whether port forwarding has been set up for the ports used by SSH and HTTPS (see step 14).
If this is the case, please deactivate this entry for the time that LANCOM support requires access, if possible.
16) This concludes the configuration of the remote access. Write the configuration back to the router.