
Description:
This document describes how to use certificates created by LANCOM Smart Certificate for a certificate-based IKEv2-VPN client connection.
Requirements:
- LCOS as of version 9.20 (download latest version)
- LANtools from version 9.20 (download latest version)
- LANCOM Advanced VPN Client (download latest version)
- LANCOM central-site gateway, WLAN controller, or LANCOM router with an activated VPN 25 Option (when using the Smart Certificate feature)
- Certificates for LANCOM routers and the LANCOM Advanced VPN Client. Creating certificates with LANCOM Smart Certificate is described in this Knowledge Base article.
Procedure:
1. Enable the certificate authority (CA) function in the LANCOM router:
In this example configuration, the LANCOM router acts as the CA for creating the certificates (Smart Certificate feature). If you wish to use certificates from another CA, you do not have to use the CA in the LANCOM router and you can skip this step of the configuration.
1.1) In LANconfig, open the configuration dialog for the LANCOM router and switch to the menu item Certificates → Cert. authority (CA).
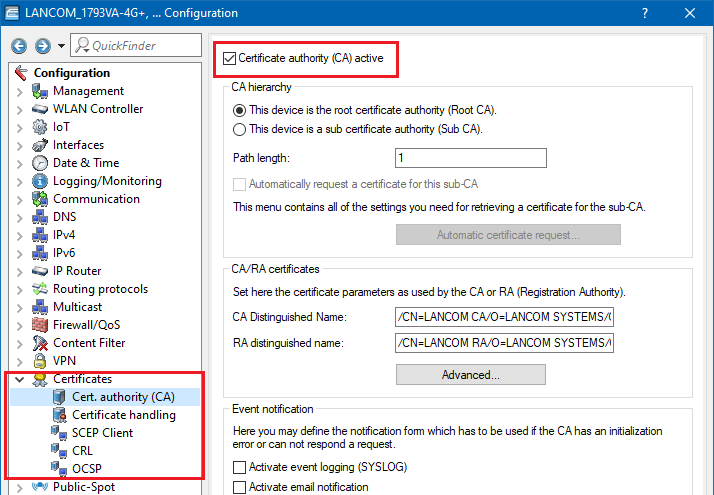
1.2) Set a check mark for the option Certificate authority (CA) active. The LANCOM router functions as the root certificate authority (root CA).
2. Upload the router certificate to the LANCOM router:
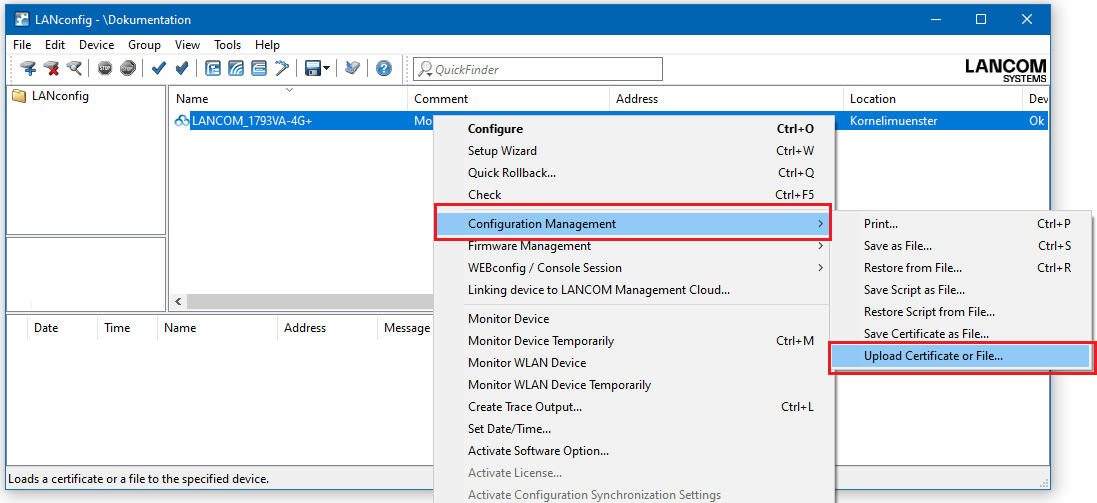
2.1) Right-click on the LANCOM router in LANconfig and select the option Configuration management → Upload certificate or file.
2.2) In the following dialog select the certificate file intended for the LANCOM router.
2.3) In the certificate type field, select a VPN container.
2.4) In the Cert. password box enter the password for the certificate file. Click on Open to start the upload.
3. Configure the certificate-based VPN client connection on the LANCOM router:
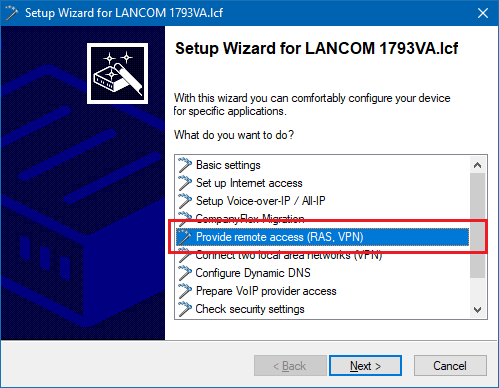
3.1) Start the Setup Wizard in LANconfig and select the option Provide remote access (RAS, VPN).
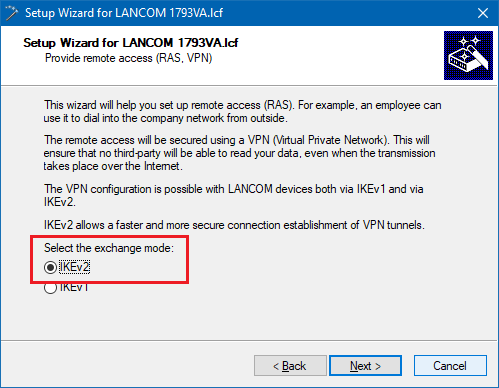
3.2) Select the option IKEv2.
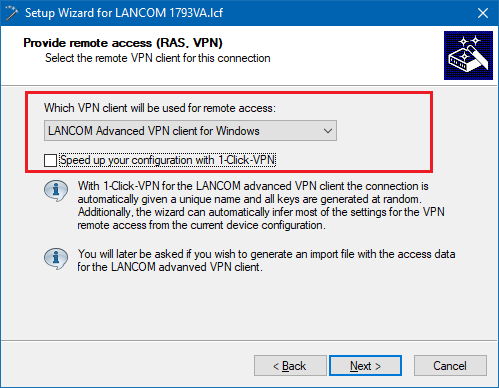
3.3) The connection should be established with the LANCOM Advanced VPN Client. Disable the 1-Click VPN option
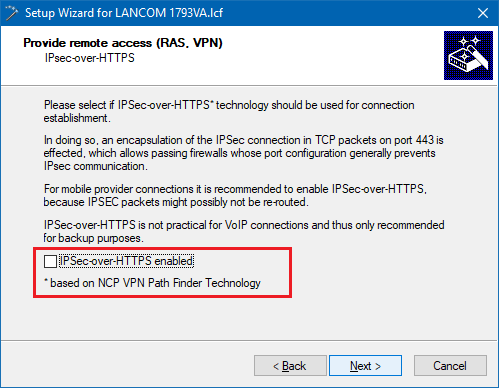
3.4) In this example, we do not use IPsec-over-HTTPS.
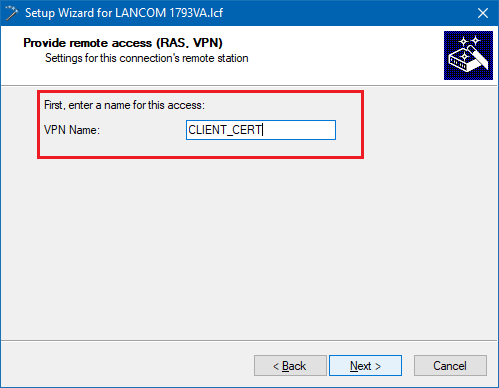
3.5) Enter a name for the new VPN connection.
3.6) Enter the public IP address or public DNS address of the LANCOM router.

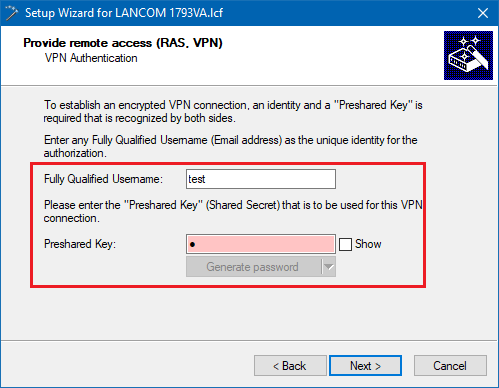
3.7) Enter any values into this dialog, as they will later be manually replaced in the configuration of the LANCOM router by the certificate authentication parameters.
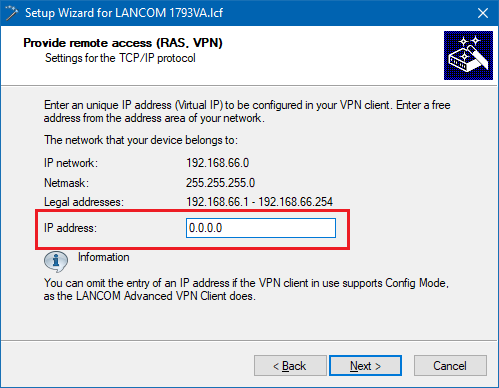
3.8) As the LANCOM Advanced VPN Client supports Config Mode, there is no need to enter an IP address into this dialog.
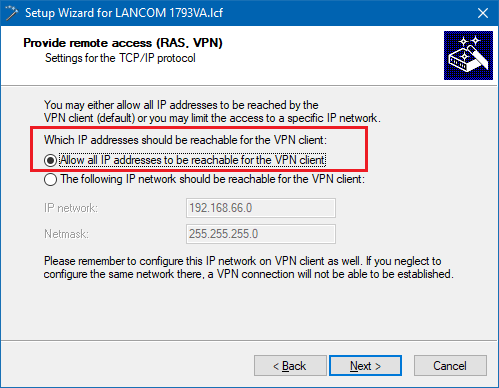
3.9) Communication should be allowed with all IP addresses in the local network.
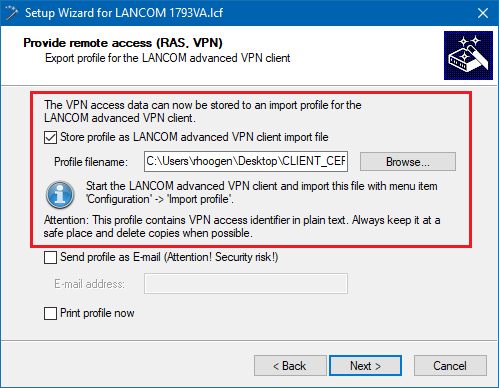
3.10) The VPN access credentials should be saved as an import file for the LANCOM Advanced VPN Client (*.ini file).
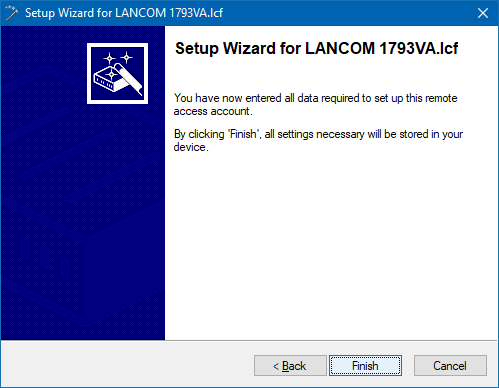
3.11) Click on Finish to write the configuration back to the LANCOM router. The *.ini file generated is stored on your PC.
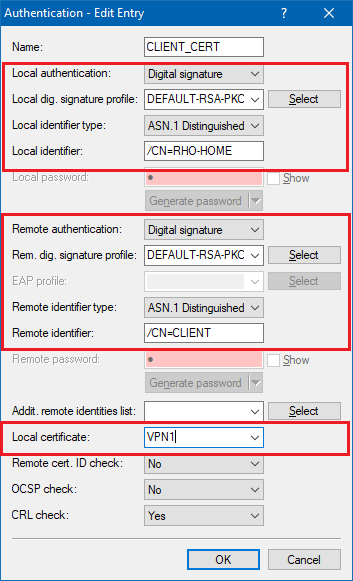
3.12) Open the configuration of the LANCOM router in LANconfig and navigate to VPN → IKEv2/IPsec → Authentication.
3.13) Select the available entry for the certificate-based VPN client connection (in this case: CLIENT_CERT).
- Set the parameters for local and remote authentication for each entry to the values Digital signature and 1 Distinguished Name.
- Set each Local dig. signature profile to DEFAULT-RSA-PKCS.
- As the local identity, enter the name of the certificate in the LANCOM router.
- As the remote identity, enter the name of the certificate in the VPN client.
- As the Local certificate, select the VPN Container you used in step 2.3.
3.14) Write the configuration back to the LANCOM router.
4. Installing the client certificate in Windows:
4.1) Double-click to open the *.p12 file of the client certificate.
4.2) Select the storage location used by the current user.
4.3.) Click on Next.
4.4) Enter the password for the client certificate. Leave the import options in their default settings.
4.5) The certificate store must be selected automatically by Windows.
4.6) Click Next and conclude the certificate import.
5. Importing the client certificate into the LANCOM Advanced VPN Client:
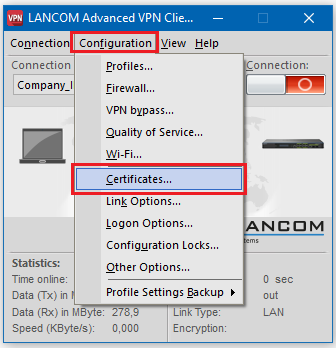
5.1) In the LANCOM Advanced VPN Client, open the option Configuration → Certificates.
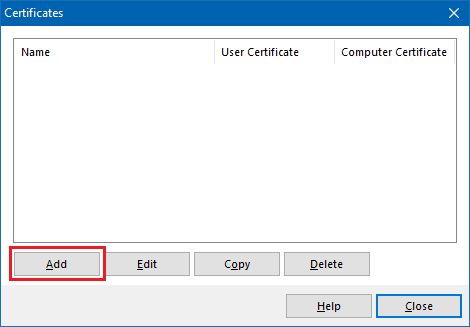
5.2) Create a new certificate configuration using the Add button
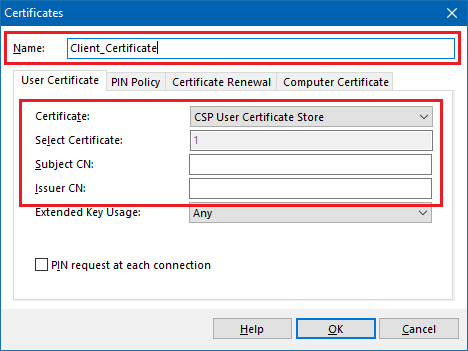
5.3) Enter a name for the new certificate configuration.
- In the Certificate field, select the option CSP User Certificate Store
- The fields Subject CN and Issue CN must be left blank.
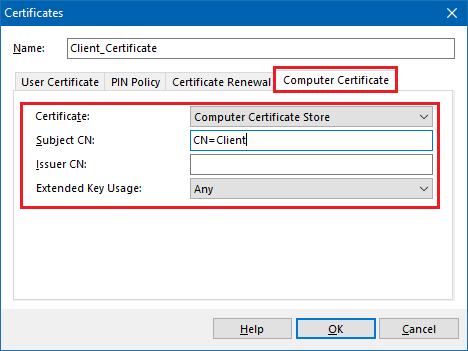
5.4) Switch to the tab Computer Certificate.
- Set the Certificate field to Computer Certificate Store.
- The field Subject CN must be set to the common name of the client certificate (in this case: CN=Client)
- Leave the Issue CN field blank.
5.5) Save the configuration with OK.
6. Import the *.ini file and the configuration of the VPN connection into the LANCOM Advanced VPN Client:
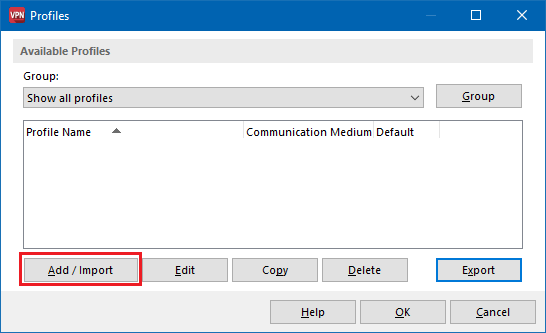
6.1) In the LANCOM Advanced VPN Client open the option Configuration → Profiles, and click Add/import.
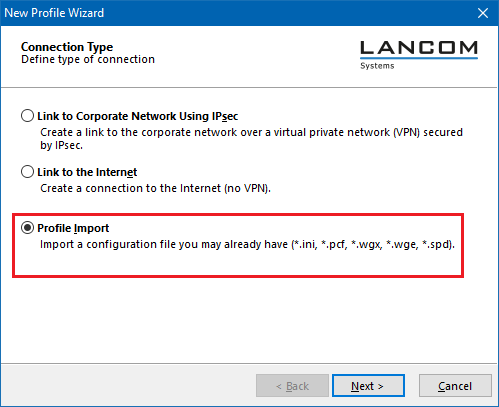
6.2) Select the option Profile import.
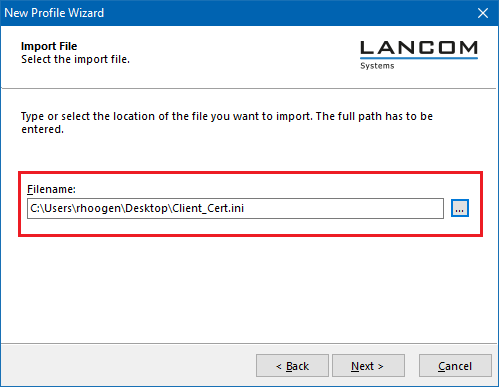
6.3) Set the path to the VPN profile file that was created in step 3.10.
6.4) Click on Finish to conclude the import.
6.5) Select the imported profile and then click Next.
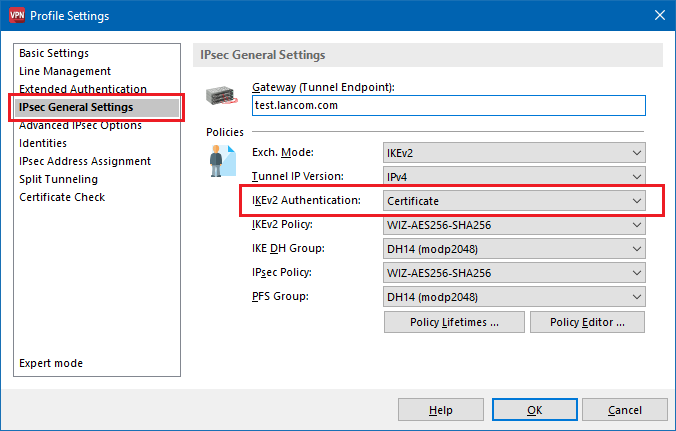
6.6) Switch to the menu IPsec General Settings and set IKEv2 Authentication to the value Certificate.
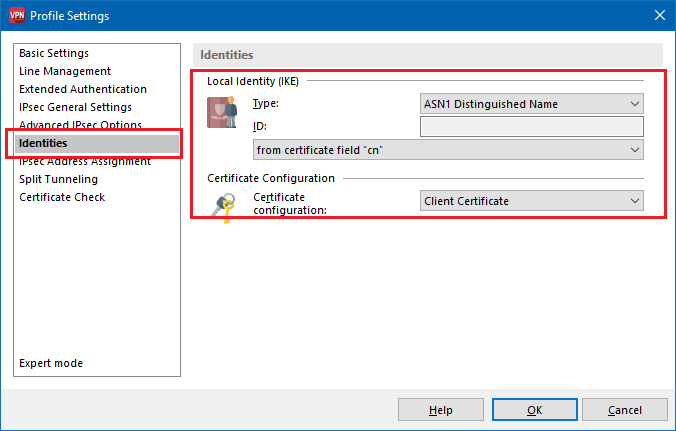
6.7) Switch to the menu identity and set the local identity type to the value ASN1 Distinguished Name.
6.8) The ID is set to the option from certificate field “cn”.
6.9) You need to set the Certificate configuration to the certificate configuration created in step 5.5 (in this case: VPN_Client).
6.10) This concludes the configuration. Close the dialogs of the LANCOM Advanced VPN Client with OK.
After a successful configuration, the Advanced VPN Client shows the icons for Smartcard and PIN.