
Description:
An IPv4 masquerading ("NAT") is only possible over a WAN connection. When going in the direction of a LAN or WLAN interface wants to mask, then the appropriate LAN or WLAN interface must be declared as a DSL port, so that it can be used to establish a WAN connection (typically IPoE or DHCPoE).
This was only possible for access points until LCOS 10.12. As of LCOS version 10.20 DSLoL is also available for WiFi routers.
This document describes how to set up a WAN connection that operates over a logical WLAN interface of a LANCOM access point or wifi router (DSLoL).
Requirements:
- LANtools as of version 7.80 (download latest version), LCOS as of version 10.20 for wifi routers
- LCOS as of version 7.80 (download latest version), LCOS as of version 10.20 for wifi routers
The DSLoL feature is not available on 180x series routers.
Procedure:
1) Open the configuration of the LANCOM access point or wifi router in LANconfig and go to the menu Interfaces → WAN → Interface settings → DSLoL.
2) Under LAN interface select the appropriate logical WLAN interface that is to be used to establish the WAN connection.

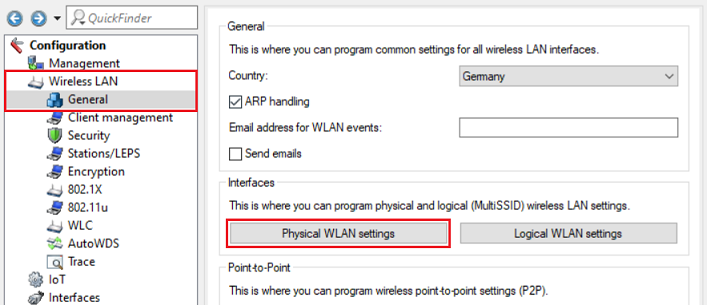
3) Go to the menu Wireless LAN → General → Physical WLAN settings.
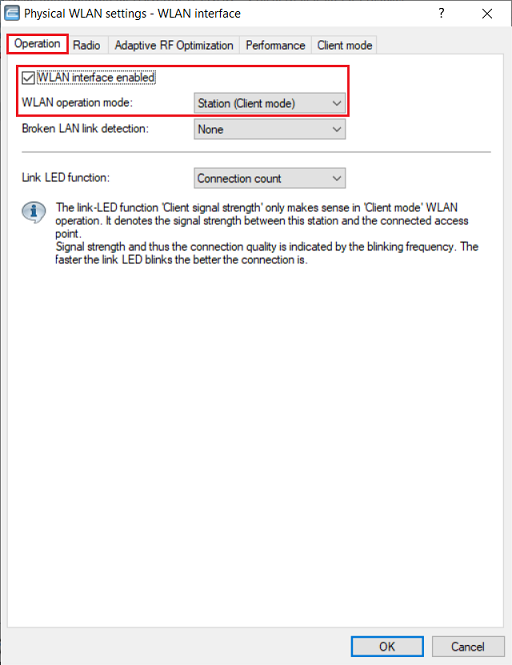
4) Make sure, that the WLAN interface is enabled and set the WLAN operation mode to Station (Client mode).
5) Change to the tab Client mode and make sure, that the parameter Keep client connection alive is active and Scan bands is set to All.

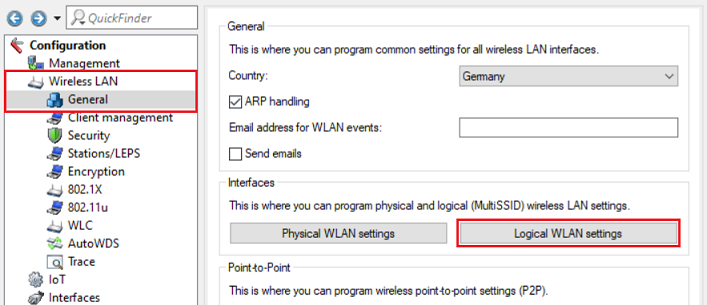
6) Go to the menu Logical WLAN settings and select the WLAN interface used in step 2 (in this example WLAN-1).
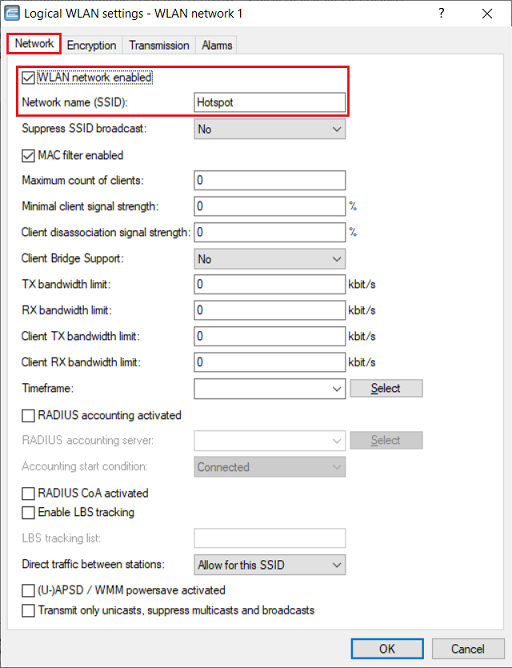
7) Make sure, that the WLAN network is enabled and enter the WiFi name you want to establish a connection with as Network name (SSID).
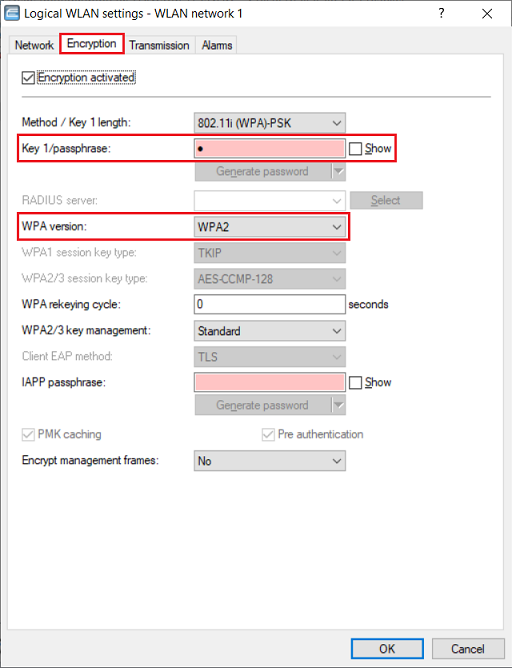
8) Go to the tab Encryption and change the following parameters:
- Key 1/passphrase: Enter the WPA key of the WiFi network you want to connect to.
- WPA version: Select the used encryption mode of the WiFi network you want to connect to (in this example WPA2).
9) Set up a Plain Ethernet connection via the setup wizard Set up Internet access and enter an unused DSL port. The procedure is described in this Knowledge Base article.
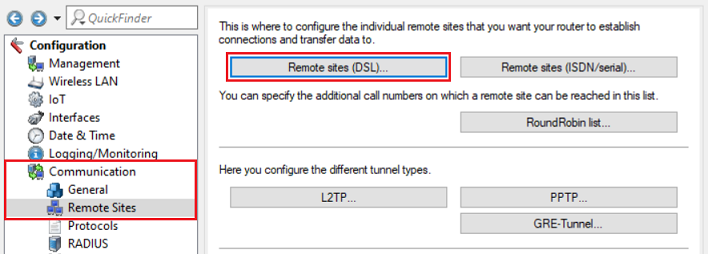
10) Go to the menu Communication → Remote Sites → Remote sites (DSL).
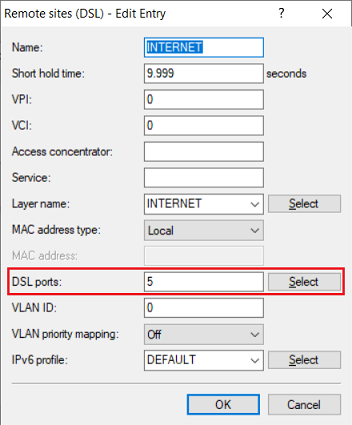
11) Edit the Plain Ethernet connection created in step 9) and enter the DSL port for DSLoL.
- Router with four LAN ports: DSL port 5
- Router with two LAN ports: DSL port 2
12) The configuratuion of the access point / WiFi router is now complete. Write the configuration back into the device.