
Description:
In certain circumstances it may not be possible to implement port forwarding to a location where a network resource is to be reached, for example where no public IPv4 address is available (e.g. with dual-stack lite).
In a case like this, port forwarding can be realized via a VPN tunnel if the location has a VPN connection to another site that does have a public IPv4 address.
This document describes how to implement port forwarding through a VPN tunnel.
Please note that when using port forwarding, anyone can read unencrypted information as cleartext. LANCOM Systems recommends using an encrypted VPN connection when transferring important information.
Requirements:
- LCOS as of version 10.12 (download latest version)
- LANtools as of version 10.12 RU4 (download latest version)
- Configured and functional Internet connections at the headquarters and the branch office
- Public IPv4 address at the headquarters
- Configured and functional IKEv2 VPN connection as previously configured with the Setup Wizard.
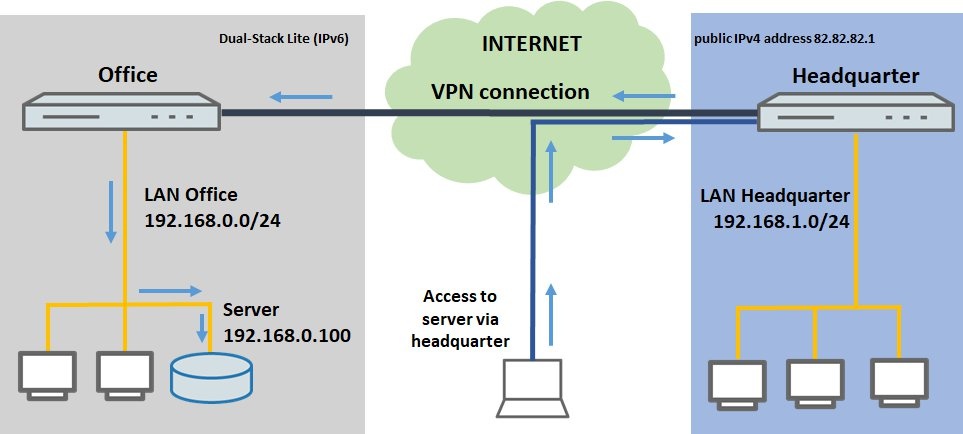
Scenario:
- The headquarters has an Internet connection with a fixed IPv4 address
- The branch office has an Internet connection with a non-public IPv4 address (e.g. dual-stack lite)
- The headquarters and the branch office are connected by VPN
- Field staff require access to a server at the branch office by means of port forwarding
Procedure:
1) Configuring port forwarding on the router at the headquarters:
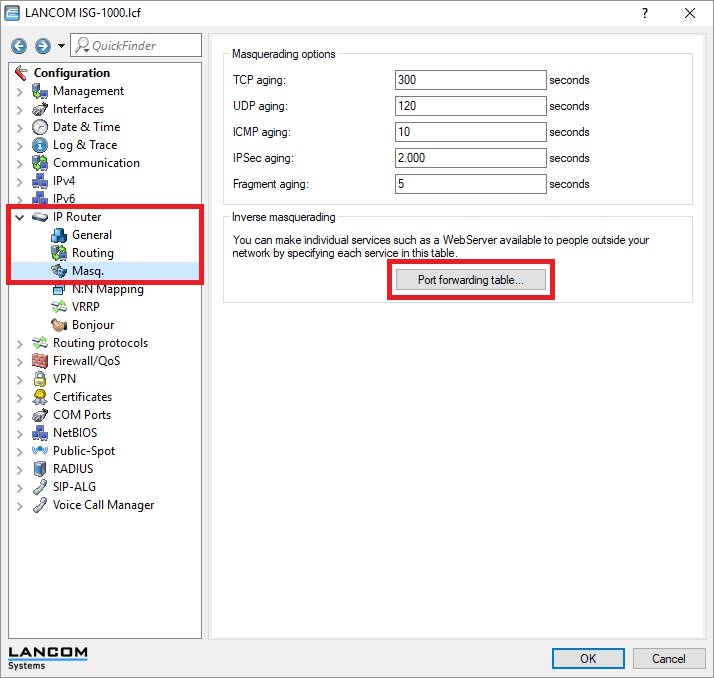
1.1) Open the configuration of the router at the headquarters and switch to the menu item IP router → Masq. → Port forwarding table.
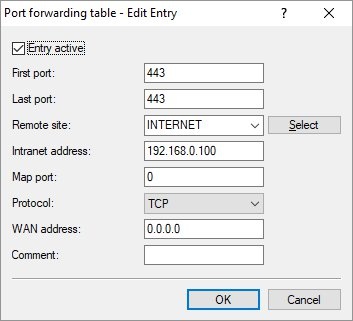
1.2) Create a new entry and enter the following information:
- First port: Enter port 443
- Last port: Enter port 443
- Remote site: From the drop-down menu, set the remote site to INTERNET, so that port forwarding applies to this connection only
- Intranet address: Enter the IP address of the server in the branch-office network (192.168.0.100)
- Map port: Leave Map port as 0, as no remapping is required
- Protocol: Set the protocol to TCP, as HTTPS is transmitted via TCP
Further information about port forwarding is available in this Knowledge Base document.
1.3) Write the configuration back to the router. This concludes the configuration at the headquarters.
2) Configuring the VPN route on the router at the branch office:
Since communications are required with a party on the Internet, a default route must be created for the VPN connection.
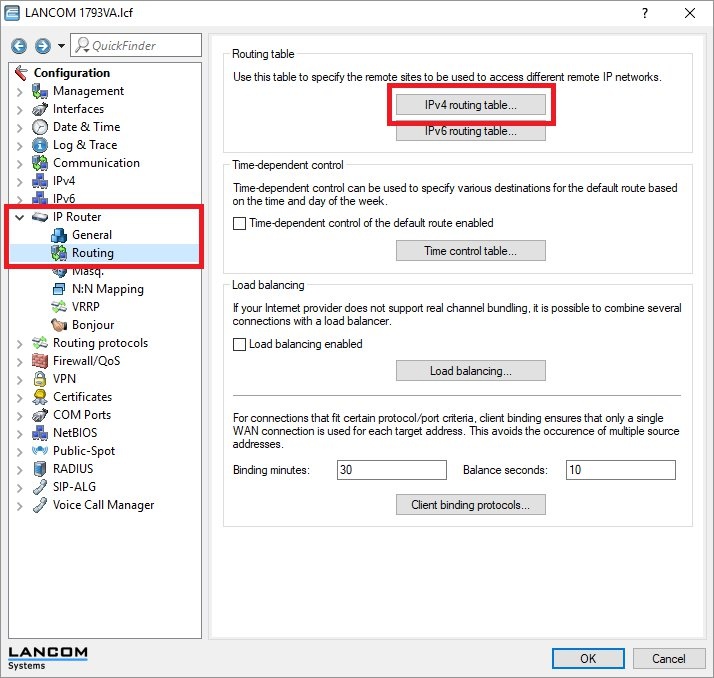
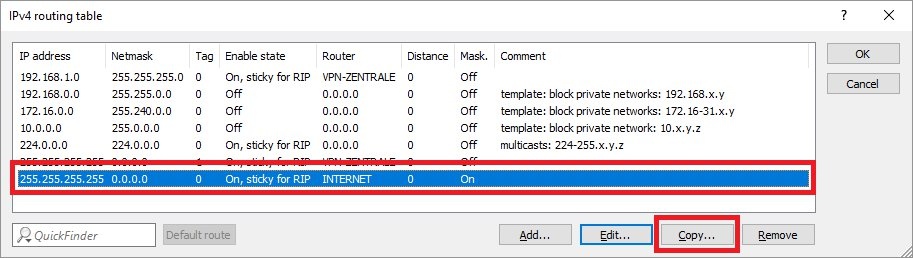
2.1) Open the configuration of the router at the branch office and switch to the menu item IP router → Routing → IPv4 routing table.
2.2) Mark the default route for the Internet connection and click Copy.
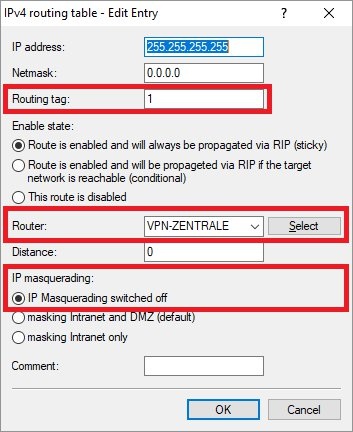
2.3) Modify the following parameters:
- Routing tag: Enter a routing tag not equal to 0, which has not yet been assigned elsewhere.
- Router: From the drop-down menu, select the VPN remote for the headquarters.
- IP masquerading: Set the radio button to IP masquerading switched off
The routing tag must not match any interface tag already stored under IPv4 → General → IP networks; otherwise the entire communication of this network takes will be routed through the VPN tunnel.
2.4) Write the configuration back to the router.