
...
To establish an Advanced VPN Client connection to a router, a one-time password (OTP) should be generated, which is displayed in an authenticator app and must be entered when starting the VPN connection.
Procedure:
1. Aktivieren der CA und Erstellen der Zertifikate auf dem Router per ) Activate the CA and create the certificates on the router using Smart Certificate:
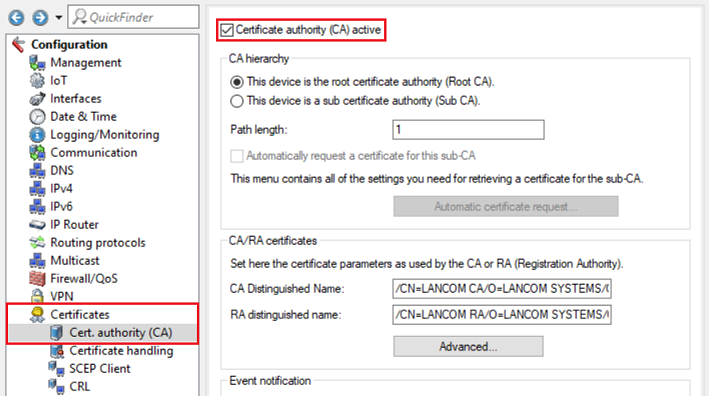
1.1 Öffnen Sie die Konfiguration des Routers in LANconfig, wechseln in das Menü ) In LANconfig, open the configuration for the router, navigate to the menu Certificates → Certificate authority (CA) und setzen den Haken bei and set a checkmark next to Certificate authority (CA) active.Schreiben Sie die Konfiguration anschließend in den Router zurück
Then write the configuration back to the router.
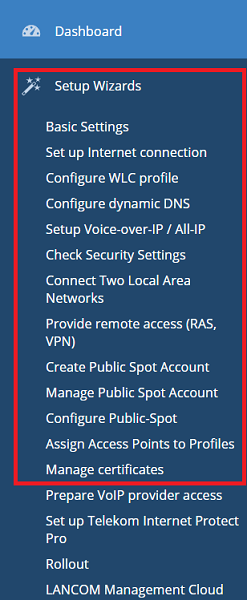
1.2 Öffnen Sie das Webinterface des Routers und wechseln in das Menü Setup Wizards → ) Open the web interface for the router and switch to the menu item Setup Wizards → Manage certificates.
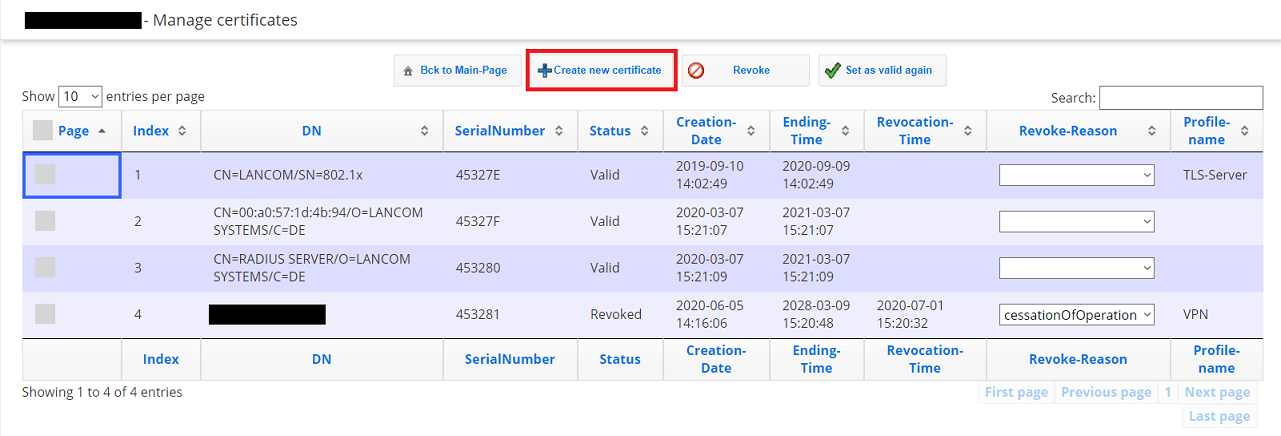
1.3 Klicken Sie auf ) Click on Create new certificate.
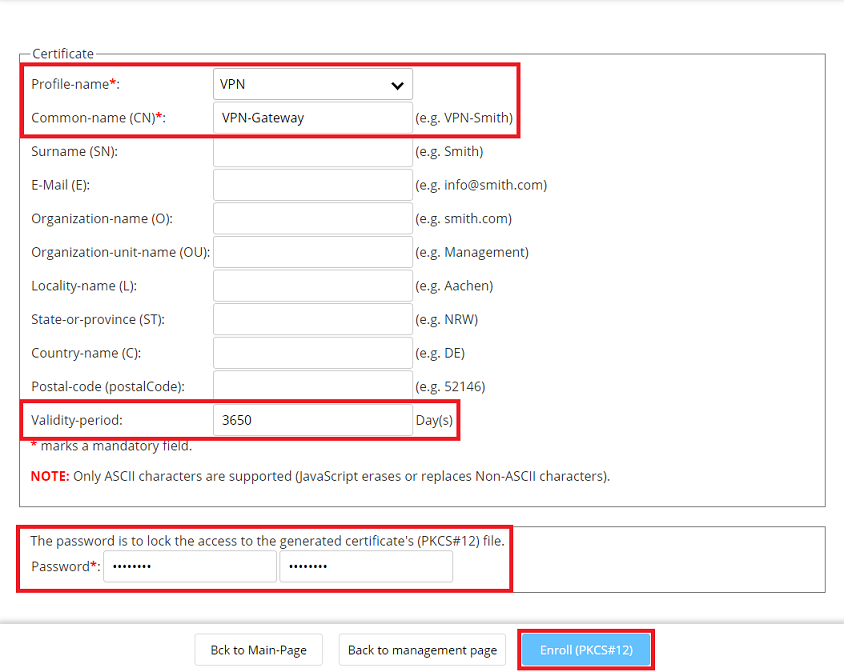
1.4 Passen Sie folgende Parameter an, klicken auf Enroll (PKCS#12) und speichern das Zertifikat ab) Adjust the following parameters, click on Enroll (PKCS # 12) and save the certificate:
- Profile - name: Wählen Sie im Dropdownmenü VPN ausFrom the drop-down menu, select VPN.
- Common - name (CN): Geben Sie einen aussagekräftigen Common Name an (in diesem Beispiel Enter a descriptive common name (in this example VPN-Gateway).
- Validity - period: Hinterlegen Sie eine möglichst lange Gültigkeitsdauer (in diesem Beispiel 10 JahreEnter a validity periodthat is as long as possible (in this example 10 years).
- Password: Geben Sie ein Passwort an, mit welchem das Zertifikat verschlüsselt wirdEnter a password used to encrypt the certificate.
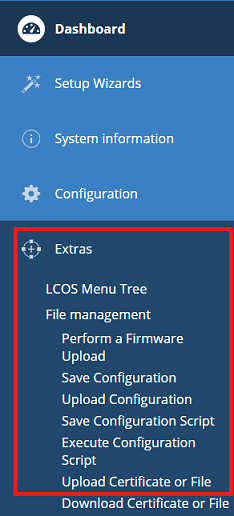
1.5 Wechseln Sie im Webinterface in das Menü Extras ) In the web interface, change to the menu Tools → Upload Certificate or File.
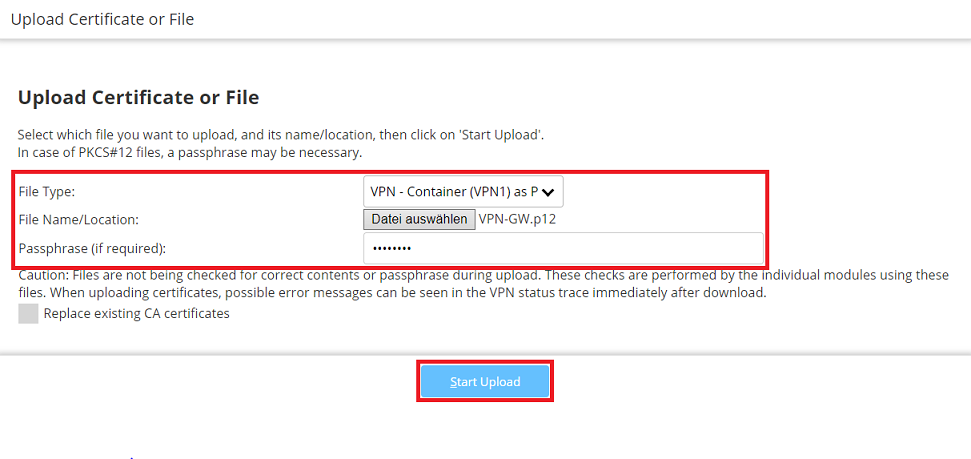
1.6 Passen Sie folgende Parameter an und klicken auf Start Upload) Modify the following parameters and then click Start upload:
- File Type: Wählen Sie im Dropdownmenü einen bisher nicht verwendeten VPN-Container aus (in diesem Beispiel wird der Select an unused VPN container from the drop-down menu (in this example the VPN - Container (VPN1) verwendet).
- File Name/Location: Wählen Sie das in Schritt Select the certificate created in step 1.4 erstellte Zertifikat aus.
- Passphrase: Geben Sie das in Schritt Enter the password set in step 1.4 hinterlegte Passwort an.
2. Einrichtung der ) Set up the IKEv2-EAP Verbindung auf dem Routerconnection on the LANCOM router:
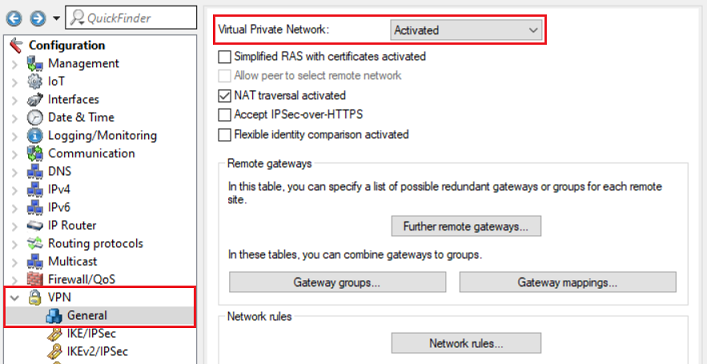
2.1 Öffnen Sie die Konfiguration des Routers ) Open the configuration of the router in LANconfig, wechseln in das Menü switch to the menu VPN → Generalund wählen bei and set the drop-down menu for Virtual Private Network im Dropdownmenü to Activatedaus.
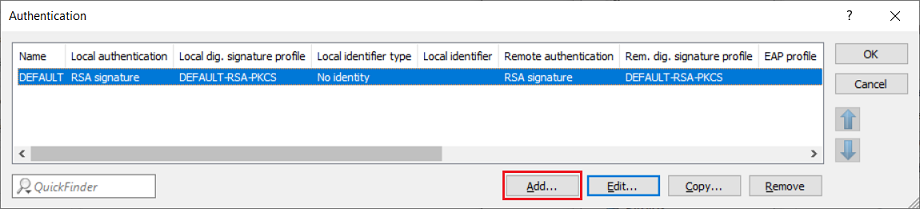
2.2 Wechseln Sie in das Menü ) Switch to the menu VPN → IKEv2/IPSec IPsec → Authentication.
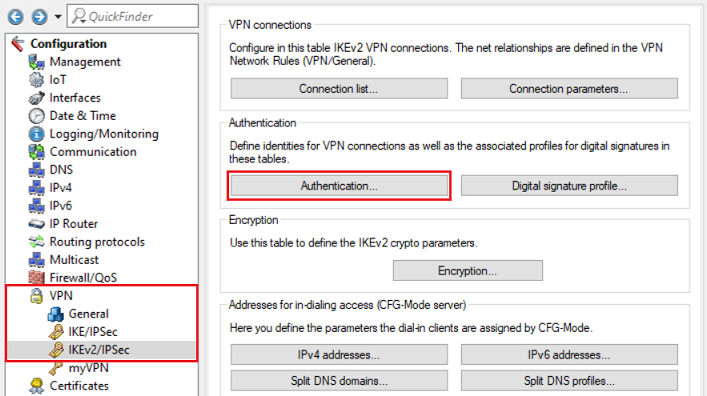
2.3 Erstellen Sie ein neues ) Add a new Authentication profile.
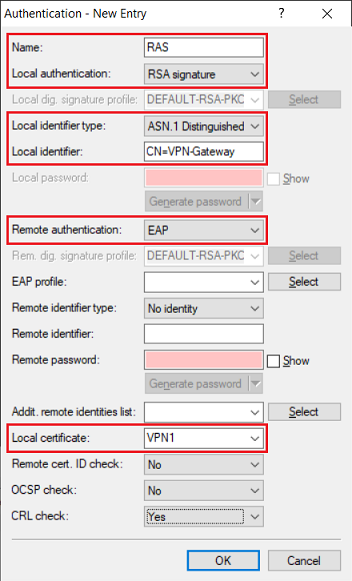
2.4 Passen Sie folgende Parameter an) Enter the following parameters:
- Name: Vergeben Sie einen aussagekräftigen NamenEnter a descriptive name.
- Local authentication: Wählen Sie im Dropdownmenü From the drop-down menu, select RSA signature aus.
- Local identifier type: Wählen Sie im Dropdownmenü ASN. From the drop-down menu, select 1 Distinguished Name aus.
- Local identifier: Hinterlegen Sie den in Schritt Enter here the common name set in step 1.4 vergebenen Common Name (in diesem Beispiel this example CN=VPN-Gateway).
- Remote authentication: Wählen Sie im Dropdownmenü EAP aus From the drop-down menu, select EAP.
- Local certificate: Wählen Sie im Dropdownmenü den in Schritt From the drop-down menu, select the VPN container created in step 1.6 verwendeten VPN-Container aus.
2.5 Wechseln Sie in das Menü ) Switch to the menu VPN → IKEv2/IPSec IPsec → IPv4 addresses.
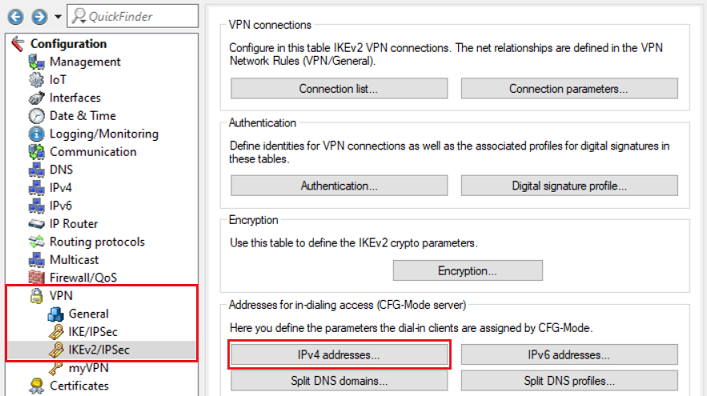
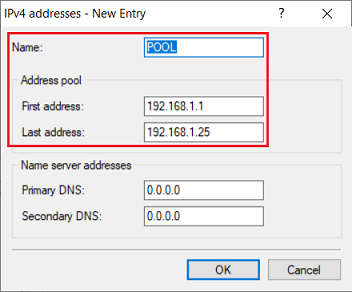
2.6 Passen Sie folgende Parameter an, um einen neuen IPv4-Adress-Pool zu erstellen) Adjust the following parameters to create a new IPv4 address pool:
- Name: Vergeben Sie einen aussagekräftigen NamenEnter a descriptive name.
- First address: Geben Sie die erste IP-Adresse aus einem Adress-Pool an, aus dem die VPN-Clients bei der Einwahl eine IP-Adresse beziehenEnter the first IP address from an address pool. An IP address from this pool will be assigned to the VPN client when it dials in.
- Last address: Geben Sie die letzte IP-Adresse aus einem Adress-Pool an, aus dem die VPN-Clients bei der Einwahl eine IP-Adresse beziehen Enter the last IP address from an address pool. An IP address from this pool will be assigned to the VPN client when it dials in.
2.7 Wechseln Sie in das Menü VPN → IKEv2/IPSec → Extended settings.
...