
...
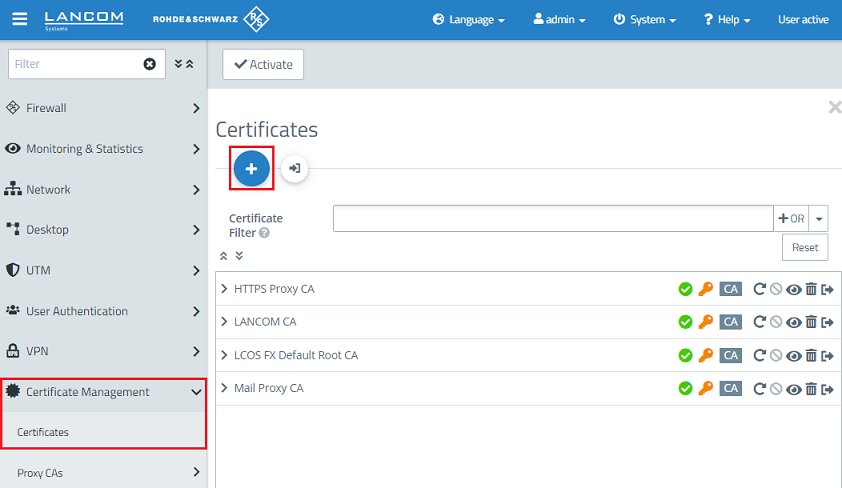
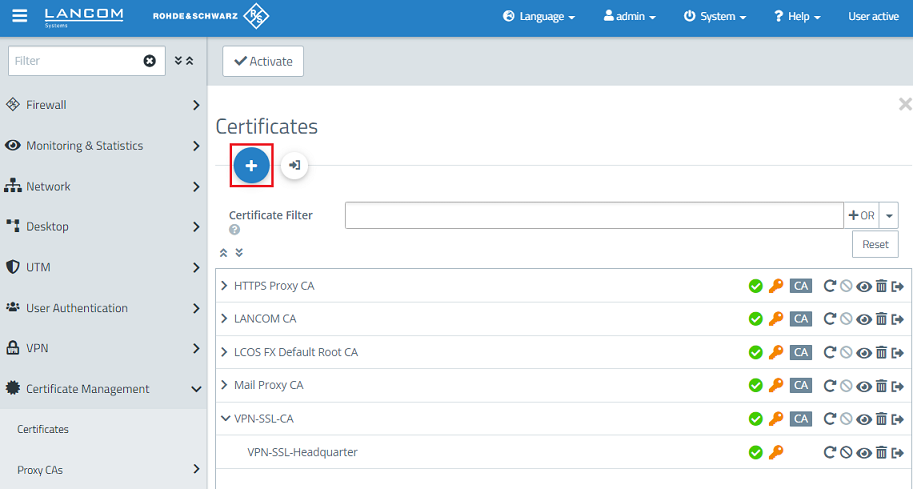
1.1) Connect to the Unified Firewall, switch to the menu Certificate Management → Certificates and click on the "+” icon to create a new certificate CA.
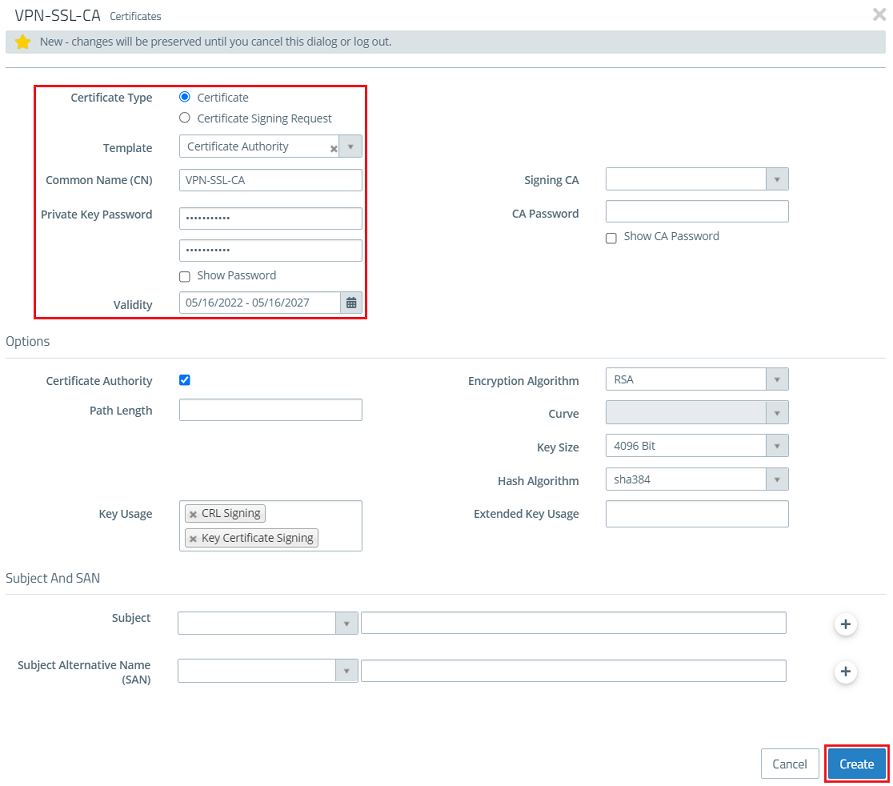
1.2) Enter Modify the following parameters in order to create a CAand click Create:
- Certificate type: From the drop-down menu, select Leave the setting on Certificate.
- Template: In CA for VPN/web-server certificate.Public key encryption: From the drop-down menu , select RSA.Private key size: Set the value in the drop-down menu to 4096.the option Certificate Authority.
- Common name (CN): Enter a descriptive common name.
- Private key password: Set a password. This is used to encrypt the private key.
- Validity: Specify how long the certificate should remain valid. For a CA, the period of validity is usually set to be very high. Private key password: Set a password. This is used to encrypt the private keyThe default setting for a CA is a validity of 5 years.
| Info |
|---|
The rest of the parameters (e.g. the encryption settings) can be left at the default values. |
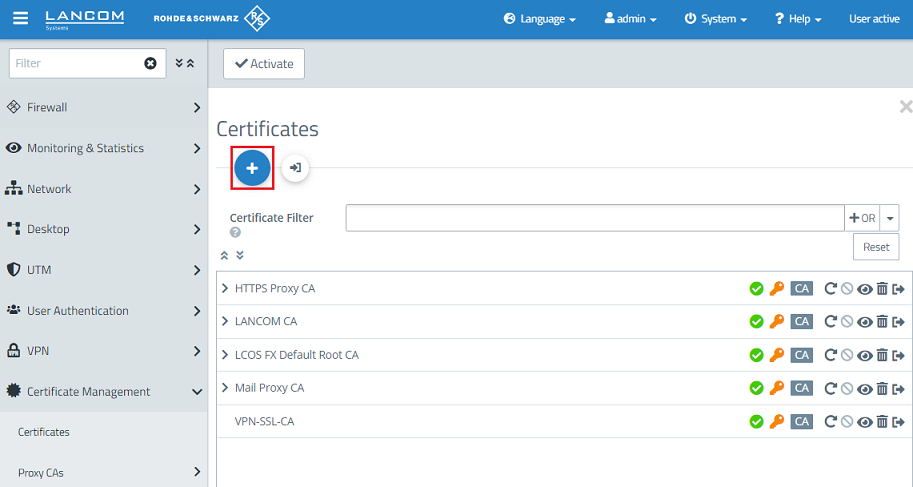
1.3) Create another certificate by clicking on the "+” icon. This is used for authenticating VPN SSL connections on the Unified Firewall.
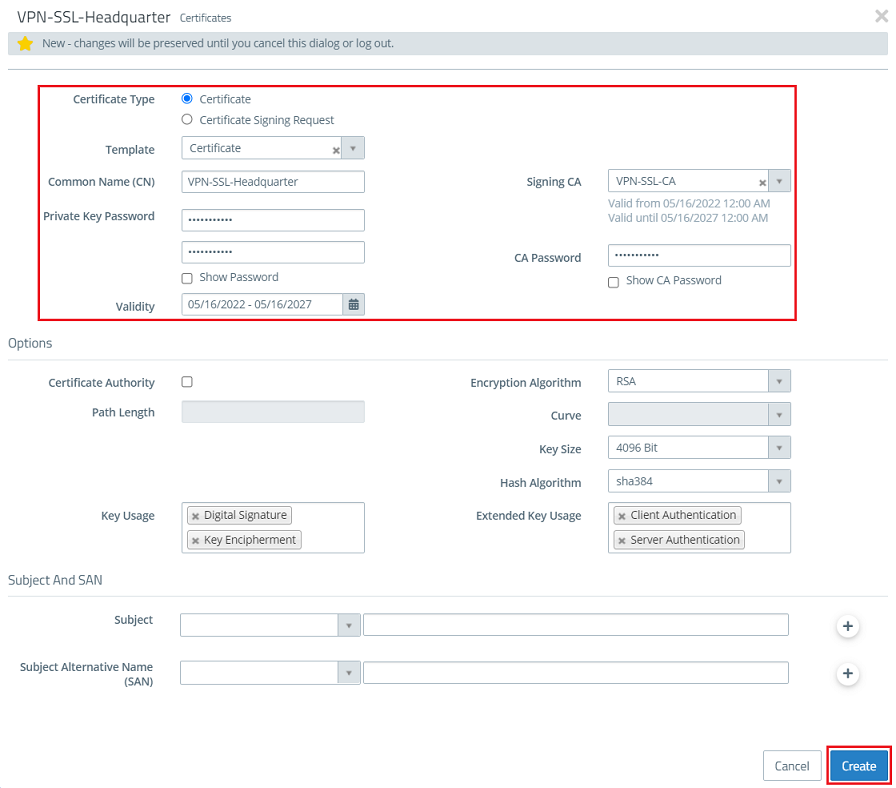
1.4) Store Modify the following parameters in order to create a VPN certificate, which is used to authenticate VPN clients at the Unified Firewalland click Create:
- Certificate type: Leave the setting on Certificate.
- Template: In From the drop-down menu, select VPN certificate.Signing CA: From the drop-down menu , select the CA created in step 1.2.
- Public key encryption: From the drop-down menu, select RSA.
- Private key size: Set the value in the drop-down menu to 4096.
- option Certificate.
- Common Name (CN): Enter a descriptive common name.
- Private key password: Set a password. This is used to encrypt the private key.
- Validity: Specify how long the certificate should remain valid. For a VPN certificate used to accept VPN clients, the period of validity is usually set to be very high.
- Signing CA password: Enter the private key password set : From the drop-down menu, select the CA created in step 1.2.
- Private key CA password: Set a password. This is used to encrypt Enter the private key password set in step 1.2.
1.5) Create another certificate by clicking on the "+” icon.
1.6) Store the following parameters in order to create a VPN certificate, which is used to authenticate a particular employee or VPN client:
- Certificate type: From the drop-down menu, select VPN certificate.
- Signing CA: From the drop-down menu, select the CA created in step 1.2.
- Public key encryption: From the drop-down menu, select RSA.
- Private key size: Set the value in the drop-down menu to 4096.
- Common Name (CN): Enter a descriptive common name that characterizes the employees.
- Validity: Specify how long the certificate should remain valid. With VPN certificates for individual users, the period of validity is usually set quite low.
- CA password: Enter the private key password set in step 1.2.
- Private key password: Set a password. This is used to encrypt the private key.
...
2.1) Right click on the OpenVPN icon in the task bar.
2.2) Click Import file to import the VPN profile.
2.3) A message is displayed to indicate that the profile was successfully imported.
2.4) This concludes the configuration steps in the OpenVPN client.
3) Setting up port and protocol forwarding on a LANCOM router (scenario 2 only):
IPSec requires the use of the UDP ports 500 and 4500 as well as the protocol ESP. These must be forwarded to the Unified Firewall.
Forwarding the UDP ports 500 and 4500 automatically causes the ESP protocol to be forwarded.
| Info |
|---|
| If you are using a router from another manufacturer, ask them about appropriate procedure. |
3.1) Open the configuration for the router in LANconfig and switch to the menu item IP-Router → Masq. → Port forwarding table.

3.2) Save the following parameters:
- First port: Specify the Port 500.
- Last port: Specify the Port 500.
- Intranet address: Specify the IP address of the Unified Firewall in the transfer network between the Unified Firewall and the LANCOM router.
- Protocol: From the drop-down menu, select UDP.

3.3) Create a further entry and specify the UDP port 4500.

3.4) Write the configuration back to the router.