
| Seiteneigenschaften |
|---|
Description:
Ein WLAN-Controller verwaltet Access Points und weist diesen WLAN-Parameter zu, mit denen diese betrieben werden sollen. Fungiert der WLAN-Controller auch als Gateway (etwa bei Betrieb als Public Spot) oder bei Verwendung eines WLC-Tunnels, stellt der WLAN-Controller einen "Single point of failure" dar.
Es ist daher in einem solchen Szenario sinnvoll mindestens einen weiteren WLAN-Controller zwecks Bildung einer Redundanz einzubinden. Damit Änderungen bei Anpassungen nicht händisch auf allen Cluster-Geräten vorgenommen werden müssen, wird eine Konfigurations-Synchronisierung bei Vorhandensein der LANCOM High Availability Clustering Option eingerichtet (HA-Cluster).
| Hinweis |
|---|
|
Requirements:
- LCOS ab Version 9.10 (download aktuelle Version)
- LANtools ab Version 9.10 (download aktuelle Version)
- Mindestens zwei LANCOM WLAN-Controller
- LANCOM High Availability Clustering Option (für die Konfigurations-Synchronisierung)
- Der zweite WLAN-Controller (Slave) darf initial nicht konfiguriert sein und muss sich im Werkszustand befinden!
- Die Option Zertifizierungsstelle (CA) aktiviert in dem Menü Zertifikate → Zertifizierungsstelle (CA) auf dem zweiten WLAN-Controller (Slave) darf auf keinen Fall aktiv sein!
Scenario:
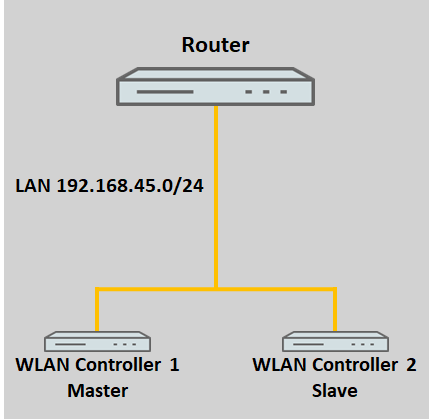
1. Beide WLAN-Controller befinden sich im gleichen Netzwerk:
Befinden sich die WLAN-Controller im gleichen Netzwerk, können diese sich automatisch per Broadcast finden.

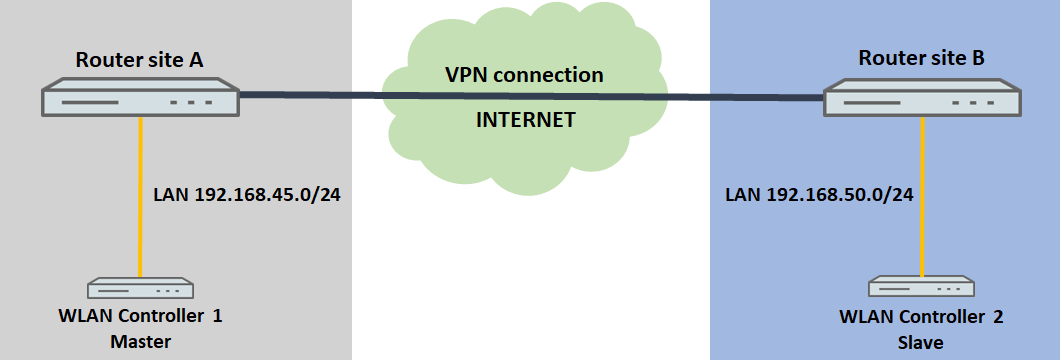
2. Beide WLAN-Controller befinden sich in unterschiedlichen Netzwerken:
Befinden sich die WLAN-Controller in unterschiedlichen Netzwerken, müssen die IP-Adressen der WLAN-Controller gegenseitig manuell bekanntgegeben werden.
In der Regel werden sich die WLAN-Controller in einem solchen Szenario an unterschiedlichen Standorten befinden, wie in der Szenario-Grafik zu sehen. Es ist aber auch denkbar, dass die WLAN sich am gleichen Standort befinden aber in getrennten Netzwerken.

Procedure:
Die Konfiguration des WLC-Clusters gestaltet sich grundsätzlich für beide Szenarien gleich. Lediglich die Bekanntgabe der anderen WLC-Cluster Teilnehmer ist anders (siehe Schritt 2.6).
A WLAN controller manages access points and assigns them the WLAN parameters they need to operate. If the WLAN controller also functions as a gateway (for example when operating as a Public Spot) or it operates a WLC tunnel, the WLAN controller represents a “single point of failure”.
In a scenario like this, having at least one additional WLAN controller for redundancy is an advantage. To avoid having to manually adapt the settings on all of the cluster devices, a configuration synchronization can be set up assuming that the LANCOM High Availability Clustering Option (HA cluster) is available.
| Hinweis |
|---|
|
Requirements:
- LCOS as of version 9.10 (download latest version)
- LANtools as of version 9.10 (download latest version)
- At least two LANCOM WLAN controllers
- LANCOM High Availability Clustering Option (for configuration synchronization)
- The second WLAN controller (slave) must initially be unconfigured and still with its factory settings.
- Under no circumstances is the option Certificate authority (CA) active in the menu Certificates → Cert. authority (CA) to be enabled on the second WLAN controller (slave)!
Scenario:
1) Both WLAN controllers are in the same network:
If the WLAN controllers are both in the same network, they will discover one another automatically by broadcast.
2) The two WLAN controllers are in different networks:
If the WLAN controllers are in different networks, the IP addresses of the WLAN controllers must be made known to one another manually.
Usually, the WLAN controllers will be located at different locations in a scenario like that pictured below. It is also conceivable that the WLANs are at the same location but in separate networks.
Procedure:
The configuration of the WLC cluster is basically the same for both scenarios. The only difference is the way that the other WLC cluster member is announced (see step 2.6).
| Hinweis |
|---|
If you use the table Access stations in the menu Management → Admin → Access settings → Configuration access ways, it must contain an entry with the IP address (e.g. IP address 192.168.45.100, netmask |
| Hinweis |
Bei Verwendung der Tabelle Zugriffs-Stationen in dem Menü Management → Admin → Zugriffseinstellungen → Konfigurations-Zugriffs-Wege muss die IP-Adresse (z.B. IP-Adresse 192.168.45.100 Netzmaske 255.255.255.255) oder das gesamte Netzwerk des anderen WLAN-Controllers (z.B. IP-Adresse or the entire network of the other WLAN controller (e.g. IP address 192.168.45.0 Netzmaske , netmask 255.255.255.0) hinterlegt werden, damit die WLAN-Controller untereinander kommunizieren können!in order for the WLAN controllers to be able to communicate with one another! |
1) Basic setup of the WLAN controller1. Grundeinrichtung der WLAN-Controller:
1.1 Grundeinrichtung des ersten WLAN-Controllers (Master) Configuring the first WLAN controller (master):
1.1.1 Führen Sie auf dem ersten WLAN-Controller (Master) die Grundeinrichtung durch1) Perform the basic setup on the first WLAN controller (master).
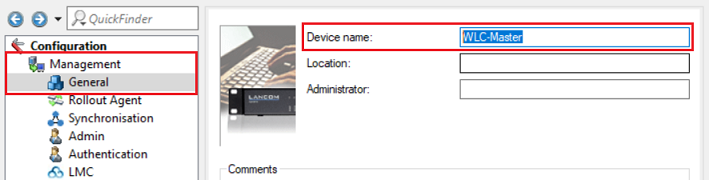
1.1.2 Vergeben Sie auf dem ersten WLAN-Controller (Master) in dem Menü ) Assign the first WLAN controller (master) a descriptive device name in the menu Management → Admin einen aussagekräftigen Gerätenamen (in diesem Beispiel this example WLC-Master).

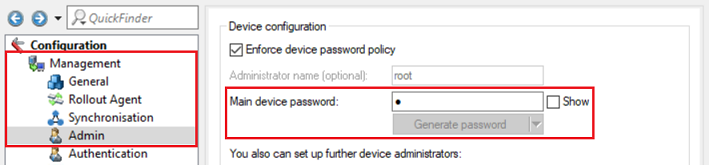
1.1. 3 Wechseln Sie in das Menü Management → Admin und vergeben ein möglichst sicheres Hauptgerätepasswort.) Change to the menu Management → Admin and set a secure Main device password.

1.1. 4 Die Grundeinrichtung des ersten WLAN-Controllers (Master) ist damit abgeschlossen) The basic configuration of the first WLAN controller is now complete.
1.2 Grundeinrichtung des zweiten WLAN-Controllers (Slave2) Configuring the second WLAN controller (master):
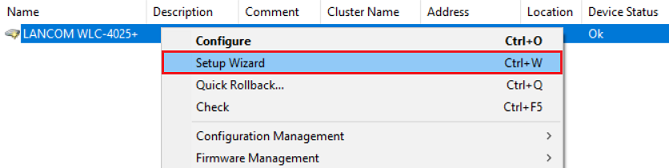
1.2.1 Markieren Sie den zweiten WLAN-Controller (Slave) im unkonfigurierten Zustand, führen einen Rechtsklick durch und wählen im Kontextmenü die Option Setup-Assistent aus.) In LANconfig, mark the second WLAN controller (slave) in its unconfigured state, right-click it and select the context-menu option Setup Wizard.

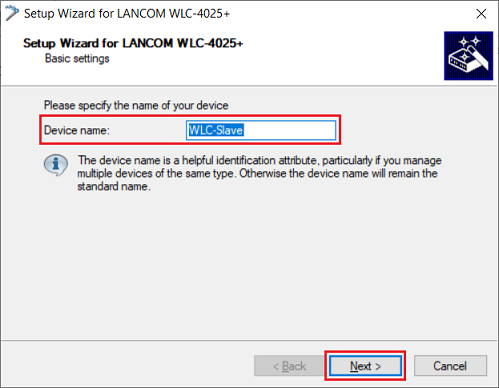
1.2.2 Vergeben Sie einen aussagekräftigen Gerätenamen und klicken auf Weiter.) Enter a descriptive Device name and then click on Next.

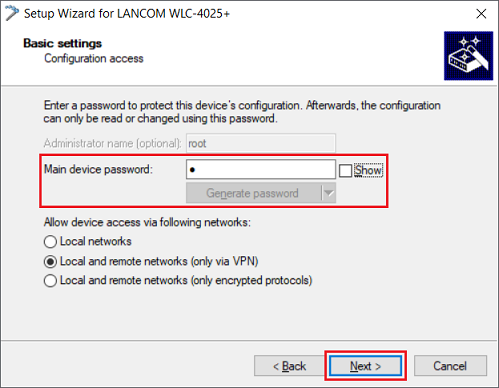
1.2.3 Vergeben Sie ein möglichst sicheres Hauptgerätepasswort und klicken auf Weiter.) Set a secure main device password and click on Next.

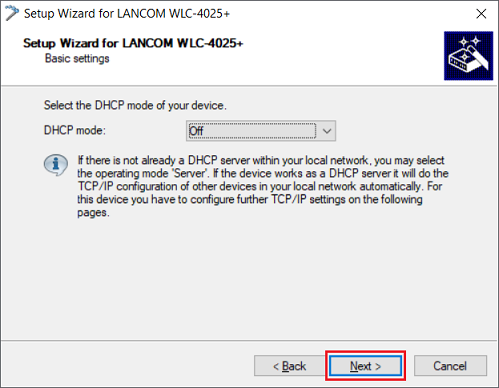
1.2.4 Der integrierte DHCP-Server wird in diesem Szenario nicht benötigt. Belassen Sie die Einstellung daher auf Aus und klicken auf Weiter.) The integrated DHCP server is not required in this scenario. Leave the setting as Off and click on Next.

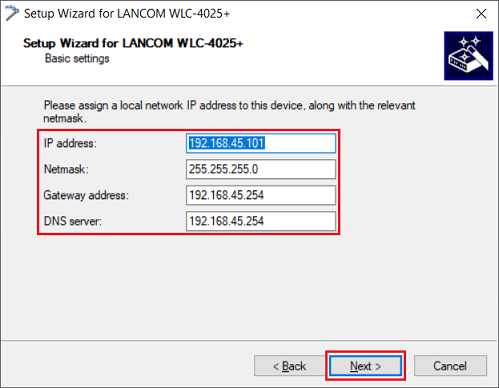
1.2.5 Passen Sie folgende Parameter an) Modify the following parameters:
- IP -Adresse: Tragen Sie eine IP-Adresse aus dem Management-Netzwerk ein.
- Netzmaske: Tragen Sie die Subnetzmaske des Management-Netzwerks ein.
- Gateway-Adresse: Tragen Sie die IP-Adresse des Standard-Gateways im Management-Netzwerk ein. Dadurch wird eine Default-Route angelegt und der WLAN-Controller kann mit dem Internet kommunizieren.
- DNS-Server: Tragen Sie die IP-Adresse eines DNS-Servers ein, den der WLAN-Controller erreichen kann.

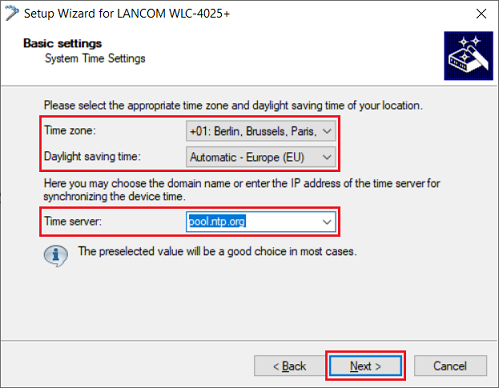
1.2.6 Passen Sie bei Bedarf die Zeitzone an, wählen im Dropdownmenü einen Zeit-Server aus und klicken auf Weiter.
- address: Enter an IP address from the management network.
- Netmask: Enter the subnet mask of the management network.
- Gateway address: Enter the IP address of the standard gateway on the management network. This creates a default route and the WLAN controller can communicate with the Internet.
- DNS server: Enter the IP address of a DNS server that the WLAN controller can reach.
1.2.6) If necessary, adjust the Time zone, select a Time server from the drop-down menu and click Next.

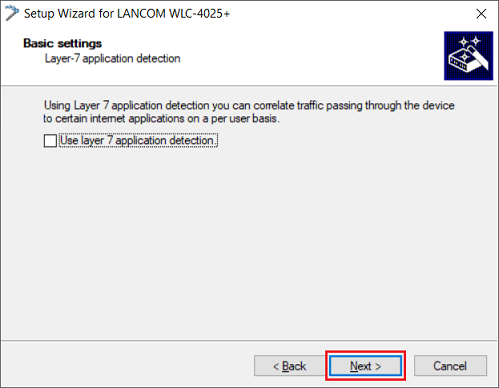
1.2.7 Die ) Layer 7-Anwendungserkennung wird in diesem Szenario nicht verwendet. Klicken Sie ohne Vornahme von Änderungen auf Weiter.-7 application detection is not used in this scenario. Click Next without making any changes.

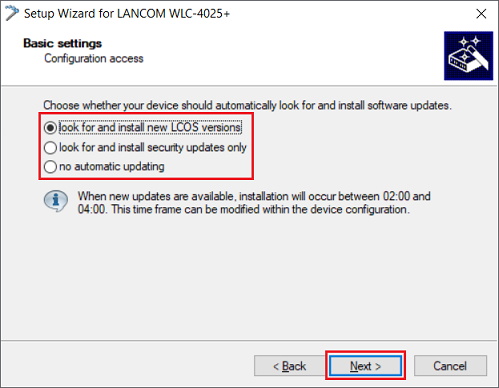
1.2.8 Passen Sie bei Bedarf die Update-Einstellungen des Gerätes an und klicken auf Weiter.) If necessary, adjust the update settings of the device and click on Next.

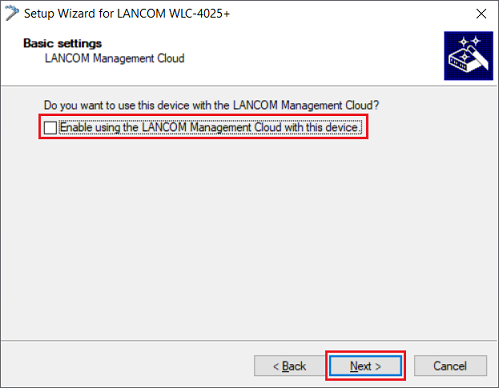
1.2.9 Die ) The LANCOM Management Cloud wird in diesem Szenario nicht verwendet. Entfernen Sie daher den Haken bei LANCOM Management Cloud mit diesem Gerät einsetzen und klicken auf Weiter. is not used in this scenario, so remove the checkmark for Enable using the LANCOM Management Cloud with this device and click Next.

1.2.10 Klicken Sie auf Fertig stellen, um den Setup-Assistenten abzuschließen.) Click Finish to close the Setup Wizard.
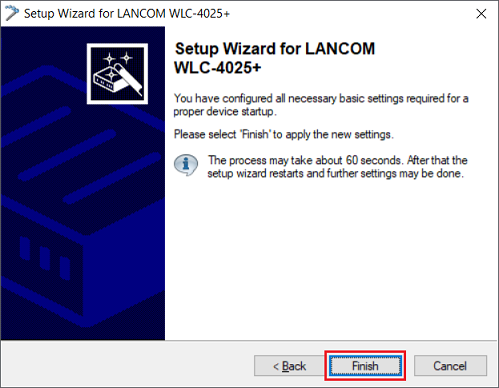

1.2.11 Die Grundeinrichtung des zweiten WLAN-Controllers (Slave) ist damit abgeschlossen.) The basic configuration of the second WLAN controller (slave) is now complete.
2) Configuring the WLC cluster with the Setup Wizard2. Konfiguration des WLC-Cluster mit dem Setup-Assistenten:
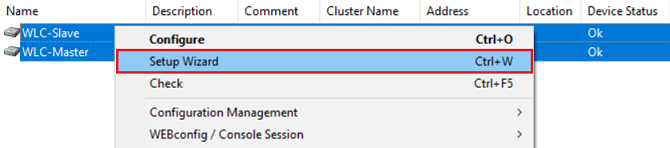
2.1 Markieren Sie beide WLAN-Controller (Master und Slave) in LANconfig, führen einen Rechtsklick aus und wählen im Kontextmenü die Option Setup-Assistent aus.) In LANconfig, mark the two WLAN controllers (master and slave), right-click and select the context-menu option Setup Wizard.
| Info |
|---|
Alternatively, you can drag and drop one of the WLAN controllers onto the other. In this case the source is operated as the slave (see step 1.2) and the target as the master (see step |
| Info |
Alternativ können Sie auch einen WLAN-Controller per Drag & Drop auf den anderen ziehen. In diesem Fall wird die Quelle als Slave verwendet (siehe Schritt 1.2) und das Ziel als Master (siehe Schritt 1.1). Schritt Step 2.4 wird in diesem Fall übersprungen will be skipped in this case. |

2.2 Bestätigen Sie den Dialog mit Ja) Confirm the dialog with Yes.

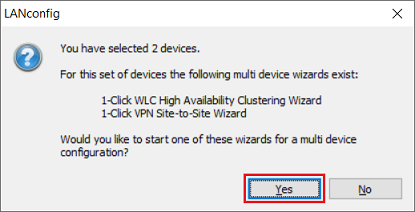
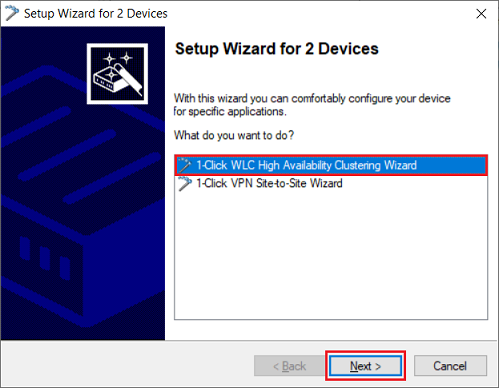
2.3 Die Option ) The option 1-Click WLC High Availability Clustering -Assistent ist bereits vorausgewählt. Klicken Sie auf Weiter.Wizard is already preselected. Click on Next.

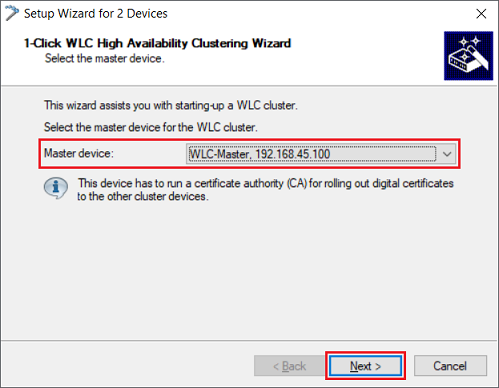
2.4 Wählen Sie den ersten WLAN-Controller (Master) als Master-Gerät aus (siehe Schritt ) Set the first WLAN controller (master) as the master device (see step 1.1).

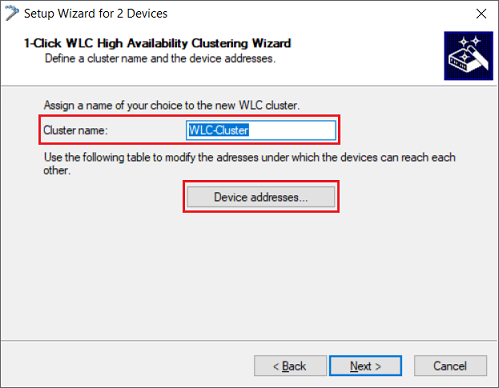
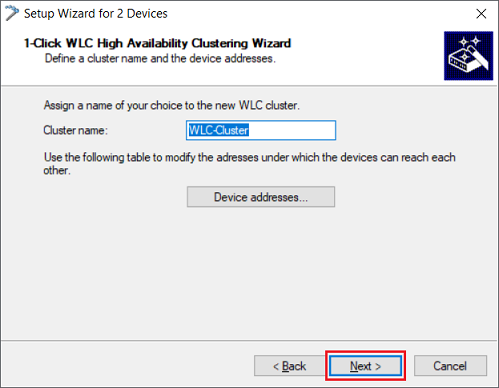
2.5 Passen Sie bei Bedarf den Cluster-Namen an und wechseln in das Menü Geräte-Adressen.

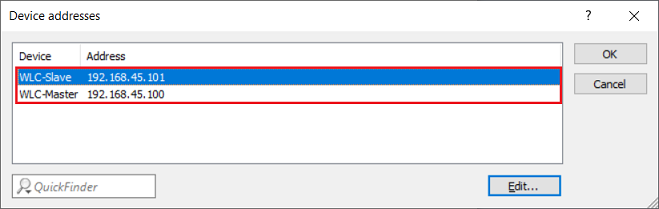
2.6 Kontrollieren Sie, ob den beiden WLAN-Controllern die korrekten IP-Adressen zugewiesen sind und passen diese bei Bedarf an.

2.7 Klicken Sie auf Weiter.

2.8 Klicken Sie auf Fertig stellen, um den Assistenten abzuschließen.

2.9 Die Einrichtung des WLC-Cluster ist damit abgeschlossen.
3. Weiterführende Schritte bei Problemen mit dem Config-Sync (HA-Cluster):
) If necessary, adjust the Cluster name and open the Device addresses menu.
2.6) Check whether the correct IP addresses have been assigned to the two WLAN controllers and adjust them if necessary.
2.7.) Click on Next.
2.8) Click Finish to close the Setup Wizard.
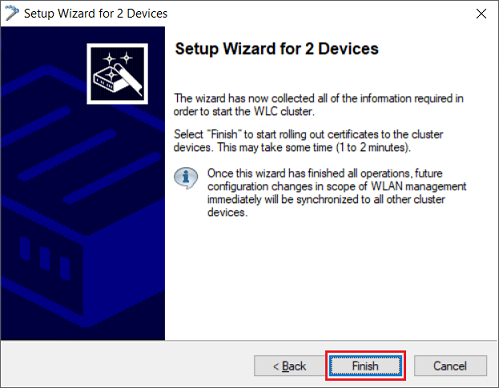
2.9) This completes the setup of the WLC cluster.
| Info |
|---|
If the Config Sync isn't active after going through the setup wizard, the CLI command do /Status/Config/Sync/New-Cluster/Launch has to be executed on the Master to start the Config Sync manually. |
3) Further steps in case of problems with Config Sync (HA cluster):
If the configuration synchronization (Config Sync) between the cluster members does not work, you can follow the steps in the Troubleshooting guide: Configuration synchronization doesn't work anymore (Config Sync)Funktioniert die Konfigurations-Synchronisierung (Config-Sync) zwischen den Cluster-Teilnehmern nicht, können Sie die Schritte in dem Troubleshooting-Guide: Konfigurations-Synchronisierung funktioniert nicht mehr (Config-Sync) durchführen.