
...
This article describes how to set up a VPN connection from the Advanced VPN Client to a LANCOM router with two-factor authentication (IKEv2-EAP-OTP).
| Info | ||||||||||||||||||||||||
|---|---|---|---|---|---|---|---|---|---|---|---|---|---|---|---|---|---|---|---|---|---|---|---|---|
The following authenticator apps have been tested for interoperability in the context of this article (as of october 2023). Apple iOS 16/17:
Android 13:
|
Requirements:
- LANCOM central-site router with at least 25 VPN licenses (Central-Site gateway, 19xx series router , WLAN controller, or LANCOM router with the VPN 25 Option)
- Advanced VPN Client for Windows as of version 5.0
- LCOS as of version 10.70 RC2 REL (download latest version)
- LANtools as of version 10.70 RC2 REL (download latest version)
- Authenticator app for Android or iOS (e.g. Google Authenticator or Microsoft Authenticator)
| Info |
|---|
All involved devices (LANCOM router, computer with Advanced VPN Client and smartphone with authenticator app) must have up-to-date time settings. Information on configuring time synchronization on a LANCOM router can be found in this article. |
Scenario:
To establish an Advanced VPN Client connection to a router, a one-time password (OTP) should be generated, which is displayed in an authenticator app and must be entered when starting the VPN connection.
...
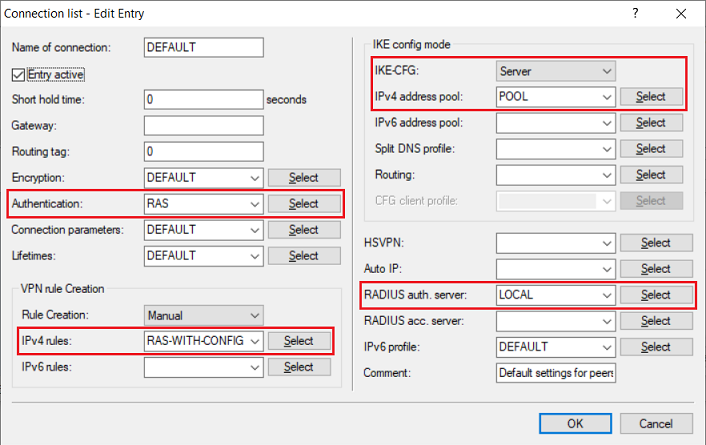
- Authentication: From the drop-down menu, select the authentication profile created in step 2.4.
- IPv4 rules: From the drop-down menu, select the predefined object RAS-WITH-CONFIG-PAYLOAD.
- IKE-CFG: From the drop-down menu, select Server.
- IPv4 address pool: From the drop-down menu, select the IP address pool created in step 2.6.
- RADIUS auth. server: From the drop-down menu, select the RADIUS object created in step 2.9.
| Info |
|---|
After the modification, existing VPN connections with preshared-key still work as usual. |
2.13) This concludes the configuration of the VPN connection.
...
3.1) Go to the menu RADIUS → Server and enable the option RADIUS authentication active. Make sure that RADIUS ports 1.812 and 1.813 are entered in the RADIUS services sorts menu (default setting).
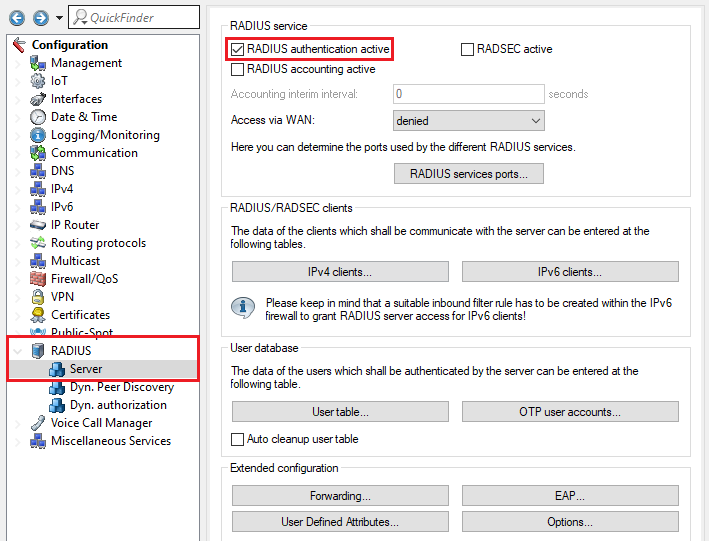
3.2) Go to the menu RADIUS → Server → EAP.
...
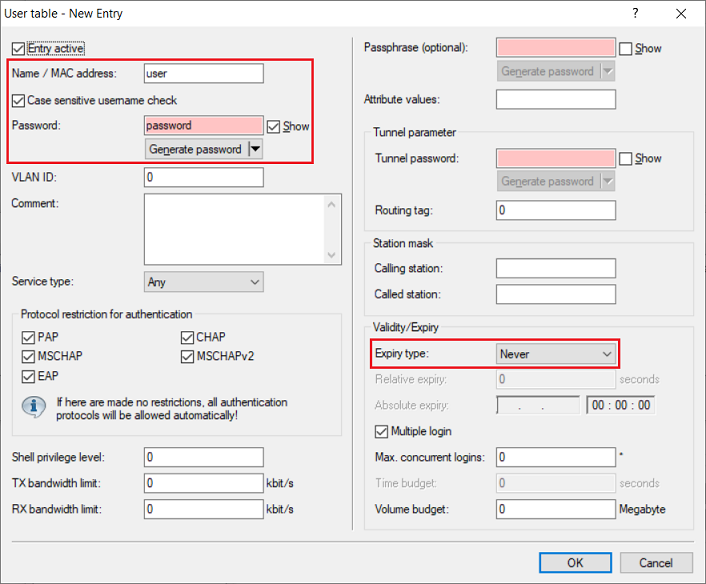
- Name / MAC address: Enter the user name for the VPN user.
- Password: Enter the password for the VPN user.
- Expiry type: From the drop-down menu, select the option Never so that the VPN user remains valid permanently.
| Info |
|---|
Repeat this step for each VPN user. Optionally you can assign a fixed IP address to the VPN client by entering the parameter Framed-IP-Address in the field Attribute values. It has to be entered in the syntax Framed-IP-Address=<IP address> (e.g. Framed-IP-Address=192.168.1.10). The IP address must be within the dial-in address range created in step 2.6. By assigning a fixed IP address, it is possible to assign individual rights to a user via the firewall. |
3.6) Go to the menu RADIUS → Server → OTP user accounts.
...
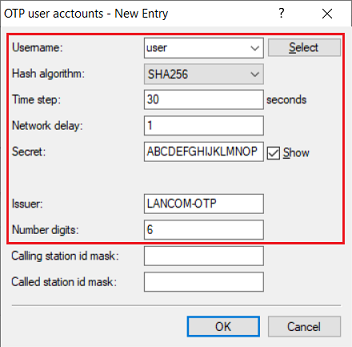
- Username: From the drop-down menu, select the name of the user account created in step 3.5.
Hash algorithm: From the drop-down menu, select the option SHA-256. If your authenticator app does not support the hash algorithm SHA256, you can use SHA1.
- Time step: This parameter is the interval after which a new OTP token is generated. Leave the setting at the default value of 30 seconds.
- Network delay: This parameter specifies the number of time steps by which the clock of the end device with the authenticator app may deviate from the time of the router. The router then also checks the OTPs before and after. Leave this setting at the default value of 1 (i.e. OTPs are checked 30 seconds before and after).
- Secret: Enter a 16-digit password. This should contain capital letters and numbers between 2 - 7 only (see RFC3548). The password is encoded in Base32 and shared with the authenticator.
- Issuer: Enter a descriptive name for the issuer (in this example LANCOM-OTP).
- Number digits: Leave the setting at the default value of 6 characters.
| Info |
|---|
Repeat this step for each VPN user. |
| Hinweis |
|---|
The Hash algorithm SHA256 is currently not supported by some older Android devices and the Microsoft Authenticator. In this case please use SHA1. If the Google Authenticator is used, the Secret must have at least 16-digits, as otherwise the scan of the QR code will fail. |
4) Exporting the CA certificate from the LANCOM router and importing it into the Advanced VPN Client:
...
4.2) Copy the certificate to the computer that is to establish the VPN connection and save it to the directory C:\ProgramData\LANCOM\Advanced VPN Client\cacerts.
| Info |
|---|
When using client version 6.21, the directory can also be C:\ProgramData\LANCOM\Trusted Access Client\cacerts. This depends on whether you have initially reinstalled version 6.21 or updated from an older version. |
4.3) Start the Advanced VPN Client and navigate to the menu Connection → Certificates → Display CA certificates.
...
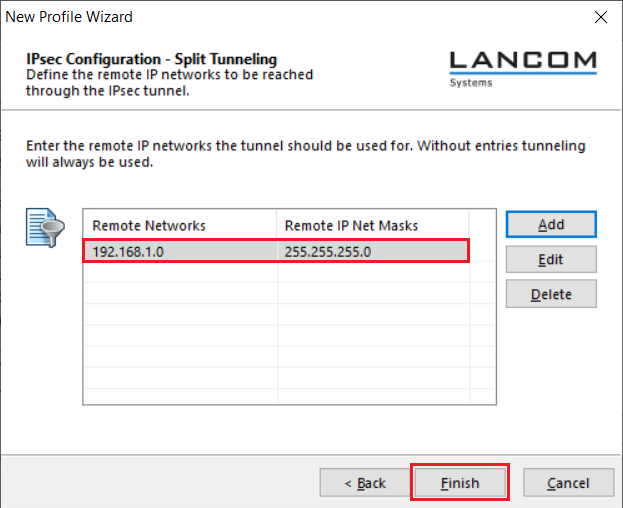
| Info |
|---|
For more information on split tunneling, see this Knowledge Base article. |
5.11) Mark the VPN profile created in the steps 5.1 – 5.10 and click Edit.
...