| Seiteneigenschaften |
|---|
Description:In
diesem Artikel wird beschrieben, wie das Routing auf einem Switch der XS-51xx Serie eingerichtet werden kannThis article describes how to set up the routing on a switch of the XS or GS-45xx series.
| Hinweis |
|---|
Das in dem Menü The Management VLAN stored in the menu System → Connectivity → IPv4 hinterlegte Management-VLAN kann nicht für das Routing verwendet werden cannot be used for routing. |
Requirements:
- Switch der XS -51xx Serieor GS-45xx series switch
- LCOS SX ab Version as of version 5.00 RU2 (download aktuelle Versionlatest version)
- Bereits eingerichtete und funktionierende VLANs
- Beliebiger Web-Browser für den Zugriff auf das Webinterface
Procedure:
Einrichtung des Routing auf dem Switch:
1. Verbinden Sie sich per Webinterface mit dem Switch und wechseln in das Menü Routing → IP → Configuration.
2. Wählen Sie bei Routing Mode die Option Enable aus und klicken anschließend auf Submit, um die Änderung zu übernehmen.
3. Wechseln Sie in das Menü Routing → IP → Interface Configuration.
4. Passen Sie die folgenden Parameter an und klicken anschließend auf Submit:
- VLANs that have already been set up and working
- Any web browser for access to the web interface
Procedure:
Setting up routing on the switch:
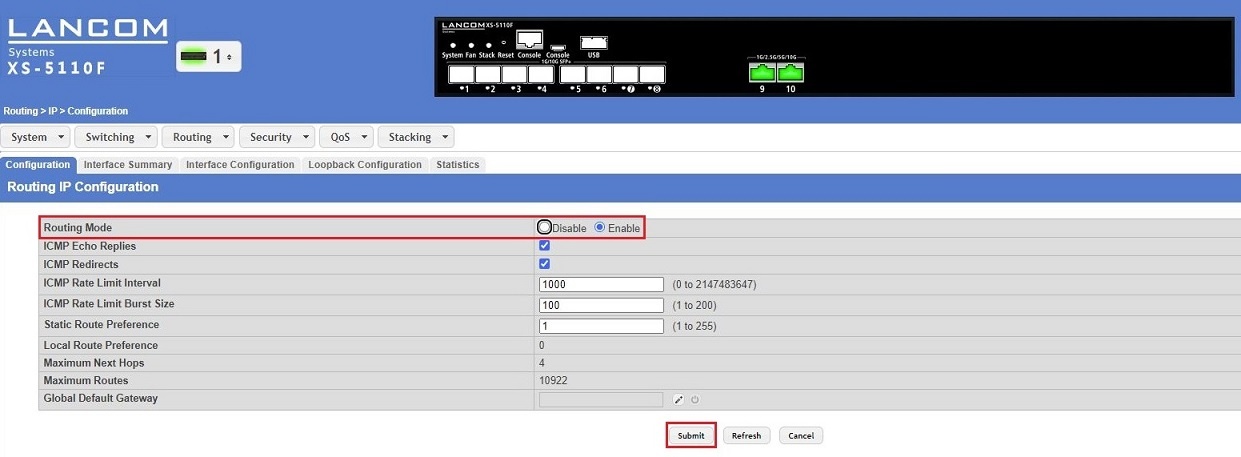
1) Connect to the web interface of the switch and navigate to the menu Routing → IP → Configuration.
2) Set the Routing mode to the option Enable and then click Submit to apply the change.
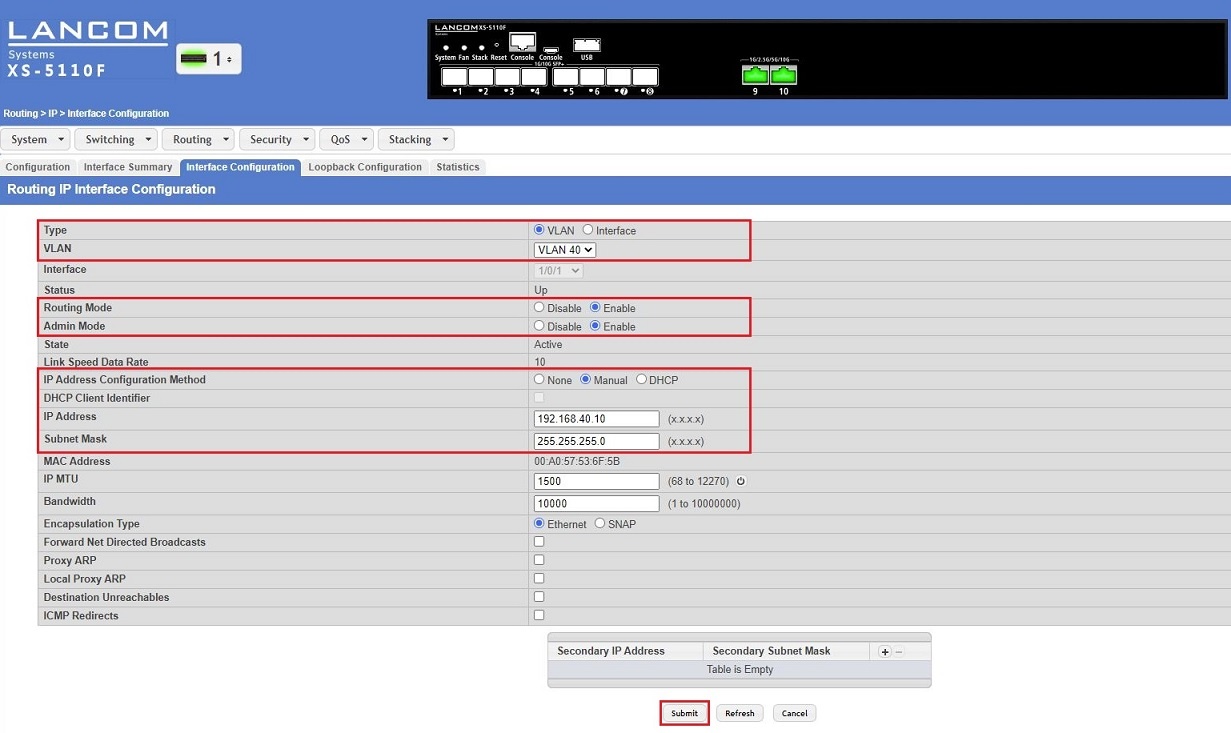
3) Change to the menu Routing → IP → Interface Configuration.
4) Modify the following parameters and then click Submit:
- Type: Select the option VLAN.
- VLAN: From the drop-down menu, select the VLAN to be used for routing.
- Routing Mode: The routing for the interface can be activated or deactivated here. Choose the option Enable.
- Admin Mode: The routing for the VLAN can be globally activated or deactivated here. Choose the option
- Type: Wählen Sie die Option VLAN aus.
- VLAN: Wählen Sie im Dropdownmenü das VLAN aus, für welches das Routing eingerichtet werden soll.
- Routing Mode: Das Routing kann hier für das Interface aktiviert oder deaktiviert werden. Wählen Sie daher die Option Enable.
- Admin Mode: Das Routing kann hier global für das VLAN aktiviert oder deaktiviert werden. Wählen Sie daher die Option Enable.
- IP Address Configuration Method: Wählen Sie die Option Manual, damit eine feste IP-Adresse hinterlegt werden kann. Dies ist erforderlich, damit das Routing funktioniert.
- IP Address: Geben Sie eine IP-Adresse an, die der Switch in dem VLAN verwenden soll. Der Switch wird dann unter dieser IP-Adresse angesprochen.
- Subnet Mask: Geben Sie die zu dem Netzwerk zugehörige Subnetzmaske an.
5. Wechseln Sie in das Menü Routing → Router → Configured Routes und klicken auf Add, um eine Default-Route zu erstellen.
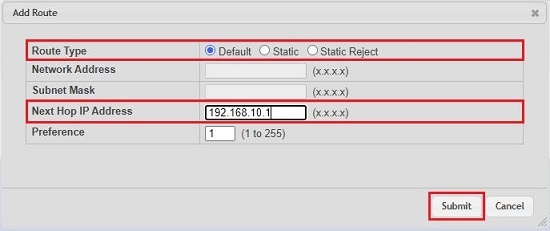
6. Passen Sie die folgenden Parameter an und klicken anschließend auf Submit:
- Route Type: Wählen Sie die Option Default aus.
- Next Hop Address: Hinterlegen Sie die IP-Adresse des nächsten Routers, der alle Anfragen in Netzwerke, die dem Switch nicht bekannt sind, weiterleitet.
7. Klicken Sie auf Save Configuration in der rechten oberen Ecke, damit die Konfiguration als Start-Konfiguration gespeichert wird.
| Info |
|---|
Die Start-Konfiguration bleibt auch nach einem Neustart des Gerätes oder einem Stromausfall erhalten. |

8. Die Konfiguration der Routing-Funktion auf dem Switch ist damit abgeschlossen.
Überprüfen der Einstellungen / Troubleshooting:
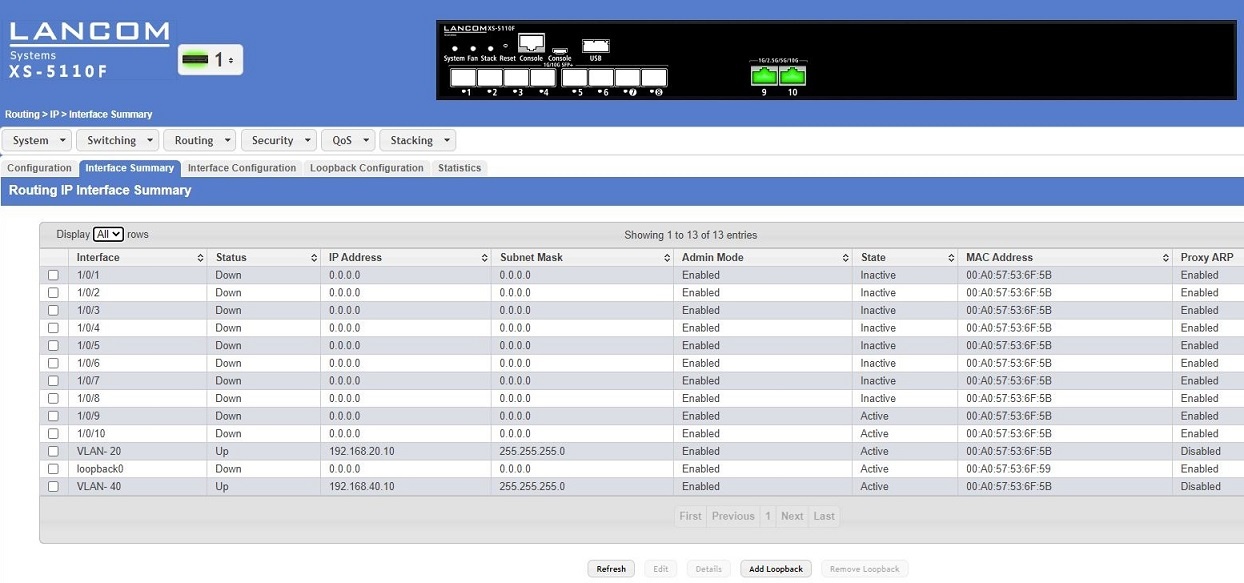
1. In dem Menü Routing → IP → Interface Summary wird aufgelistet, welche IP-Adressen den VLAN-Interfaces zugewiesen sind.
| Hinweis |
|---|
Der Status des VLAN-Interfaces muss auf Up stehen. |
- Choose the option Manual so that a fixed IP address can be assigned. This is necessary for the routing to work.
- IP address: Enter an IP address that the switch should use on the VLAN. The switch will be addressed under this IP address.
- Subnet mask: Enter the subnet mask for the related network.
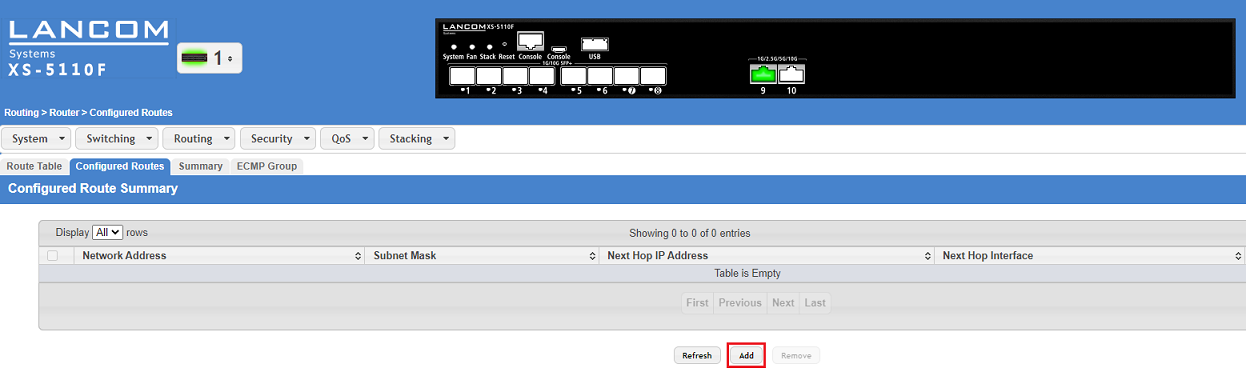
5) Switch to the menu Routing → Router → Configured Routes and click Add to create a default route.
6) Modify the following parameters and then click Submit:
- Route Type: Select the option Default.
- Next Hop Address: Enter the IP address of the next router, which will forward all inquiries to networks that are unknown to the switch.
7) Click on Save Configuration in the top right corner to save the configuration as the start configuration.
| Info |
|---|
The start configuration is retained even if the device is restarted or there is a power failure. |

8) This concludes the configuration of the routing on the switch.
Checking the settings / troubleshooting:
1) The menu Routing → IP → Interface Summary lists the IP addresses assigned to the VLAN interfaces.
| Hinweis |
|---|
The status of the VLAN interface must be Up. |
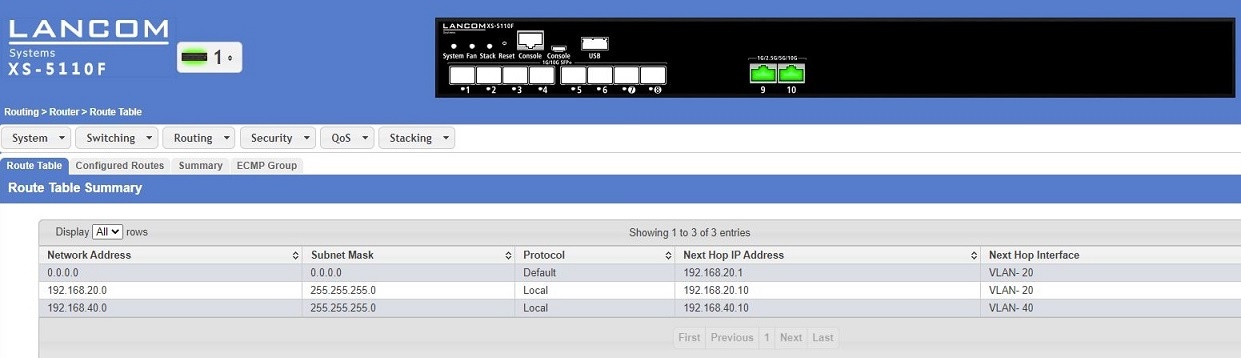
2) The routing table of the device is displayed in the menu Routing → Router → Route Table2. In dem Menü Routing → Router → Route Table wird die Routing-Tabelle des Gerätes angezeigt.