...
Then write the configuration back to the router.
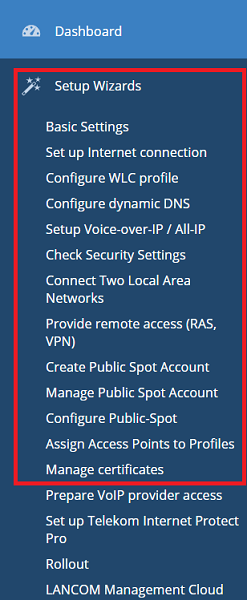
1.2) Open the web interface of the router and switch to the menu item Setup Wizards → Manage certificates.
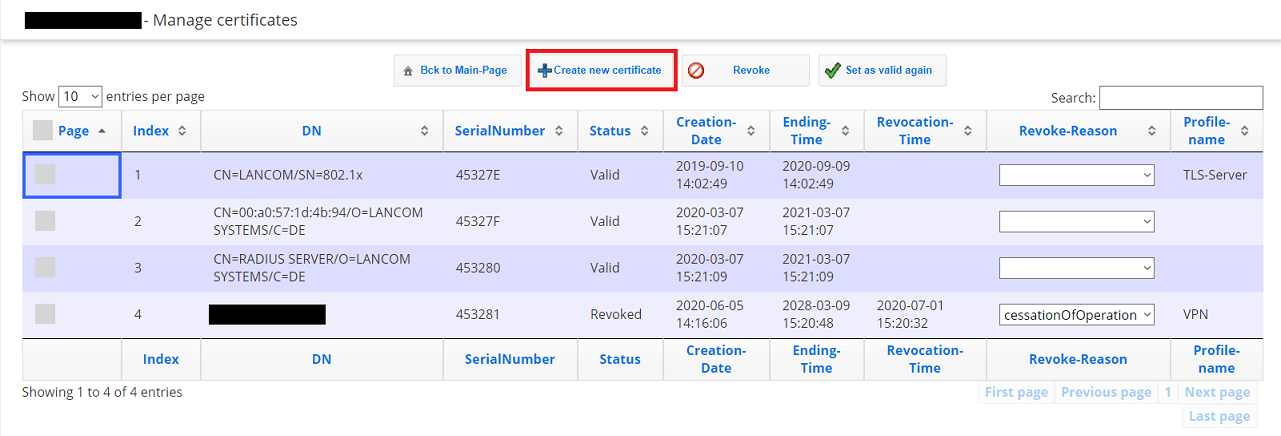
1.3) Click on Create new certificate.
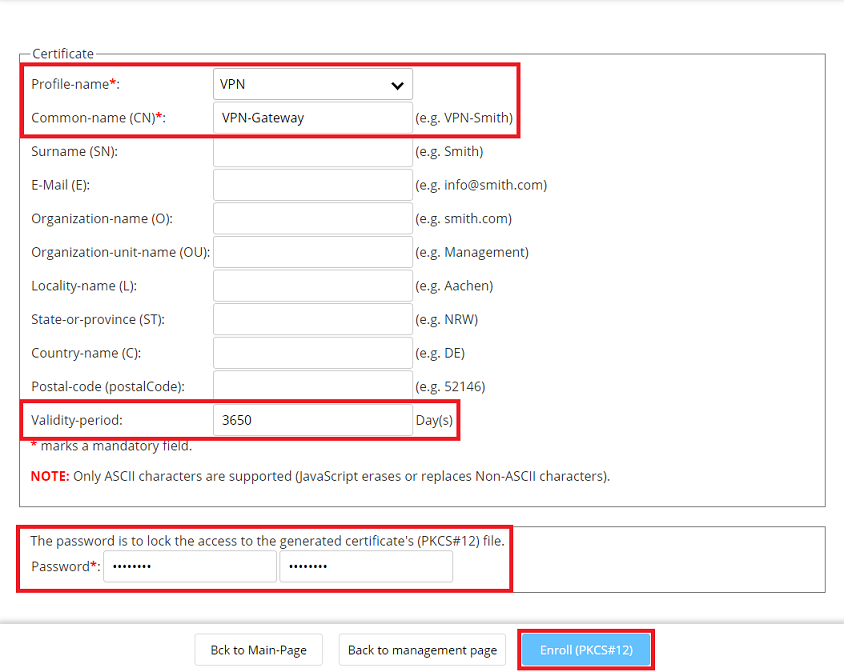
1.4) Adjust the following parameters, click on Enroll (PKCS # 12) and save the certificate:
- Profile name: From the drop-down menu, select VPN.
- Common name (CN): Enter a descriptive common name (in this example VPN-Gateway).
- Validity period: Enter a validity period that is as long as possible (in this example 10 years).
- Password: Enter a password used to encrypt the certificate.
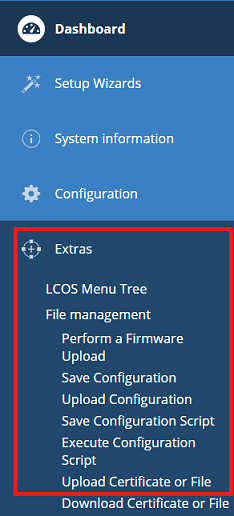
1.5) In the web interface, change to the menu Extras → File management → Upload Certificate or File.
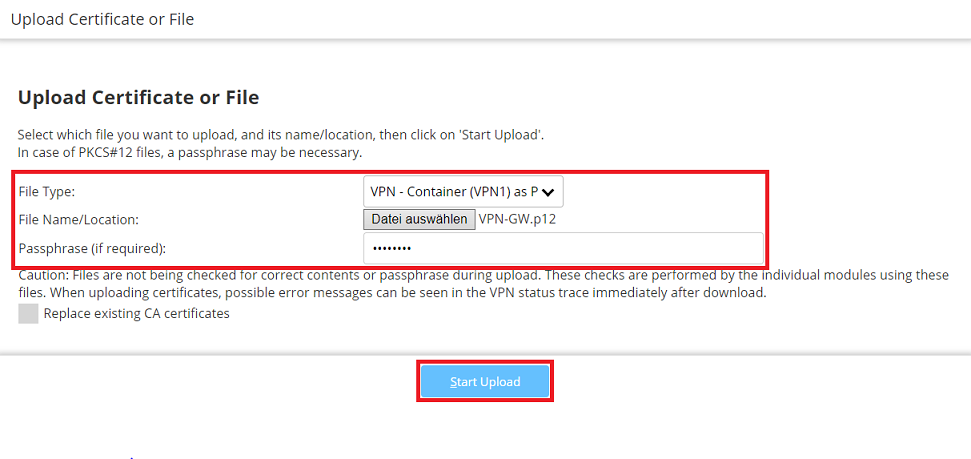
1.6) Modify the following parameters and then click Start upload:
- File Type: Select an unused VPN container from the drop-down menu (in this example the VPN - Container (VPN1)).
- File Name/Location: Select the certificate created in step 1.4.
- Passphrase: Enter the password set in step 1.4.
2) Set up the IKEv2-EAP connection on the LANCOM router:
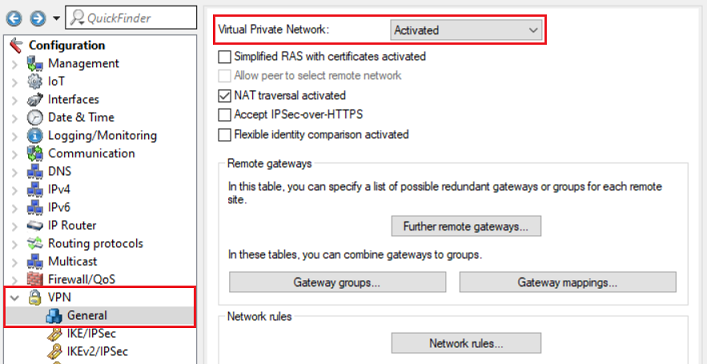
2.1) Open the configuration of the router in LANconfig, switch to the menu VPN → General and set the drop-down menu for Virtual Private Network to Activated.
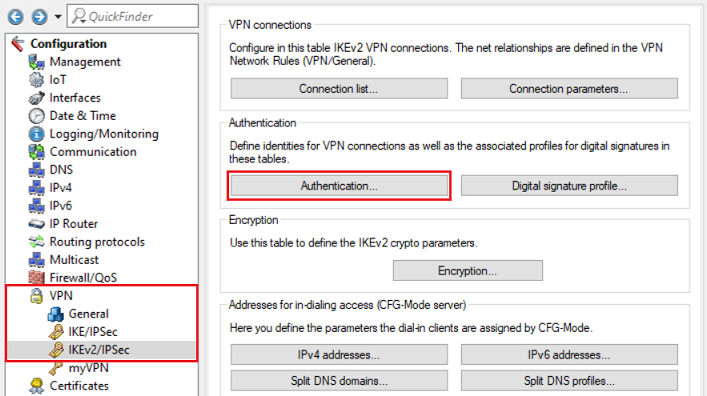
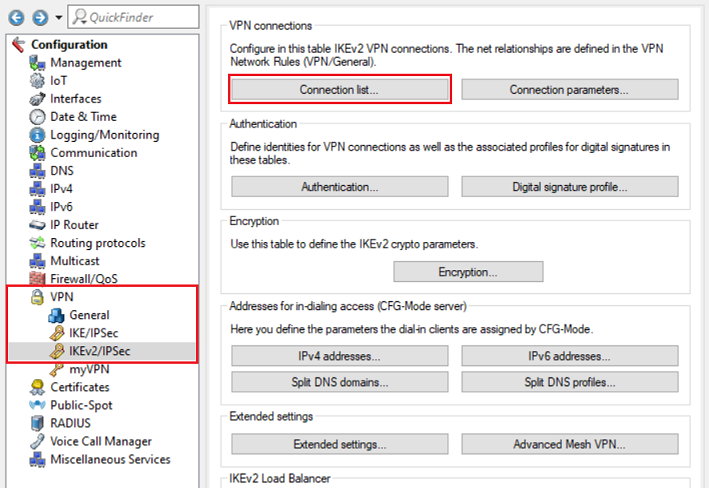
2.2) Switch to the menu VPN → IKEv2/IPsec → Authentication.
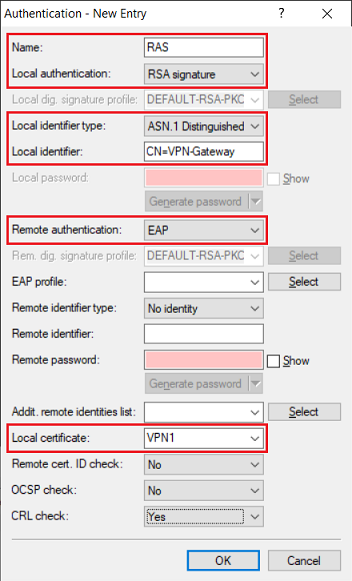
2.3) Add a new Authentication profile.
2.4) Enter the following parameters:
- Name: Enter a descriptive name.
- Local authentication: From the drop-down menu, select RSA signature.
- Local identifier type: From the drop-down menu, select ASN.1 Distinguished Name.
- Local identifier: Enter the common name set in step 1.4 (in this example CN=VPN-Gateway).
- Remote authentication: From the drop-down menu, select EAP.
- Local certificate: From the drop-down menu, select the VPN container assigned in step 1.6.
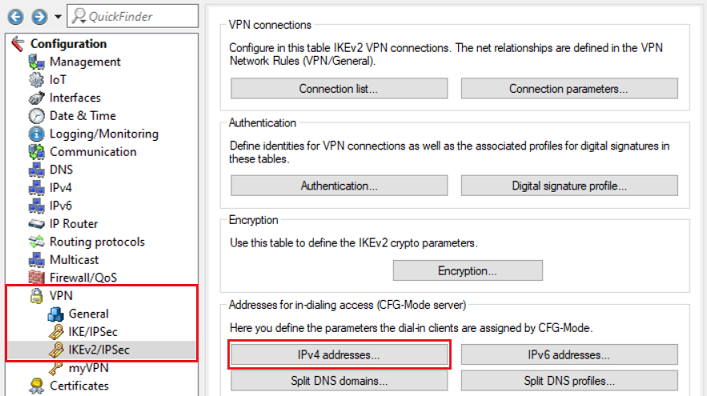
2.5) Switch to the menu VPN → IKEv2/IPsec → IPv4 addresses.
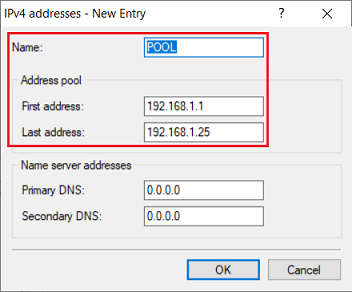
2.6) Adjust the following parameters to create a new IPv4 address pool:
- Name: Enter a descriptive name.
- First address: Enter the first IP address from an address pool. An IP address from this pool will be assigned to the VPN client when it dials in.
- Last address: Enter the last IP address from an address pool. An IP address from this pool will be assigned to the VPN client when it dials in.
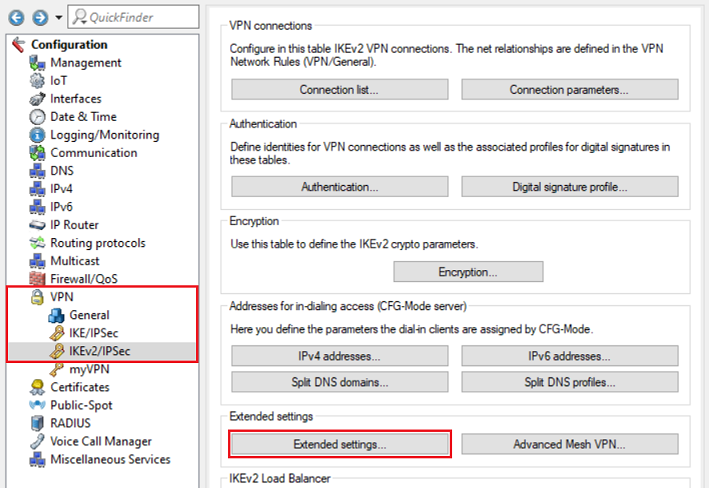
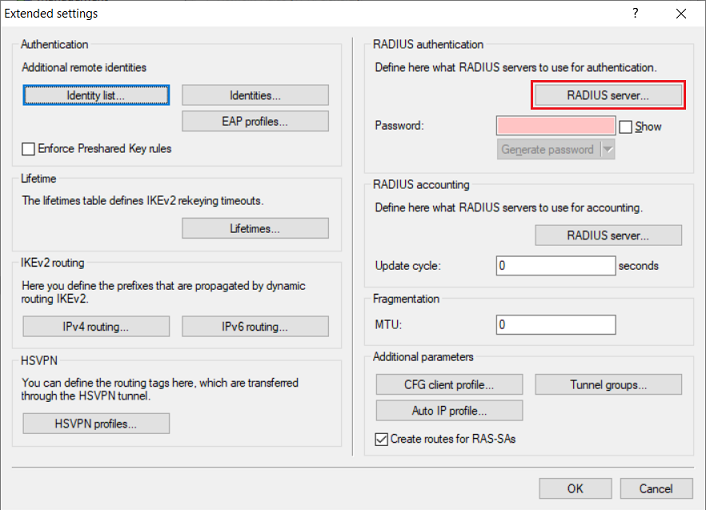
2.7) Switch to the menu VPN → IKEv2/IPsec → Extended settings.
2.8) Go to the menu RADIUS server.
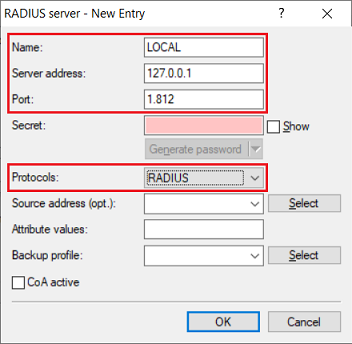
2.9) Create a new entry and adjust the following parameters:
- Name: Enter a descriptive name.
- Server address: Enter the loopback address 127.0.0.1.
- Port: Check that the port is set to 1812.
- Protocols: Check that the protocol is set to RADIUS.
2.10) Navigate to the menu VPN → IKEv2/IPsec → Connection list.
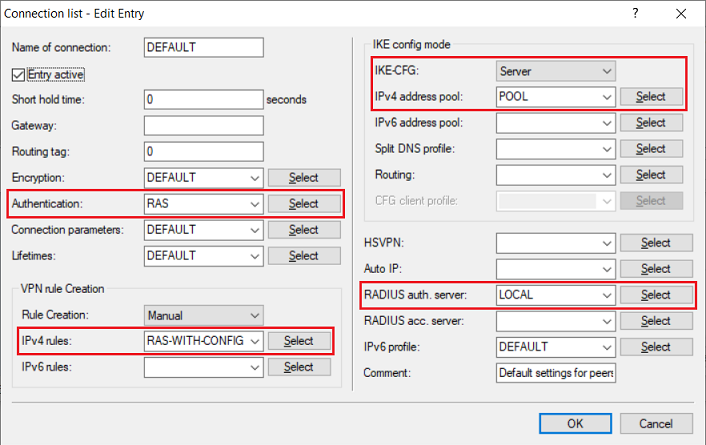
2.11) Edit the existing DEFAULT entry.
2.12) Enter the following parameters:
...
| Info |
|---|
After the modification, existing VPN connections with preshared-key still work as usual. |
2.13) This concludes the configuration of the VPN connection.
...
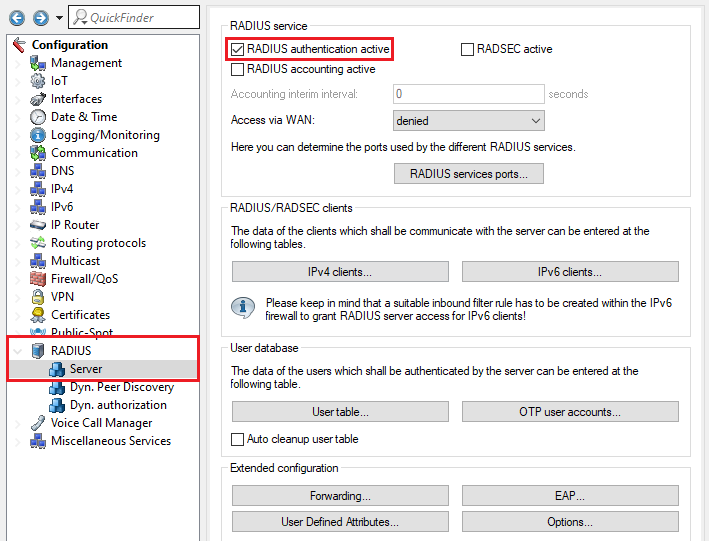
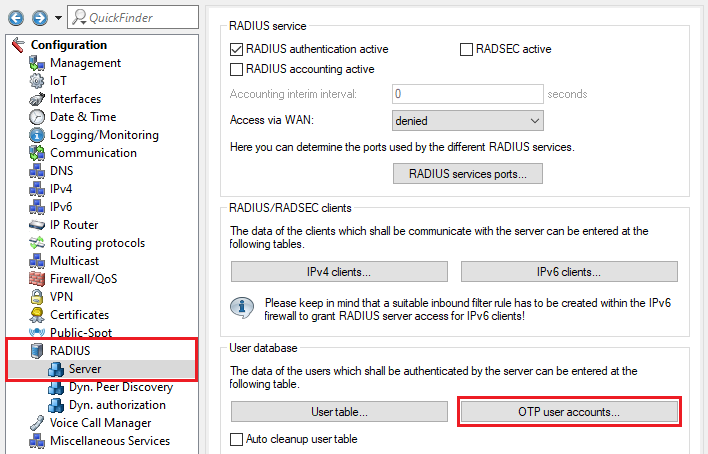
3.1) Go to the menu RADIUS → Server and enable the option RADIUS authentication active. Make sure that RADIUS ports 1.812 and 1.813 are entered in the RADIUS services sorts menu (default setting).
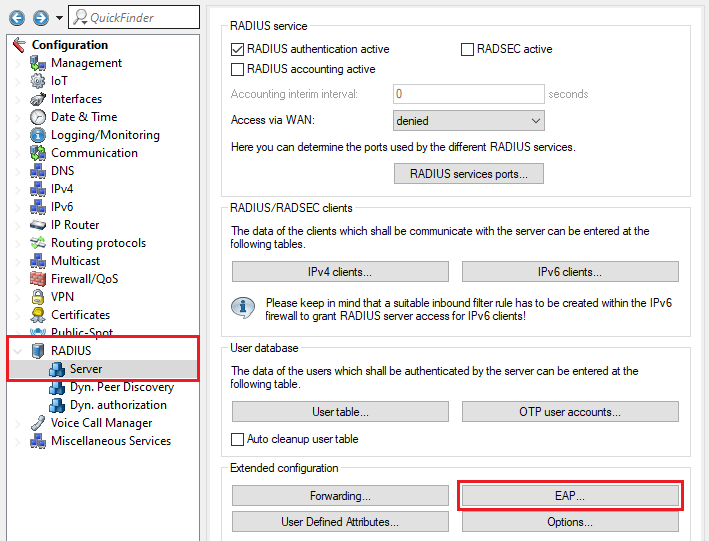
3.2) Go to the menu RADIUS → Server → EAP.
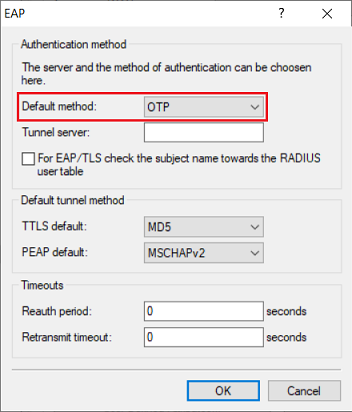
3.3) In the drop-down menu Default method select the option OTP.
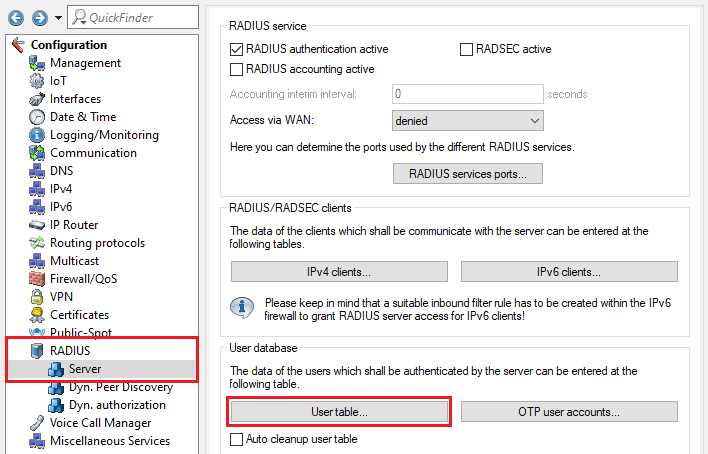
3.4) Go to the menu RADIUS → Server → User table.
3.5) Create a new entry and adjust the following parameters:
...
| Info |
|---|
Repeat this step for each VPN user. Optionally you can assign a fixed IP address to the VPN client by entering the parameter Framed-IP-Address in the field Attribute values. It has to be entered in the syntax Framed-IP-Address=<IP address> (e.g. Framed-IP-Address=192.168.1.10). The IP address must be within the dial-in address range created in step 2.6. By assigning a fixed IP address, it is possible to assign individual rights to a user via the firewall. |
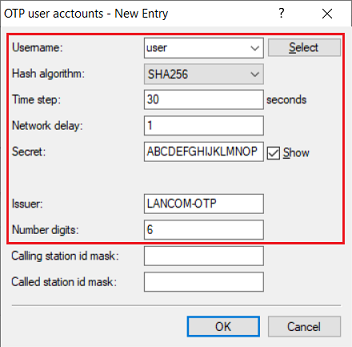
3.6) Go to the menu RADIUS → Server → OTP user accounts.
3.7) Create a new OTP user account and modify the following parameters:
...
| Hinweis |
|---|
The Hash algorithm SHA256 is currently not supported by some older Android devices and the Microsoft Authenticator. In this case please use SHA1. If the Google Authenticator is used, the Secret must have at least 16-digits, as otherwise the scan of the QR code will fail. |
4) Exporting the CA certificate from the LANCOM router and importing it into the Advanced VPN Client:
4.1) Connect to the web interface of the LANCOM router, switch to the menu Extras → Download current CA certificate and save the certificate.
4.2) Copy the certificate to the computer that is to establish the VPN connection and save it to the directory C:\ProgramData\LANCOM\Advanced VPN Client\cacerts.
...
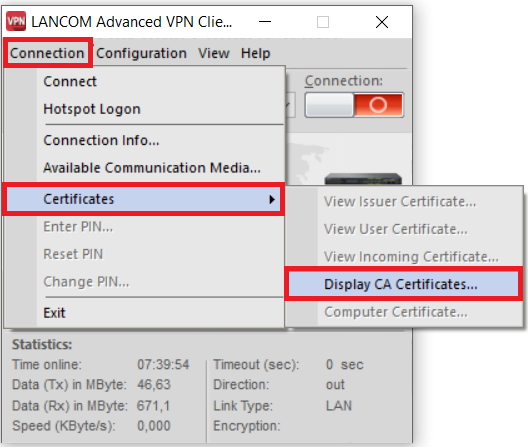
4.3) Start the Advanced VPN Client and navigate to the menu Connection → Certificates → Display CA certificates.
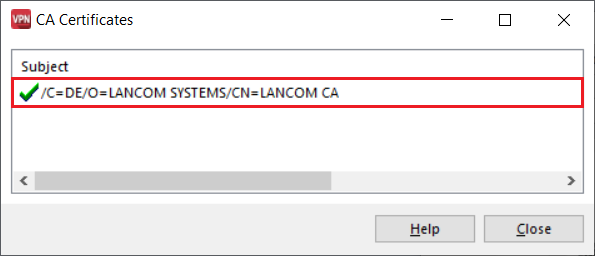
4.4) Check whether the Advanced VPN Client recognized the certificate.
5) Setting up an IKEv2-EAP-OTP connection with the Advanced VPN Client:
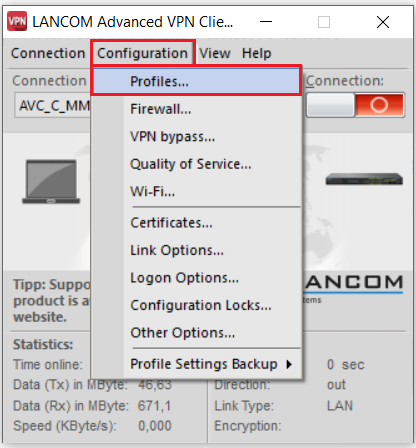
5.1) In the Advanced VPN Client, navigate to the menu Configuration → Profiles.
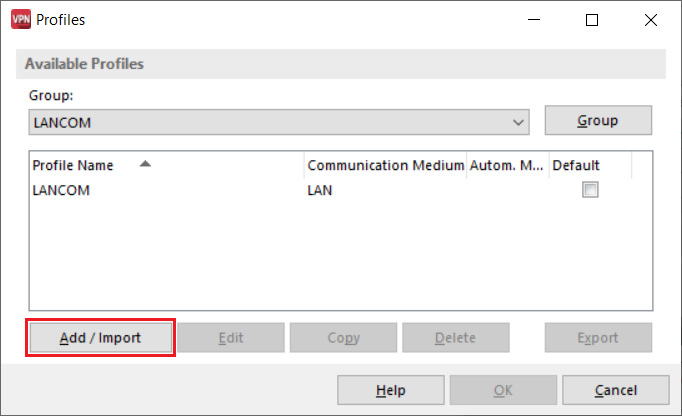
5.2) Click on Add / Import to create a new VPN connection.
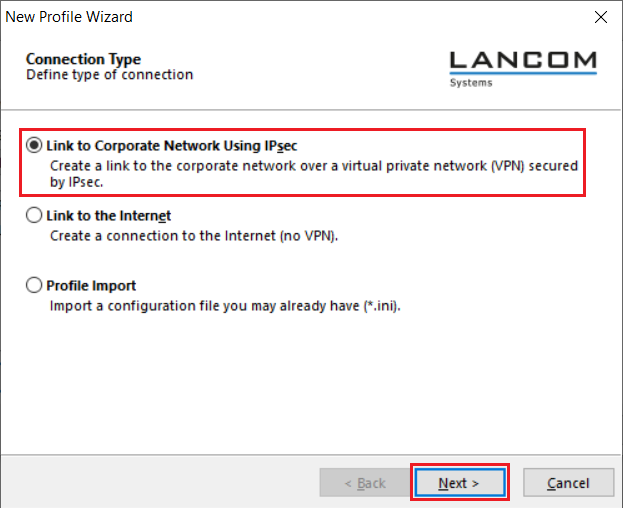
5.3) Select Link to Corporate Network Using IPsec and click on Next.
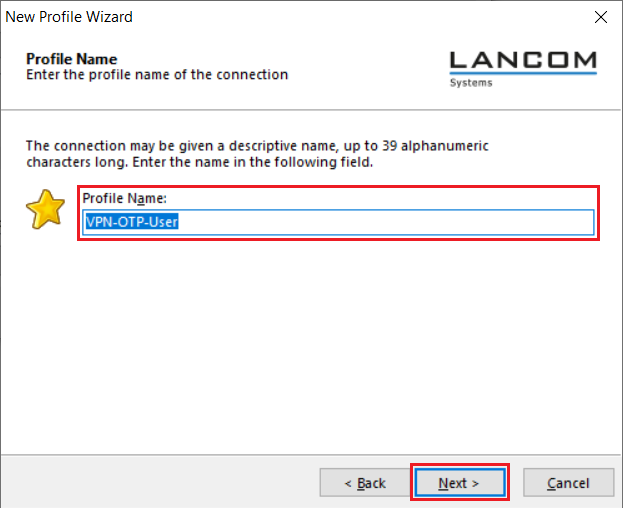
5.4) Enter a descriptive Profile Name.
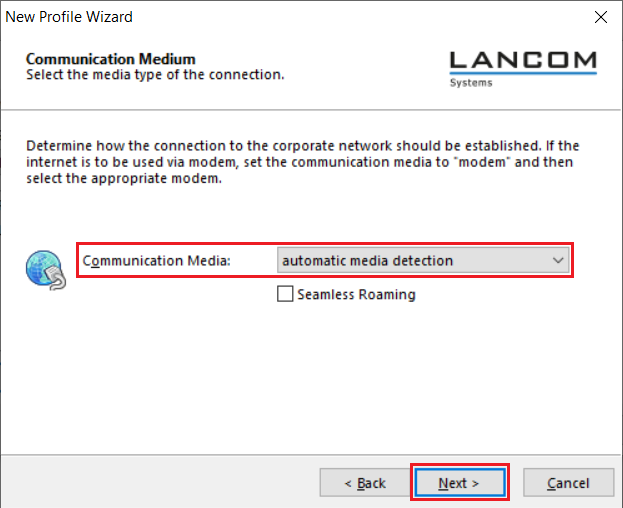
5.5) From the drop-down menu, select the Communication Media to be used for establishing the VPN connection.
| Info |
|---|
If you wish to establish the VPN connection with different connection media (e.g. LAN and Wi-Fi), select automatic media detection. |
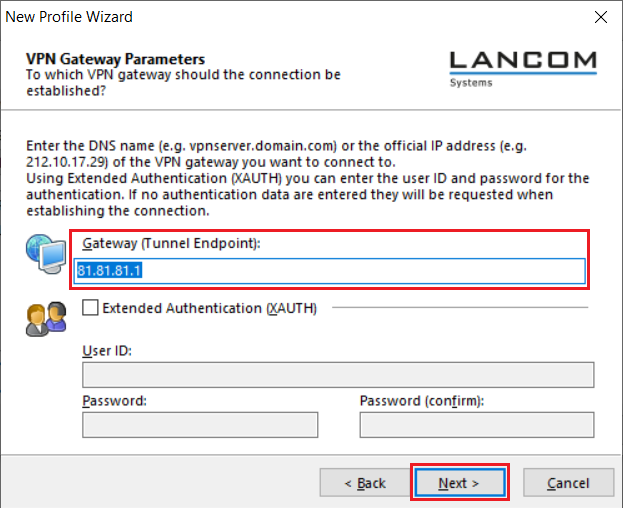
5.6) Under Gateway (Tunnel Endpoint) enter the public IP address or the DNS name of the router.
5.7) Enter the following parameters:
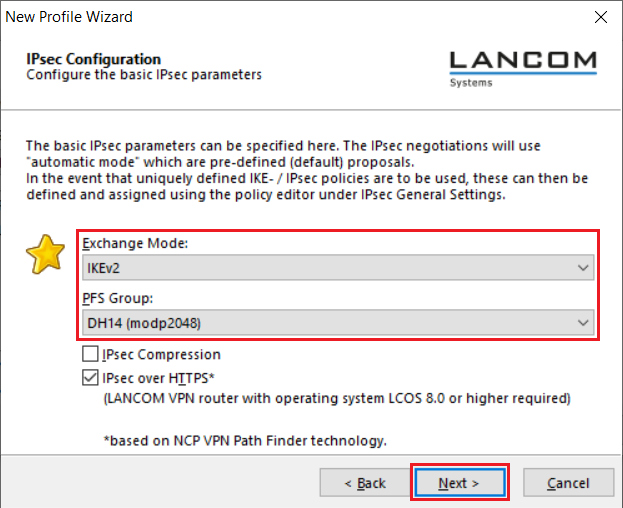
- Exchange Mode: From the drop-down menu, select IKEv2.
- PFS Group: From the drop-down menu, select DH14 (modp2048).
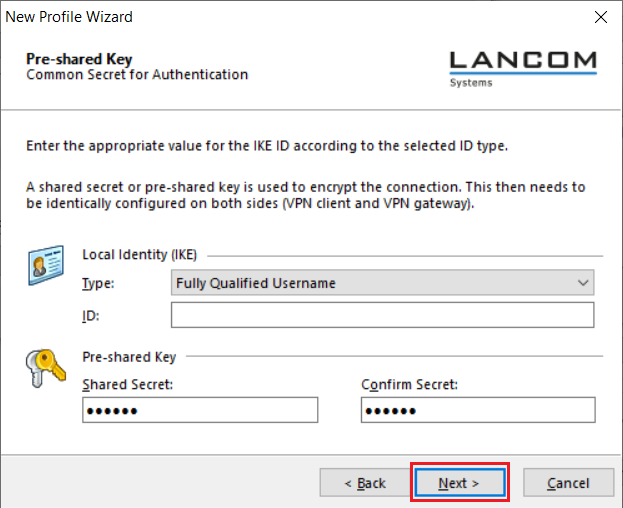
5.8) Authentication via EAP-OTP cannot be configured in the wizard, so this must be done manually at a later stage (see steps 5.12 - 5.13). Click Next without making changes.
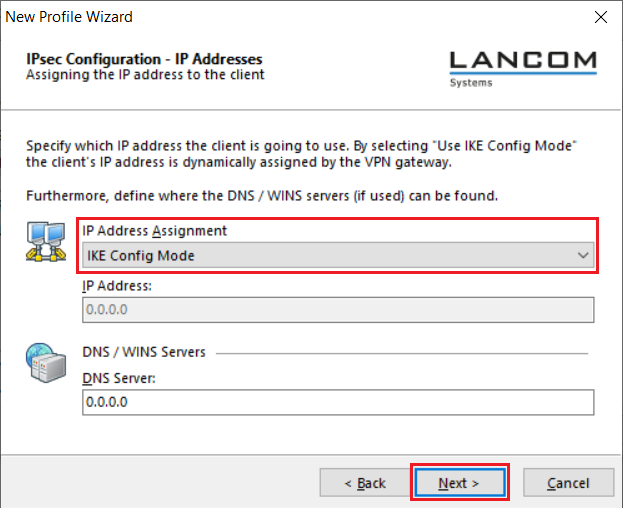
5.9) For the IP address assignment select the drop-down menu entry IKE Config Mode. This allows the Advanced VPN Client to obtain an IP address from the router when dialing in via VPN.
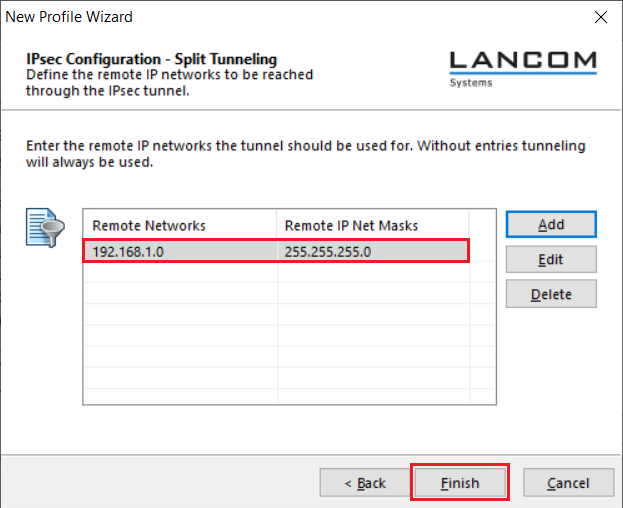
5.10) Enter the target network to which the VPN connection is to be established. This means that only the data traffic destined for the target network is routed via the VPN tunnel.
...
| Info |
|---|
For more information on split tunneling, see this Knowledge Base article. |
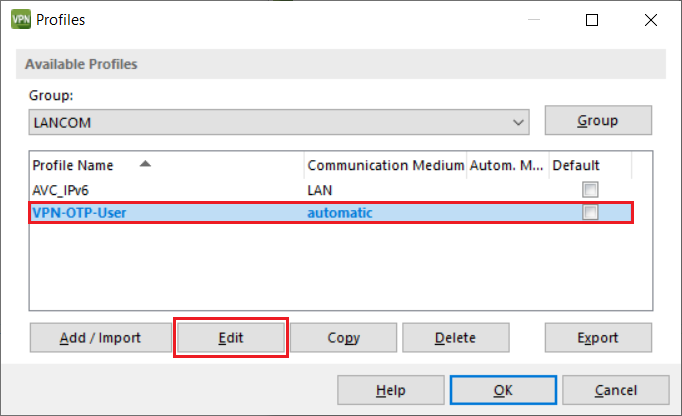
5.11) Mark the VPN profile created in the steps 5.1 – 5.10 and click Edit.
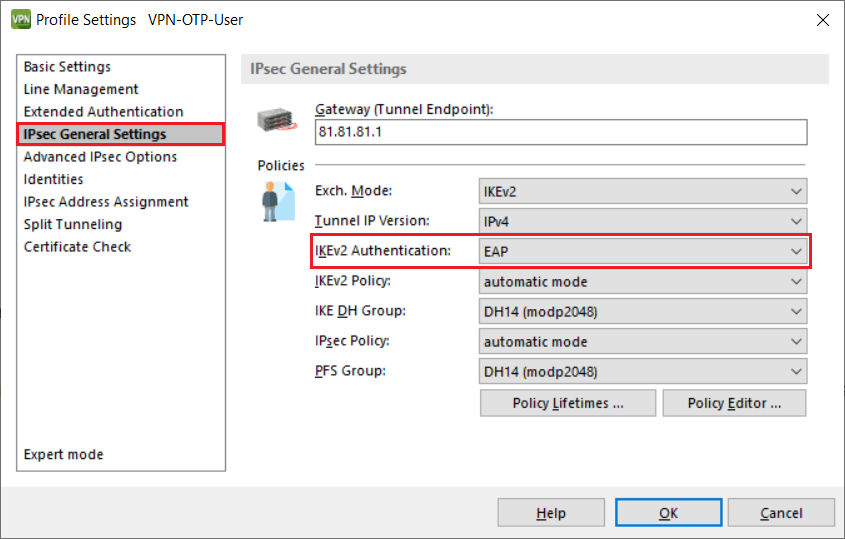
5.12) Go to the tab IPsec General Settings and set the IKEv2 Authentication to EAP.
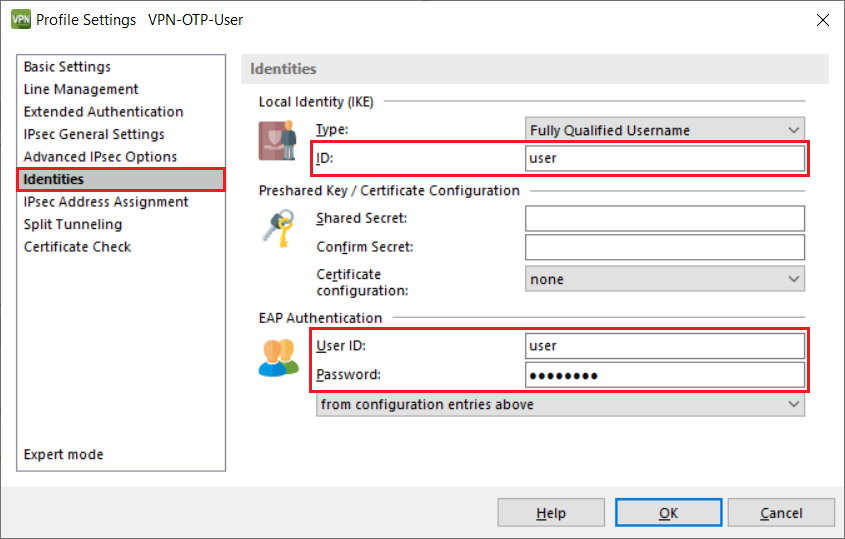
5.13) Switch to the Identities tab and enter the user name of the RADIUS user as the Local Identity and also the OTP user name as the user ID for the EAP Authentication. You must also enter any password under EAP Authentication as the field may not be left empty.
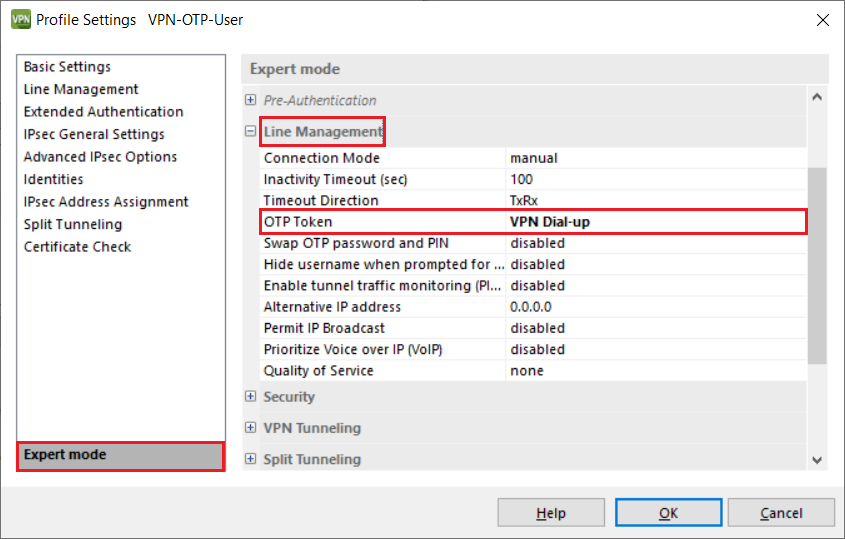
5.14) Switch to the Expert mode, click on Line Management and, under OTP Token, select the option VPN Dial-up.
5.15) This concludes the configuration of the VPN connection in the Advanced VPN Client. Confirm the manually entered changes by clicking on OK.
...
6.1) Use WEBconfig to connect to the router and navigate to the menu Extras → EAP-OTP users.
6.2) Next to the user, click the “eye” icon to view the QR code.
6.3) Scan the QR code with an authenticator app. OTP codes are now generated and displayed in the app.
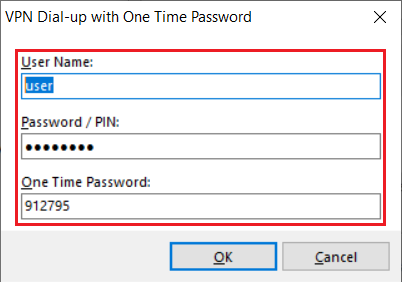
6.4) Two passwords are requested when the VPN connection is established: the password of the RADIUS user set in step 3.5 along with the one-time password (OTP) displayed in the authenticator app.
