
...
- Availability of telephony features guaranteed anywhere, on any device
- Integration of users in different locations, including guaranteed high availability
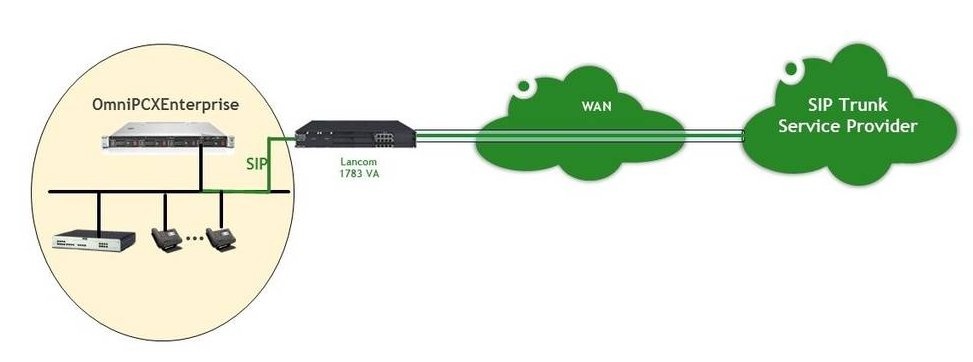
- Operation on a DTAG SIP trunk with LANCOM Session Border Controller, SBC
- Provision of excellent voice communication for your customers and colleagues
- Integration in business processes via open interfaces

Procedure:
1) Configuration steps on the LANCOM router:
...
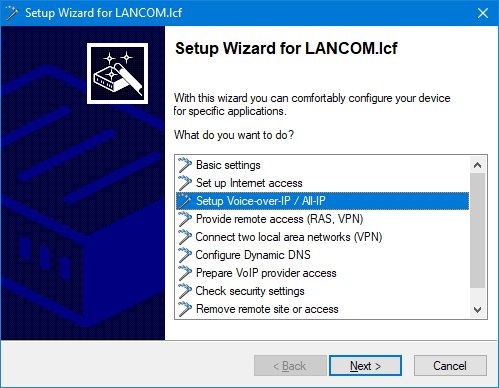
1.2) Select the Setup Wizard to Setup Voice-over-IP/All-IP.

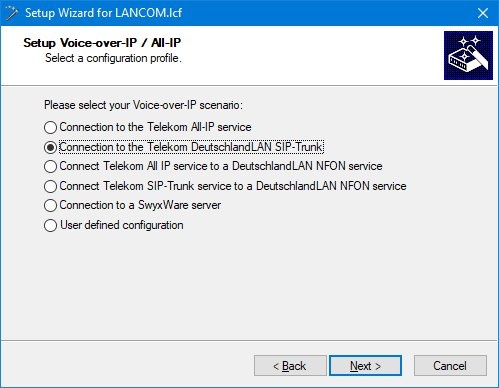
1.3) Run the wizard for the Connection to the Telekom DeutschlandLAN SIP trunk.

1.4) Enter the authentication data for the SIP trunk that you received from Telekom.
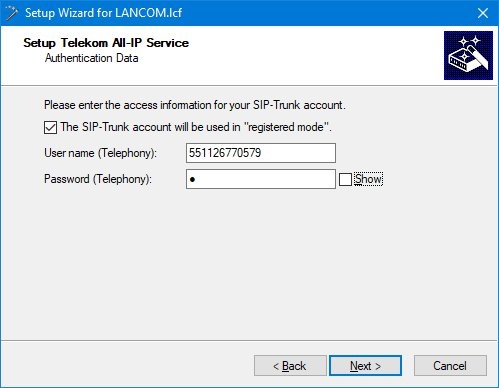

| Info |
|---|
In some cases, the SIP trunk may not require the “registered mode” . The checkmark needs to be removed accordingly. |
1.5) Enter the Area code of the connection without the leading zero and enter the main number under Durchwahlnummer .
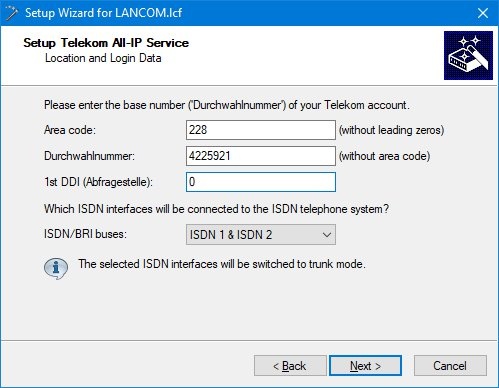

1.6) Confirm the next few steps by clicking on Next.
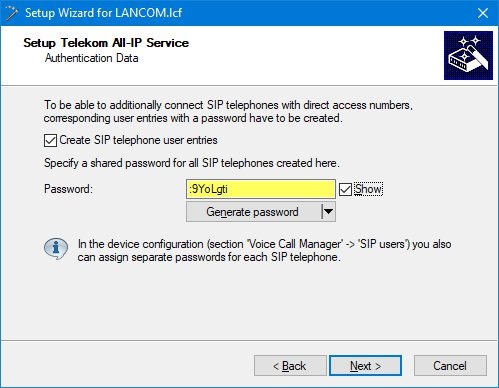
1.7) Specify a shared password for all connected SIP phones.

1.8) Enter a phone number of your choice for a SIP extension number (OmniPCX PBX system). This configuration will be modified later in step 1.16.


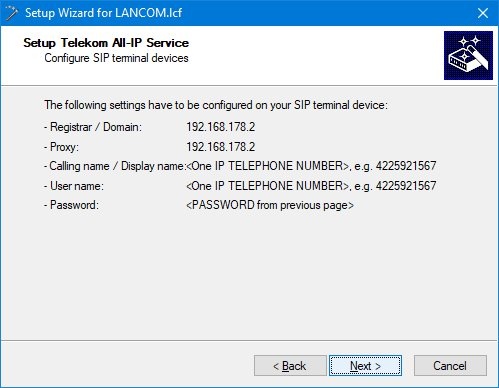
1.9) Make a note of the settings required for your SIP terminal.

1.10) Close the Setup Wizard by clicking on Finish.


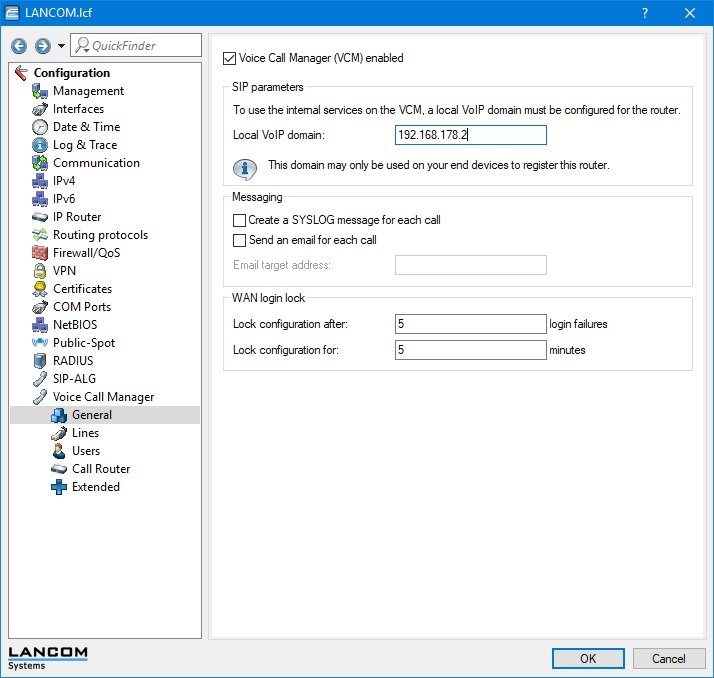
1.11) Open the configuration dialog for the LANCOM router and switch to the menu item Voice Call Manager → General.
1.12) In the field Local VoIP domain, enter the local IP address of the LANCOM router.

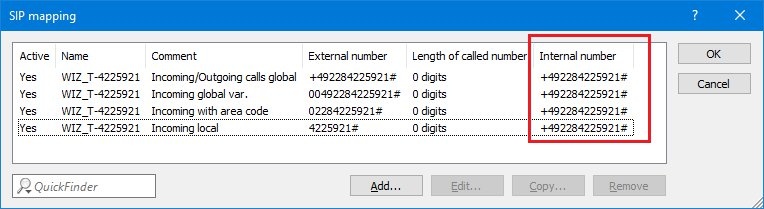
1.13) Open the menu Voice Call Manager → Lines → SIP mapping.
1.14) For each entry in the table, modify each internal number to include the prefixes for the +<country code><area code> (e.g. +49228, see the following figure).

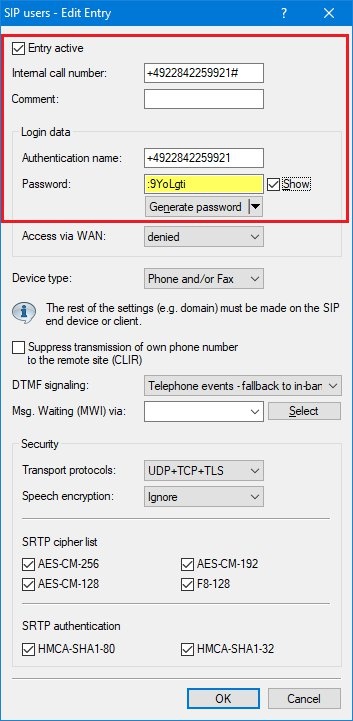
1.15) Open the menu Voice Call Manager → Users → SIP users.
1.16) Modify the entry for the user so that the fields Internal call number and Authentication name contain the internal call number entered in step 1.14. This user entry is used for the SIP connection to the PBX system.

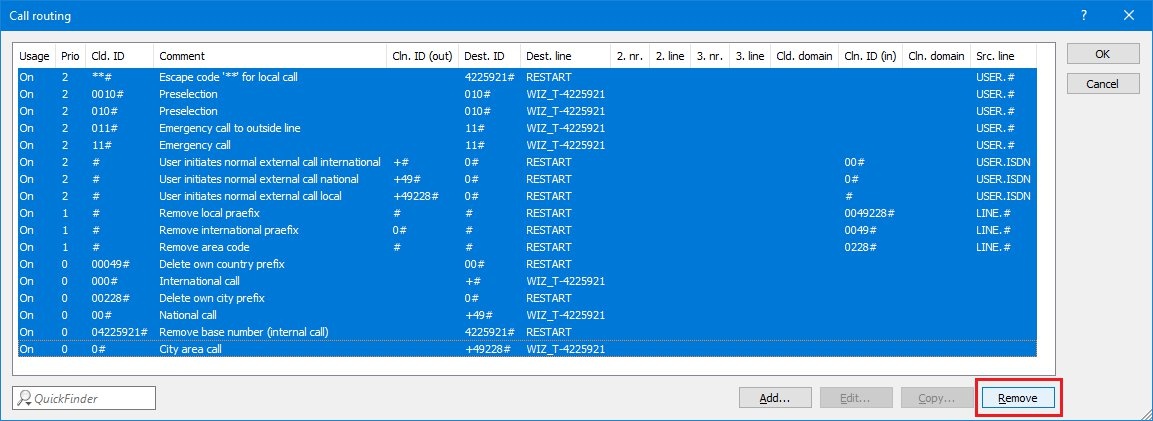
1.17) Open the menu Voice Call Manager → Call router → Call routing and delete any entries.

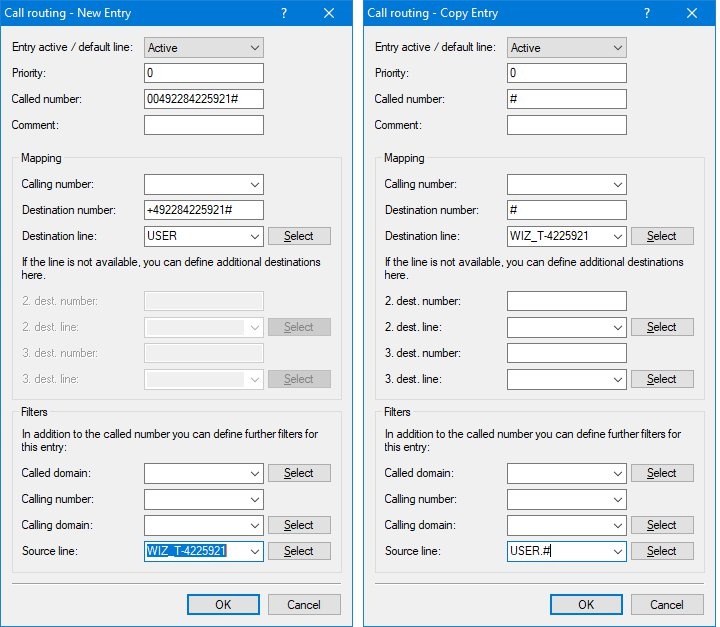
1.18) Create two new call routes as is shown in the following illustrations.

1.19) The call routing table should then appear as follows:


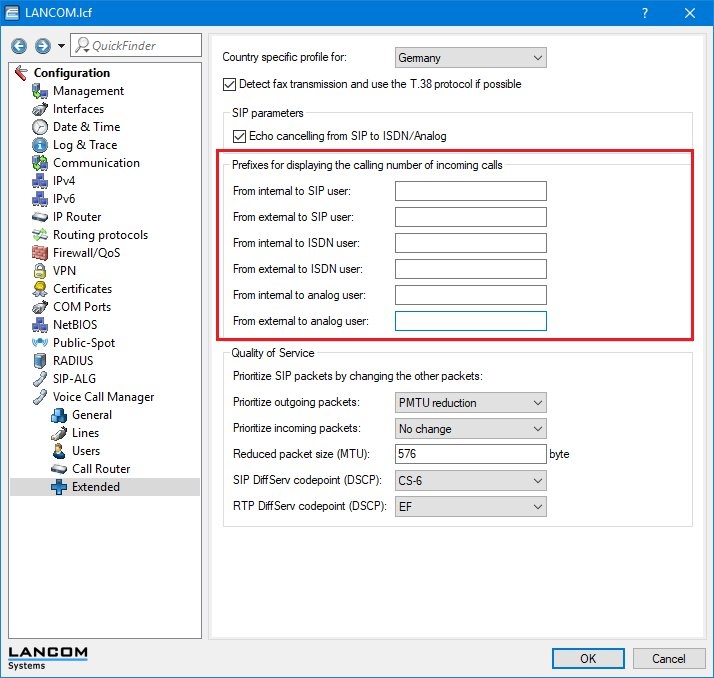
1.20) Open the menu Voice Call Manager → Extended.
1.21) Make sure that no prefixes have been entered for displaying the calling number of incoming calls.

1.22) Write the configuration back to the LANCOM router.
...