BlackBerry smartphone with the operating system BlackBerry 10 OS or later.
Procedure:
1) Configuration steps on the LANCOM router:
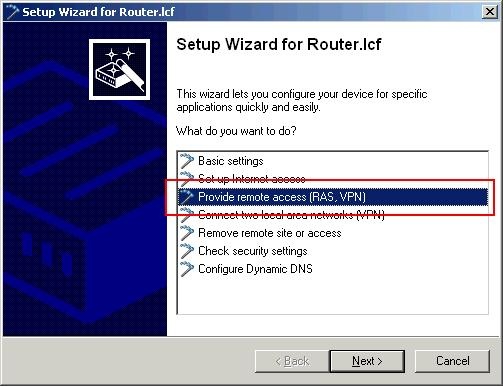
1.1) Start the LANCOM router's Setup Wizard in LANconfigand select the option Provide remote access (RAS, VPN).
Image Removed
Image Added
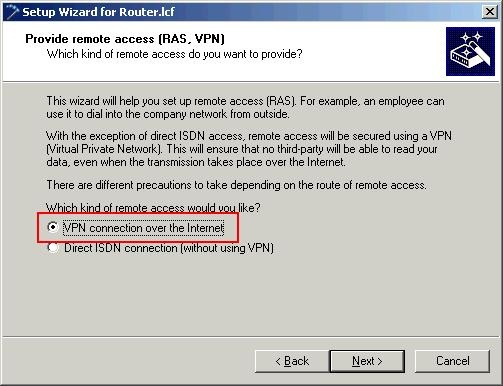
1.2) Select the option VPN connection over the Internet.
Image Removed
Image Added
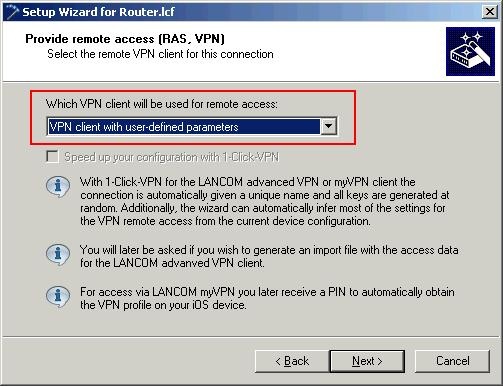
1.3) In the following dialog, select the option VPN client with user-defined parameters.
Image Removed
Image Added
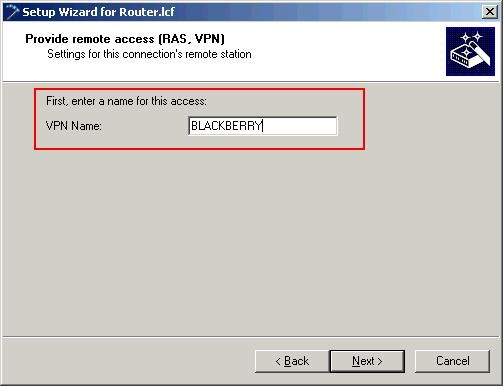
1.4) Enter a name for your VPN connection.
Image Removed
Image Added
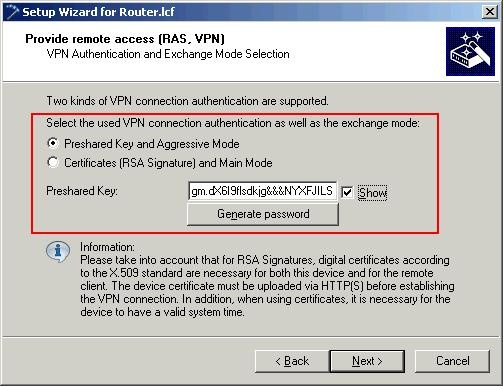
1.5) Select the option Preshared Key and Aggressive Modeand enter a passwordinto the field preshared key. Information:
You will require this
preshared key
later in
item 2.6, configuration of the BlackBerry
.
Image Removed
Image Added
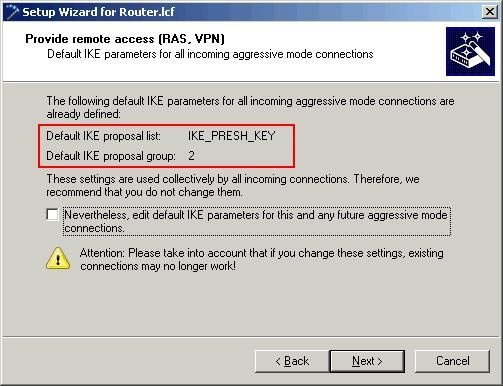
1.6) In the next dialog box, you can use the default IKE parameters.
Image Removed
Image Added
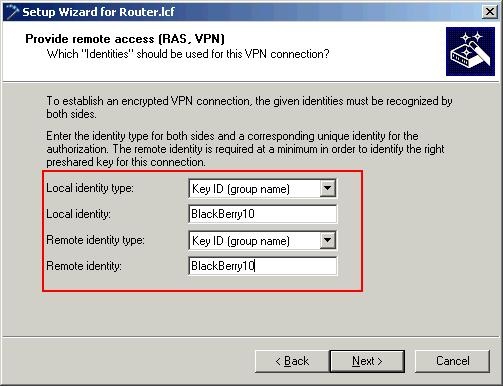
1.7) For the Local identity typeand the Remote identity type, set the option Key ID (group name). In each of the fields, Enter a group name(in this case: BlackBerry10).
Image Removed
Image Added
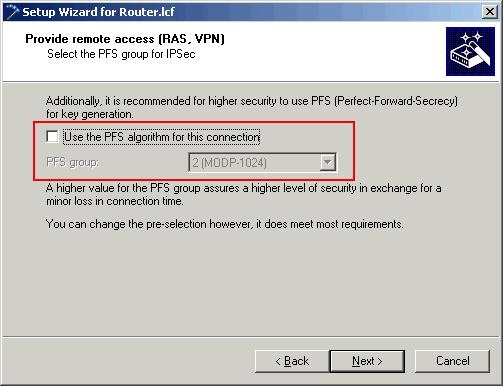
1.8) The PFS algorithmis not requiredfor this VPN connection, so you need to disable this option.
Image Removed
Image Added
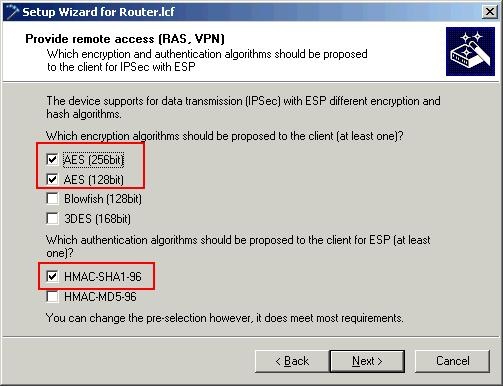
1.9) For the Encryption algorithm, activate the options AES (256bit)and AES (128bit). Set the Authentication algorithmto HMAC-SHA1-96.
Image Removed
Image Added
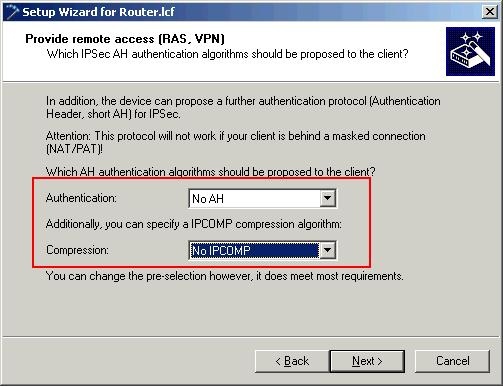
1.10) You should also set No AH(authentication header) and No IPCOM(compression).
Image Removed
Image Added
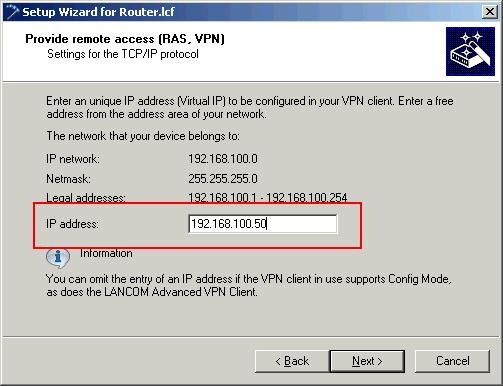
1.11) In the next dialog you have to enter the local IP addresswhich is to be assigned to the client.
Image Removed
Image Added
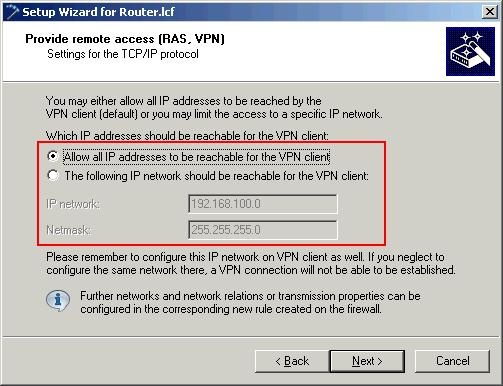
1.12) Accept the default settings in the following dialog.
Image Removed
Image Added
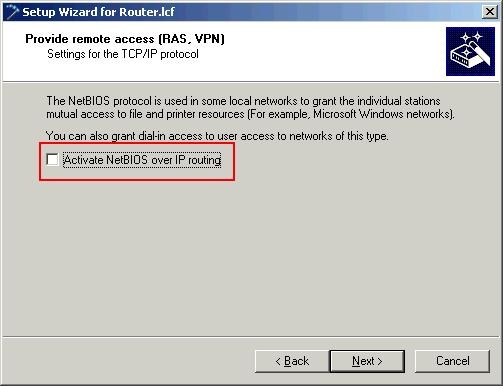
1.13) The function NetBIOS over IP routingis not used.
Image Removed
Image Added
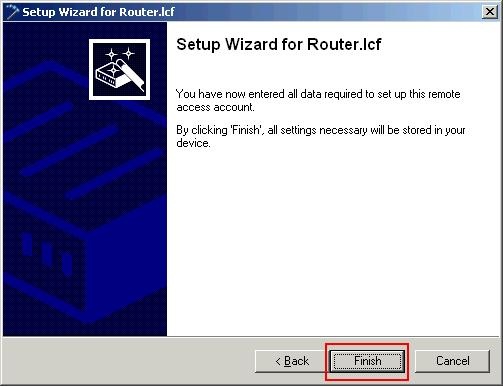
1.14) Click on Finishto close the Setup Wizard and write the configuration back to the LANCOM router.
Image Removed
Image Added
1.15) Use LANconfig to open the configuration for the LANCOM router and switch to the menu item Configuration -> VPN -> General -> Connection list.
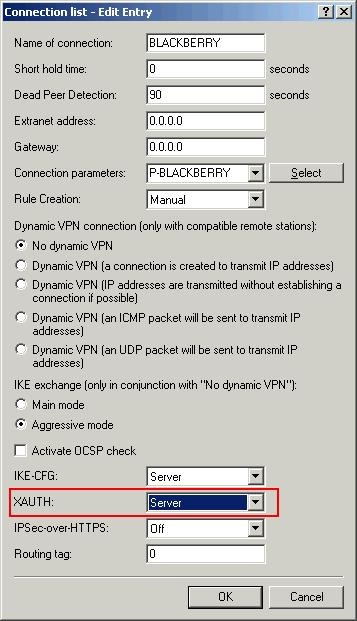
1.16) Open theentry for the VPN client connectionwith a double-click.
1.17) For the item XAUTH, select the option Server. Save the change by clicking on the OKbutton.
Image Removed
Image Added
1.18) Navigate to the menu Configuration -> Communication -> Protocols -> PPP list.
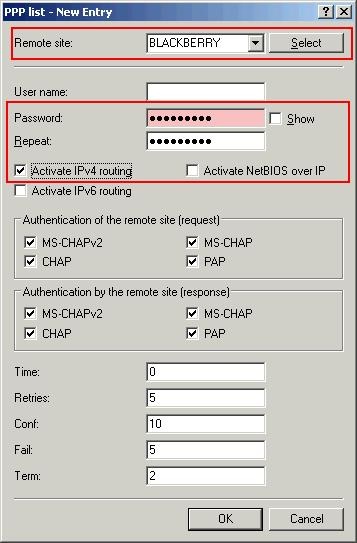
1.19) Create a new entry.
The Remote site is to be set your VPN client connection.
Enter a Passwordinto the appropriate field.
Select the option Activate IP routing.
Information: You will require the name of the remote siteand the password later in the item 2.7, configuration of the BlackBerry.
Image Removed
Image Added
1.20) Save the configuration using the OK button and write the new configuration back to the LANCOM router. This concludes the configuration of the LANCOM router.
2) Setting up the VPN connection on the BlackBerry device:
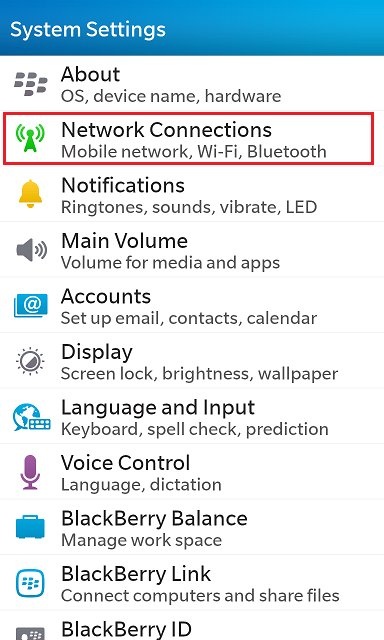
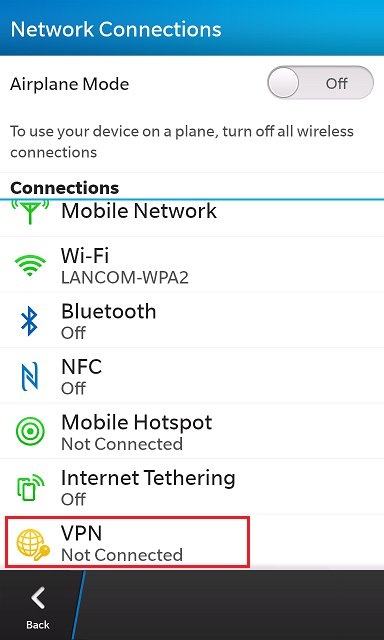
2.1) The VPN profiles are managed in the menu Settings -> Network connections -> VPN.
2.2) Tap on the Add...button to create a new VPN profile.
Image RemovedImage Removed
Image AddedImage Added
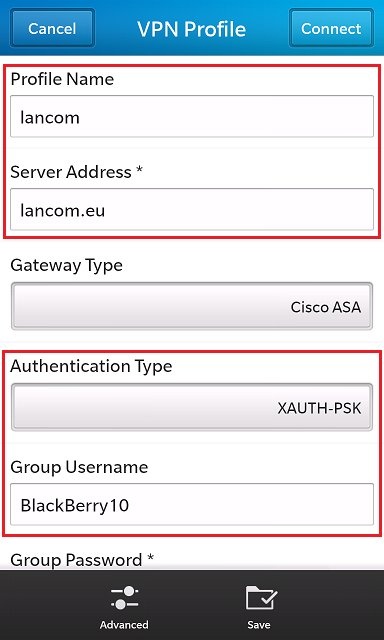
2.3) Enter a name for the new profile. In the field Server addressyou enter the public IP address or DNS name of the LANCOM router.
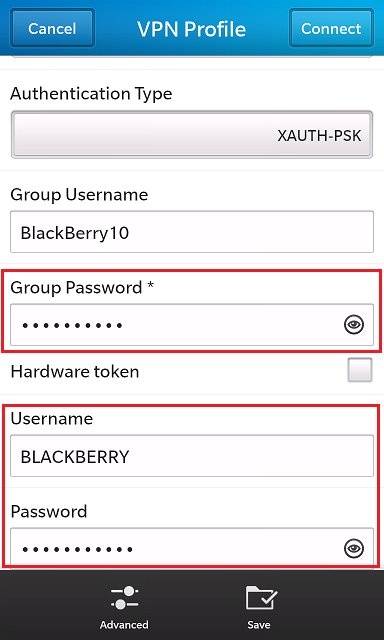
2.4) The default setting for Gateway typecan be left unchanged at Cisco ASA. The Authentication type XAUTH-PSKalso remains unchanged.
2.5) In the field Group usernameyou enter the value that you specified as the Remote identity typein step 1.7 of the LANCOM router configuration (in this case: BlackBerry10).
Image Removed
Image Added
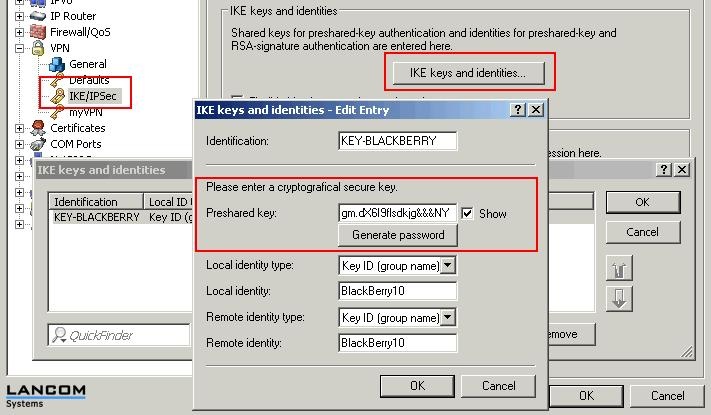
2.6) In the field Group passwordenter the password for the preshared key, which you specified in the LANCOM router configuration in step 1.5. Information:
The preshared key in the configuration of the LANCOM router can be viewed under
VPN -> IKE/IPSec -> IKE keys and identities
.
Image Removed
Image Added 2.7) In the field Usernameyou must enter the name of the VPN connectionthat you entered into the configuration of the LANCOM router in step 1.19 (in this case: BLACKBERRY).
The Passwordrequired here is the Passwordentered into the router configuration under step 1.19.
Image Removed
Image Added
2.8) Tap on Saveto apply the configuration.
2.9) After the settings are saved, you can connect to the LANCOM router. If this was successful, the status bar next to the wireless icon shows a small key.