
...
| Seiteneigenschaften |
|---|
| Seiteneigenschaften |
|---|
Description:
Dieser Artikel beschreibt, wie der FTP-Proxy bzw. das Application-Management für das Protokoll FTP eingerichtet werden kann. This article describes how to set up the FTP proxy or Application Management for the FTP protocol.
Requirements:
- LANCOM LANCOM R&S®Unified Firewall mit with LCOS FX ab Version as of version 10.3
- Web -Browser zur Konfiguration der browser for configuring the Unified Firewall.
Es werden folgende Browser unterstützt
The following browsers are supported:- Google Chrome
- Chromium
- Mozilla Firefox
Procedure
Bei With LANCOM Unified Firewalls wird automatisch das ALG für das Protokoll FTP aktiviert , the ALG for the FTP protocol is automatically activated (Conntrack Helper) , wenn eine Firewall-Regel für den TCP-Port 21 erstellt wird.
| Info |
|---|
Das Protokoll FTP sollte nach Möglichkeit nur für ausgewählte Netzwerk-Teilnehmer erlaubt werden, die dieses benötigen. |
LANCOM Systems empfiehlt bei Verwendung von FTP die zusätzliche Einrichtung des FTP-Proxy oder des "Application-Management" für das Protokoll FTP:
1. Einrichtung des "Application Filter":
| Hinweis |
|---|
Die Verwendung von "Aktivem FTP" ist durch diese Methode nicht mehr möglich. Es kann dann nur "Passives FTP" verwendet werden. |
Bei einer Prüfung über das Application-Management muss ein separates Host- oder Netzwerk-Objekt erstellt werden, in dem nur das Protokoll FTP samt einem benutzerdefinierten Protokoll für FTP-Daten enthalten ist. Das Application-Management wird für FTP dann nur für dieses Objekt angewandt.
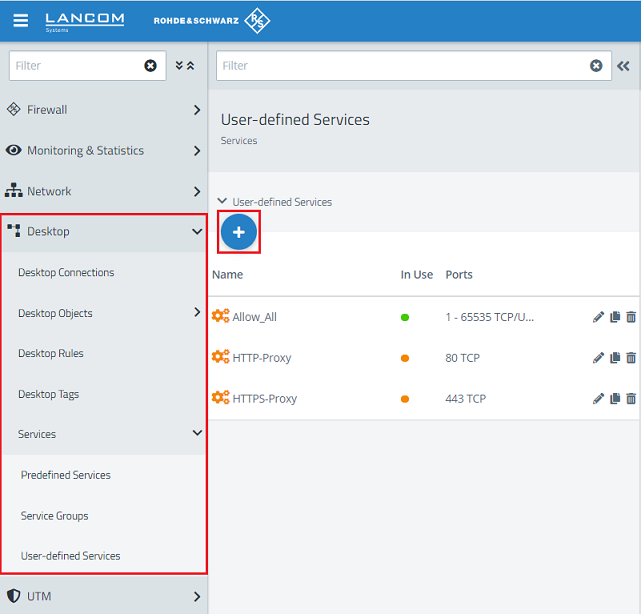
1.1 Öffnen Sie die Konfiguration der Unified Firewall in einem Web-Browser, wechseln in das Menü Desktop → Dienste → Benutzerdef. Dienste und klicken auf das "Plus-Symbol", um einen neuen Dienst für die Übertragung der FTP-Daten anzulegen.
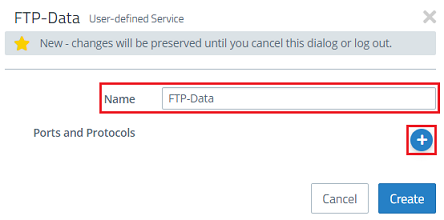
1.2 Vergeben Sie einen aussagekräftigen Namen und klicken auf das "Plus-Symbol", um die Ports und Protokolle anzulegen.
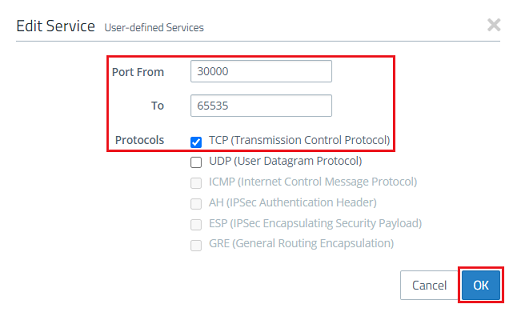
1.3 Tragen Sie die Ports 30000 bis 65535 ein und wählen das Protokoll TCP aus. Klicken Sie anschließend auf OK.
| Info |
|---|
Die hier hinterlegten Ports werden für den FTP-Datentransfer verwendet. Stellen Sie sicher, dass diese Ports (oder eine Teilmenge) auch in Ihrem FTP-Client hinterlegt sind. |
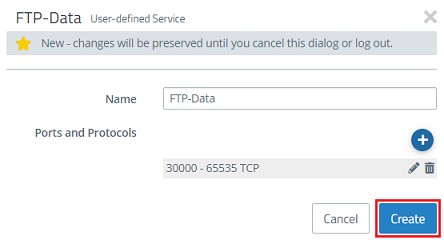
1.4 Klicken Sie auf Erstellen, um den Dienst anzulegen.
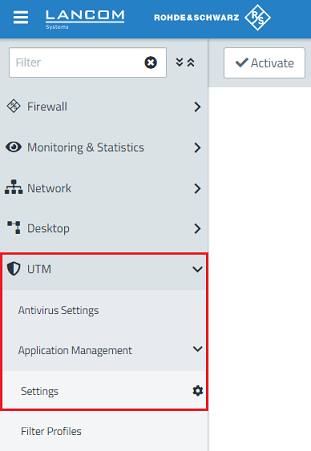
1.5 Wechseln Sie in der Konfiguration der Unified Firewall in das Menü UTM → Application-Management → Einstellungen.
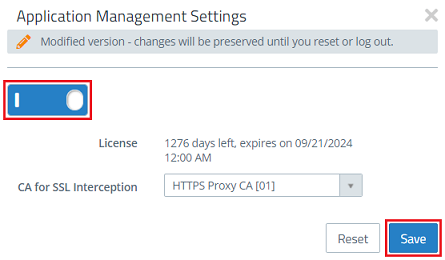
1.6 Aktivieren Sie das Application-Management über den Schiebe-Regler und klicken auf Speichern.
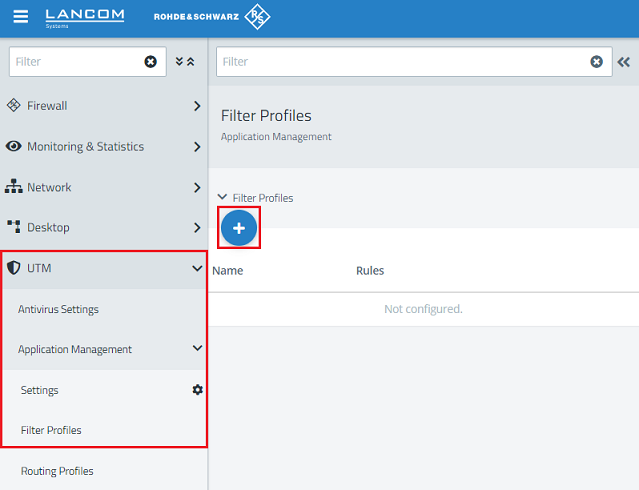
1.7 Wechseln Sie in das Menü UTM → Application-Management → Filter-Profile.
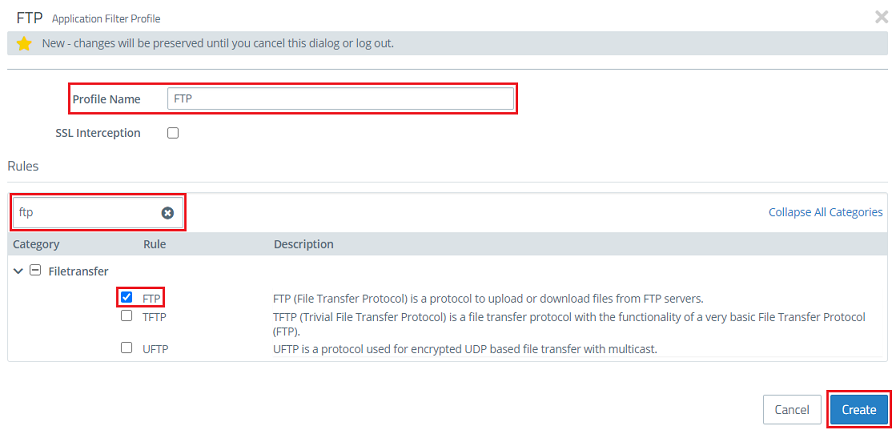
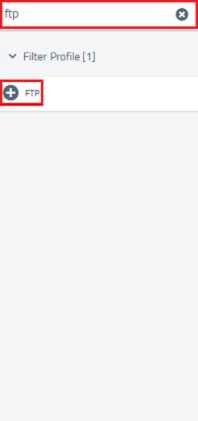
1.8 Vergeben Sie einen aussagekräftigen Profilnamen, aktivieren das Protokoll FTP und klicken auf Erstellen.
| Info |
|---|
Tragen Sie im Filter-Feld den Suchbegriff ftp ein, damit Sie das gewünschte Protokoll FTP schneller finden können. |
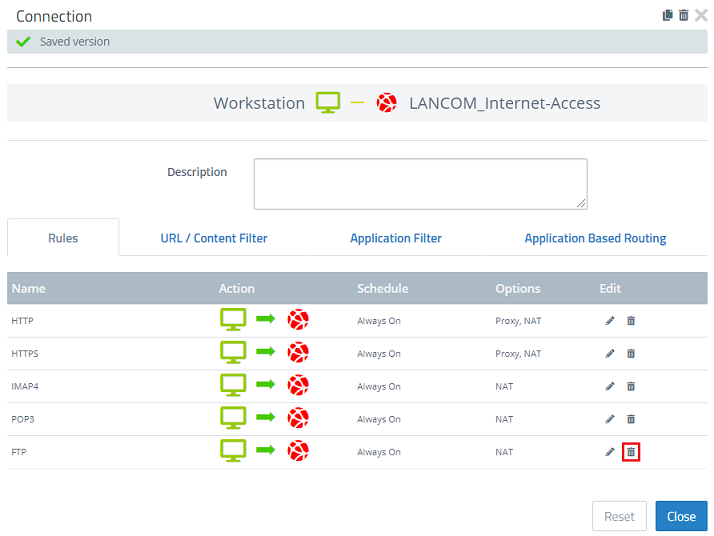
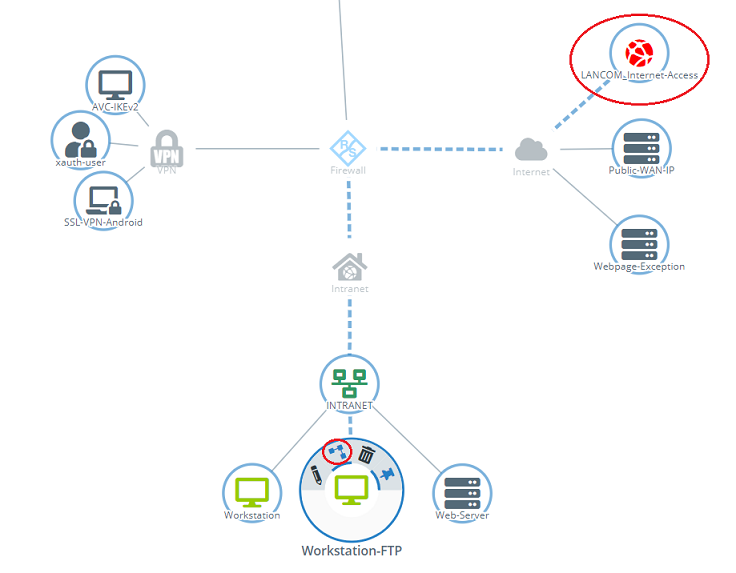
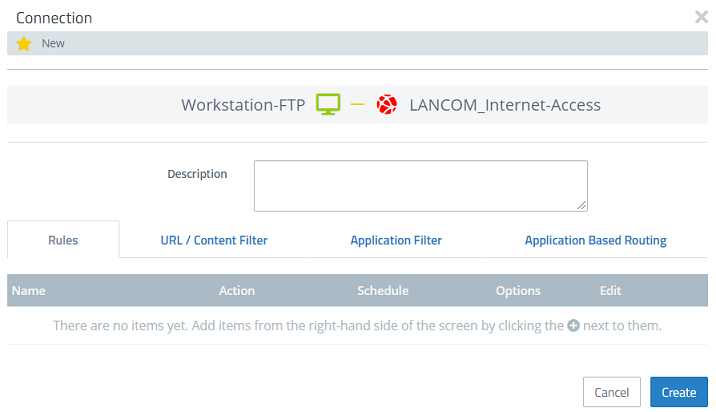
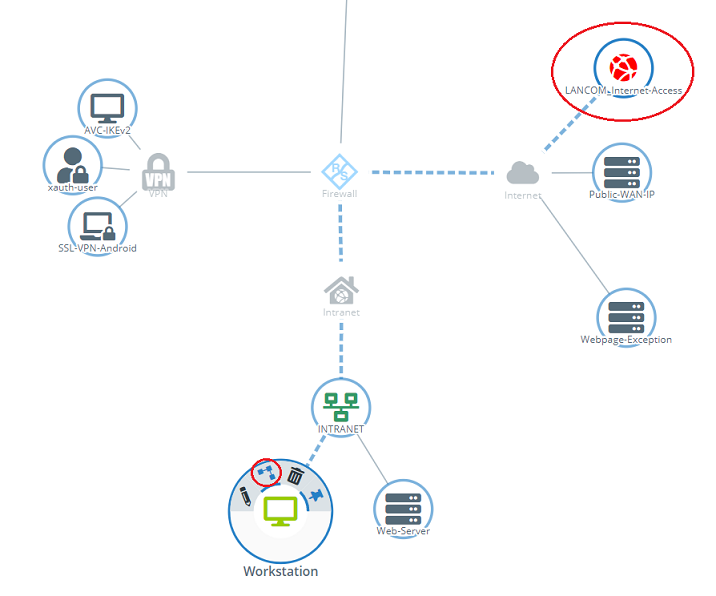
1.9 Klicken Sie auf dem Desktop auf das Host- oder Netzwerk-Objekt, für welches die Kommunikation per FTP erlaubt ist, wählen das Verbindungswerkzeug aus und klicken auf das Internet-Objekt, um die Firewall-Regeln aufzurufen.

1.10 Klicken Sie bei FTP auf das "Mülltonnen-Symbol", um das Protokoll aus dieser Regel zu entfernen.
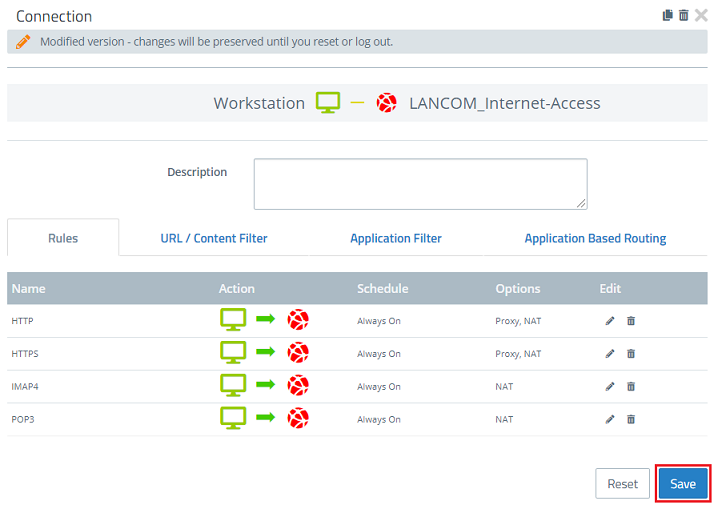
1.11 Klicken Sie anschließend auf Speichern.
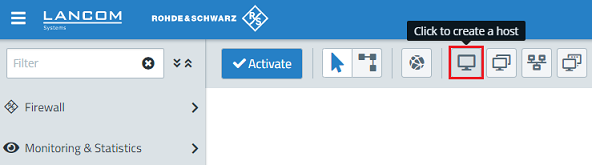
1.12 Klicken Sie auf das Symbol zum Erstellen eines Hosts oder zum Erstellen eines Netzwerks, sofern FTP im ganzen Netzwerk erlaubt werden soll.
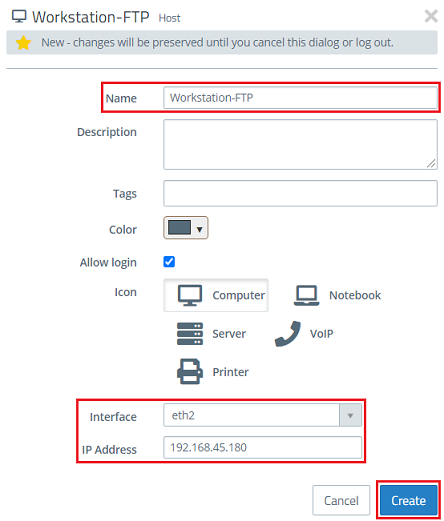
1.13 Passen Sie folgende Parameter an und klicken auf Erstellen:
- Name: Vergeben Sie einen aussagekräftigen Namen. Dieser darf nicht dem Namen des bereits bestehenden Objektes entsprechen.
- Interface: Wählen Sie das Interface, an dem der Host bzw. das Netzwerk angeschlossen ist.
- IP-Adresse: Tragen Sie die IP-Adresse des bereits bestehenden Hosts bzw. die Netzadresse des bereits bestehenden Netzwerks ein.
1.14 Klicken Sie auf das in Schritt 1.13 erstellte Host- oder Netzwerk-Objekt, wählen das Verbindungswerkzeug aus und klicken auf das Internet-Objekt, um die Firewall-Regeln aufzurufen.
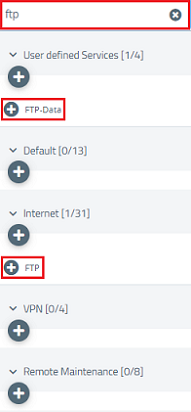
1.15 Fügen Sie das Protokoll FTP sowie das in Schritt 1.1 - 1.4 erstellte Protokoll für die FTP-Daten (in diesem Beispiel FTP-Data) hinzu.
| Info |
|---|
Verwenden Sie das Filter-Feld, damit Sie die gewünschten Dienste schneller finden können. |
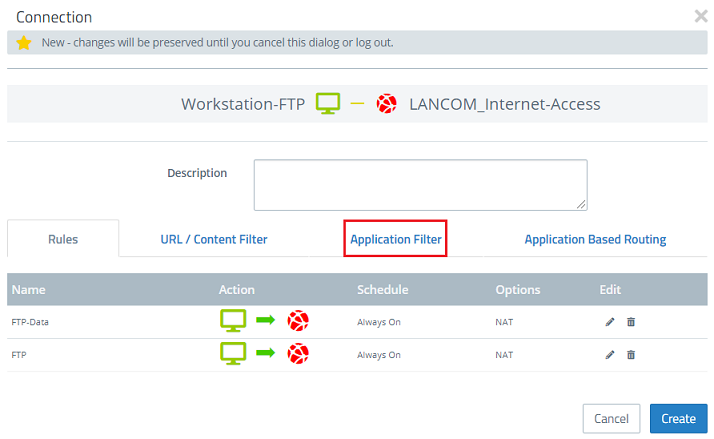
1.16 Klicken Sie auf den Reiter Application Filter.
1.17 Wählen Sie die Option Whitelist aus und fügen das in Schritt 1.8 erstellte Filter-Profil hinzu.
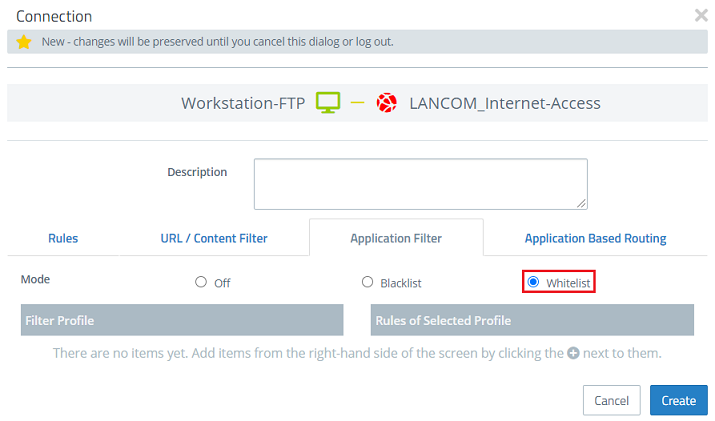
1.18 Klicken Sie auf Erstellen.

1.19 Klicken Sie auf Aktivieren, damit die vorgenommenen Einstellungen umgesetzt werden.

2. Einrichtung des FTP-Proxy:
| Hinweis |
|---|
Die Verwendung des FTP-Proxy setzt einen aktiven und funktionierenden HTTP-Proxy voraus. |
2.1 Klicken Sie auf dem Desktop auf das Host- oder Netzwerk-Objekt, für welches die Kommunikation per FTP erlaubt ist, wählen das Verbindungswerkzeug aus und klicken auf das Internet-Objekt, um die Firewall-Regeln aufzurufen.
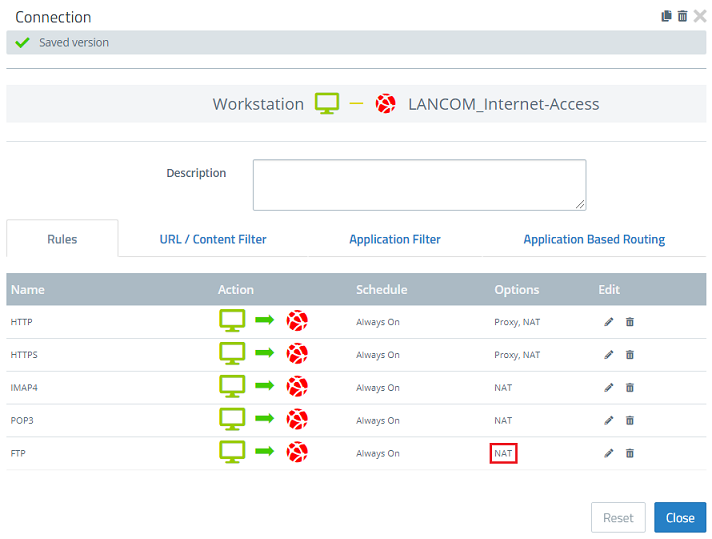
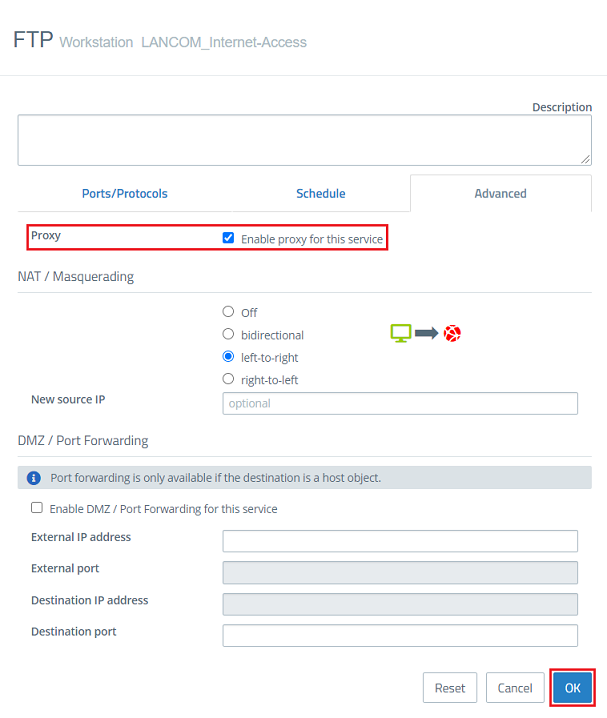
2.2 Klicken Sie bei FTP unter Optionen auf NAT, um die erweiterten Einstellungen aufzurufen.
2.3 Setzen Sie bei Proxy den Haken bei Proxy für diesen Dienst aktivieren und klicken anschließend auf OK.
2.4 Klicken Sie auf Speichern, um die Änderung zu übernehmen.

when a firewall rule is created for TCP port 21.
| Info |
|---|
If possible, the FTP protocol should only be allowed for selected network users who need it. |
When using FTP, LANCOM Systems recommends that you additionally set up the FTP proxy or “Application Management” for the FTP protocol:
1. Configuring the "Application Filter":
For verification by the Application Management, a separate host or network object has to be created containing only the protocol FTP together with a custom protocol for FTP data. The Application Management is then applied to FTP for this object only.
1.1) Open the configuration of the Unified Firewall in a web browser, switch to the menu Desktop → Services → User-defined Services and click on the “+” icon to create a new service for FTP data transfer.
1.2) Give it a descriptive name and click on the “+” icon to specify the Ports and Protocols.
1.3) Enter the ports 30000 to 65535 and select the TCP protocol. Then click on OK.
| Info |
|---|
|
1.4) Click Create to create the service.
1.5) In the configuration of the Unified Firewall, navigate to the menu UTM → Application Management → Settings.
1.6) Enable Application Management with the slider button and click Save.
1.7) Open the menu UTM → Application Management → Filter Profiles.
1.8) Enter a descriptive profile name, activate the protocol FTP and click Create.
| Info |
|---|
In the filter field, enter the search term ftp to help you find the FTP protocol faster. |
1.9) On the desktop, click the host or network object for which communication via FTP is allowed, select the connection tool and click on the Internet object to view the firewall rules.
1.10) For the entry FTP, click the trash-can icon to remove the protocol from this rule.
1.11) Then click on Save.
1.12) Click the icon for Create a host, or for Create a network if FTP should be allowed for the entire network.
1.13) Modify the following parameters and then click Create:
- Name: Enter a descriptive name. This must not be the same as the name of the existing object.
- Interface: Select the interface that the host or network is connected to.
- IP address: Enter the IP address of the existing host or the network address of the existing network.
1.14) Click the host or network object created in step 1.13, select the connection tool and click the Internet object to view the firewall rules.
1.15) Add the FTP protocol as well as the service for the FTP data (in this example FTP-Data) created in steps 1.1 - 1.4.
| Info |
|---|
Use the filter field to help you find the services faster. |
1.16) Click on the tab Application Filter.
1.17) Select the option Whitelist and add the filter profile created in step 1.8.
1.18) Click on Create.
1.19) Finally, implement the changes by clicking Activate.
2. Setting up the FTP proxy:
| Hinweis |
|---|
The use of the FTP proxy requires an active and working HTTP proxy . |
2.1) On the desktop, click the host or network object for which communication via FTP is allowed, select the connection tool and click on the Internet object to view the firewall rules.
2.2) Under the Options for FTP,click on NAT to access the advanced settings.
2.3) Next to Proxy, check the box next to Enable proxy for this service and click OK.
2.4) Click Save to accept the change.
2.5) Finally, implement the changes by clicking Activate2.5 Klicken Sie auf Aktivieren, damit die vorgenommenen Einstellungen umgesetzt werden.