
...
This article describes how to set up a certificate-based IKEv2 VPN connection between two LANCOM R&S®Unified Firewalls.
| Info |
|---|
The certificate module was updated in LCOS FX 10.7, therefore the corresponding menus differ compared to older LCOS FX versions. The configuration of a certificate-based IKEv2 connection between two Unified Firewalls as of LCOS FX 10.7 is described in the following article: |
Rquirements:
- Two LANCOM R&S® Unified Firewalls with LCOS FX as of version 10.4 up to and including LCOS FX 10.6
- A configured and functional Internet connection on the two Unified Firewalls
- Web browser for configuring the Unified Firewall.
The following browsers are supported:- Google Chrome
- Chromium
- Mozilla Firefox
...
- Type: From the drop-down menu, select the option CA for VPN/web-server certificate.
- Private Key Encryption: Make sure that the option RSA is selected.
- Private Key Size: From the drop-down menu, select the option 4096 bit.
- Common Name (CN): Set a descriptive common name for the CA (in this example IKEv2_ CA).
- Validity: Select a validity period for this CA. A CA usually requires a long period of validity, which is why it is set to 5 years in this example.
- Private key password: Set a password for the private key. This is used to encrypt the private key.
...
- Type: From the drop-down menu, select the option VPN certificate.
- Signing CA: From the drop-down menu, select the CA created in step 1.1.2.
- Private Key Encryption: Make sure that the option RSA is selected.
- Private Key Size: From the drop-down menu, select the option 4096 bit.
- Common Name (CN): Set a descriptive common name for certificate at the headquarters (in this example IKEv2_Headquarter).
- Validity: Select a validity period for this certificate. A VPN certificate for a site-to-site VPN connection usually requires a long period of validity, which is why it is set to 5 years in this example.
- CA password: Enter the private key password set in step 1.1.2.
- Private key password: Set a password for the Assign any private key . This is used to encrypt the private key of the VPN certificate.password.

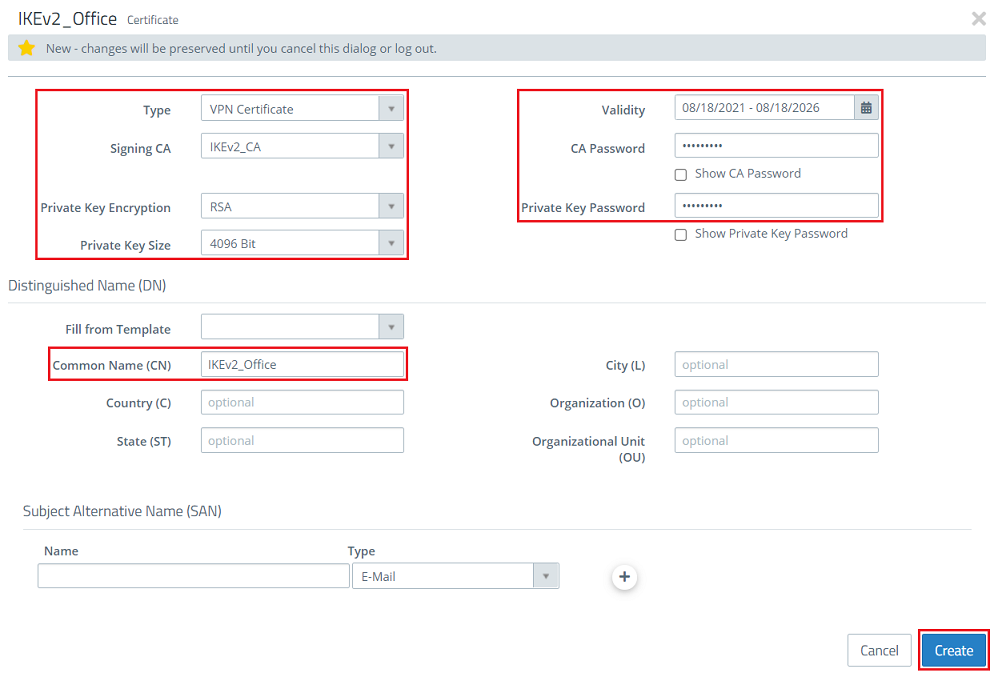
1.1.4) Next, create a VPN certificate for the branch office. Modify the following parameters for it and then click Create:
- Type: From the drop-down menu, select the option VPN certificate.
- Signing CA: From the drop-down menu, select the CA created in step 1.1.2.
- Private Key Encryption: Make sure that the option RSA is selected.
- Private Key Size: From the drop-down menu, select the option 4096 bit.
- Common Name (CN): Set a descriptive common name for certificate at the branch office (in this example IKEv2_Office).
- Validity: Select a validity period for this CA. A VPN certificate for a site-to-site VPN connection usually requires a long period of validity, which is why it is set to 5 years in this example.
- CA password: Enter the private key password set in step 1.1.2.
- Private key password: Set a password for the private key. This is used to encrypt the private key of the VPN certificateAssign any private key password.
1.1.5) Under Certificate management, go to the certificate of the branch office and click the export button.
...
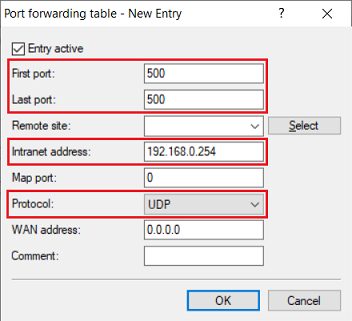
- First port: Specify the port 500.
- Last port: Specify the port 500.
- Intranet address: Specify the IP address of the Unified Firewall in the intermediate network between the Unified Firewall and the LANCOM router.
- Protocol: From the drop-down menu, select UDP.
3.3) Create a further entry and specify the UDP port 4500.
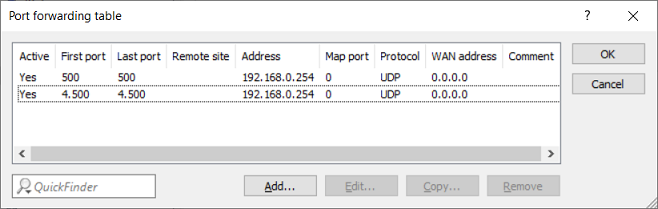
3.4) Write the configuration back to the router.