| Seiteneigenschaften |
|---|
Description:
In diesem Artikel wird beschrieben, wie die Konfiguration eines Switches der XS-Serie per Webinterface abgespeichert werden kann.
This article describes how the configuration of an XS and GS-45xx series switch can be exported and imported via the webinterface.
| Info |
|---|
The procedure for the configuration import / export for an XS and GS-45xx series switch via SCP is described in this Knowledge Base article. The procedure for the configuration import / export for an XS and GS-45xx series switch via LANconfig is described in this Knowledge Base article |
| Info |
Die Vorgehensweise zum Speichern der Konfiguration eines Switches der XS-Serie per SCP ist in diesem Knowledge Base Artikel beschrieben. |
Requirements:
- LCOS SX ab Version as of version 5.10 Rel (download aktuelle Version)latest version)
- Any web browser for accessing the webinterfaceBeliebiger Web-Browser für den Zugriff auf das Webinterface
Procedure:
1) Saving the switch configuration:
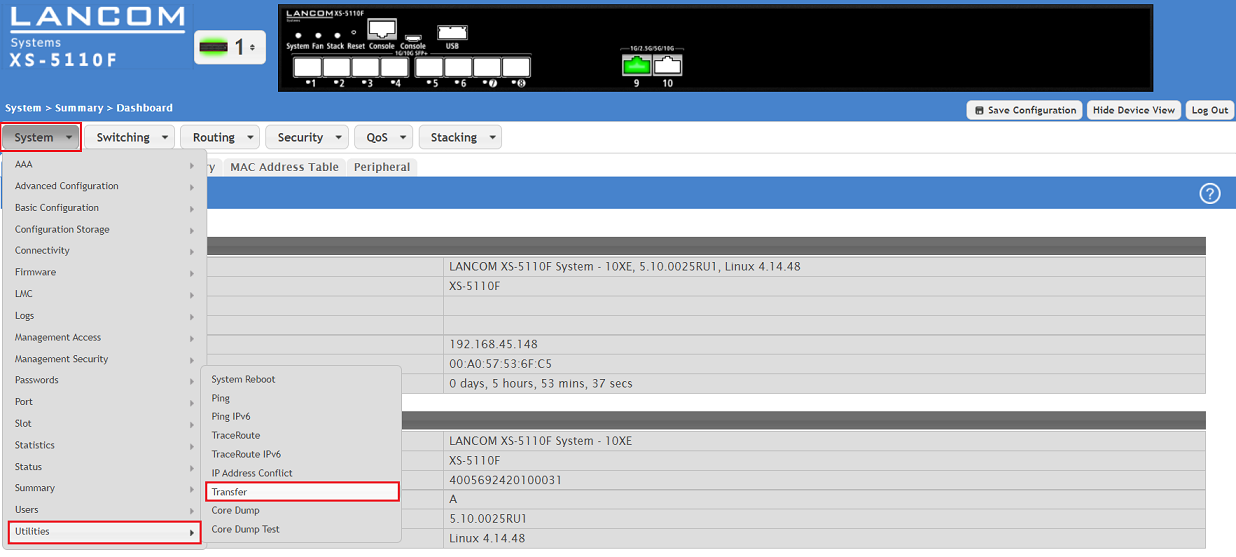
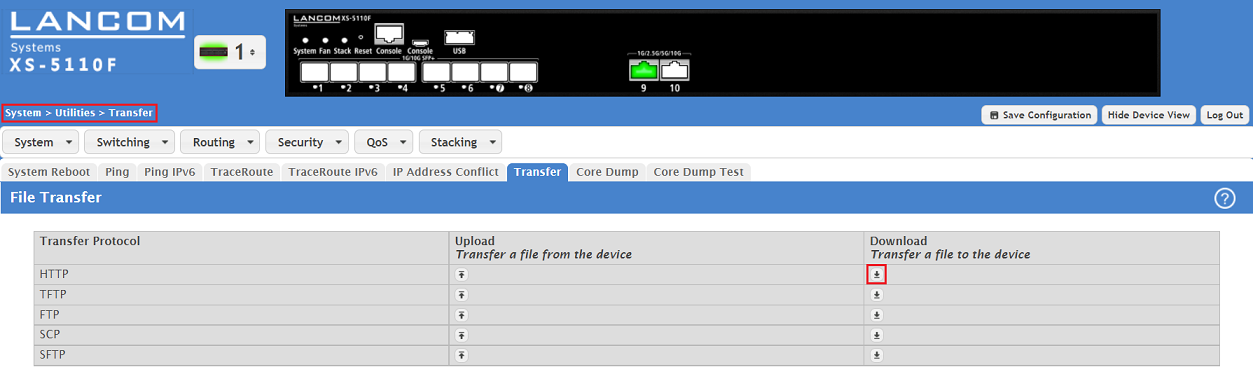
1.1) Connect to the switch via the webinterface and switch to the menu . Verbinden Sie sich mit dem Webinterface des Gerätes und wechseln in das Menü System → Utilities → Transfer.
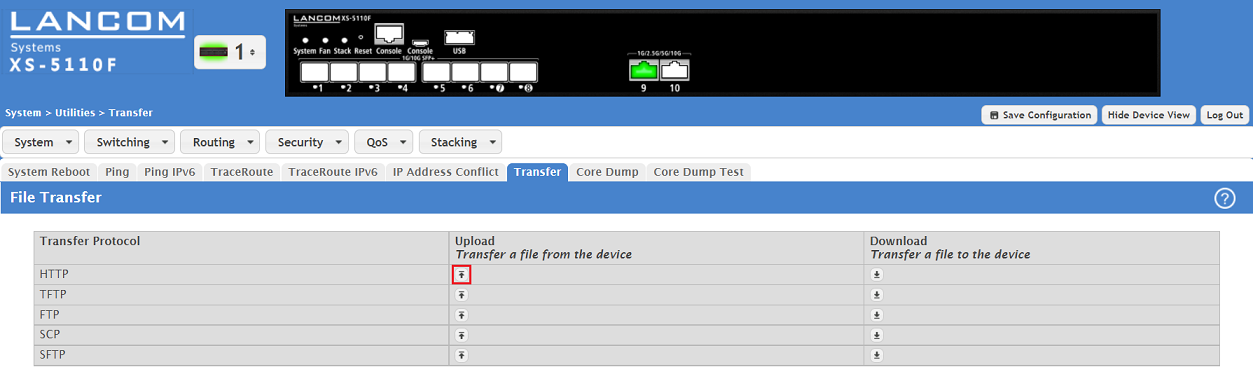
2. Klicken Sie bei HTTP auf die Schaltfläche für den Upload1.2) Click the Upload button for HTTP.
| Info |
|---|
Der The Up- und Download ist aus Sicht des Gerätes zu verstehen. Mit dem Upload ist also das Herunterladen der Geräte-Konfiguration oder einer Log-Datei auf ein Laufwerk gemeint. Per Download kann eine Konfigurations-Datei oder ein Skript in den Switch hochgeladen werden. |
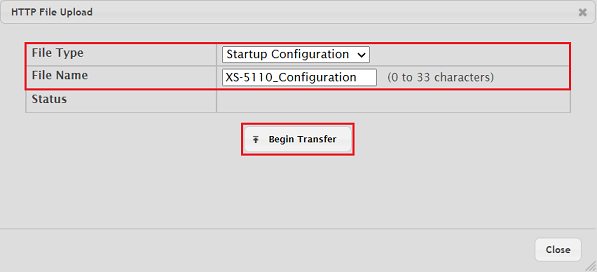
3. Wählen Sie die folgenden Parameter aus, klicken auf Begin Transfer und wählen anschließen den Speicher-Ort aus:
and Download is to be understood from the point of view of the device. Therefore the Upload stands for the download of a configuration or log files to a computer drive. The Download stands for the upload of a configuration file or a script file to the switch. |
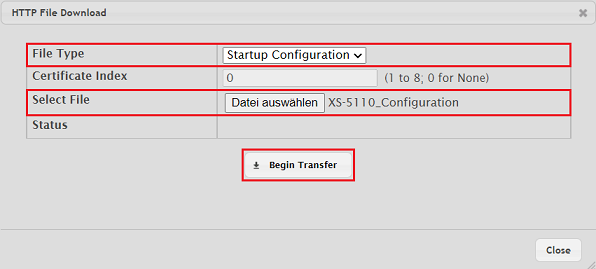
1.3) Select the following parameters, click Begin Transfer and select the save location afterwards:
- File Type: In the dropdown menu select the option Startup Configuration.
- File Name: In the dropdown menu enter a descriptive name (in this example
- File Type: Wählen Sie im Dropdown-Menü die Option Start Configuration aus.
- File Name: Vergeben Sie einen aussagekräftigen Namen (in diesem Beispiel XS-5110_Configuration).
2) Uploading the switch configuration:
2.1) Connect to the switch via the webinterface and switch to the menu System → Utilities → Transfer.
2.2) Click the Download button for HTTP.
| Info |
|---|
The Up- and Download is to be understood from the point of view of the device. Therefore the Upload stands for the download of a configuration or log files to a computer drive. The Download stands for the upload of a configuration file or a script file to the switch. |
2.3) Select the following parameters and click Begin Transfe r:
- File Type: In the dropdown menu select the option Startup Configuration.
- Select File: Select a saved configuration file (in this example XS-5110_Configuration).
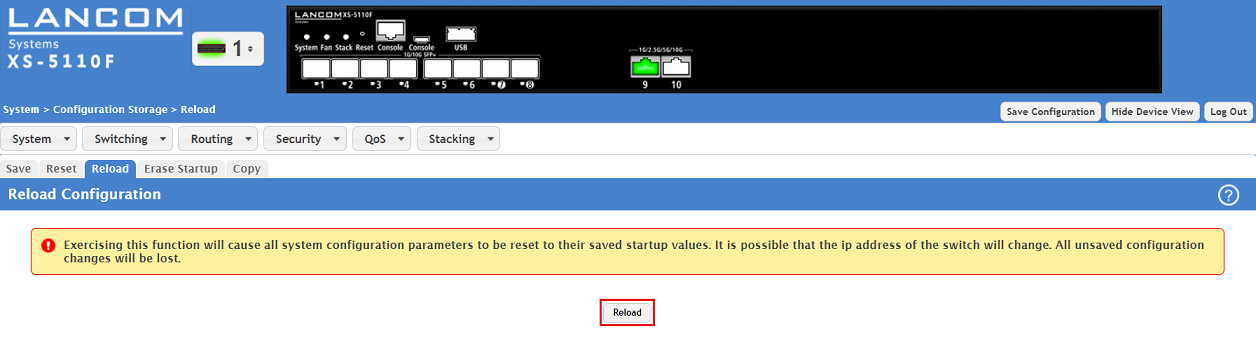
2.4) Switch to the menu System → Configuration Storage → Reload.

2.5) Click Reload in order for the start configuration to be set active.
| Info |
|---|
As an alternative you can also activate the start configuration via the CLI with the command reload configuration. |