
...
- LANCOM R&S Unified Firewall as of LCOS FX 10.7
- LANCOM VPN router
- LCOS as of version 10.20 (download)
- LANtools from version 10.20 (download)
- A configured and functional Internet connection on the Unified Firewall
- Web browser for configuring the Unified Firewall.
The following browsers are supported:
- Google Chrome
- Chromium
- Mozilla Firefox
Scenario:
1) The Unified Firewall is connected directly to the Internet and has a public IPv4 address:
...
1.1) Click on the "+" icon to create a new routing entry.

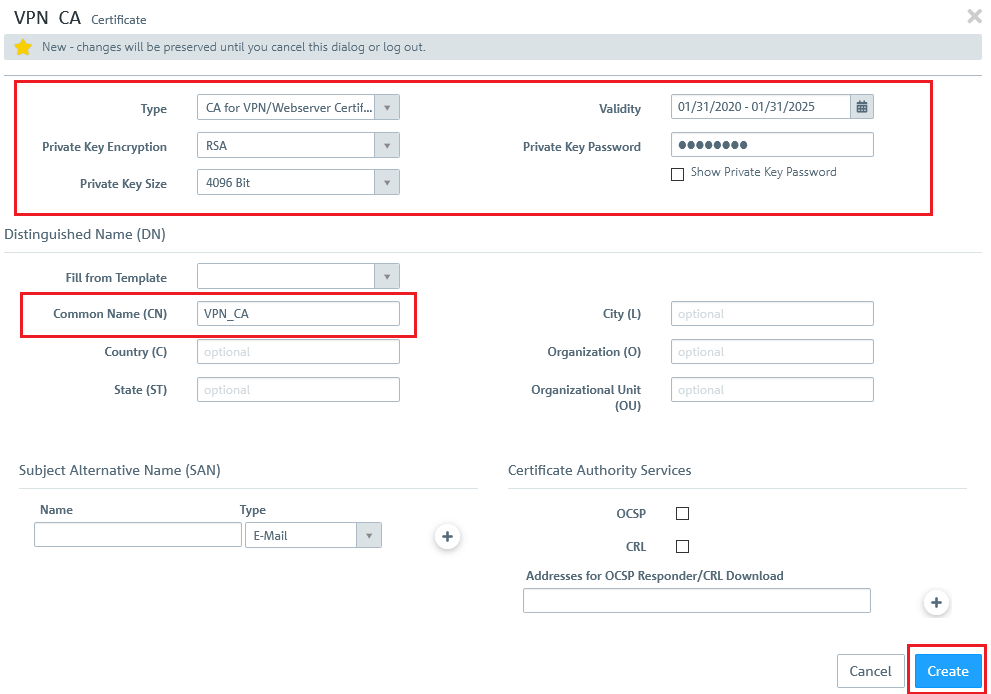
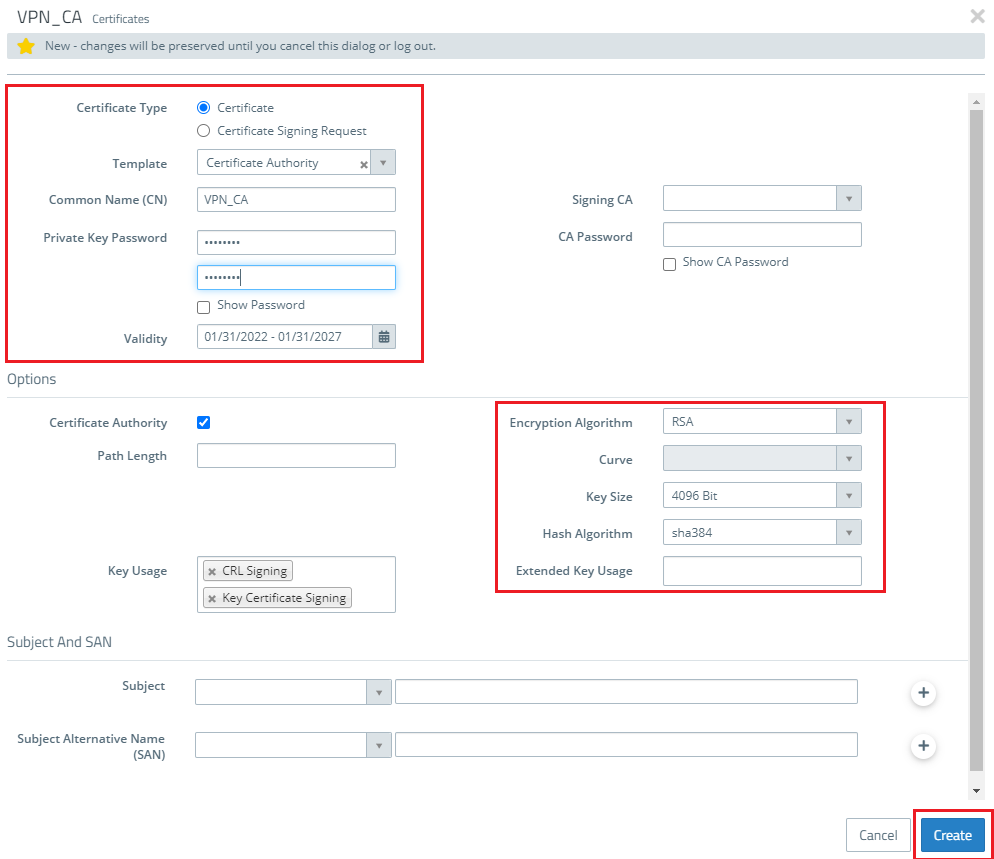
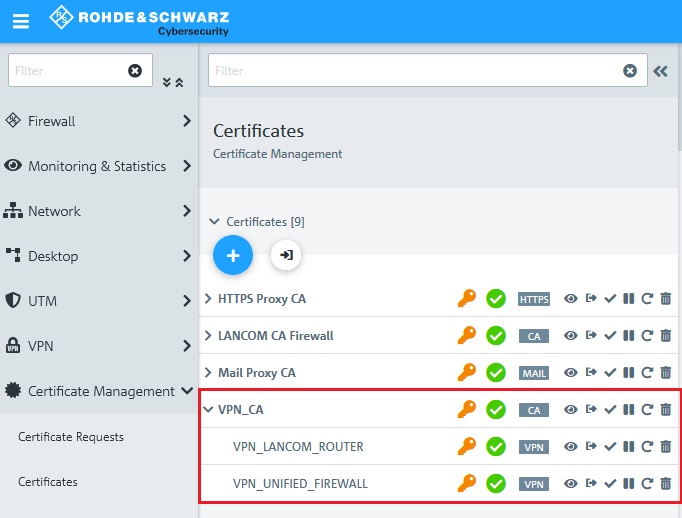
1.2) The first step is to create a Certification Authority (CA) for VPN connections.
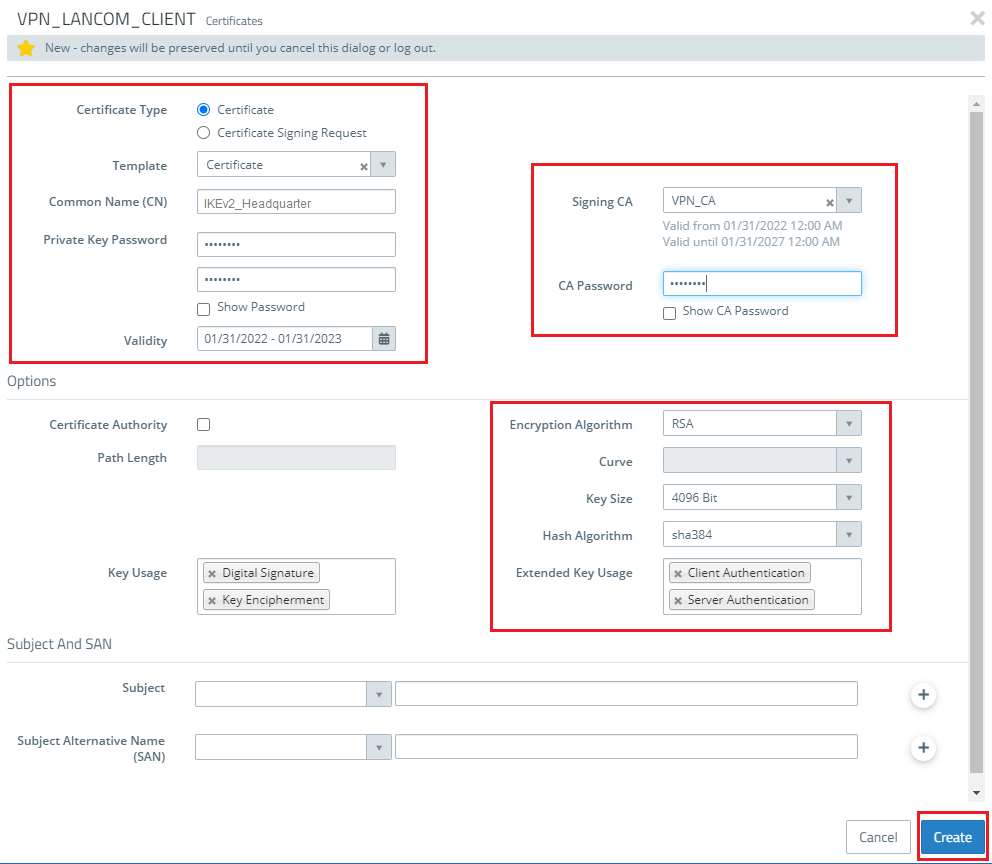
- For the Certificate type, select Certificate.
- Certificate Authority must be selected as the template.
- Enter any Common Name.
- Assign any private key password.
- Set a validity period.
- You can leave the settings Encryption Algorithm, Key Size and Hash Algorithm in the default
- In the drop-down menu "Type" of the window displayed at top left, select the option "CA for VPN/Webserver certificates".
- In the field "Private key size", select the value 4096 bit.
- Enter a common name of your choice (e.g. VPN_CA).
- Set a Validity period.
- Set any Private Key Password.
1.3) Then click the Create button.
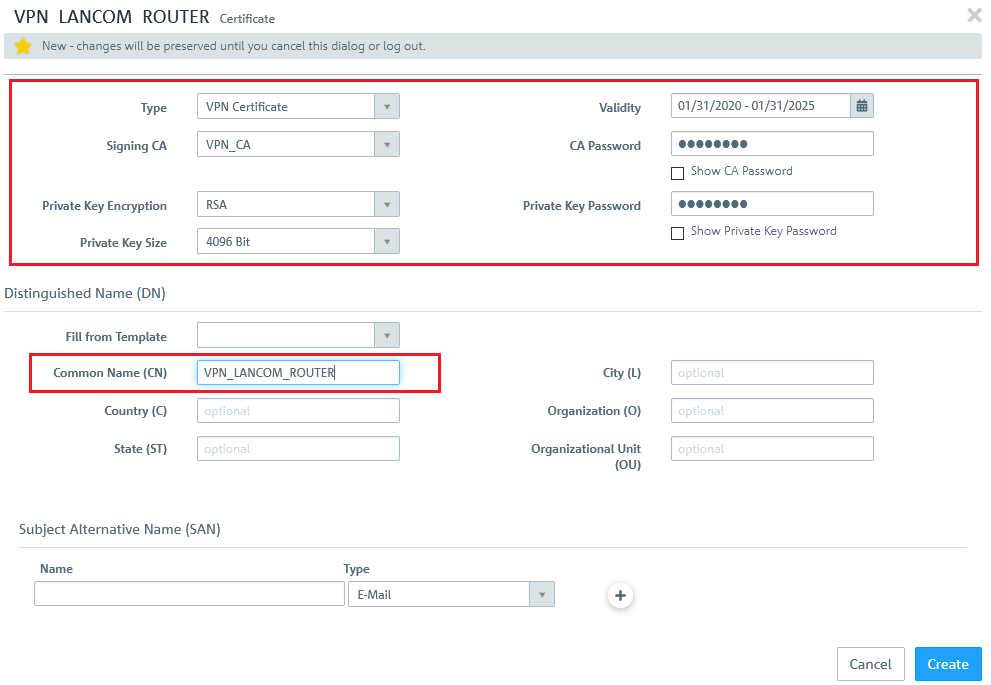
1.4) Click on the "+" icon to create a certificate for the LANCOM router at the branch office:
- For the Certificate type, select Certificate.
- Certificate must be selected as the template.
- Assign any private key password.
- Set a validity period.
- Select the VPN
- In the drop-down menu "Type" of the window displayed at top left, select the option "VPN certificate".
- Set the "Signing CA" to the VPN_ CA from step 1.2 .In as the field "Private key size", select the value 4096 bit.
- Enter a common name of your choice (e.g."VPN_LANCOM_ROUTER").
- Set a Validity period.
- Signing CA".
- In the CA password fieldIn the fields CA Password and Private Key Password, enter the password set that you assigned in step 1.2.
- You can leave the settings Encryption Algorithm, Key Size and Hash Algorithm in the default.
1.5) Then click the Create button.

1.6) Click on the "+" icon to create a VPN certificate for the United Firewall at the branch officeheadquarter:
- For the Certificate type, select Certificate.
- Certificate must be selected as the template.
- Assign any private key password.
- Set a validity period.
- Select the VPN
- In the drop-down menu "Type" of the window displayed at top left, select the option "VPN certificate".
- Set the "Signing CA" to the VPN_ CA from step 1.2 .In as the field "Private key size", select the value 4096 bit.
- Enter a common name of your choice (e.g."VPN_UNIFIED_FIREWALL").
- Set a Validity period"Signing CA".
- In the fields CA Password and Private Key Password CA password field, enter the password set that you assigned in step 1.2.
- You can leave the settings Encryption Algorithm, Key Size and Hash Algorithm in the default.
1.7) Then click the Create button.
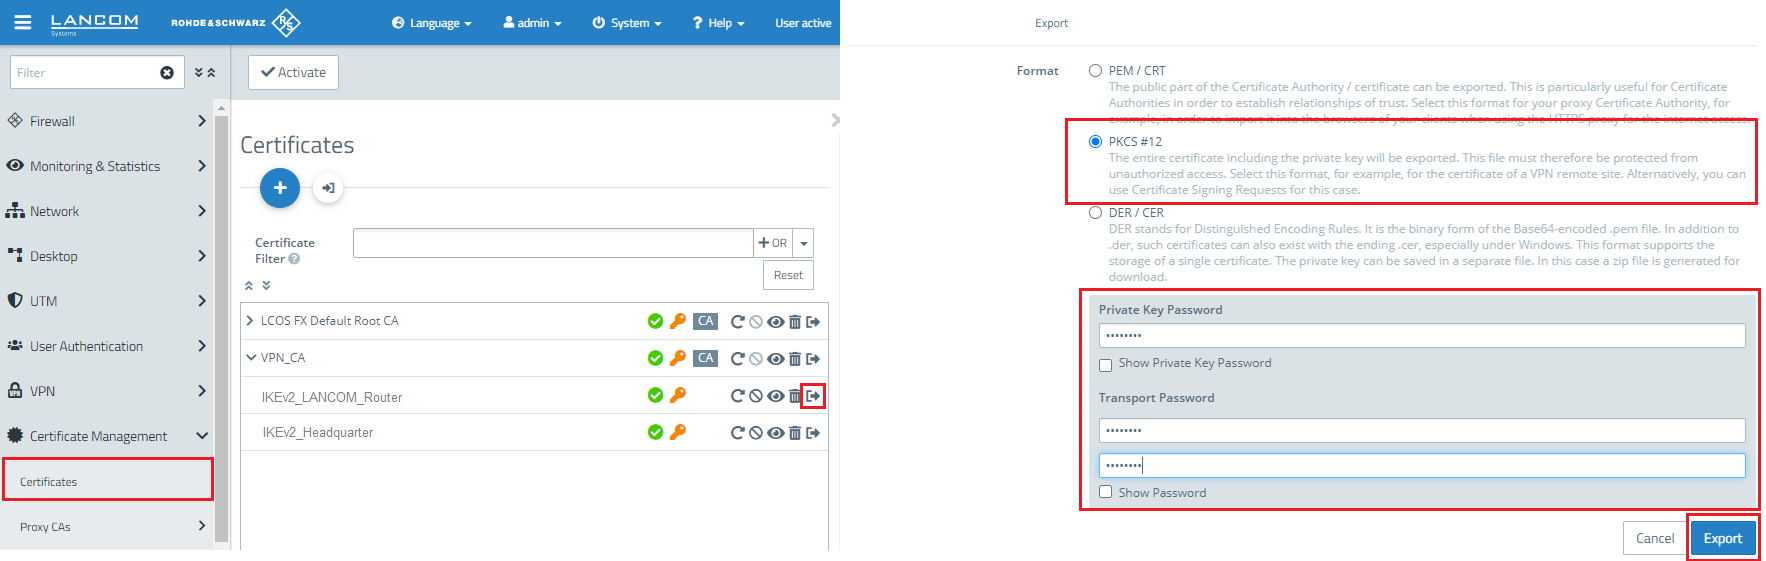
1.8) The newly created VPN certificates are listed below the newly created VPN certification authority (see following figure).
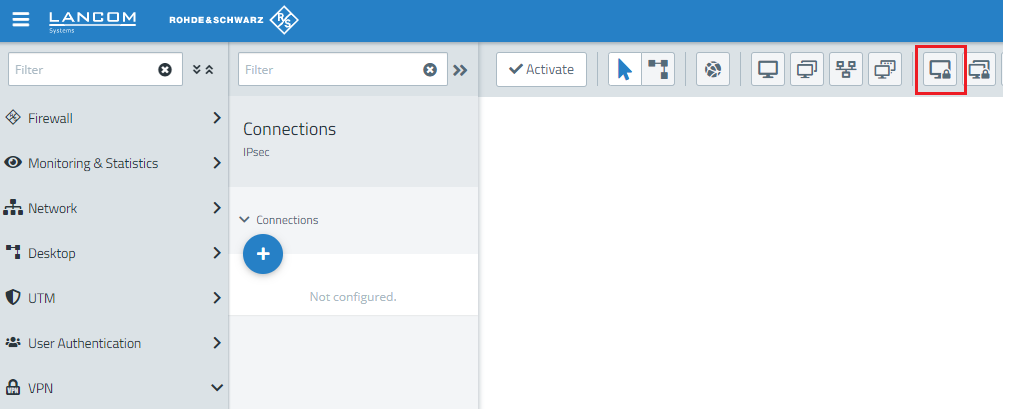
2) Creating the VPN connection on the Unified Firewall:
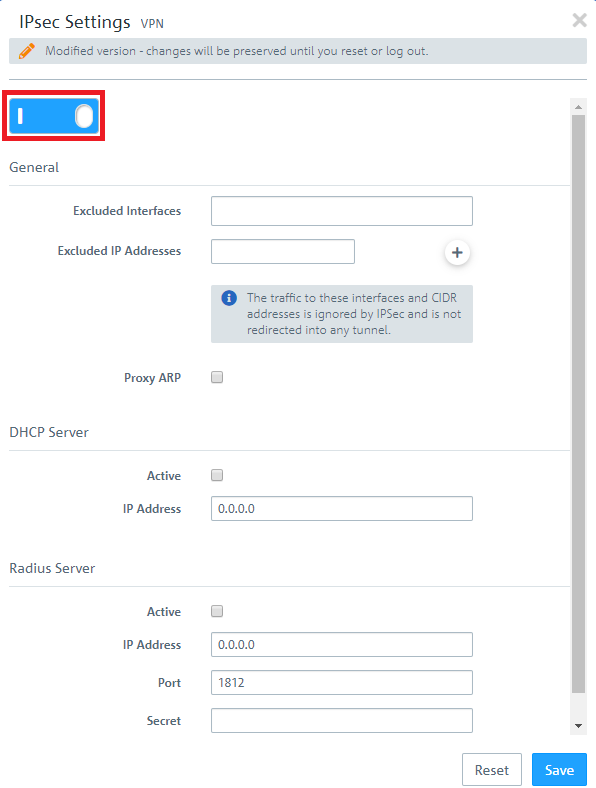
2.1) Connect to the configuration interface of the Unified Firewall and navigate to VPN -> IPsec settings.
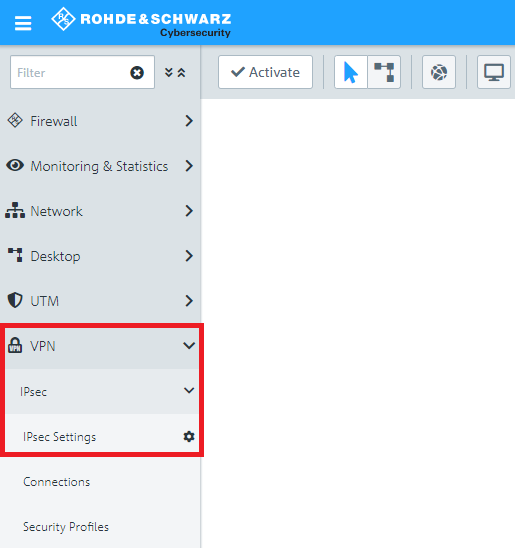
2.2) Activate IPsec.
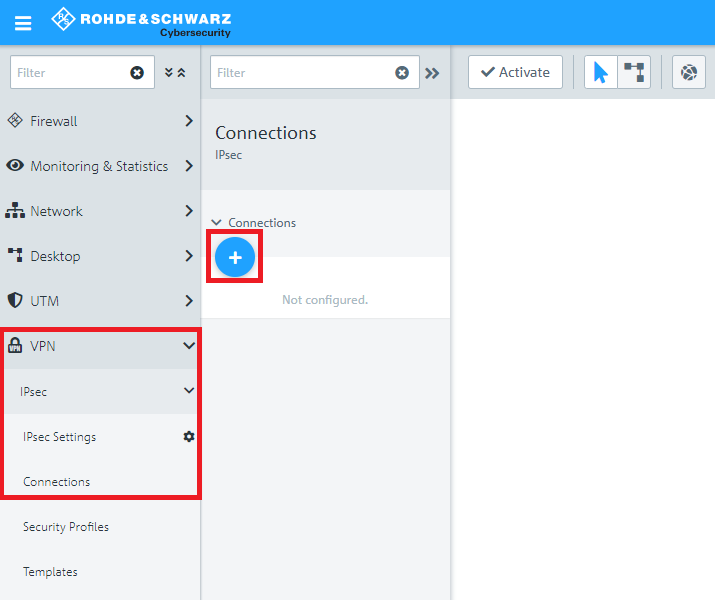
2.3) Switch to VPN -> IPsec Connections and click on the "+" icon to create a new IPsec connection.
2.4) Save the following parameters:
- Name: Enter a descriptive name.
- Security profile: Select the profile LANCOM LCOS Default IKEv2.
- Connection: From the drop-down menu, select the Network connection used for the Internet connection.
- Remote Gateway: Enter the public IP or DNS address of the LANCOM router at the branch office.
If you have created your own template or security profile, you can use these here.
...
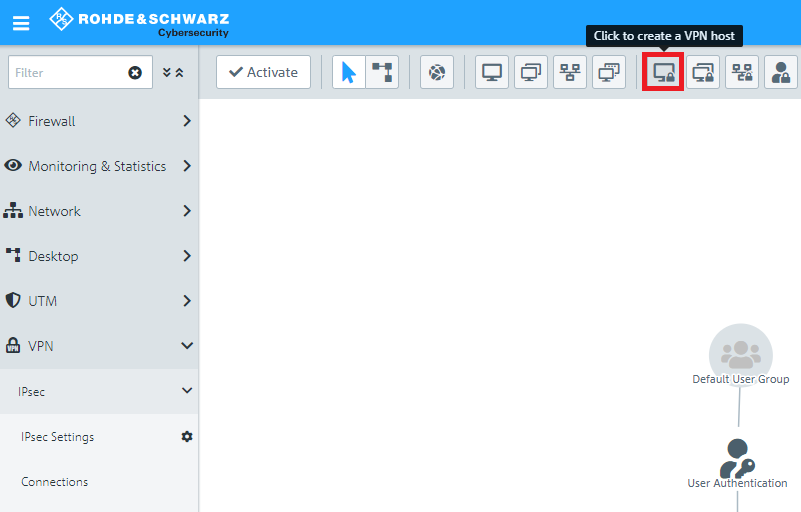
2.8) Click the icon to create a new VPN host.
2.9) Save the following parameters:
...
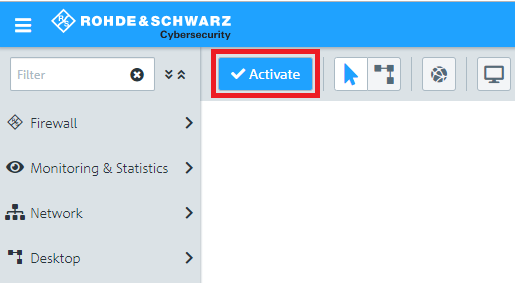
2.12) Finally, implement the configuration changes by clicking Activate in the firewall.

2.13) This concludes the configuration steps on the Unified Firewall.
3) Export the VPN certificate for the LANCOM router at the branch office:
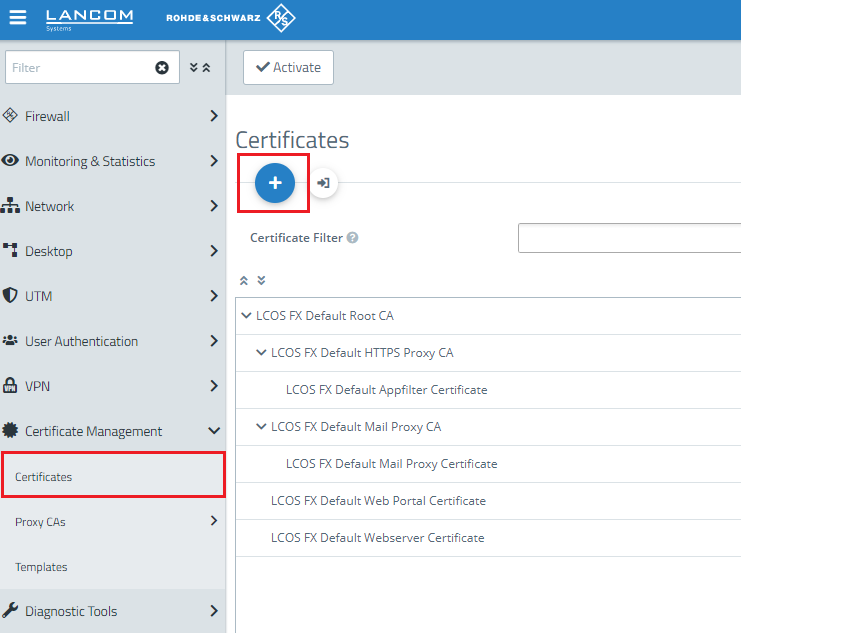
3.1) Change to the menu Certificate Management → Certificates and, for the VPN certificate for the LANCOM router, click the Export button.

3.2) Select the PKCS 12 PKCS#12 format and enter any password the private Key password you configured in step 1.4 and a transport password.
3.3) Click Export and save the certificate file on your PC.
4) Configuration steps on the LANCOM router:
4.1) Upload the router certificate to the LANCOM router:
...
4.1.4) In the Cert. password box enter the transport password for the certificate file (see step 3.2).
...
The certificate-based VPN connection to the Unified Firewall at the headquarters will now be established.
5) Setting up port and protocol forwarding on a LANCOM router (scenario 2 only):
...