
Description:
When using the Public Spot with sending the login credentials via E-mail it can be desirable to prevent logins from certain E-mail domains (Blacklist) or to allow logins only from certain domains (Whitelist).
This article describes how the Email domains can be configured and which characteristics have to be considered.
Requirements:
- LCOS as of version 8.62 (download aktuelle Version)
- LANtools as of version 8.62 (download aktuelle Version)
- LANCOM Router, Access Point or WLAN-Controller with active Public Spot Option
- Configured and functional Public Spot mit Versand der Zugangsdaten per E-Mail
Using the Email domains as a Blacklist:
If logins from certain E-mail domains are to be prevented these have to be entered in the Blacklist.
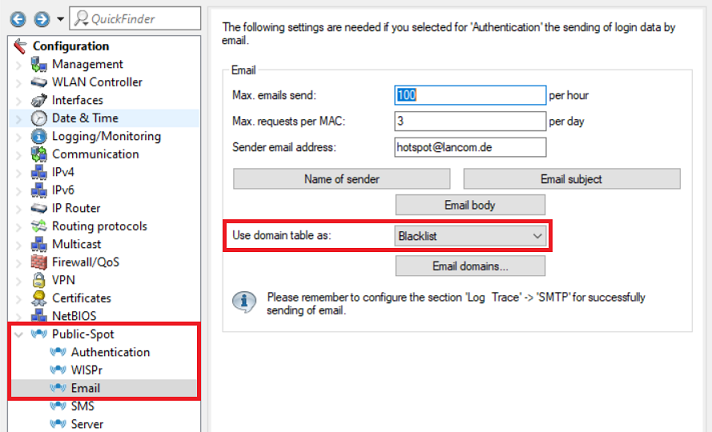
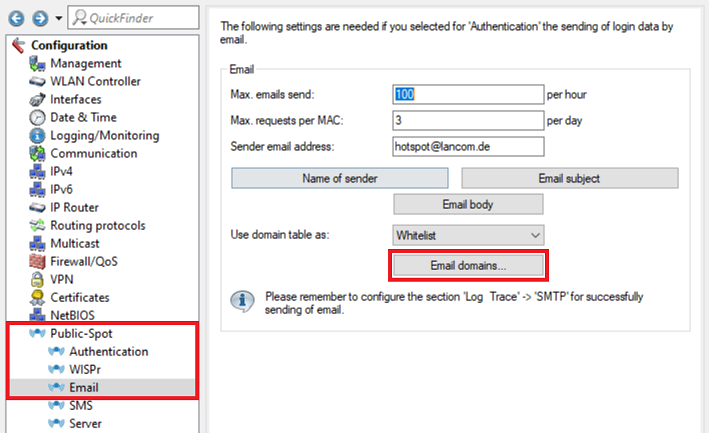
1) Open the configuration of the device in LANconfig, go to the menu Public-Spot → Email and make sure the option Use domain table as is set to Blacklist.
Ex factory the setting Blacklist is used. Without entering Email domains logins from any domain are possible.
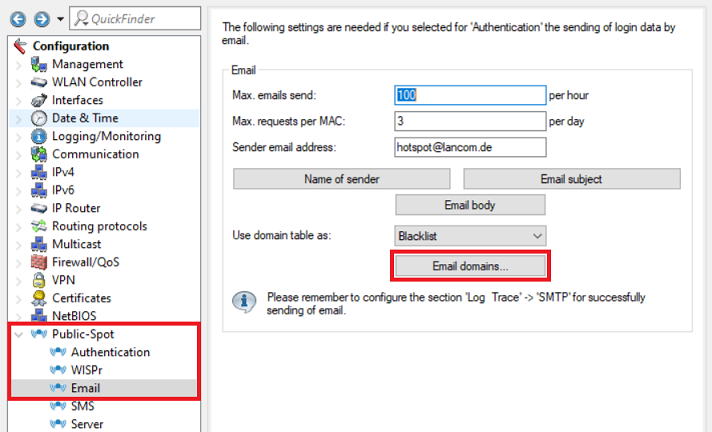
2. Go to the menu Email domains.
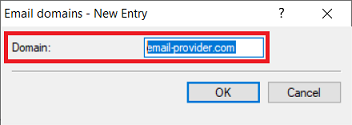
3) Create a new entry and enter a domain which should be blocked (in this example the domain email-provider.com).
Repeat this step for additional domains if necessary.
4) The configuration of the Blacklist is complete. Write the configuration back into the device.
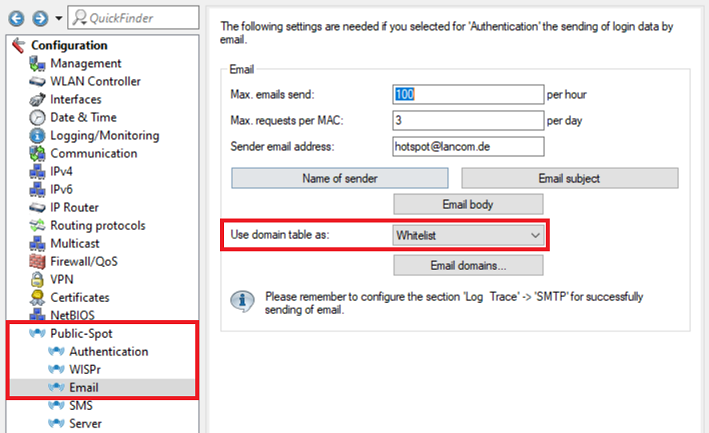
Using the Email domains as a Whitelist:
Sollen nur Anmeldungen von bestimmten E-Mail-Domains erlaubt werden, müssen diese in der Whitelist hinterlegt werden.
1. Öffnen Sie die Konfiguration des Gerätes in LANconfig, wechseln in das Menü Public-Spot → E-Mail und wählen im Dropdownmenü bei Verwende Domain-Tabelle als die Option Whitelist aus.
Wird die Domain-Tabelle als Whitelist verwendet, aber keine Domain hinterlegt, ist keine Anmeldung möglich!
2. Wechseln Sie in das Menü E-Mail-Domains.
3. Erstellen Sie einen neuen Eintrag und hinterlegen eine Domain, welche erlaubt werden soll (in diesem Beispiel die Domain email-provider.de).
Wiederholen Sie diesen Schritt gegebenenfalls für weitere Domains.
4. Die Einrichtung der Whitelist ist damit abgeschlossen. Schreiben Sie die Konfiguration in das Gerät zurück.