
Description:
Wird eine Internet-Verbindung mit dynamischer IPv4-Adresse eingesetzt, müsste die neue IP-Adresse bei einem Wechsel umständlich bekanntgegeben werden. Um dies zu umgehen, besteht die Möglichkeit die aktuelle IP-Adresse an einen DynDNS-Dienst zu senden und die Verbindung zu dem Router über einen DNS-Namen aufzubauen. Die LANCOM Management Cloud bietet einen integrierten DynDNS-Dienst. Damit sind sowohl die Verwaltung der Router als auch der DynDNS-Dienst unter einem Dach.
In diesem Artikel wird die Einrichtung des DynDNS-Dienstes in der LANCOM Management Cloud beschrieben.
Requirements:
- LCOS as of version 10.42 RC3 on the LANCOM router (download latest version)
- Access to the LMC including your own project
- The router has to be connected to the LMC and a valid LMC license is needed
- Configured Site with assigned Network and router
- The Function Gateway has to be assigned to the router
- Configured and functional Internet connection with public IPv4 address on the router
- The Internet connection can be configured as follows:
- manually on the router via LANconfig / WEBconfig
- manually via the detail configuration in the LMC
- automatically via LMC addins
- The Internet connection can be configured as follows:
- Web browser for accessing the LMC
Procedure:
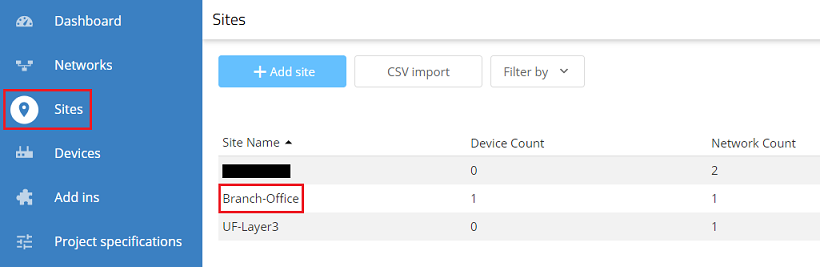
1) Connect to the LMC, click on Sites and select the used site.
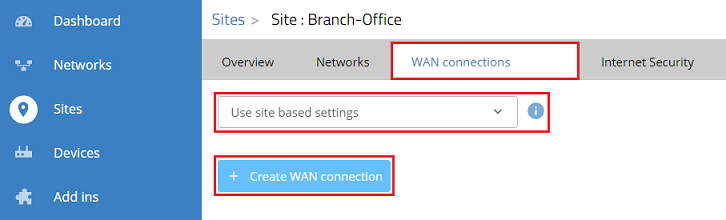
2) Go to the tab WAN connections, select the option Use site based settings in the dropdown menu and click Create WAN connection.
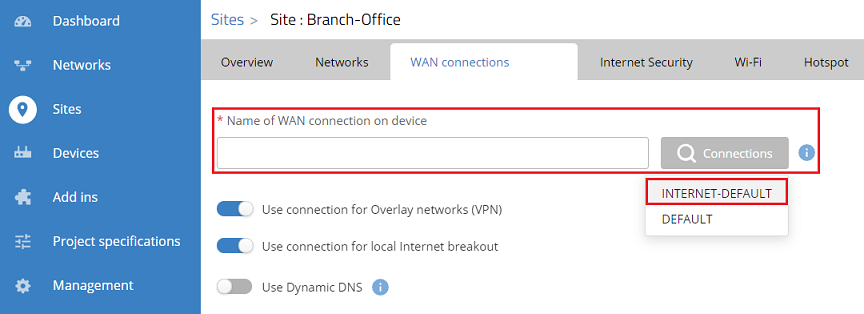
3) Click on the Connections box at Name of WAN connection on device to display the configured Internet connections. Afterwards select the used Internet connection (in this example the connection INTERNET-DEFAULT).
As an alternative you can also enter the name of the Internet connection manually.
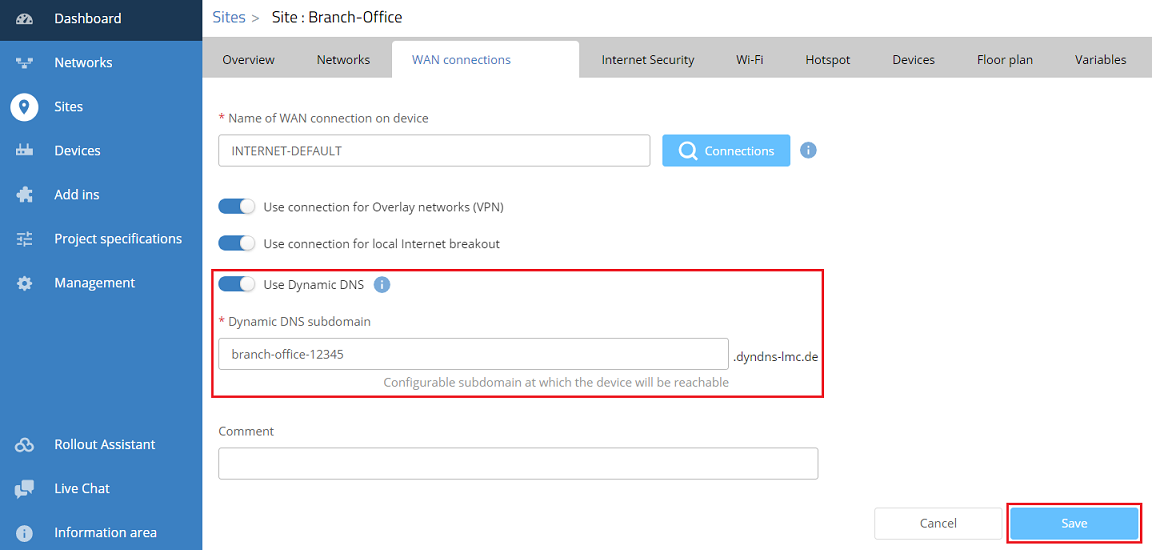
4) Activate the option Use Dynamic DNS, adjust the Dynamic DNS subdomain if needed and click Save.
5) Go to the menu Devices, select the router which is assigned to the used site and click on the "dots" icon to gain access to additional functions.

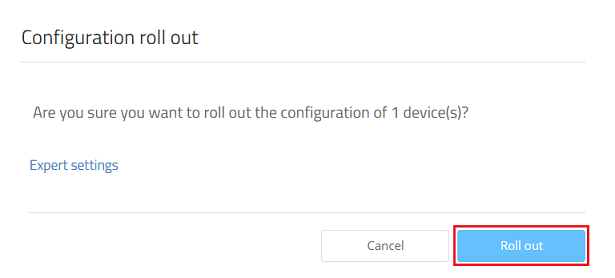
6) Click on Configuration roll out to transfer the configuration changes to the devices.

7) Acknowledge the query by clicking Roll out.
8) the configuration of the DynDNS service for a site is now complete.