Description:
This article describes how to configure the DHCP server on an XS-51xx / XS-61xx and GS-45xx series switch.
Requirements:
- Switch of the XS-51xx / XS-61xx and GS-45xx series
- LCOS SX as of version 5.00 RU2 (download latest version)
- Already configured and functional routing on the switch
- Any web browser for access to the web interface
Procedure:
Setting up DHCP for a network:
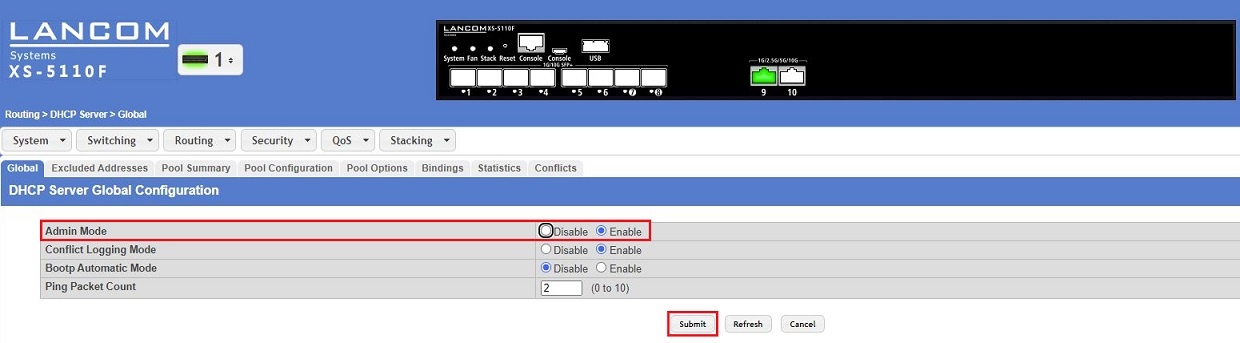
1) Connect to the web interface of the switch and navigate to the menu Routing → DHCP Server → Global.
2) Under Admin mode, select the option Enable to activate the DHCP server and then click Submit.
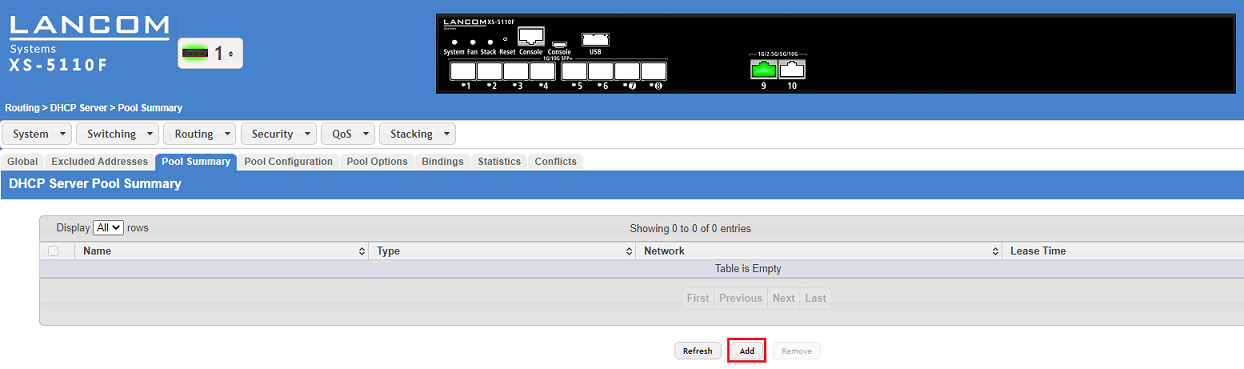
3) Switch to the menu Routing → DHCP Server → Pool Summary and click Add to create a DHCP pool.
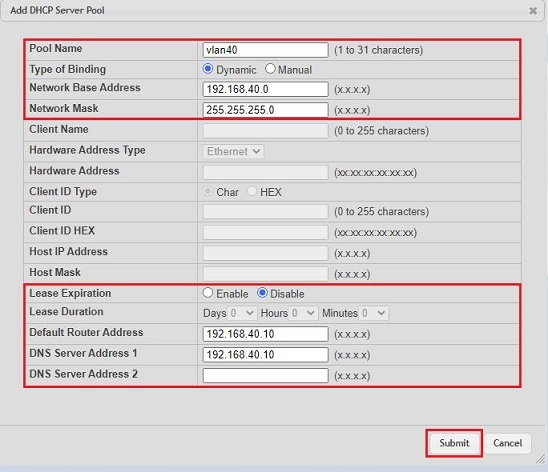
4) Modify the following parameters and then click Submit:
- Pool Name: Enter a descriptive name for the DHCP pool.
- Type of Binding: Check that the option Dynamic is selected.
- Network Base Address: Enter the network address of the network from which IP addresses are to be distributed via DHCP.
- Network Mask: Enter the subnet mask for the related network.
- Lease Expiration: You can optionally adjust for how long the DHCP assignment remains valid. With the default setting Disable the assigned IP address remains valid for 60 days.
- Default Router Address: Enter the IP address of the gateway. If the switch also performs the routing, its IP address from the DHCP network must be entered (see Network Base Address).
- DNS Server Address 1: Enter the IP address of a DNS server. If the switch also operates as a DNS server, its IP address from the DHCP network must be entered.
- DNS Server Address 2: You can optionally enter the IP address of an additional DNS server.
By default, the DNS server on the switch is enabled. It sends DNS requests to its gateway (next hop address).
The DHCP pool either applies to a specific VLAN or a specific switch port (configured in the Routing IP Interface, see Requirements). The assignment is made automatically on the basis of the configured IP address range.
5) Click on Save Configuration in the top right corner to save the configuration as the start configuration.
The start configuration is retained even if the device is restarted or there is a power failure.

6) This concludes the configuration of DHCP on the switch.
Further steps/troubleshooting:
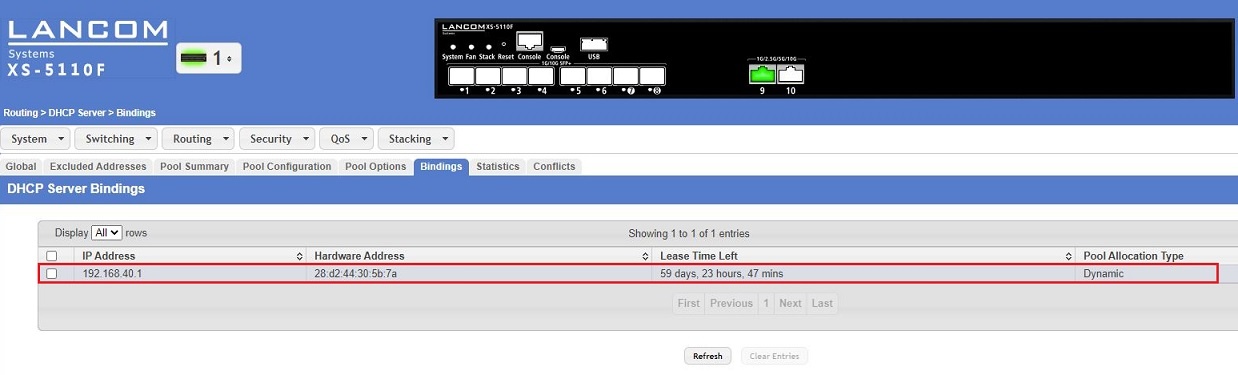
You can view the IP addresses assigned by the DHCP server to individual devices in the menu Routing → DHCP Server → Bindings.