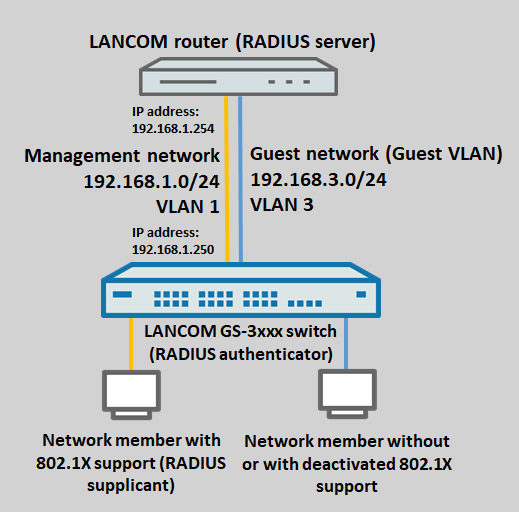
Description:
In scenarios where each switch port should support just one network participant, who authenticates via RADIUS and then can communicate via this port, a GS-3xxx switch allows the use of the authentication method Single 802.1X.
If network participants do not support 802.1X or if this is deactivated, they will be rejected and cannot communicate on the switch port. It can therefore make sense to create a separate network for these participants and have the switch automatically move them to the corresponding VLAN. As a result and depending on the configuration of the router, network participants within this network can also communicate with the Internet, but they have no access to the administration network (the router must prevent this by means of firewall rules or interface tags). On a GS-3xxx switch, the feature Guest VLAN supports this.
This article describes how to configure a GS-3xxx switch to use RADIUS authentication with Single 802.1X and an activated Guest VLAN. A LANCOM router acts as the RADIUS server.
Requirements:
Scenario:

Procedure:
1) Configuration steps on the LANCOM router:
1.1) Open the configuration for the router in LANconfig and switch to the menu item IPv4 → General → IP networks.
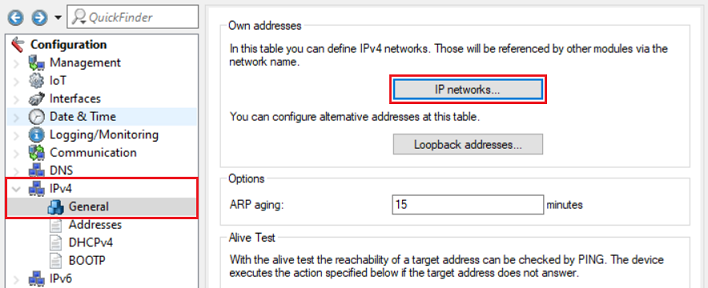
1.2) Click Add to create the network for the Guest VLAN.

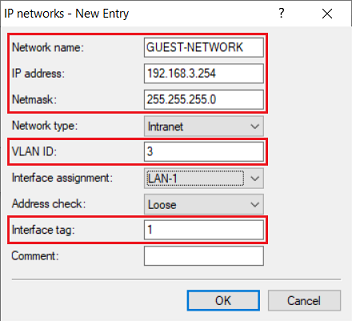
1.3) Change the following parameters:
For the administration network INTRANET there is no need to enter a VLAN ID. Also, there is no need to enable the VLAN module as tagging is handled by the switch. With the Hybrid tagging mode, the port VLAN ID is removed from outbound packets, so that the packets for the INTRANET arriving at the router from the switch are untagged (see step 2.2). |
1.4) Switch to the menu IPv4 → DHCPv4 → DHCP networks.
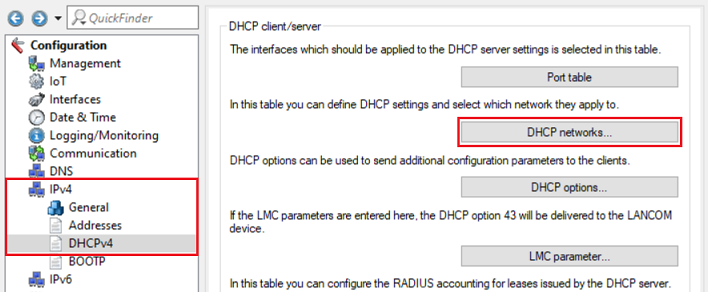
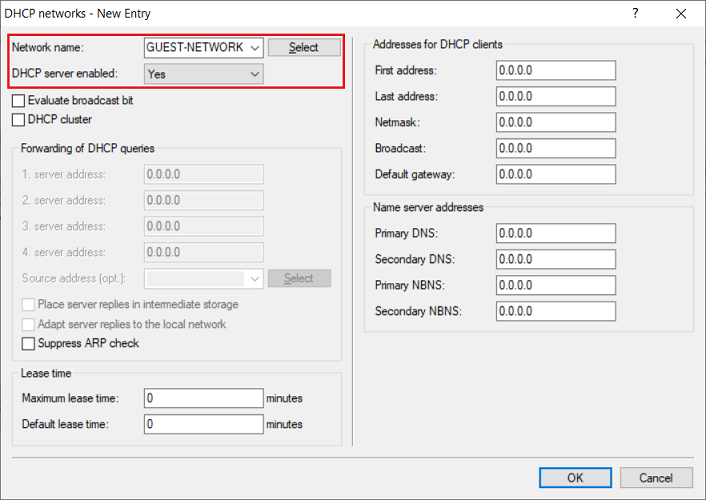
1.5) Click Add to set up a DHCP network for the network created in step 1.3.

1.6) Change the following parameters:
You can optionally adjust other parameters such as the address pool and the default gateway. |
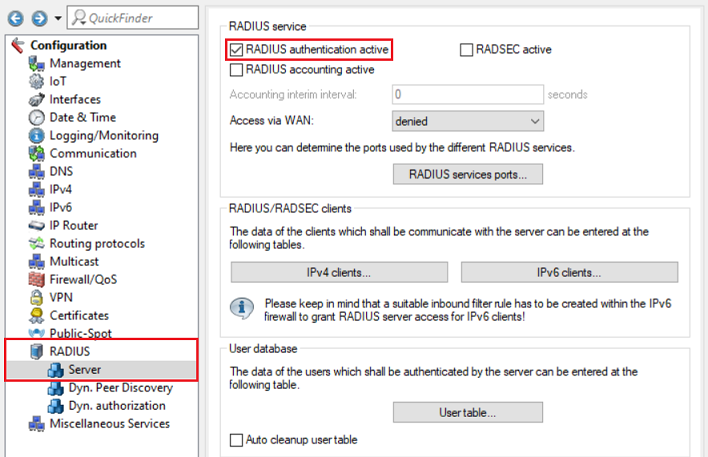
1.7) Go to the menu RADIUS → Server and set a checkmark for RADIUS authentication active.
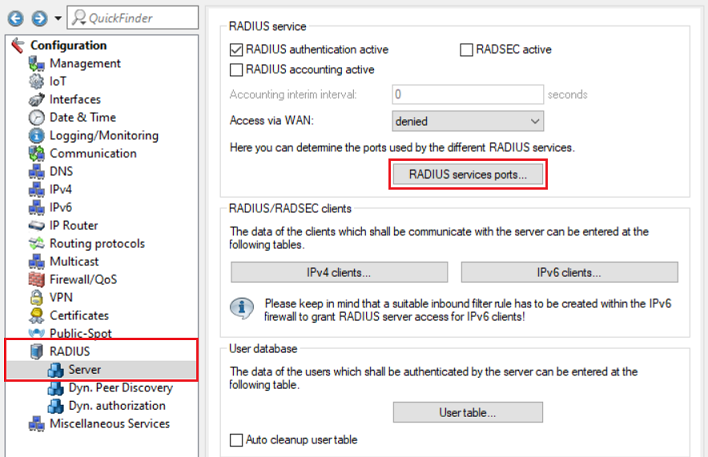
1.8) Navigate to the menu RADIUS services ports.
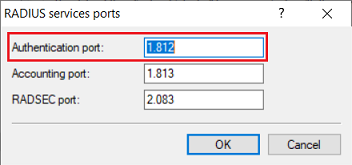
1.9) Check that the authentication port is set to 1812.
1.10) Go to the menu IPv4 clients.
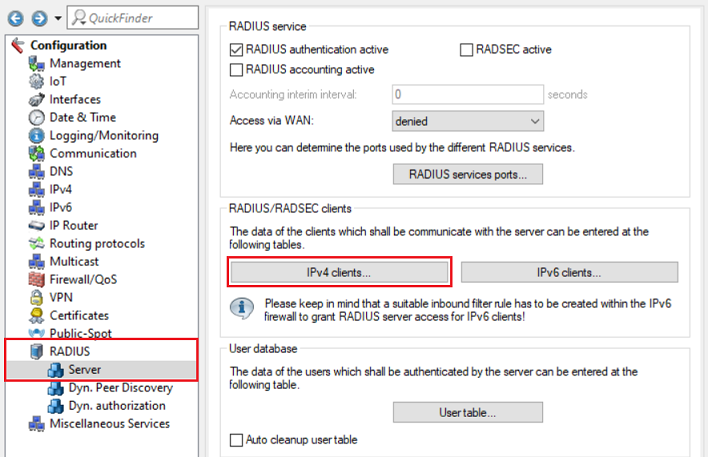
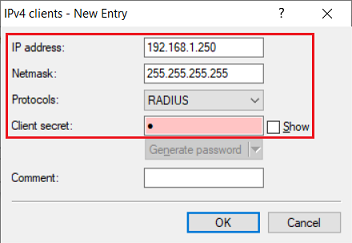
1.11) Create a new entry and enter the following parameters:
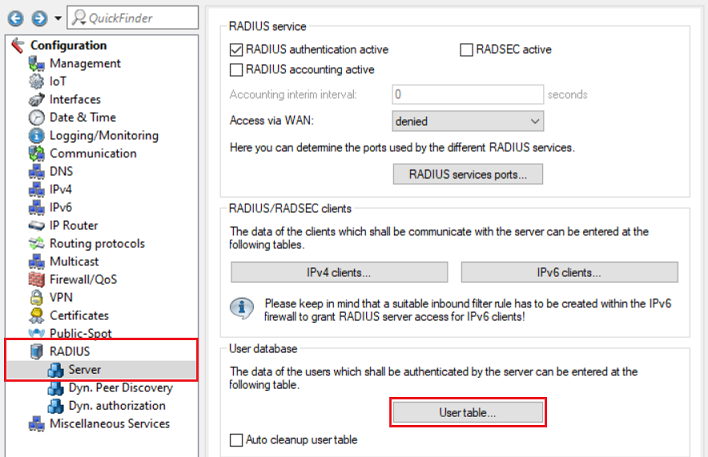
1.12) Go to the menu User table.
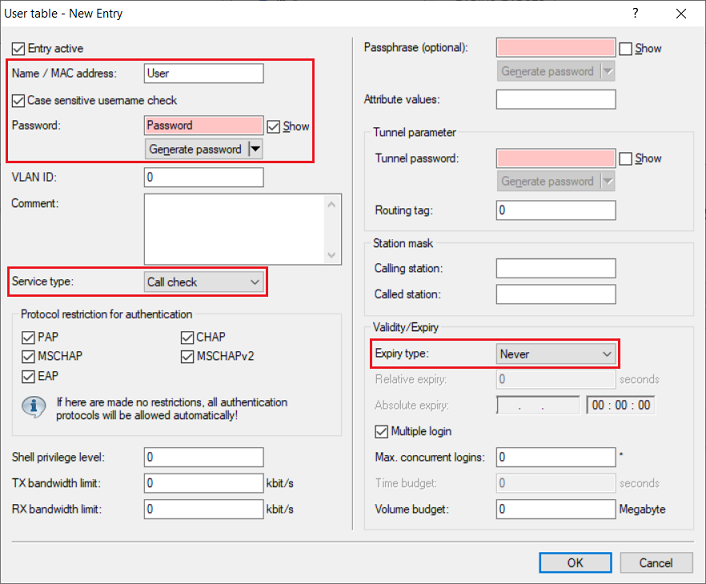
1.13) Create a new entry and adjust the following parameters:
The service type “Call check” is only supported as of LCOS 10.30. |
1.14) This concludes the configuration steps on the LANCOM router. You can now write the configuration back to the device.
2) Configuration steps on the GS-3xxx switch:
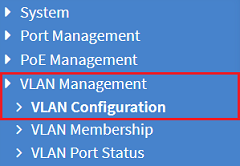
2.1) Open the web interface for the device and switch to the menu item VLAN Management → VLAN Configuration.
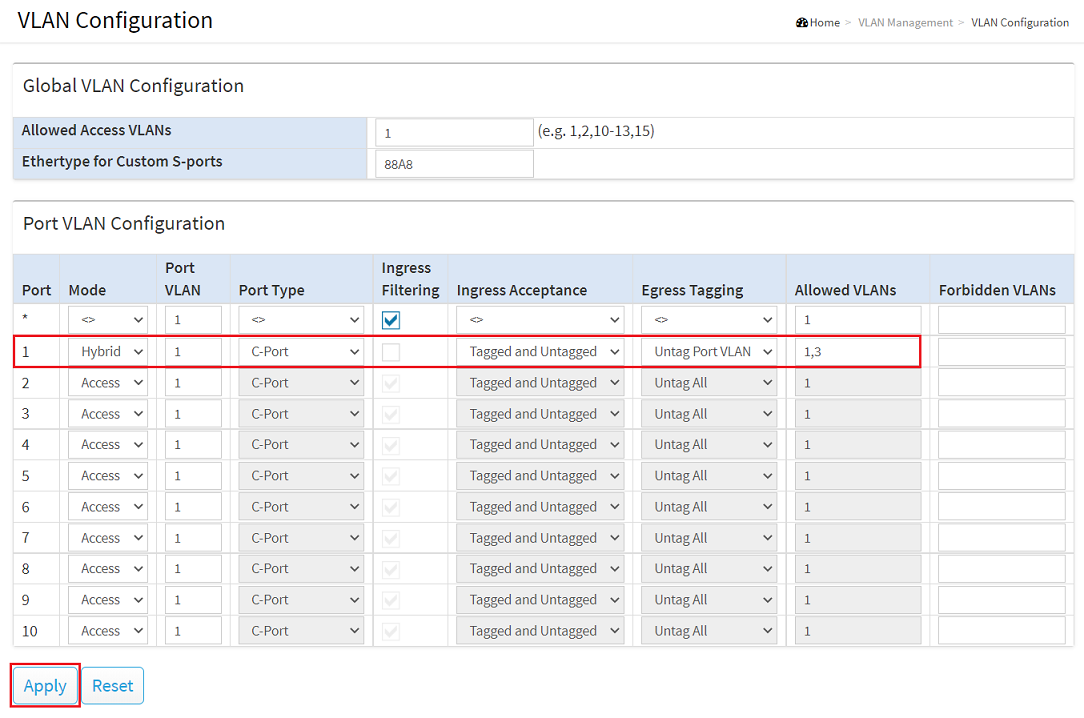
2.2) For the switch port the router is connected to, adjust the following parameters and click Apply:
For more information about VLAN configuration on a GS-3xxx switch, see the following Knowledge Base article: |
2.3) Change to the menu Security → RADIUS → Configuration and click Add New Server.
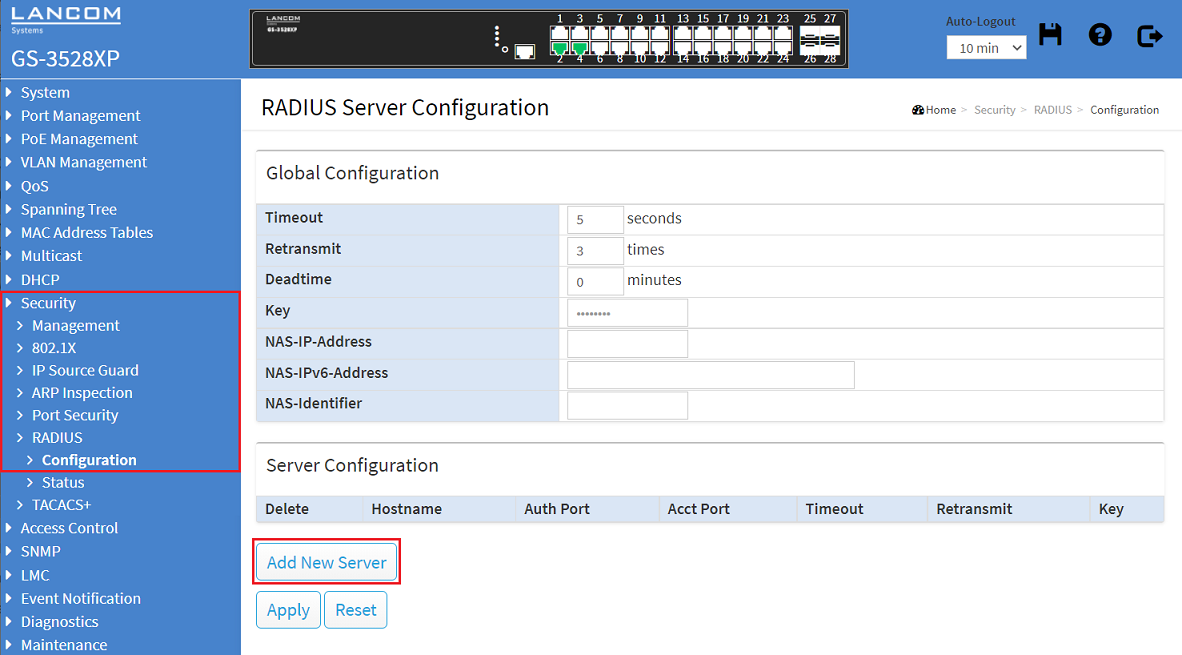
2.4) Modify the new entry for the server by adjusting the following parameters and click Apply:

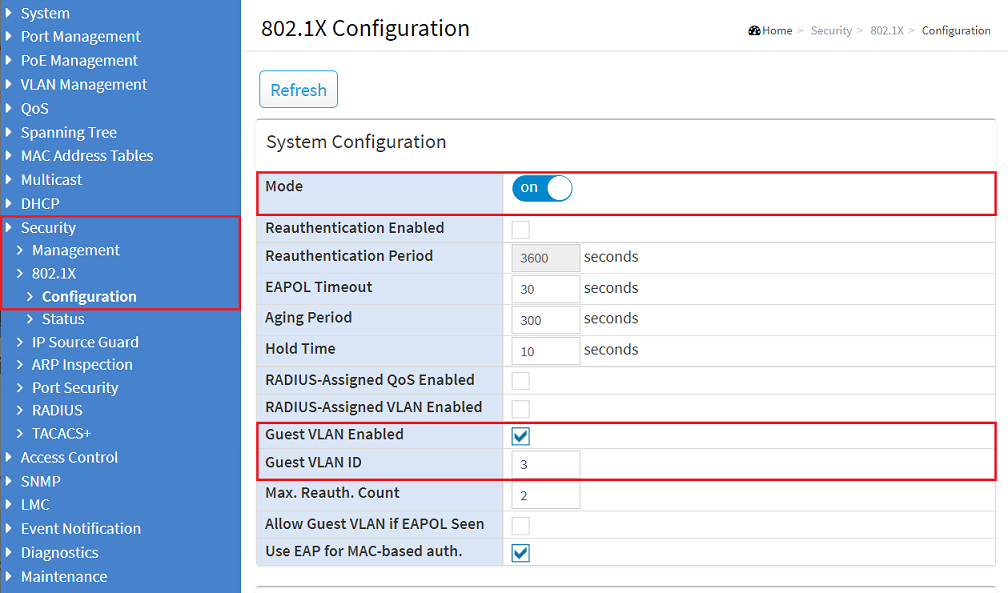
2.5) Change to the menu Security → 802.1X → Configuration and modify the following parameters:
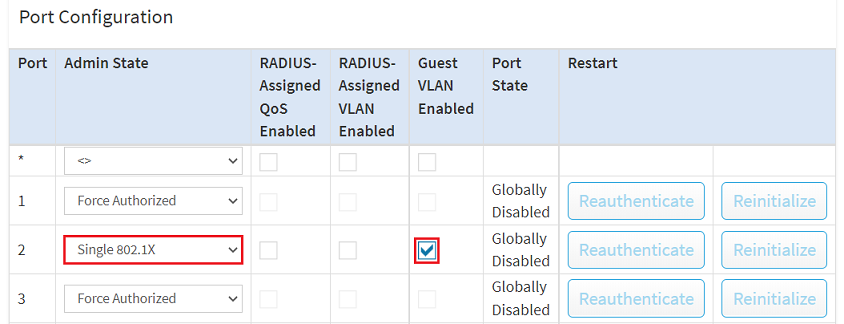
2.6) In the Port Configuration for the ports where end devices should be authenticated, enter the following parameters and click Apply:
With the option Single 802.1X only one network participant can be authenticated at the port and then communicate. If a network participant does not support RADIUS authentication or if it is deactivated, this participant is transferred by the switch to the Guest VLAN so that it can communicate there and does not have access to the management network. |

2.7) Save the configuration as the startup configuration by clicking the red floppy disk icon in the top-right corner.
The Start configuration is boot persistent and is therefore available even after a restart or a power failure. |

2.8) This concludes the configuration of the switch.