Description:
In certain scenarios it may be desirable to limit the maximum data transmission rate of network participants within a network, while communication within other networks should not be restricted.
This article describes how the available bandwidth for communication within a network can be limited to a specific value on all switch ports of an XS and GS-45xx switch.
Requirements:
Scenario:
Procedure:
1) Enable the Diffserv feature:
1.1) Connect to the web interface of the switch and navigate to the menu QoS → Diffserv → Global.

1.2) Make sure that the profile used has the Diffserve Admin Mode option set to Enable.

2) Configure the classes:
Two different classes have to be created, one for the inbound and one for the outbound traffic.
2.1) Switch to the tab Class Summary and click Add to add a new class.

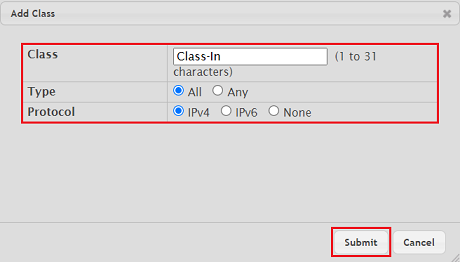
2.2) Create a class for the inbound data traffic. Modify the following parameters and then click Submit:
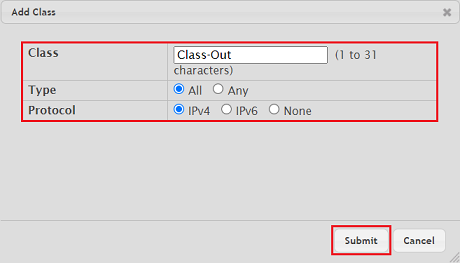
2.3) Create a class for the outbound data traffic. Modify the following parameters and then click Submit:
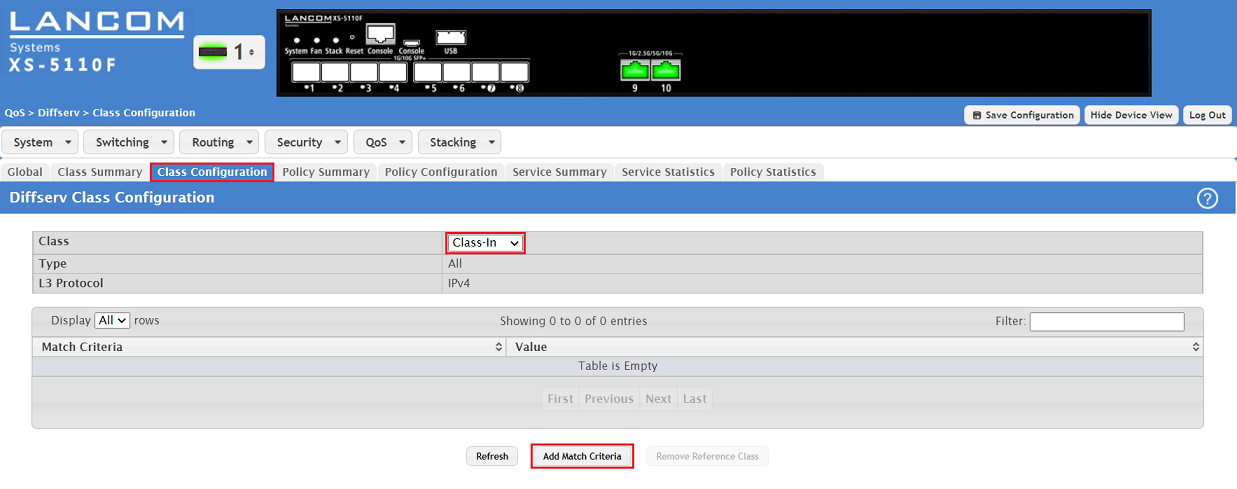
2.4) Switch to the tab Class Configuration, set the Class to the class for inbound traffic created in step 2.2 (in this example Class-In) and click Add Match Criteria to add the criteria that apply the QoS settings.
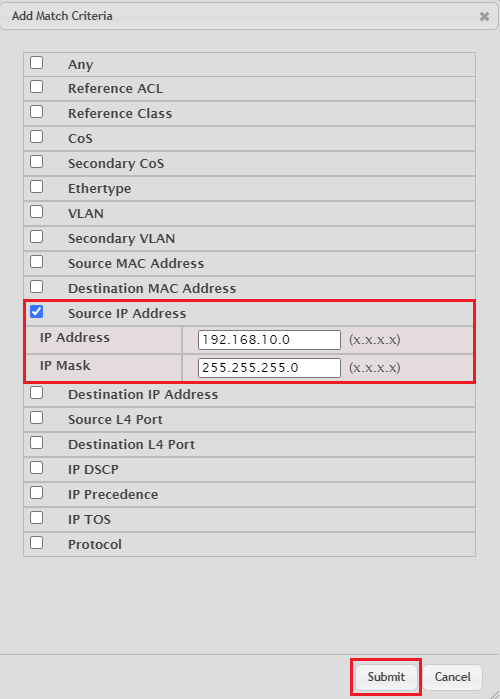
2.5) Select the criteria for which the QoS settings should take effect and then click Submit.
In this example, enable the option Source IP Address and adjust the following parameters:
The option Any means the settings apply to any packet. Multiple criteria can be selected. |
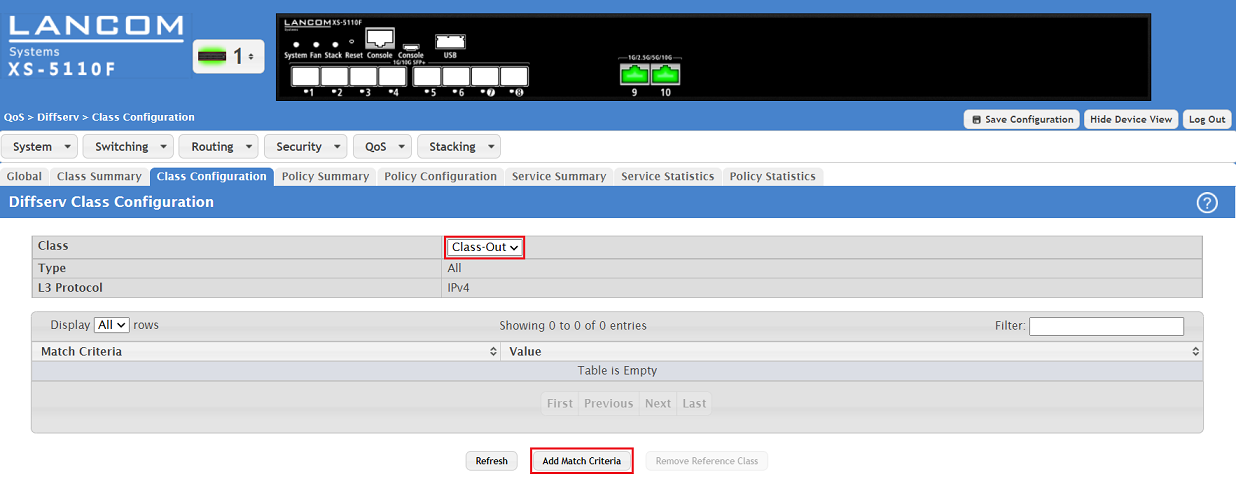
2.6) For Class, set the Class to the class for outbound traffic created in step 2.3 (in this example Class-Out) and click Add Match Criteria to add the criteria that apply the QoS settings.
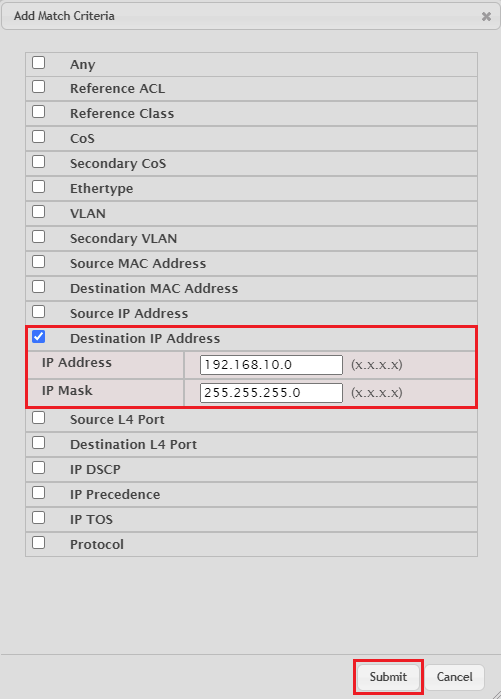
2.7) Select the criteria for which the QoS settings should take effect and then click Submit.
In this example, enable the option Destination IP Address and adjust the following parameters:
The option Any means the settings apply to any packet. Multiple criteria can be selected. |
3) Policy configuration:
3.1 Creating the policy:
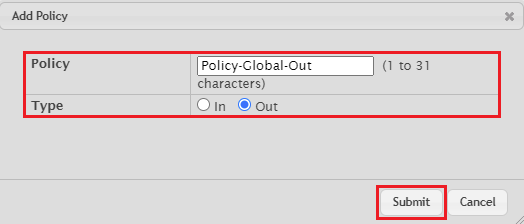
3.1.1) Switch to the tab Policy Summary and click Add to add a new policy.
A distinction is made between inbound and outbound packets. Because the policy is intended to apply to all ports, two guidelines need to be created.

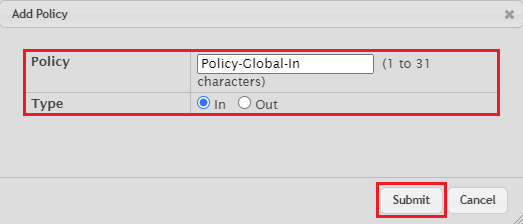
3.1.2) Create a policy for each, the inbound and outbound traffic. Modify the following parameters and then click Submit:
3.2) Assign the classes to the policies:
3.2.1) Global inbound traffic:
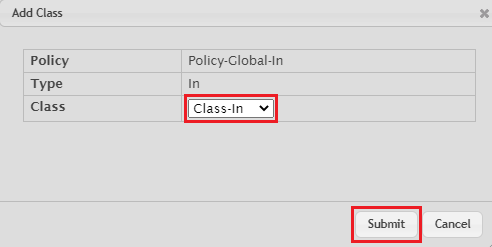
3.2.1.1) Go to the tab Policy Configuration and make sure that the Policy is set to the inbound packet policy created in step 3.1.2 (in this example Policy-Global-In). Then click Add Class.

3.2.1.2) Under Class, enter the class created for the inbound traffic in step 2.2 (in this example Class-In) and click Submit.
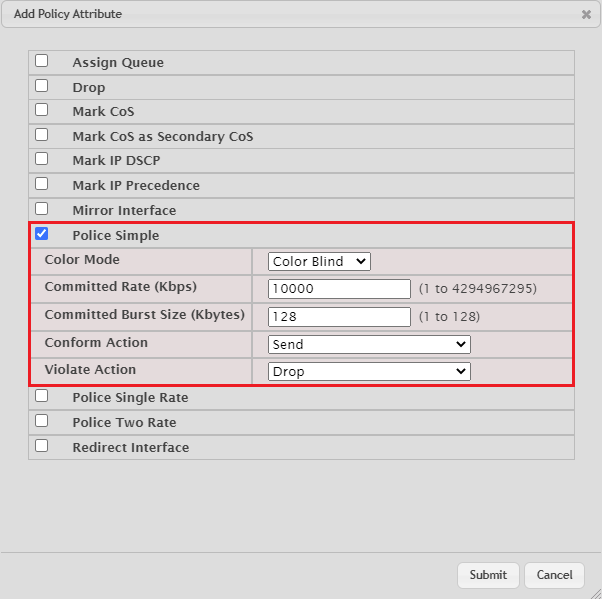
3.2.1.3) Under Class, select the assigned class and click Add Attribute to specify which QoS attributes should be assigned to the packets.
3.2.1.4) Select the option Police Simple, adjust the following parameters and click Submit:
3.2.2) Global outbound traffic:
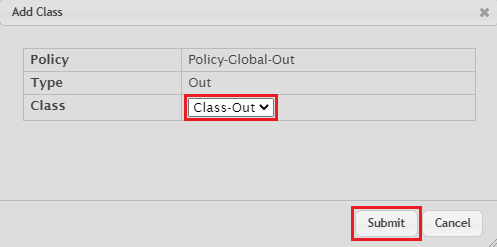
3.2.2.1) From the drop-down menu, set the Policy to the outbound packet policy created in step 3.1.2 (in this example Policy-Global-Out). Then click Add Class.

3.2.2.2) Under Class, enter the class created for the outbound traffic in step 2.3 (in this example Class-Out) and click Submit.
3.2.2.3) Under Class, select the assigned class and click Add Attribute to specify which QoS attributes should be assigned to the packets.

3.2.2.4) Select the option Police Simple, adjust the following parameters and click Submit:

4) Configuring the services:
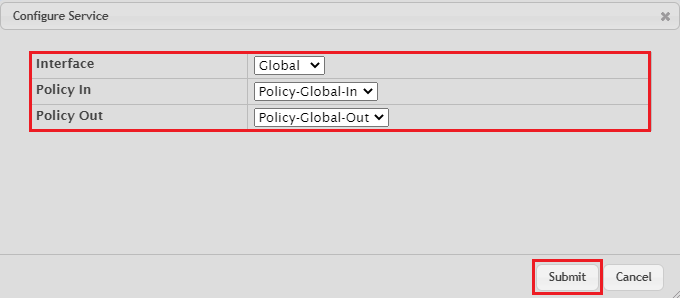
4.1) Go to the tab Service Summary and click Add to assign the new policies to the switch ports.

4.2) Create the service for all ports (Global). Modify the following parameters and then click Submit:
If the settings are to apply to specific switch ports, a separate entry must be created for each port. |
5) Save the configuration as the startup configuration:
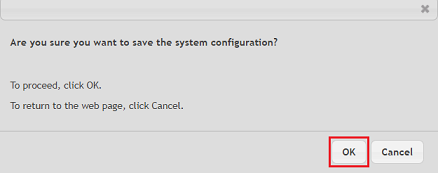
5.1) With the configuration complete, click Save Configuration in the top right-hand corner to save the configuration as the boot configuration.
The start configuration is retained even if the device is restarted or there is a power failure. |

5.2) Confirm your changes by clicking OK.
