Description:
When switching from a LANCOM router to a LANCOM R&S®Unified Firewall, it makes sense to transfer the configuration of the Advanced VPN Client connections from the router to the LANCOM R&S®Unified Firewall so that the profiles of the Advanced VPN Client connections do not have to be rolled out to the end devices again.
This article describes how to transfer an IKEv2 connection for the Advanced VPN Client from a LANCOM router to a LANCOM R&S®Unified Firewall.
The scenario and the general procedure correspond to the procedure for setting up a new IKEv2 connection for the Advanced VPN Client on a Unified Firewall. |
Requirements:
Procedure:
1) Reading out the authentication parameters of the Advanced VPN Client connection from the LANCOM router:
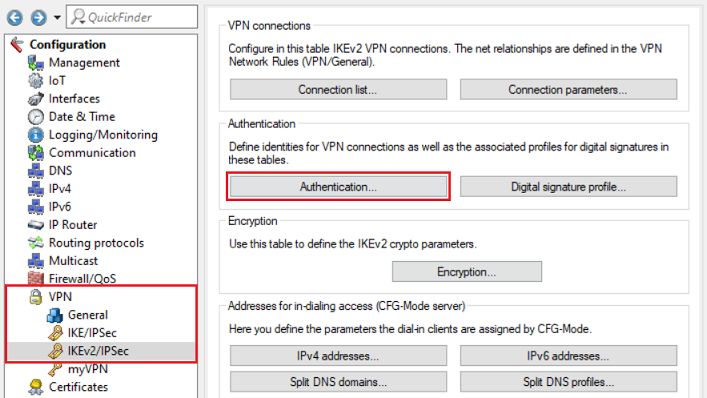
1.1) Open the configuration of the LANCOM router in LANconfig and navigate to VPN → IKEv2/IPsec → Authentication.

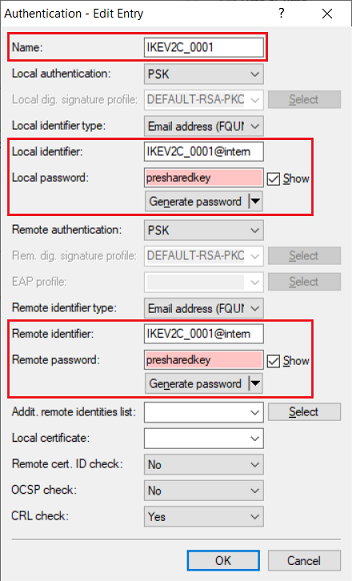
1.2) Open the entry for the VPN connection to be transferred to the Unified Firewall and note the following parameters:
The entries for the parameters Local identifier / Remote identifier and Local password / Remote password are set the same in the router by the Setup Wizard. |
2) Configuring the Advanced VPN Client connection in the Unified Firewall:
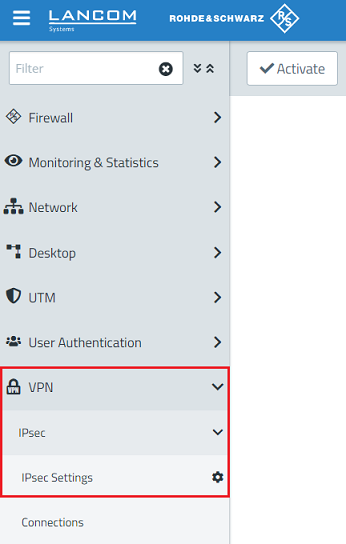
2.1) Connect to the Unified Firewall and navigate to the menu VPN → IPsec → IPsec Settings.
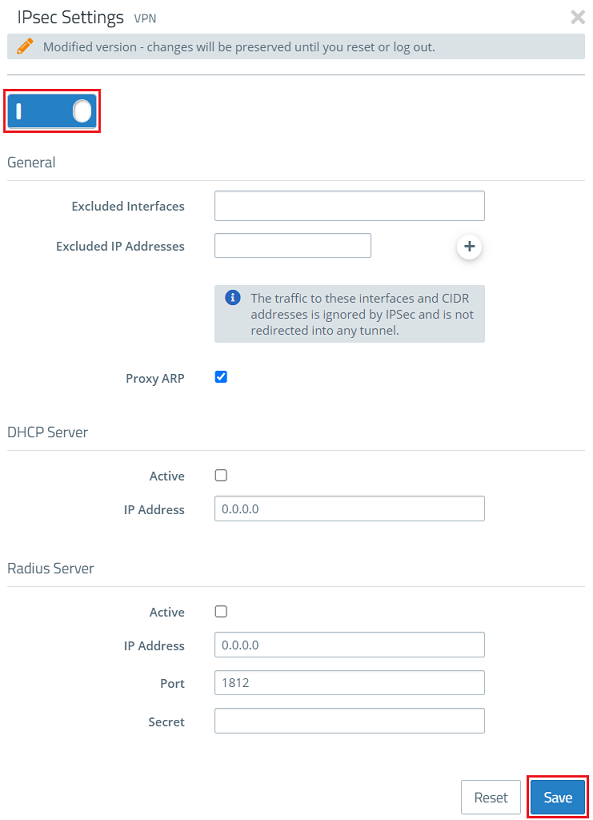
2.2) Check that IPsec is enabled.
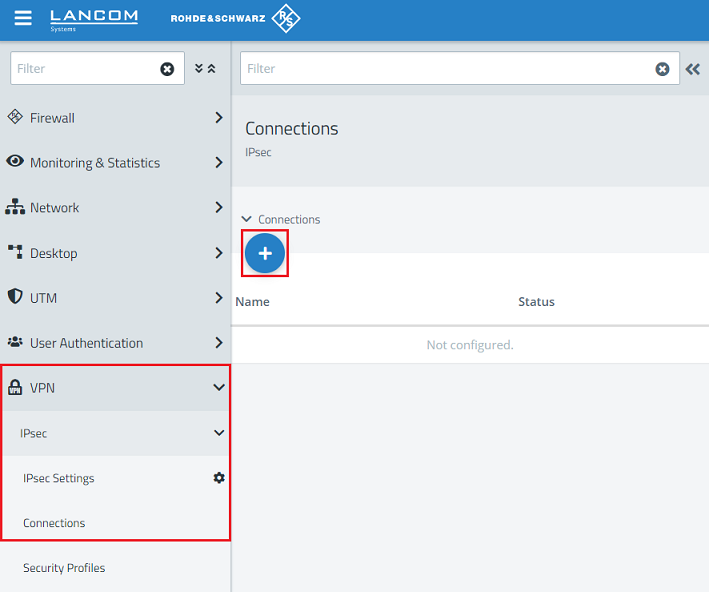
2.3) Go to the menu VPN → IPsec → Connections and click the “+” icon to create a VPN connection.
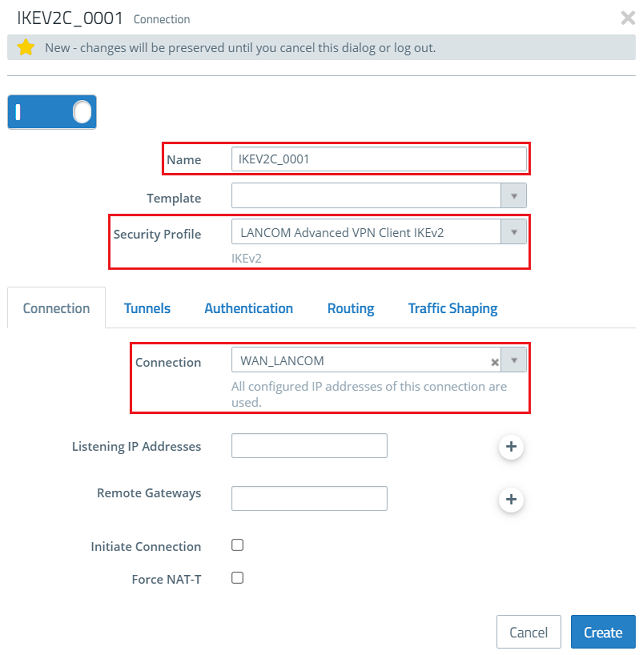
2.4) Change the following parameters:
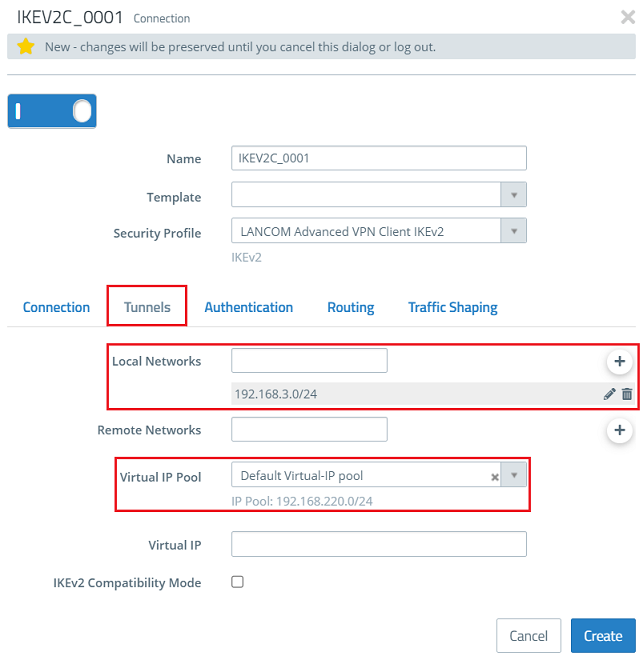
2.5) Go to the Tunnels tab and modify the following parameters:
2.6) Go to the Authentication tab, adjust the following parameters and click Create:
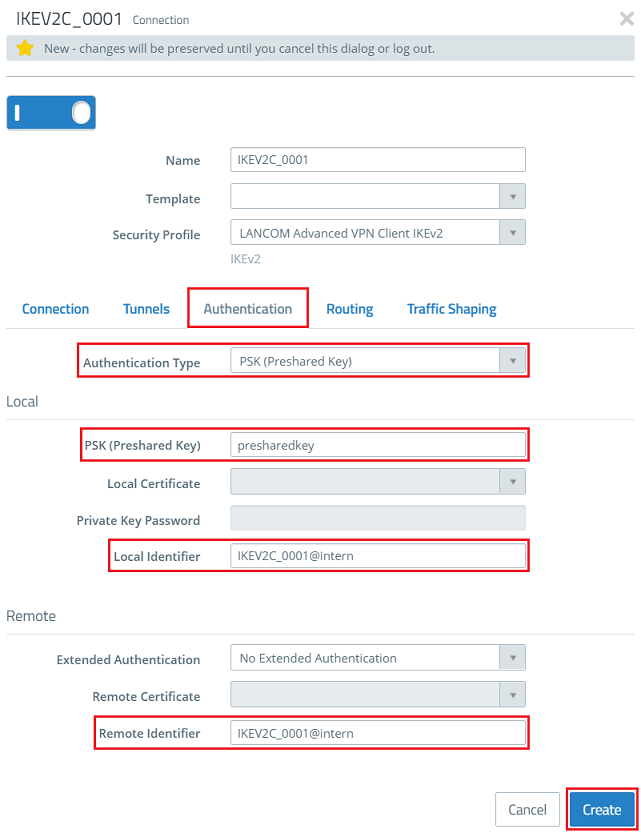
If you need further VPN connections for which communication is to be permitted in the same network, this connection can be copied. You only need to adjust the Name and the authentication parameters.
|
2.7) Click the icon to create a VPN host.

2.8) Modify the following parameters and then click Create:
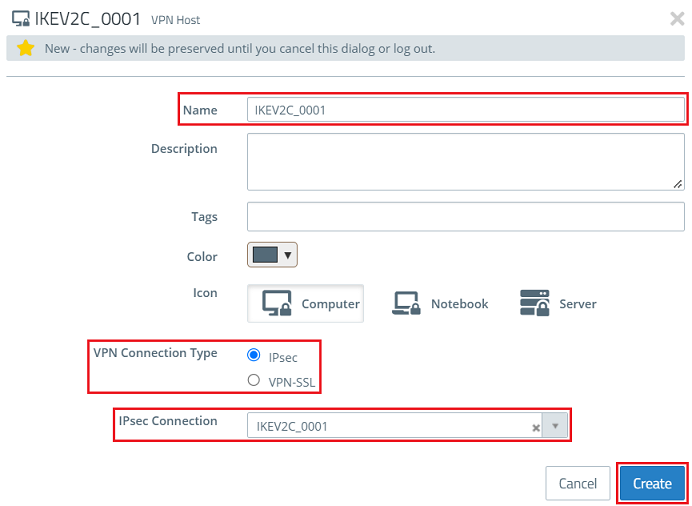
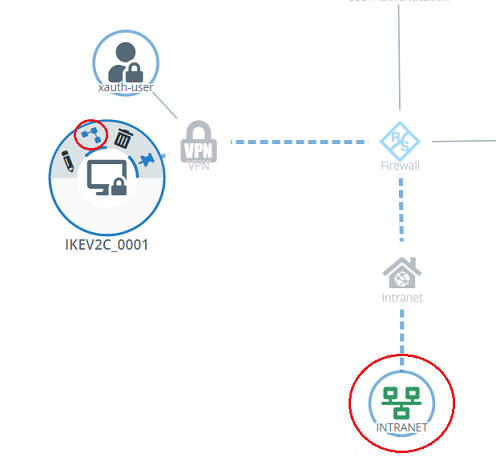
9) Click the VPN host on the desktop, select the “connection tool” and click the network with which communication via the Advanced VPN Client should be allowed.
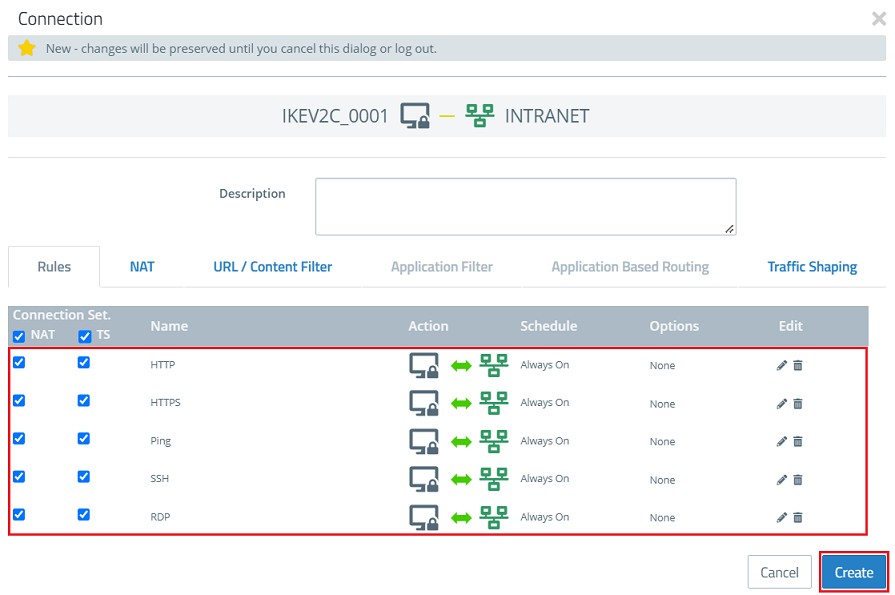
10) Assign the necessary protocols to the VPN host using the “+” icons.
A Unified Firewall uses a deny-all strategy. You therefore have to explicitly allow communication. |

11) Finally, implement the changes by clicking Activate.
