Description:
In some scenarios, it may be necessary to observe the data traffic on a network before operating the Unified Firewall. This can be achieved by using a transparent bridge.
This article describes how to operate a LANCOM R&S®Unified Firewall in bridge mode.
In transparent bridge mode the only UTM features available are IDS / IPS and application management . Other UTM features cannot be operated! |
Requirements:
Scenario:
Procedure:
1) Setting up bridge mode on the Unified Firewall:
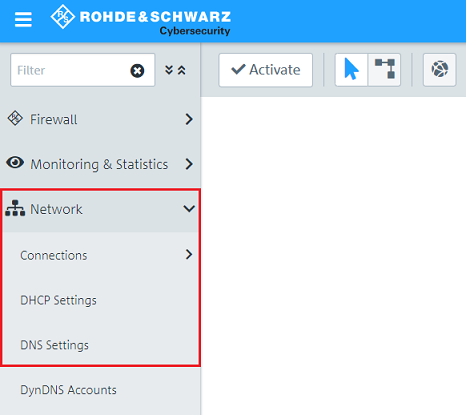
1.1) In your browser, open the configuration for the United Firewall and switch to the menu item Network → Connections → DNS Settings.
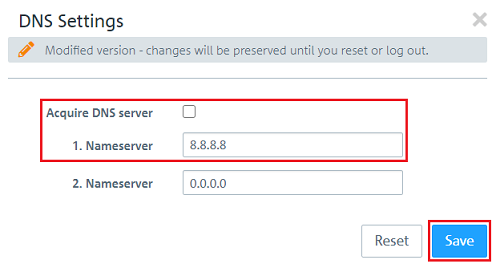
1.2) Modify the following parameters and then click Save:
You can optionally enter a 2nd name server. |
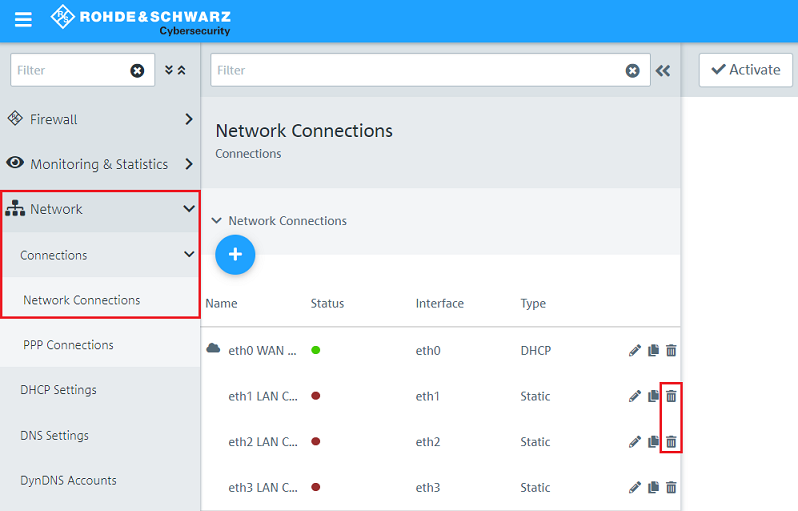
1.3) Switch to the menu Network → Connections → Network Connections and use the “trash can” icon to delete the two unused connections (in this example eth1 and eth2), which frees up two Ethernet ports for the operation as a bridge.
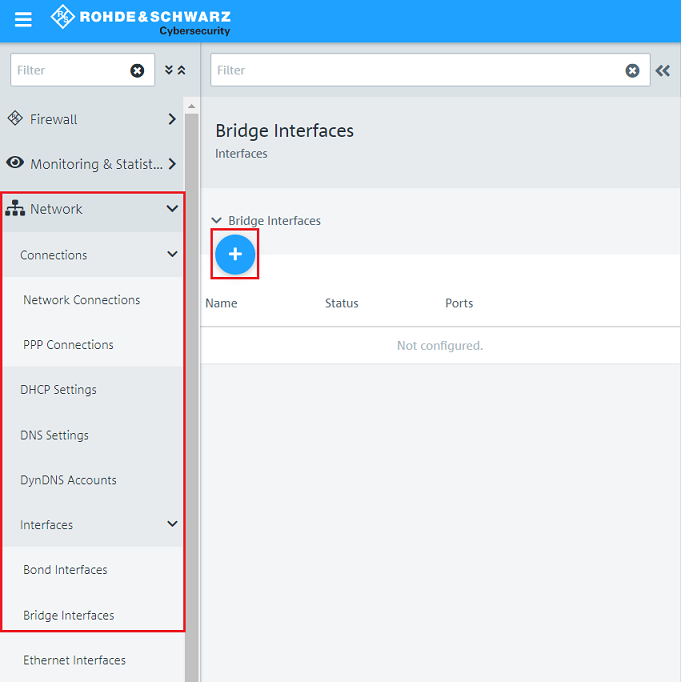
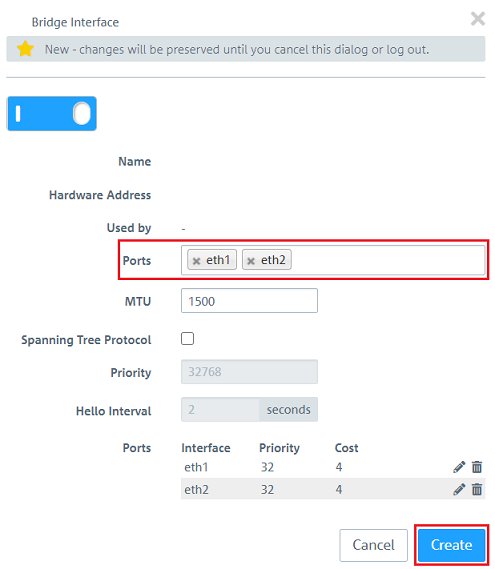
1.4) Navigate to the menu Network → Interfaces → Bridge Interfaces and click on the “+” icon to create a bridge.
1.5) Under Ports, add the Ethernet ports freed up in step 1.3 (in this example eth1 and eth2) and click on Create.
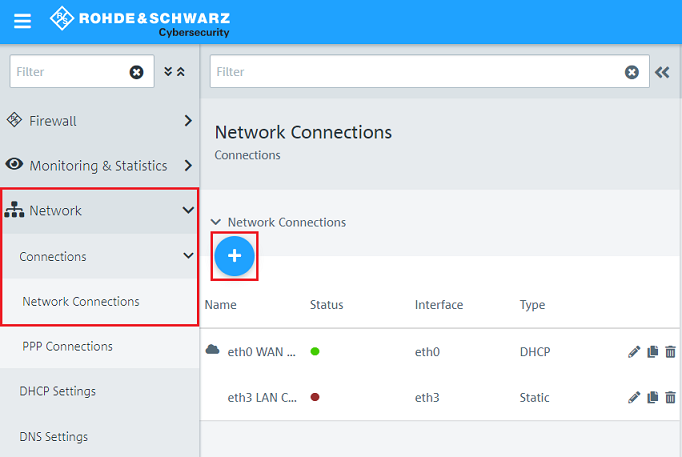
1.6) Change to the menu Network → Connections → Network Connections and click on the “+” icon to create a new connection.
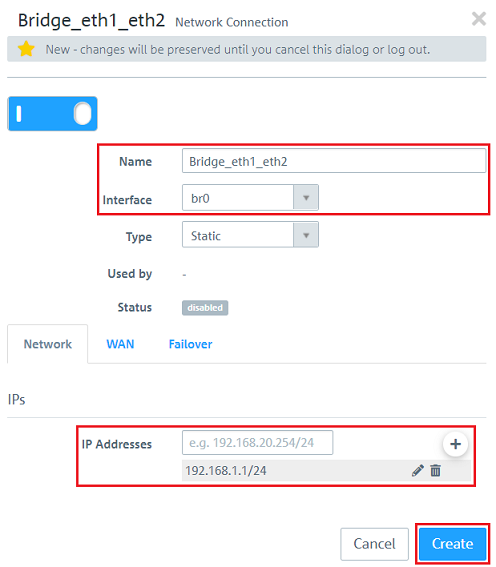
1.7) Enter the following parameters:
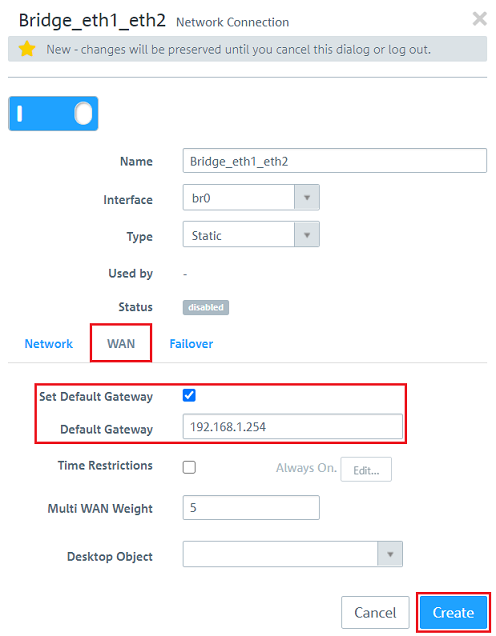
1.8) Switch to the tab WAN, adjust the following parameters and click Create:
1.9) Click the icon Click to generate an Internet object.

1.10) Modify the following parameters and then click Create:
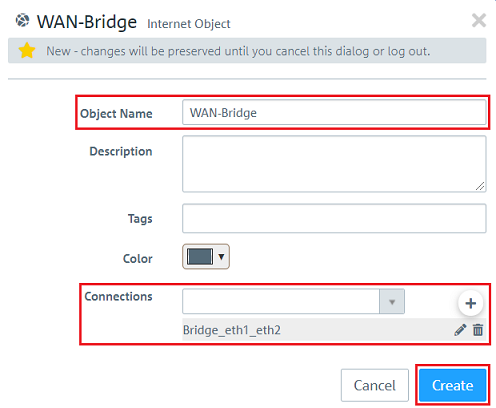
1.11) Click the icon Click to create a network.

1.12) Modify the following parameters and then click Create:
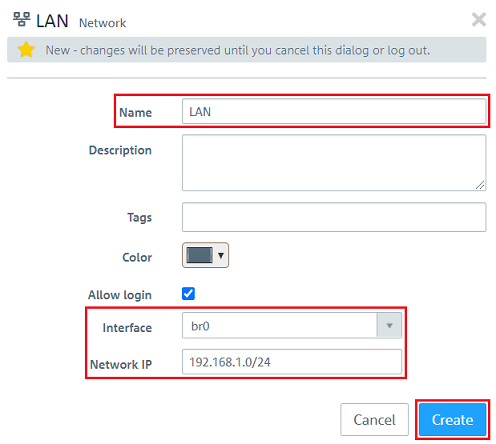
1.13) Finally, implement the changes on the United Firewall by clicking Activate.

2) Logging and analyzing the data traffic:
There are various options for logging and then analyzing the data packets. The following describes two different approaches, “Deny All” and “Allow All”).
The following UTM functions can also be configured:
2.1) Deny All:
Since the factory default is to discard all packets (Deny All strategy), there is no need to create a separate firewall rule.
This mode is only suitable for checking the traffic for a short period of time because no communication is possible.
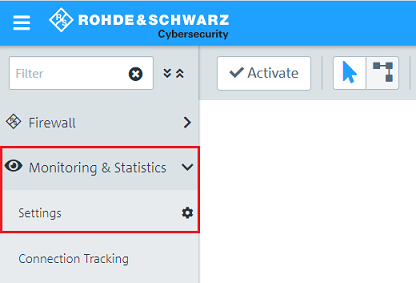
2.1.1) Navigate to the menu Monitoring & Statistics → Settings.
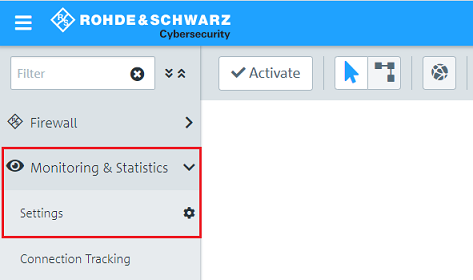
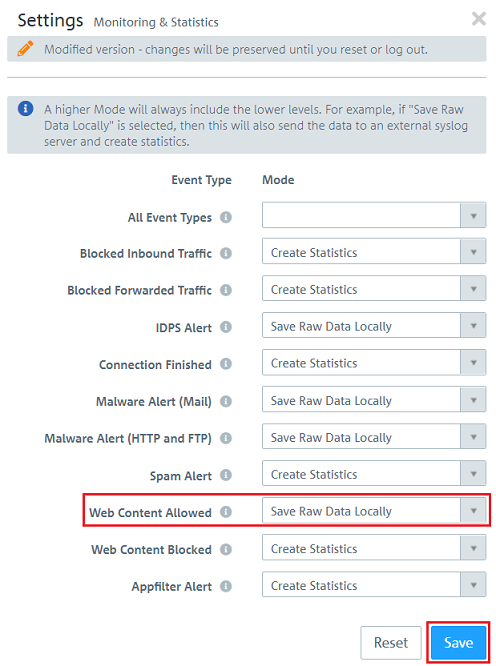
2.1.2) For each of the following options, select Save Raw Data locally so that the blocked packets are logged in detail. Then click on Save.
The raw data is saved on the hard drive of the Unified Firewall. This can cause the hard disk to fill up with data. For this reason, do not permanently enable the option Save Raw Data locally! |
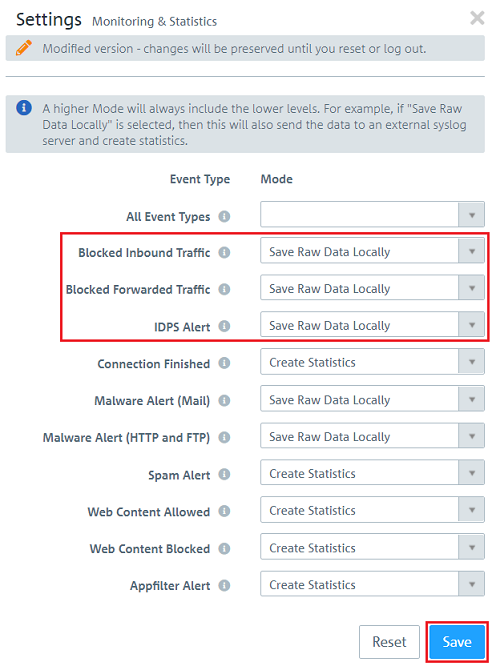
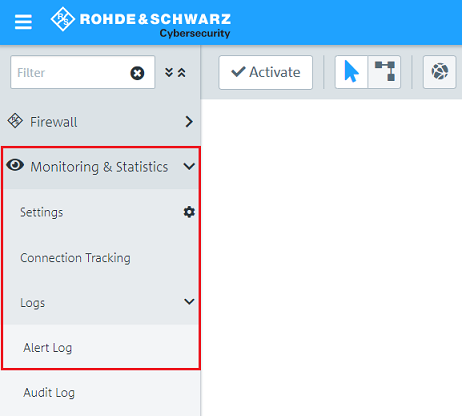
2.1.3) Navigate to the menu Monitoring & Statistics → Logs → Alert Log.
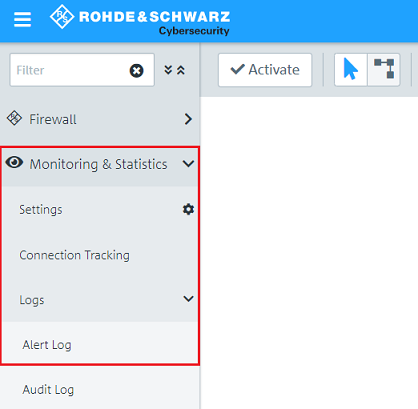
2.1.4) In the field More filters, select the filter Category: Connection blocked so that the Unified Firewall displays the blocked packets.
If you only want to display the packets detected/blocked by the IDS/IPS function, use the filter Category: IDPS. |

2.2) Allow All:
In order to allow all packets, an object must be created that applies to all ports and protocols. This can then be used in a firewall rule.
This mode can be used for a longer period of time because full communication is allowed.
2.2.1) Change to the menu Desktop → Services → User-defined Services and click on the “+” icon to create a new user-defined service.
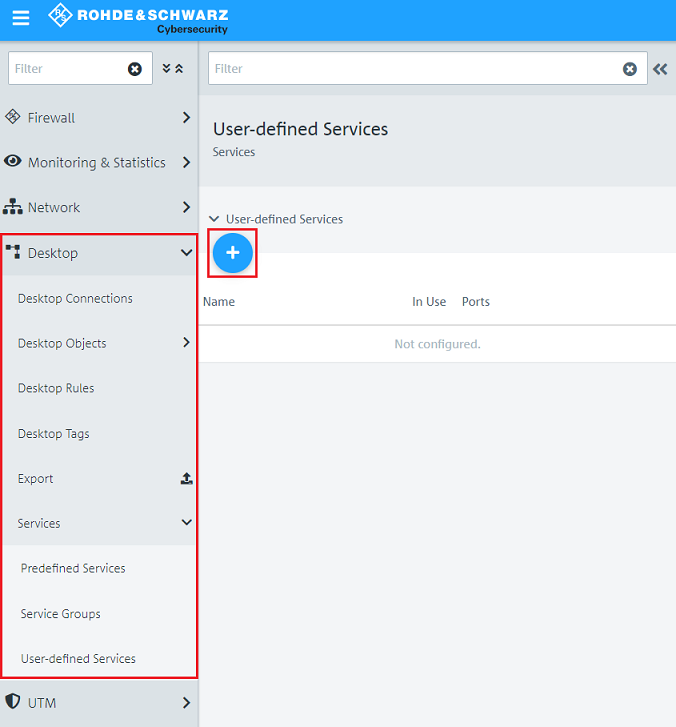
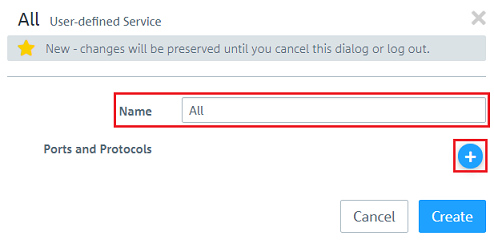
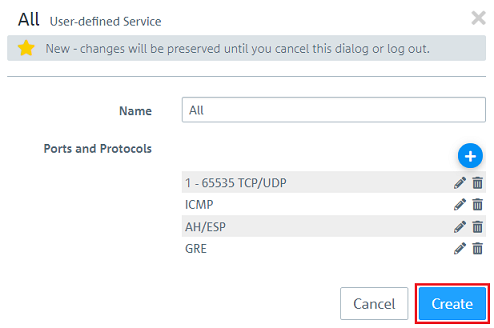
2.2.2) Under Name enter a descriptive name and click on the “+” icon under Ports and Protocols to select the port and protocol.
2.2.3) Set the ports from 1 - 65535 and set a checkmark for TCP and UDP. Then click on OK.
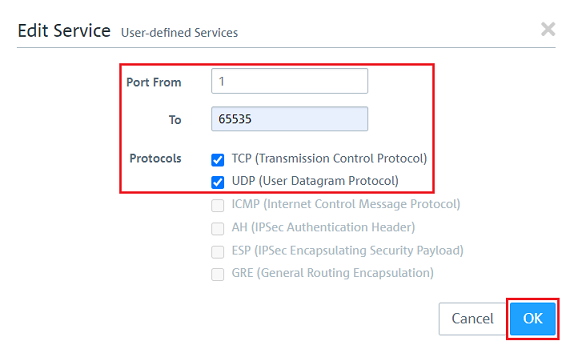
2.2.4) Additionally add the protocols ICMP, AH, ESP and GRE.
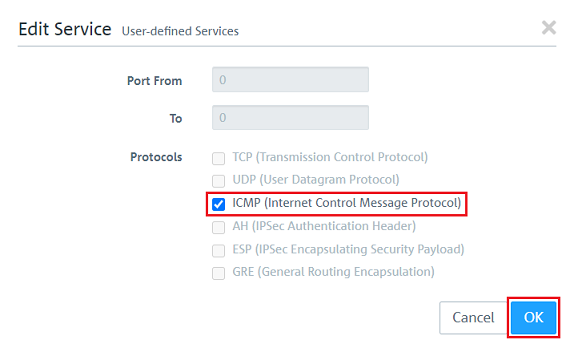
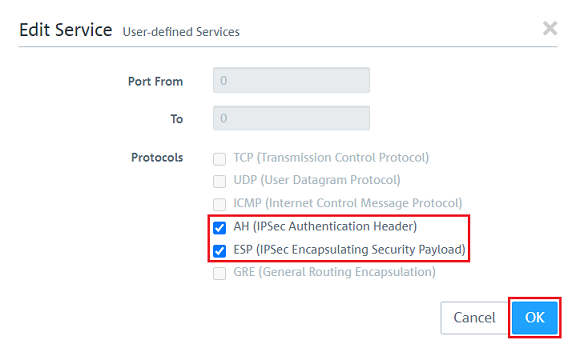
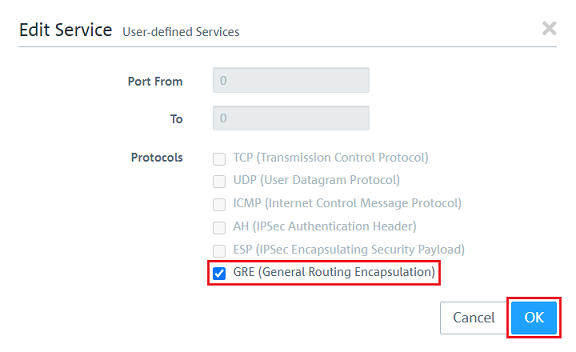
2.2.5) Click Create to create the user-defined service.
2.2.6) Click the network object on the desktop created in step 1.12 (in this example LAN), select the connection tool and click the Internet object created in step 1.10 (in this example WAN-Bridge).
2.2.7) Add the user-defined service created in steps 2.2.2 - 2.2.5.

2.2.8) Under Action, click three times on the green arrow so that it becomes a two-way arrow, meaning communication is allowed in both directions.
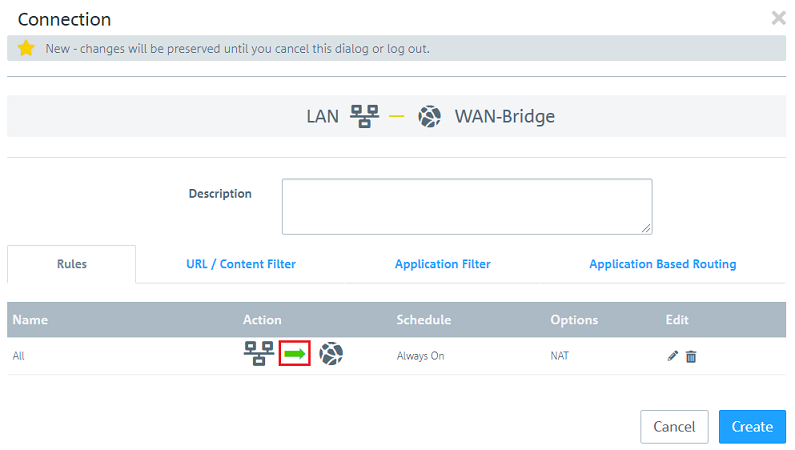
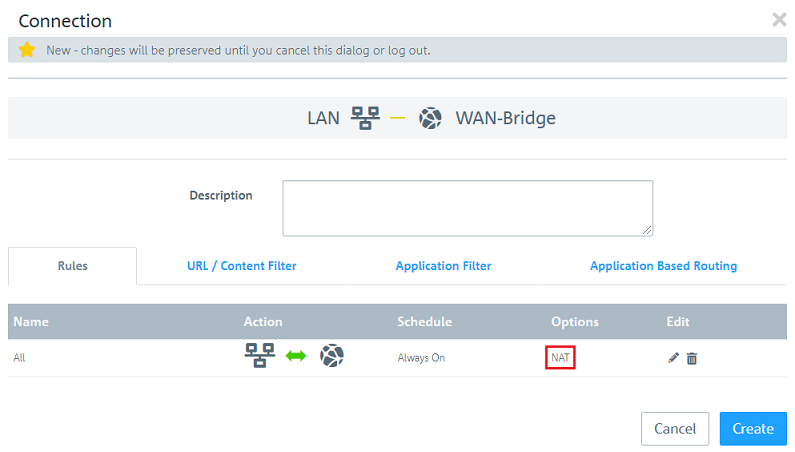
2.2.9) Under Options, click on NAT to adjust further settings.
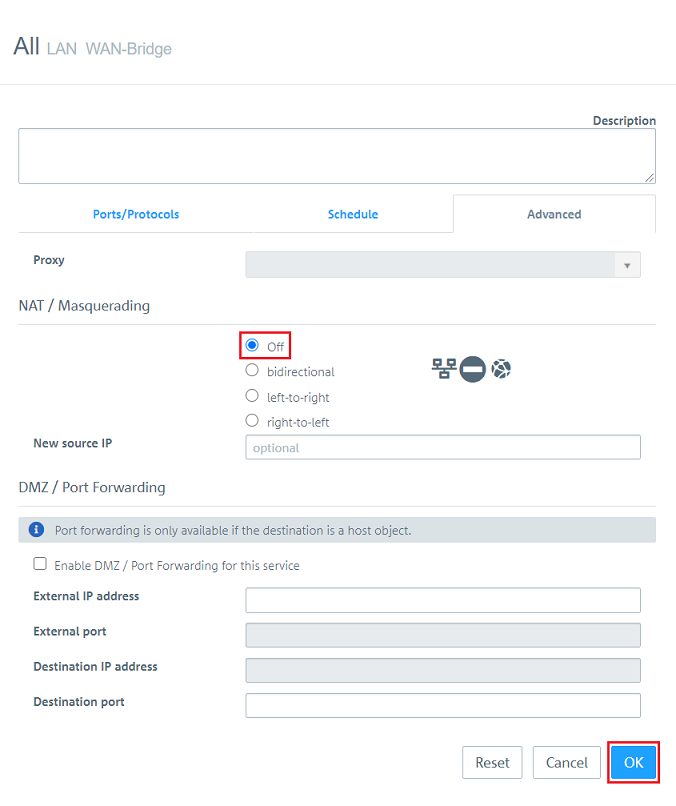
2.2.10) Set the NAT/Masquerading to Off so that the data traffic is transmitted transparently.
2.2.11) Then click Create.
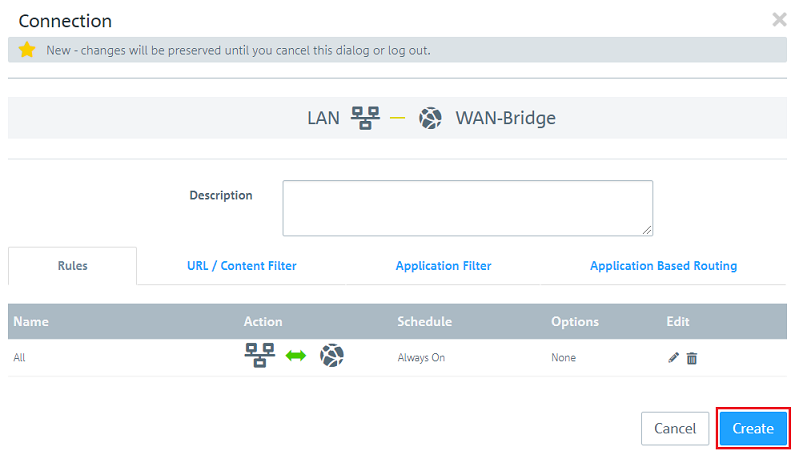
2.2.12) Finally, implement the changes by clicking Activate.

2.2.13) Navigate to the menu Monitoring & Statistics → Settings.
2.2.14) Under Web content allowed, select the option Save raw data locally to log the permitted data traffic in detail.
The raw data is saved on the hard drive of the Unified Firewall. This can cause the hard disk to fill up with data. For this reason, do not permanently enable the option Save Raw Data locally! |
2.2.15) Navigate to the menu Monitoring & Statistics → Logs → Alert Log.
2.2.16) In the field More filters, select the filter Category: Connection finished so that the Unified Firewall displays the transferred packets.
