Description:
This document describes how to establish a point-to-point (P2P) connection between two LANCOM access points that are managed in the LANCOM Management Cloud (LMC).
Please note, that the P2P implementations in LCOS and LCOS LX are not compatible with each other. Therefore it is not possible to connect an LCOS access point to an LCOS LX access point via P2P.
Requirements:
- LCOS as of version 10.4x (download)
- Access to the LANCOM Management Cloud (subject to charge)
- Web-Browser
- Installed LMC add-in script for creating a P2P link
The procedures described below are based on a fully functional network scenario managed by the LMC.
The Add-in script only works with dual radio access points, as the P2P connection uses the logical interface P2P-2-1, which belongs to the second radio module.
Scenario:
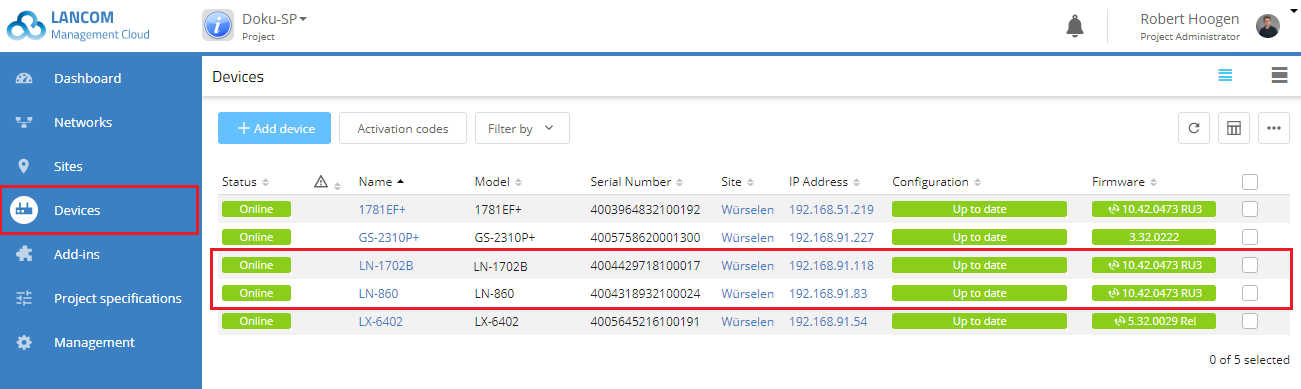
An LMC project contains numerous LANCOM access points, two of which must now communicate via a Wi-Fi point-to-point link due to a change of premises. All of the devices are already fully integrated into the LMC.
In this example, the access points of the type LN-1702B and LN-860 (see figure in the configuration step) are initially connected by Ethernet cable to a LANCOM switch, but the LANCOM LN-1702B is being moved so that it has to be connected to the rest of the local network exclusively via P2P link.
The LN-1702B is configured as a “slave” device for this purpose.
Please note that you must remove the LAN cable from the LN-1702B (the “slave” device) after completing the configuration, otherwise an endless network loop will occur!
Procedure:
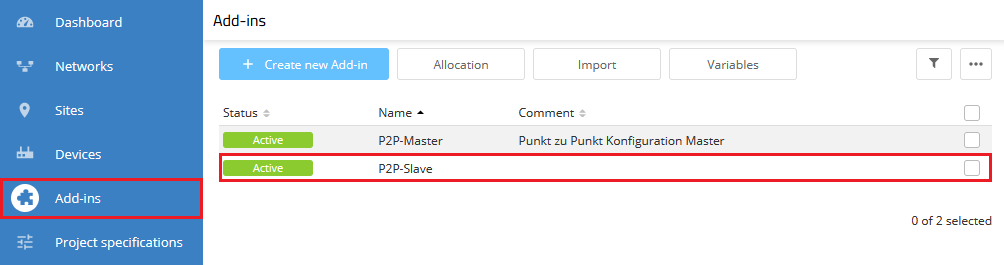
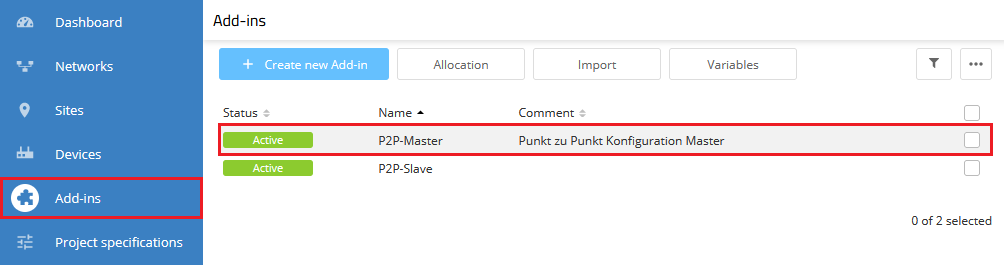
To configure P2P links in the LMC, LANCOM Systems provides appropriate add-ins that need to be activated in the LMC project.
More useful add-in scripts are available in the online documentation for the add-ins .
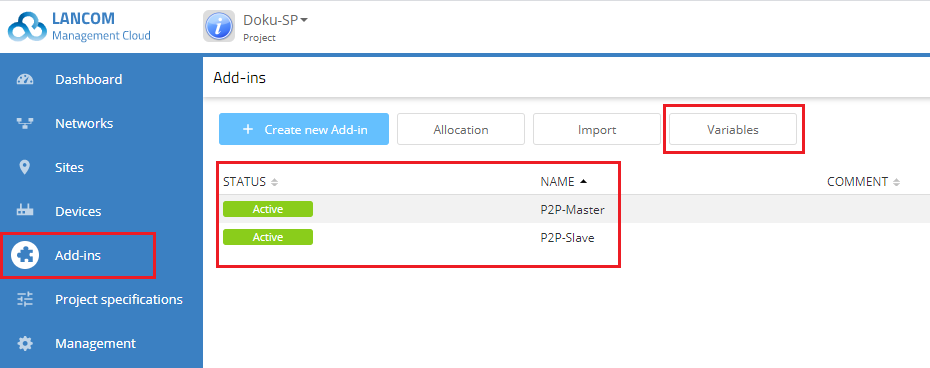
1) In the Add-ins menu, click the Variables button.
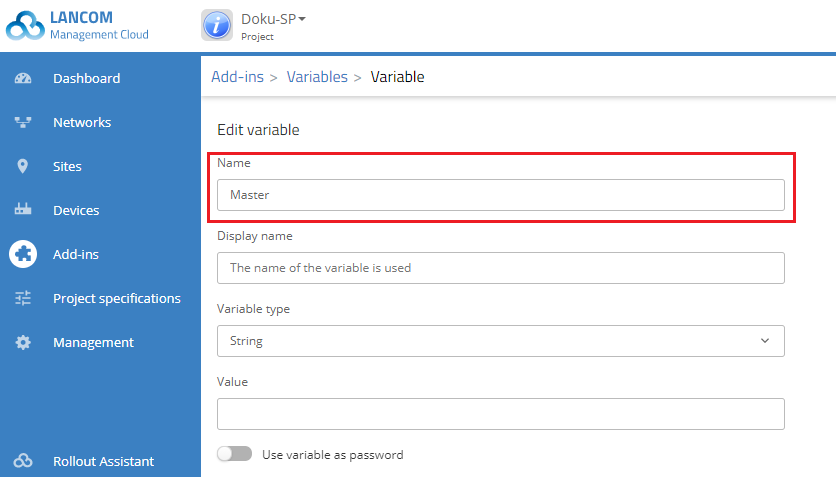
2) Create a new variable with the name Master. All other configuration items remain unchanged.
3) Click on Save.
4) Create another new variable with the name Slave. Here, too, all other configuration items remain unchanged.
5) Click on Save.

6) The two new variables should then be listed in the variable list as follows:

7) Select the variable P2P_PSK and click Edit.

8) Enter a Preshared Key for the P2P connection in the field Value and deactivate the option Use variable as password.
Click Save afterwards. This is important, as otherwise the placeholder in the script is used!
If the option Use variable as password is active, the password will be deleted when assigning the variable to the device (see steps 12 and 16) and must be reentered.

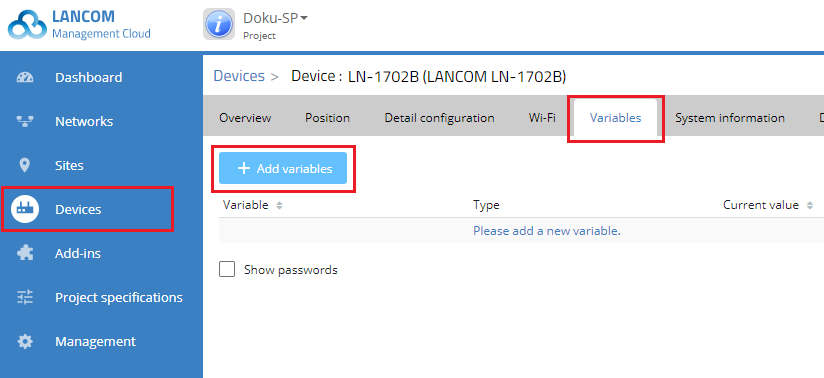
9) Switch to the device dialog for the master device (here the LN-860) under Devices → LN-860 and switch to the Variables tab.
10) Click Add variables.

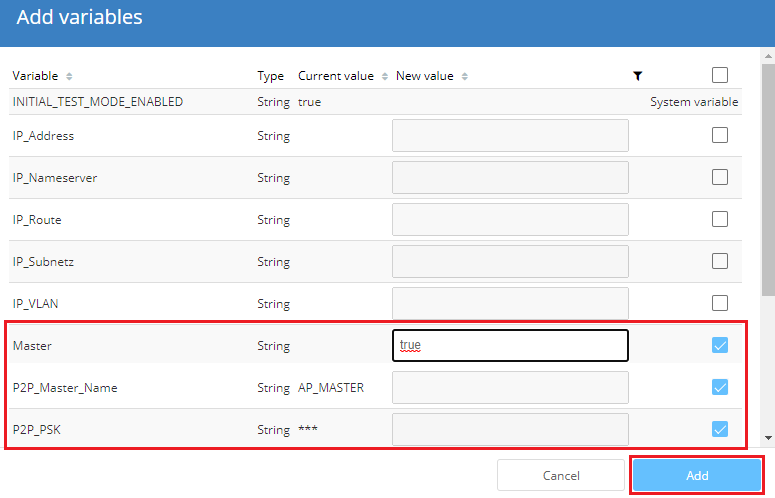
9) Select the viables Master, P2P_Master_Name and P2P_PSK.
10) In the “New value” column, add the value "true" for the "Master" variable. Then click on Add.
13) Switch to the device dialog for the slave device (here the LN -1702B) under Devices → LN-1702B and switch to the Variables tab.
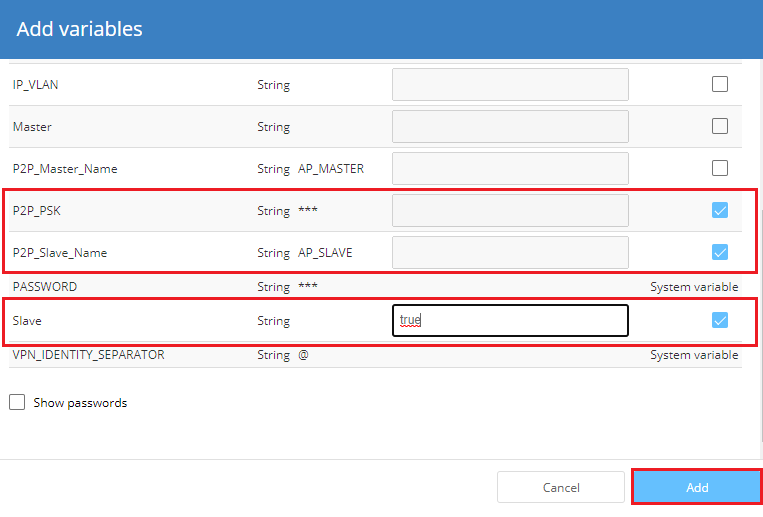
14) Click Add variables.
15) Select the variables Slave, P2P_Slave_Name and P2P_PSK.
16) In the “New value” column, add the value "true" for the "Slave" variable. Then click on Add.
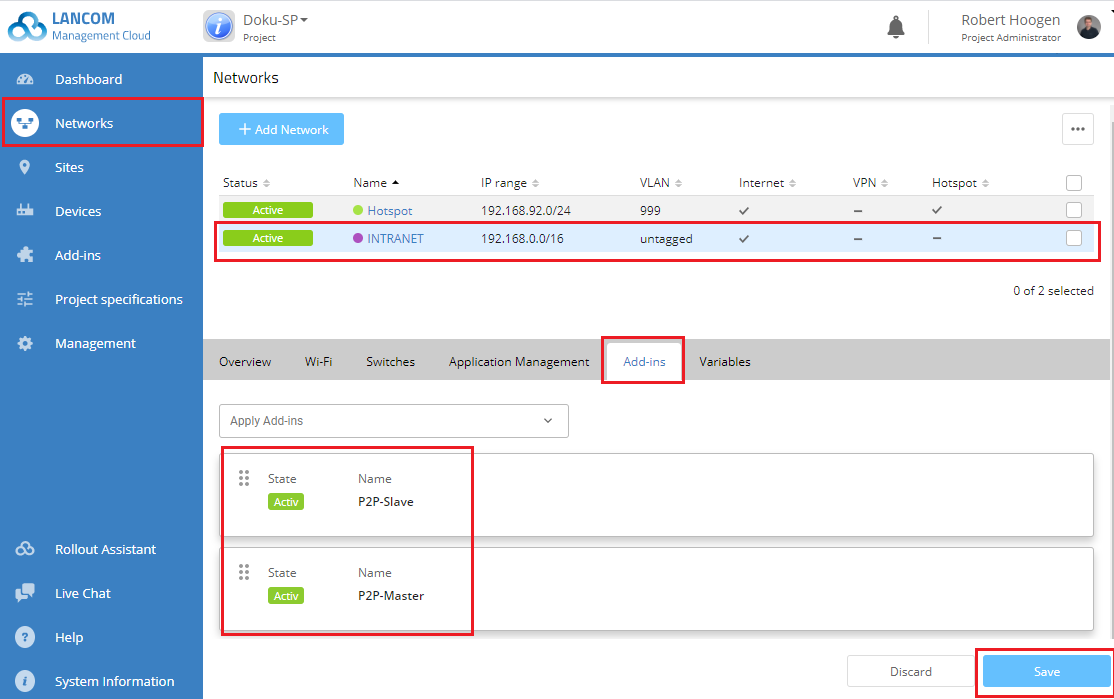
17) Switch to the Networks menu and select the local network where you want to create the point-to-point link between the selected access points.
The access points must be located in this network.
18) On the Add-ins tab, add the script “P2P-Master” and the script “P2P-Slave”.
19) Click the Save button.
20) The final step is to roll out the configuration changes to your network.
21) Mark all of the devices with a configuration marked as “Outdated” and then click Configuration roll out.
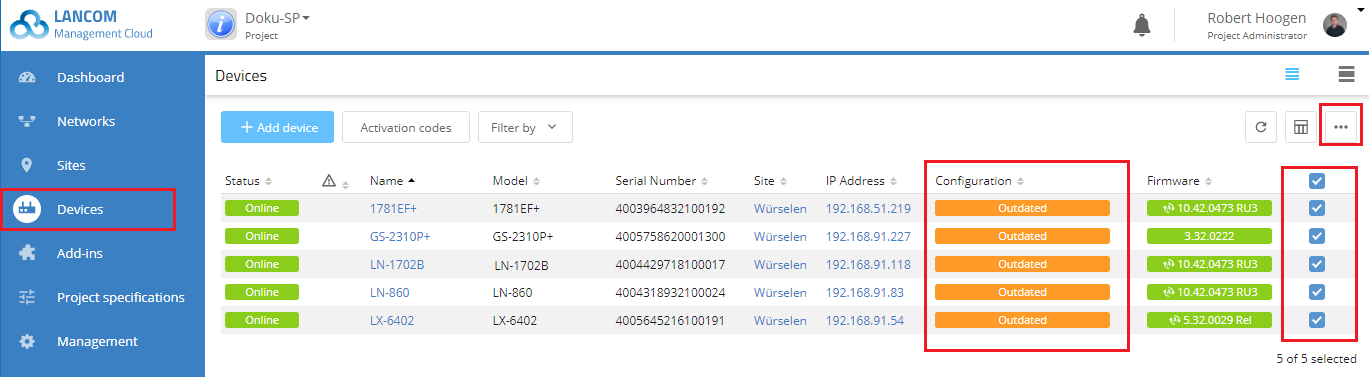
22) After rolling out the configuration, it is vital that you remove the Ethernet cable from the slave device!
23) The P2P connection is established now.
Additional steps when using multiple VLAN (optional):
If multiple VLANs are to be transmitted via the P2P connection, the two Add-ins P2P-Master and P2P-Slave have to be modified.
1) Go to the menu Add-ins and click on the Add-in P2P-Master.
2) In the editor copy the passage VLAN 1 mit Namen Default_VLAN einfügen and paste it right below. Aditionally copy the string vlanNetworks.addOrMerge(vlanDefault); in the passage insert changes and paste it right below.
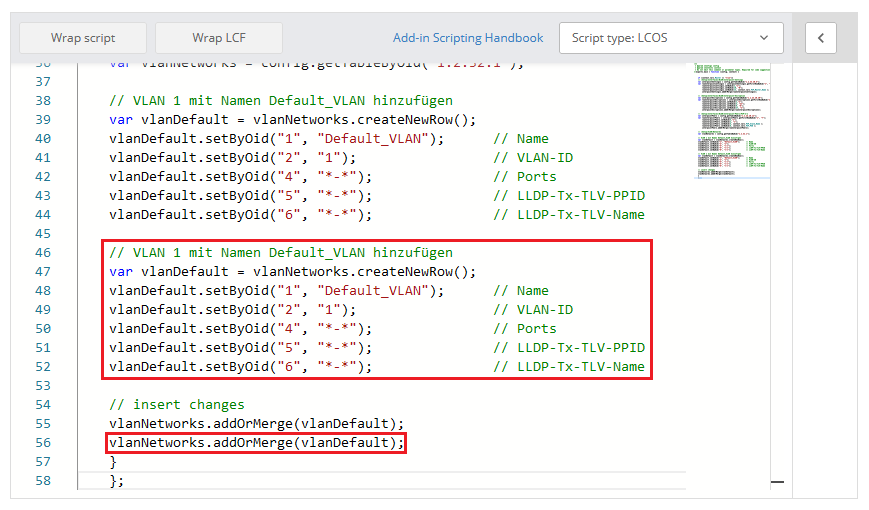
3) Modify the following rows and click Save:
- In the pasted passage modify the commented out text, so that it includes information regarding the new VLAN.
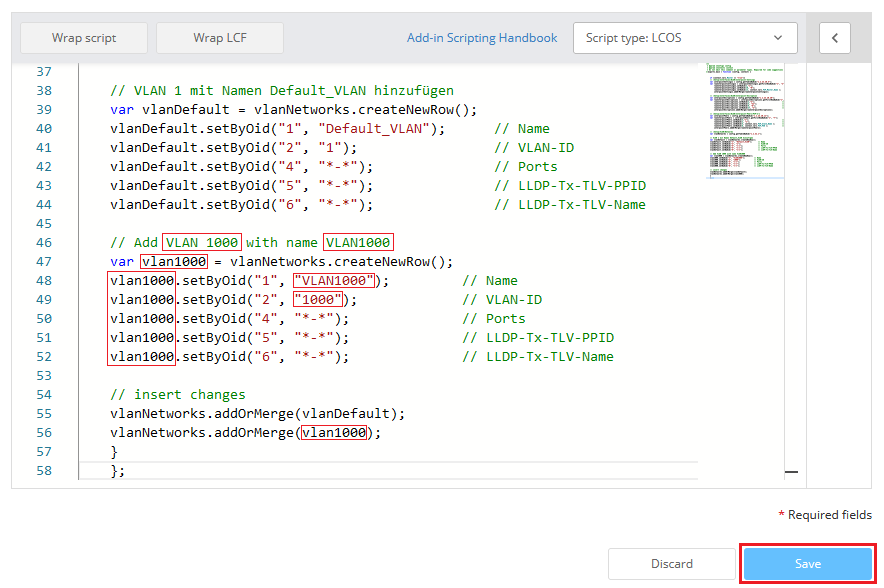
- In the pasted passage replace the previous name in the variable declaration (var) with a variable name for the new VLAN (in this example vlan1000).
- In the pasted passage replace the previous variable name vlanDefault in all rows with the variable name of the new VLAN (in this example vlan1000).
- Modify the name of the VLAN in the pasted passage (in this example VLAN1000).
- Modify the VLAN ID in the pasted passage (in this example the VLAN 1000).
- Enter the variable name of the new VLAN in the pasted string vlanNetworks.addOrMerge in the passage insert changes (in this example vlanNetworks.addOrMerge(vlan1000);).
The Name of the VLAN must correspond to a VLAN already configured on the access points. Otherwise the configuration cannot be rolled out to the access points!
Repeat steps 2) and 3) for additional VLANs, if necessary.
4) Repeat steps 2) and 3) for the Add-in P2P-Slave.