Description:
This article describes how to configure an SNMP user on a GS-23xx series switch and monitor the switch with the LANmonitor via SNMPv3. Of course It is also possible to use any other monitoring tool which supports SNMPv3.
If a monitoring tool other than LANmonitor is used, it is possible, that some parameters have to be configured differently (e.g. the encryption). Please contact the respective manufacturer regarding the necessary settings.
Requirements:
- LCOS SX as of version 3.32 RU7 (download latest version)
- LANmonitor as of version 10.50 Rel (download latest version)
- Any web browser for accessing the webinterface
Vorgehensweise:
1) Configuring the SNMP user on the switch:
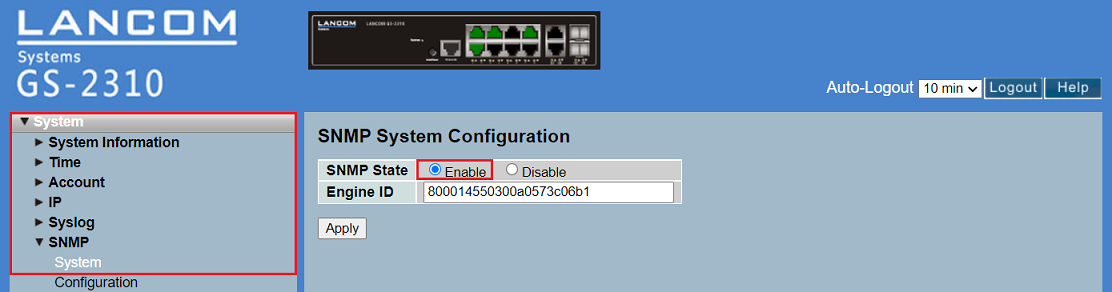
1.1) Connect to the webinterface of the device, go to the menu System → SNMP → System and make sure, that the option Enable is selected for SNMP State.
1.2) Go to the menu System → SNMP → Users and click on Add new user to create an SNMP user.
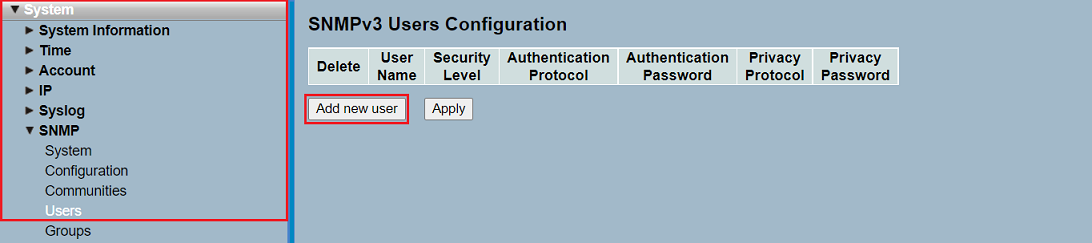
1.3) Modify the following parameters and click Apply:
- User Name: Enter a descriptive user name (in this example SNMP-User).
- Security Level: Make sure, that the option Auth, Priv is selected. This enables authentication via login credentials (Auth) and the data is encrypted (Priv).
- Authentication Protocol: In the dropdown menu select the optiion SHA.
- Authentication Password: Enter a password for authentication. In conjunction with the user name it is used for the login.
- Privacy Protocol: In the dropdown menu select the option AES.
- Privacy Password: Enter a p assword . It is used for data encryption.

1.4) Go to the menu System → SNMP → Groups and click on Add new group to create an SNMP group.
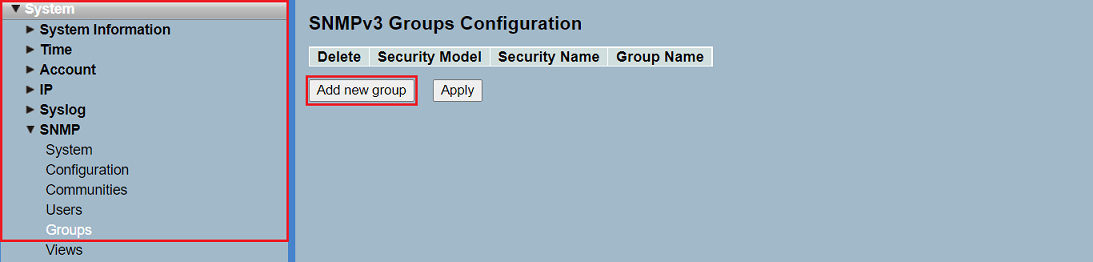
1.5) Modify the following parameters and click Apply:
- Security Model: Make sure, that the option usm is selected. USM (User-based Security Model) is only used for SNMPv3.
- Security Name: Make sure, that the SNMP user created in step 1.3) is selected.
- Group Name: Enter a descriptive name for the SNMP group (in this example SNMP-Group).

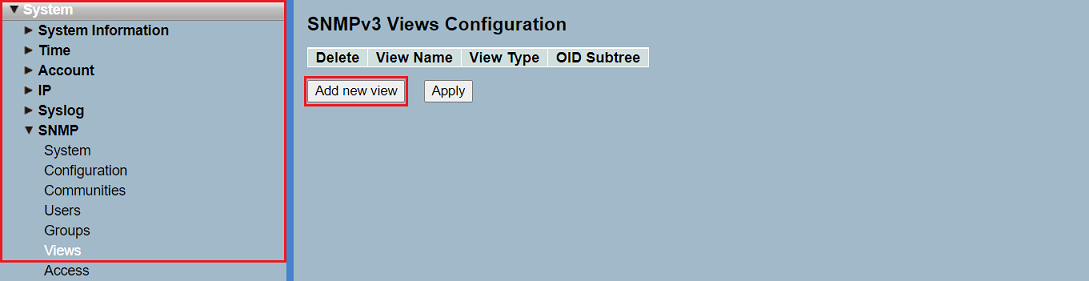
1.6) Go to the menu System → SNMP → Views and click on Add new view to create an SNMP view.
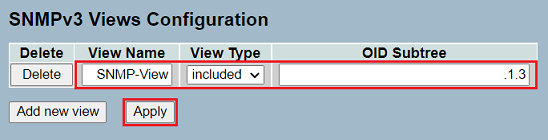
1.7) Modify the following parameters and click Apply:
- View Name: Enter a descriptive name for the SNMP view (in this example SNMP-View).
- View Type: Make sure, that the option included is selected.
- OID Subtree: Enter the string .1.3. The OID path of LANCOM devices begins with this string.
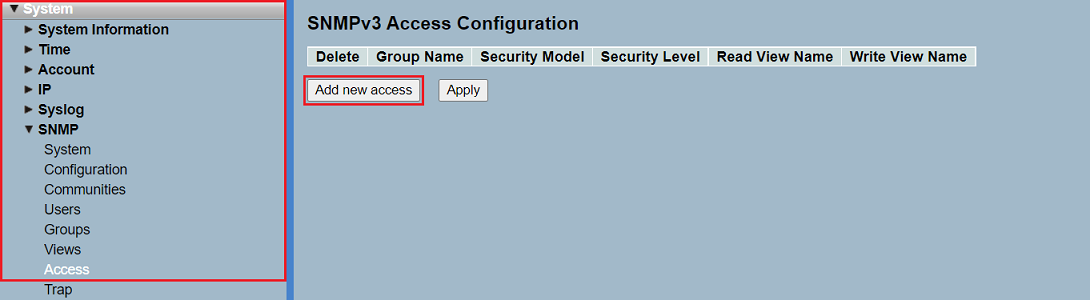
1.8) Go to the menu System → SNMP → Access and click on Add new access to create the SNMP access.
1.9) Modify the following parameters and click Apply:
- Group Name: Make sure, that the SNMP group created in step 1.5) is selected.
- Security Model: In the dropdown menu select the option usm.
- Security Level: In the dropdown menu select the option Auth, Priv.
- Read View Name: Make sure, that the SNMP view created in step 1.7) is selected.
- Write View Name: Make sure, that the SNMP view created in step 1.7) is selected.

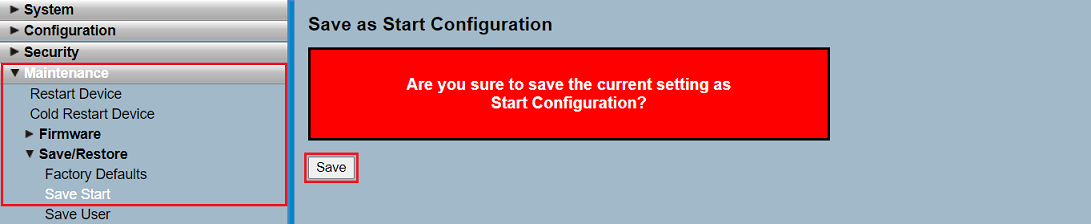
1.10) Go to the menu Maintenance → Save/Restore → Save Start and click Save to save the configuration as start configuration .
The start configuration is retained even if the device is restarted or there is a power failure.
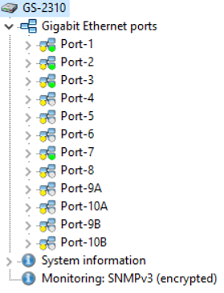
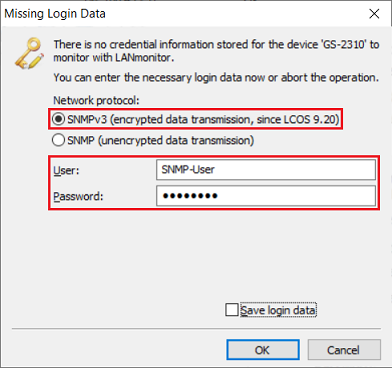
2.1) Connect to the switch via the LANmonitor, make sure, that the protocol SNMP3 is selected and enter the login credentials for the SNMP user entered in step 1.3) .
2.2) The switch can now be monitored via the LANmonitor and various status information can be read out. If write permissions are given, individual ports can be deactivated and reactivated, for example.