
Description:
- Notes on configuring the antivirus feature are available in following Knowledge Base article .
- You can read about the options available with the antispam settings in the Unified Firewall user manual.
If an E-Mail domain is falsely classified (either desired E-Mail is falsely classified as Spam or undesired E-Mail is not classified as Spam), please send the following information to LANCOM Support . For the purpose of correction, LANCOM Systems will then forward the affected E-Mail domain to the OEM partner, who operates the Antispam servers.
- E-Mail domain in the format @<domain.com>.
- Copy of an E-Mail from the affected domain as a ZIP file.
- Description of the problem.
Up until LCOS FX version 10.4.x, the mail proxy can only be used for the POP3 and SMTP protocols.
Use for the IMAP protocol is an option as of LCOS FX version 10.5.0.
- LANCOM R&S®Unified Firewall with firmware as of version 10 and an activated Full License
- A configured and functional Internet connection on the Unified Firewall
- Web browser for configuring the Unified Firewall.
The following browsers are supported:- Google Chrome
- Chromium
- Mozilla Firefox
Procedure:
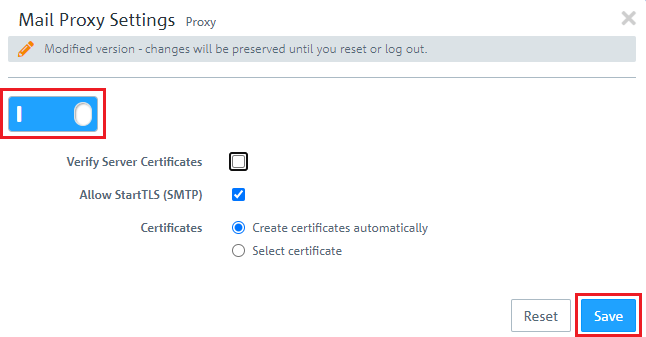
- Activate the option Verify server certificates if you require the mail proxy of your LANCOM R&S®Unified Firewall to validate server certificates.
- If you choose the default setting Create certificates automatically, pseudo-certificates are automatically created for every mail server. If you select the option Select certificate, your LANCOM R&S®Unified Firewall uses one certificate for all mail servers. Select a certificate from the Proxy Certificate drop-down list.
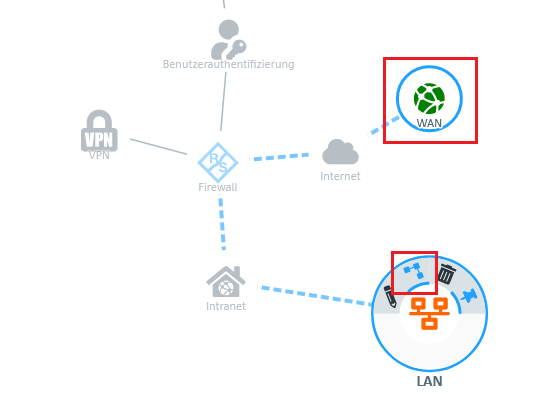
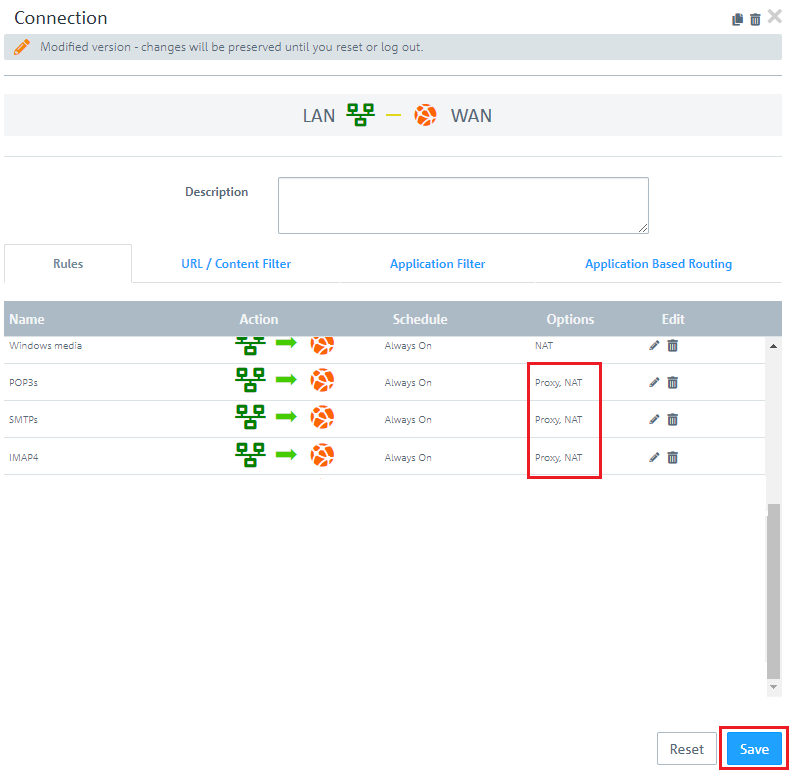
2. Configuring how the mail proxy is used:
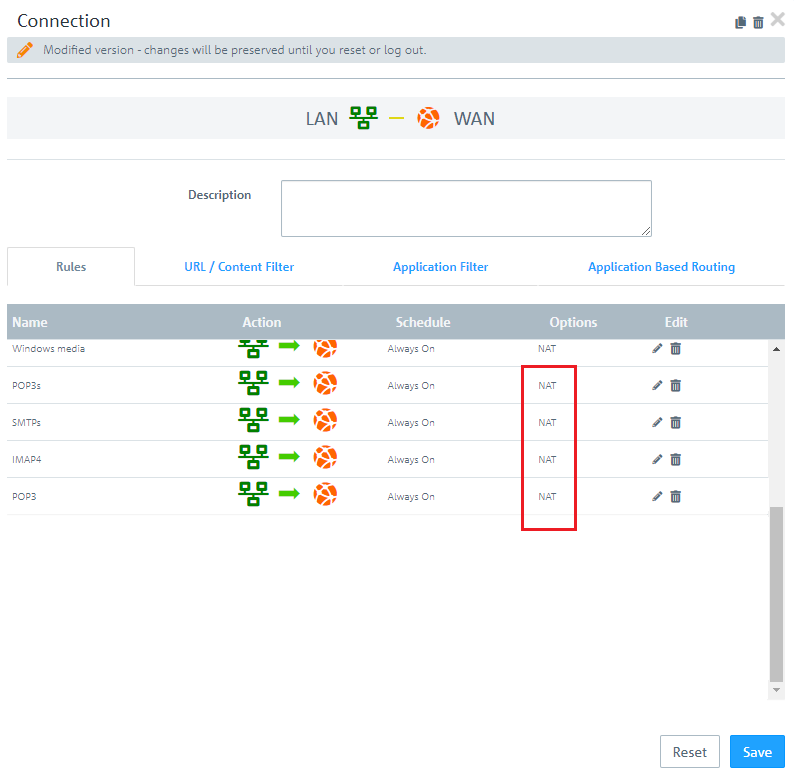

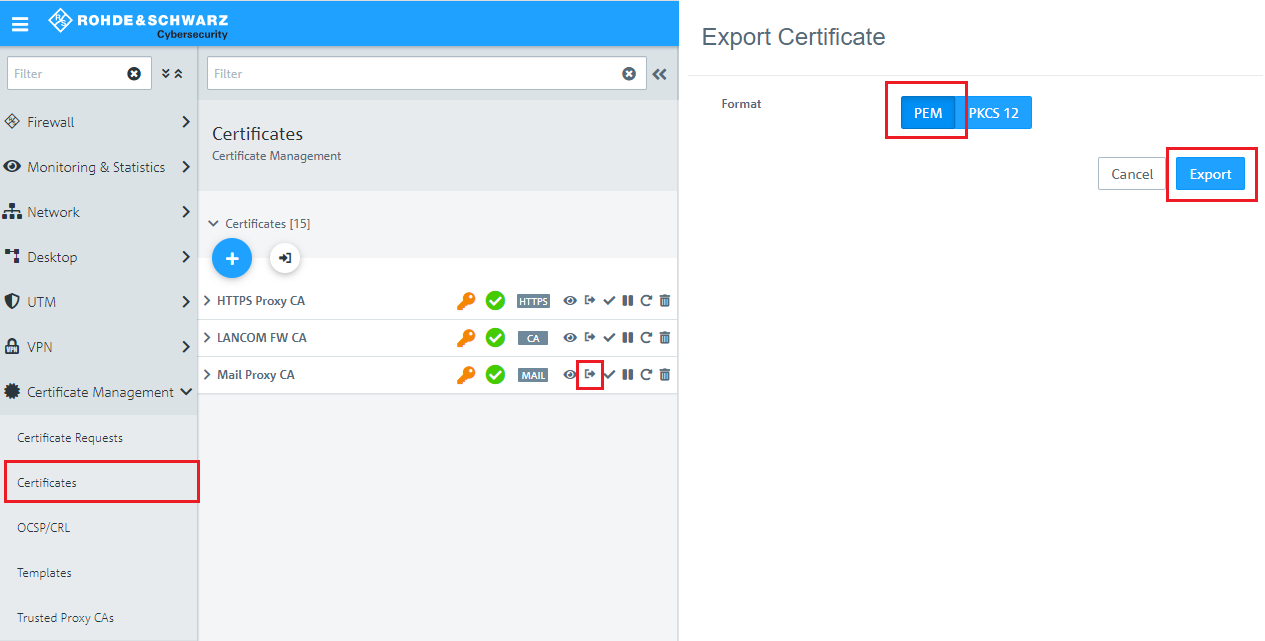
If necessary click on the "double arrow" symbol next to the Filter field to expand the menu. In this example the menu is already expanded.
3.4. On your computer, go to the folder where you exported the certificate.
3.5. In order to install the certificate under Windows, change the file extension from *.pem to *.crt .
3.6. Click the certificate file and acknowledge the subsequent security warning with OK.
3.7. In the Certificate dialog, select the option Install certificate.
3.8. In this example, the certificate installed on the local computer is to be used by all users of this computer.
3.9. Select the option Place all certificates in the following store, click Browse and select the Trusted root certification authorities store.
3.10. Click Next and continue until the Certificate Import Wizard is finished.
3.11. This concludes the certificate import. Any popular browser will be able to use the certificate after the computer is restarted.
Repeat the certificate import procedure (steps 3.7 to 3.11) on all of the other computers in the LAN.