Description:
This article describes how network devices, which obtain their IP address via DHCP can be assigned additional information besides the usual IP parameters via a DHCP option.
For a list of the most common DHCP options see RFC 2123.
Requirements:
- LCOS as of version 9.24 (download latest version)
- LANtools as of version 9.24 (download latest version)
- Configured and functional DHCP server for the network where the DHCP option should be assigned
Procedure:
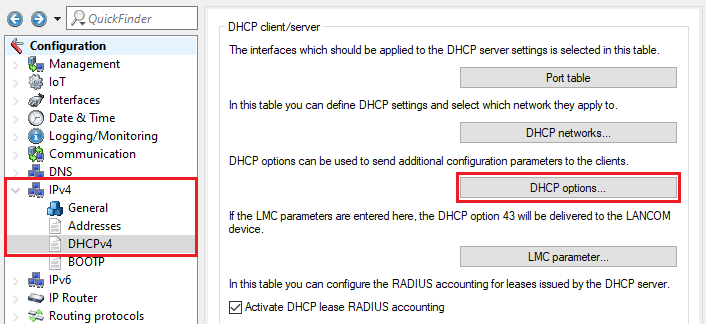
1) Open the router configuration in LANconfig and go to the menu IPv4 → DHCPv4 → DHCP options.
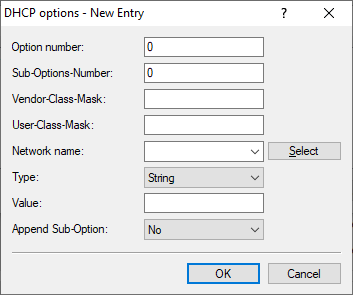
2) Create a new entry and modify the following parameters as needed:
- Option number: Enter the code number of the DHCP option.
- Sub-Options-Number: Optionally you can enter a Sub-Option-Number. For instance this is used in the DHCP option 43 to inform the connected SIP telephones where they can get the firmware and the configuration.
- Vendor-Class-Mask: Optionally you can enter a Vendor-Class-Mask. The DHCP option is only sent when the network device sends a DHCP request with the string contained in the mask. It is possible to use the wildcards * (any number of characters) and ? (exactly one character). For LANCOM devices the string *LANCOM* would be used.
- User-Class-Mask: Optionally you can enter a User-Class-Mask ein. The DHCP option is only sent when the network device sends a DHCP request with the string contained in the mask. It is possible to use the wildcards * (any number of characters) and ? (exactly one character). For LANCOM devices the string *LANCOM* would be used.
- Network name: In the dropdown menu select the DHCP network where the DHCP option should be assigned.
- Type: In the dropdown menu select the Type which fits the selected DHCP option.
- String (default setting)
- IP address
- 32 bit integer
- 16 bit integer
- 8 bit integer
- Value: Enter the Value which fits the used DHCP option and the selected Type. For example, this could be an IP address or a URL.
- Append Sub-Option: If the DHCP option 43 is used and a Sub-Options-Number should be appended, the option Yes has to be selected. The Sub-Options-Number with the corresponding information then has to be entered in a separate entry. Thereby the entries are bundled.
Examples for DHCP options:
DHCP option 6 - Domain Name Server Option:
- Option number: Enter the number 6.
- Network name: In the dropdown menu select the DHCP network, where the DHCP option should be assigned (in this example the network INTRANET).
- Type: In the dropdown menu select the type IP address.
- Value: Enter the IP address of a DNS server (in this example 192.168.10.200). If two DNS servers should be entered, these can be separated via a comma (e.g. 192.168.10.200, 217.137.150.33).

DHCP option 17 - Rootpath:
- Option number: Enter the number 17.
- Network name: In the dropdown menu select the DHCP network, where the DHCP option should be assigned (in this example the network INTRANET).
- Type: In the dropdown menu select the type String.
- Value: Enter the URL for the path to the root disk.

DHC option 42 - Network Time Protocol Servers Option:
- Option number: Enter the number 42.
- Network name: In the dropdown menu select the DHCP network, where the DHCP option should be assigned (in this example the network INTRANET).
- Typd: In the dropdown menu select the type IP address or String.
- Value: Enter the IP address of a time server or the DNS name of a time server.


DHCP option 44 - NetBIOS over TCP/IP Name Server Option:
- Option number: Enter the number 44.
- Network name: In the dropdown menu select the DHCP network, where the DHCP option should be assigned (in this example the network INTRANET).
- Type: In the dropdown menu select the type IP address.
- Value: Enter the IP address of a NetBIOS server.

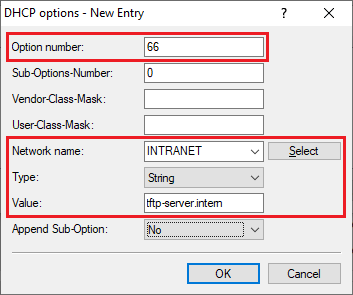
DHCP option 66 - TFTP server name:
- Option number: Enter the number 66.
- Network name: In the dropdown menu select the DHCP network, where the DHCP option should be assigned (in this example the network INTRANET).
- Type: In the dropdown menu select the type IP address or String.
- Value: Enter the IP address of a TFTP server or the DNS name of a TFTP server.

DHCP option 121 - Classless Static Route:
The procedure is described in the following Knowledge Base article:
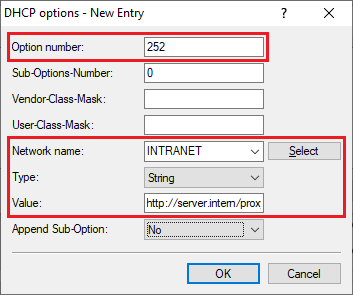
DHCP option 252 - Web Proxy Auto-Discovery Protocol:
- Option number: Enter the number 252.
- Network name: In the dropdown menu select the DHCP network, where the DHCP option should be assigned (in this example the network INTRANET).
- Type: In the dropdown menu select the type String.
- Value: Enter the URL of the web server with the proxy configuration (in this example http://server.intern/proxyconfig.pac ).
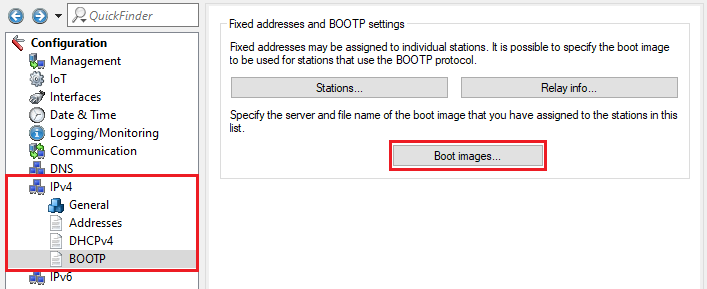
Specify an image file for a PXE boot server:
1) Go to the menu IPv4 → BootP → Boot images.
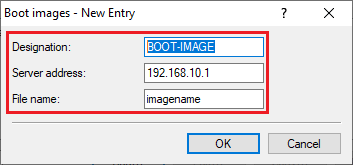
2) Create a new entry and modify the following parameters:
- Designation: Enter a descriptive name for the boot image.
- Server address: Enter the IP address of the server, which provides the boot image.
- File name: Enter the name of the file on the server, which contains the boot image.
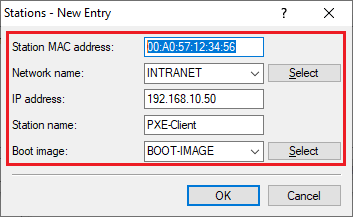
3) Go to the menu IPv4 → BootP → Stations.
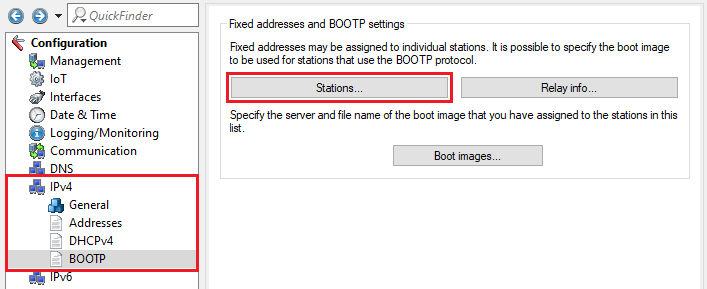
4) Create a new entry and modify the following parameters:
- Station MAC address: Enter the MAC address of the PXE client in the format 00:a0:57:12:34:56.
- Network name: In the dropdown menu select the Network, from which an IP address should be assigned to the network device.
- IP address: Enter the IP address, which should be assigned to the network device.
- Station name: Optionally you can enter a descriptive name for the station.
- Boot image: In the dropdown menu select the boot image created in step 2.