Description:
If a website is assigned to a wrong category and is therefore falsely blocked or allowed, please send the following information to LANCOM Support . For the purpose of correction, LANCOM Systems will then forward the affected URL to the OEM partner, who operates the Content Filter servers.
- Full URL.
- Copy of the affected webite in the format *.htm (Save page as in your web browser).
- Description of the problem.
Requirements:
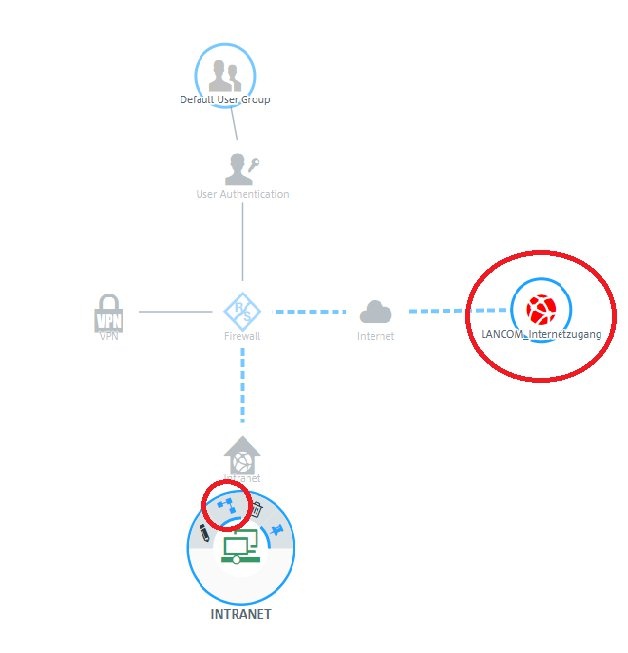
- LANCOM R&S®Unified Firewall with firmware as of version 10 and an activated full license
- Internet connection already set up and functional on the Unified Firewall
- Functionally configured packet filter on the Unified Firewall
- Functionally configured HTTP (S) proxy on the Unified Firewall
- Web browser to configure the Unified Firewall.
The following browsers are supported:
- Google Chrome
- Chromium
- Mozilla Firefox
Procedure:
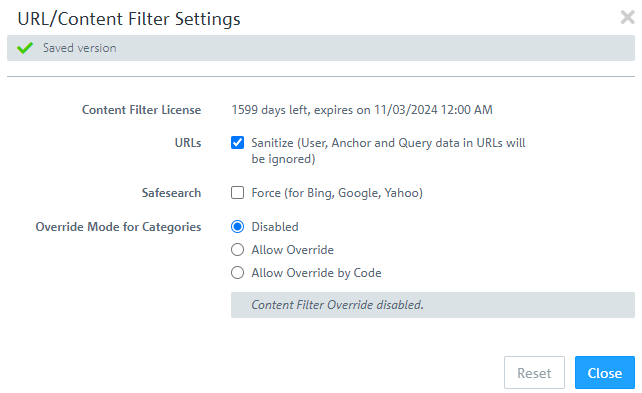
- Sanitize URLs: Set a checkmark here in order for sections following a ? (used to communicate variables in PHP) to be excluded from black and white lists.
- Force Safesearch: Set this checkmark to configure the setting SafeSearch=strict to automatically configure the search engines Google, Bing, and Yahoo to keep adult content out of search results. Users cannot change this setting.
- Override mode for categories (as of LCOS FX 10.5.0): If a website has been blocked, you can control the behavior of your firewall here:
- Deactivated: No exceptions are allowed (default setting).
- Allow override: If a website has been blocked, you can override the content filter locking mechanisms for a selected period of time. Enter the period for the content filter category in minutes to deactivate the corresponding profile. Only the current category of a URL/content filter profile is overwritten as not blocked for a certain period of time.
- Allow override by code: If a website has been blocked, your users can override the locking mechanisms of the content filter by entering a short numerical sequence (code) ( see also the following document ).
Enter the users who are allowed to manage the corresponding codes here. From the perspective of your LANCOM R&S®Unified firewall, these can be local users, LDAP users or LDAP groups.
In LCOS FX 10.11 a change was made to another OEM partner for the URL and Content Filter. Associated with this the default profiles were removed and are only available in existing installations with a source version up to and including LCOS FX 10.10. With a new installation with LCOS FX as of version 10.11 it is always necessary to create your own URL/Content Filter profile (see step 2.2).
The user overwrite function is deactivated by default. Activate this function if you want to allow (certain) users to be able to view pages blocked by the content filter.
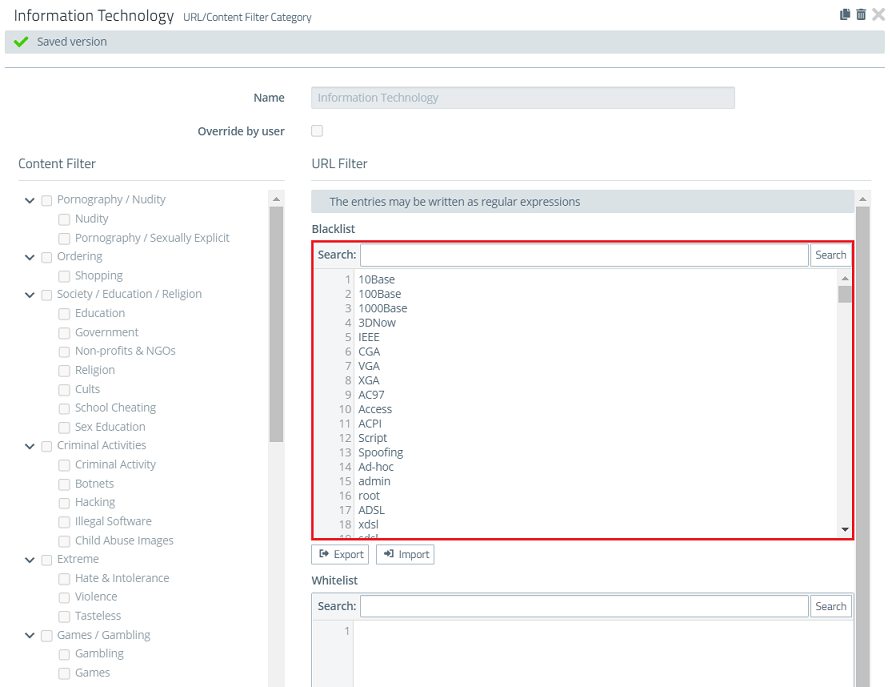
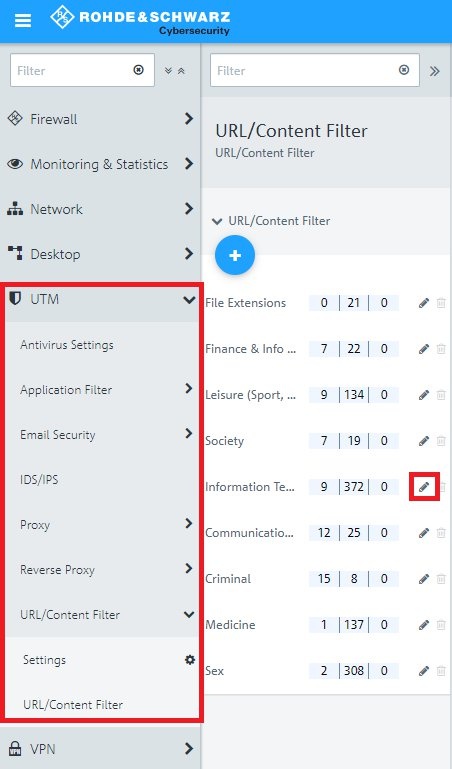
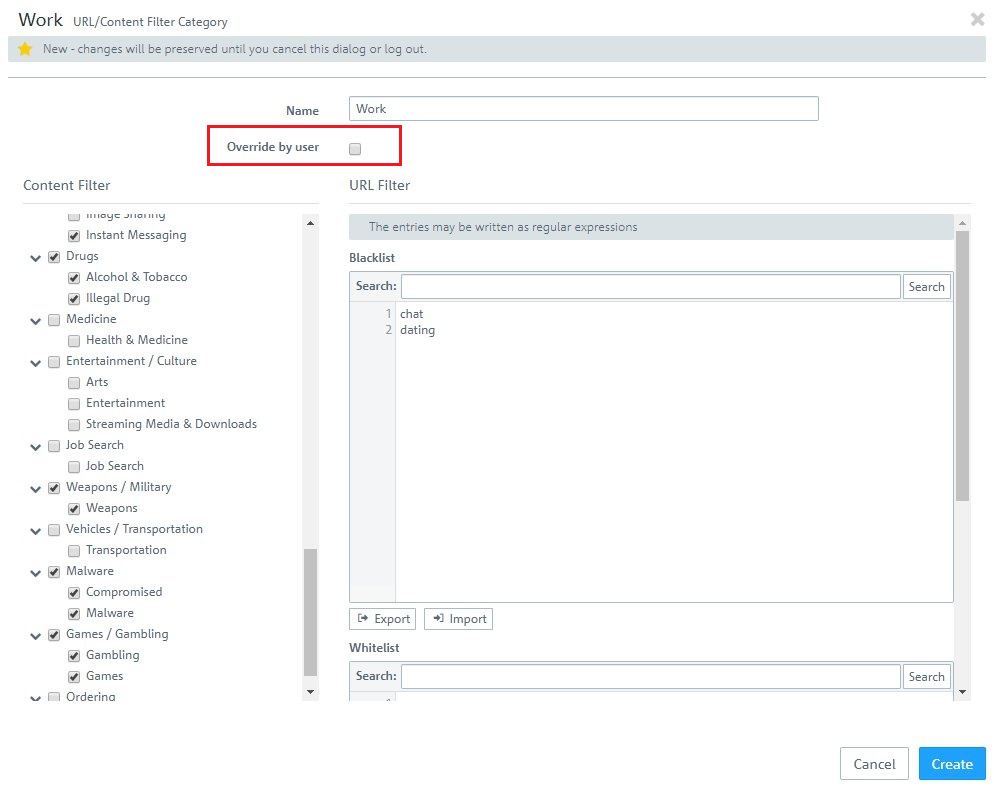
You cannot adjust the default Content Filter profiles. You can, however, add entries to the black list and white list.
As of LCOS FX 10.5.0, the management of the content filter has been expanded to include codes with which users can view blocked pages within certain times by entering the respective code despite the filter. For more information, see the following Knowledge Base article.
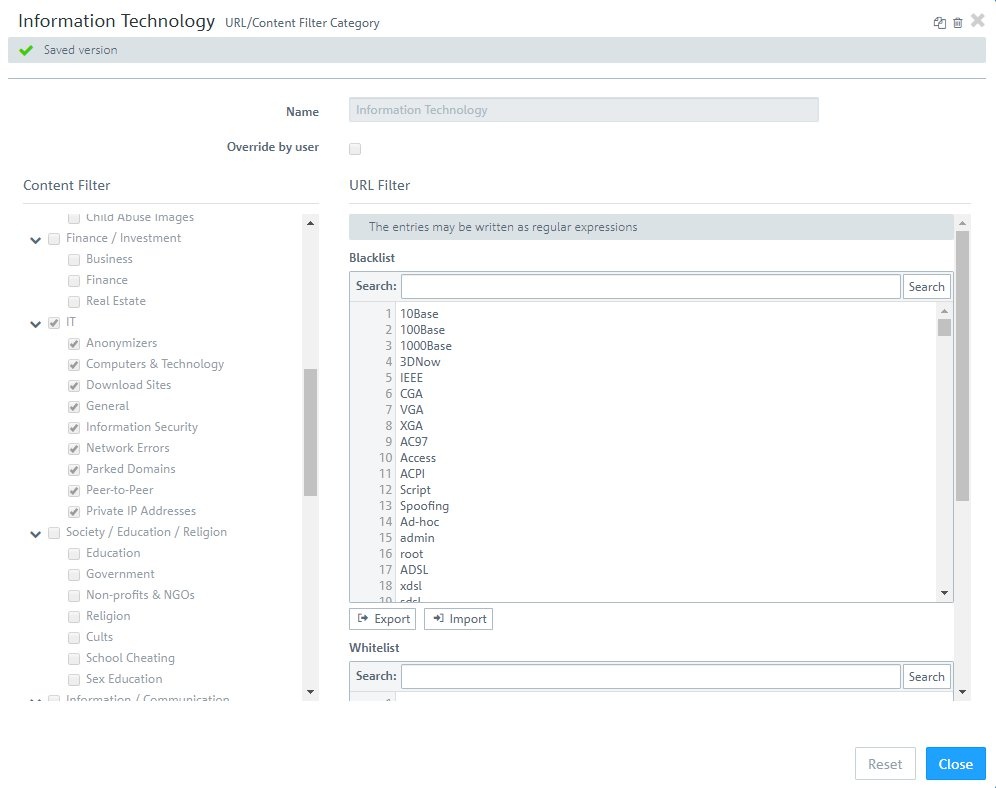
If the blacklist and the whitelist are used in parallel, the whitelist is treated with higher priority.
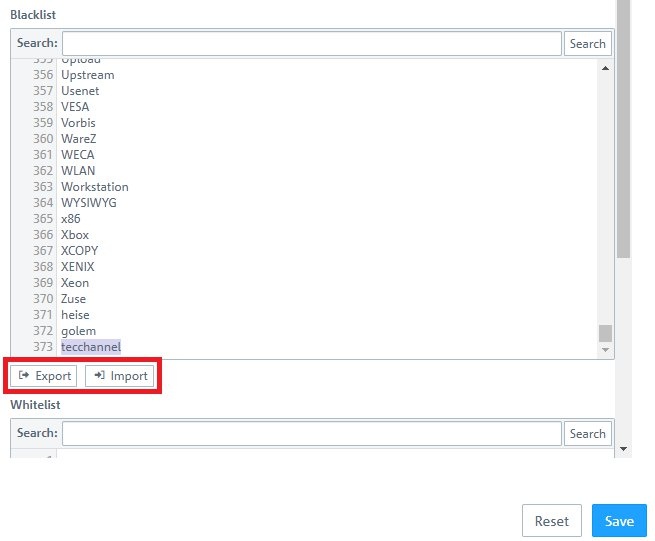
With the function Export the blacklist or whitelist can be exported as a text file and with the function Import it can be imported.
The maximum size of the text file is 1 MB.
- Name: Enter a descriptive name for the profile.
- Override by user: With this option enabled, users can temporarily unblock the category if a website is blocked (also see step 1.2).
- Content Filter: Select the categories to block.
- URL Filter - Blacklist: Enter terms that are contained in undesirable URLs.
- URL Filter - Whitelist: Enter terms that are contained in desired URLs.
If the function Block all by default is activated, all URL and content filter profiles created in the system are activated. Exceptions can then only be permitted via the whitelist.
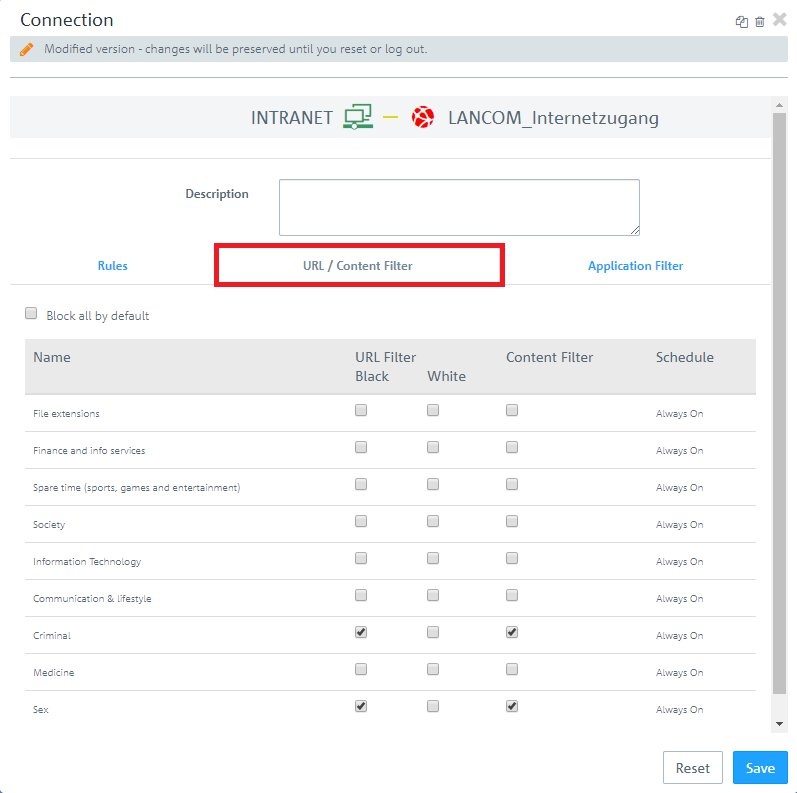
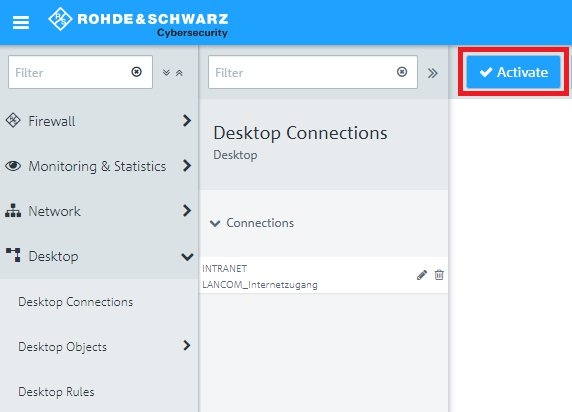
3.3) Click on the Activate button to accept the changes and enable filtering.
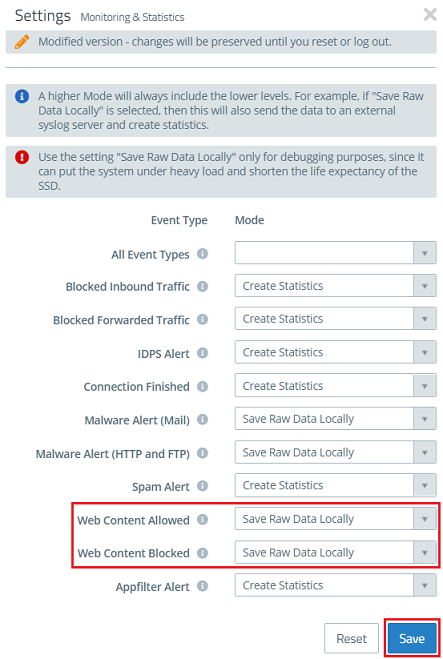
4.1) In the Unified Firewall go to the menu Monitoring & Statistics → Settings and for the parameters Web Content Allowed und Web Content Blocked select the option Save Raw Data Locally , so that messages regarding the URL / Content Filter are logged to the Alert Log . Click Save afterwards.