
Description:
The Administrative distance is used to set up multiple identical static routes to different remote sites. Both routes are permanently enabled. This allows the implementation of simple backup scenarios.
The Administrative distance uses values between 0 and 255. The values 0 and 255 each have a special function:
- Using the value 0 sets the metric according to the defined default values. LANCOM Systems recommends not to use the value 0.
- The value 255 describes the state when there is no connection (interface down). Consequently, this must not be selected for a connection.
- There are Administrative distance default values for routes from other sources (e.g. the value 20 for BGP). LANCOM Systems recommends to only use values between 5 and 14 for static routing entries, so that routing problems are avoided.
The route with the lower Administrative distance is the one that is selected. If this connection fails, the operating system sets the route to the value 255 (interface down) and the routing entry with the lowest Administrative distance becomes active.
The use of the Administrative distance and the Backup table are mutually exclusive.
Requirements:
- LCOS as of version 10.40 (download latest version)
- LANtools from version 10.40 (download latest version)
Scenario:
1) Two internet connections are used for redundant operation:
- The connections INTERNET and INTERNET2 are already set up and functional.
- The connection INTERNET2 should be a backup for INTERNET1.
2) At a remote location without physical access, an IKEv1 connection should be changed to an IKEv2 connection:
- An IKEv1 connection is already set up and functional.
- It should be migrated to IKEv2. For this purpose, the IKEv2 connection is set up in parallel.
Procedure:
1) Two internet connections are used for redundant operation:
When using a plain Ethernet connection, you need to set up ICMP polling so that the router will detect a line failure.
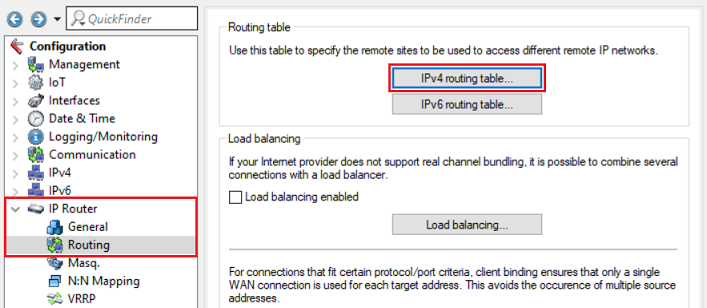
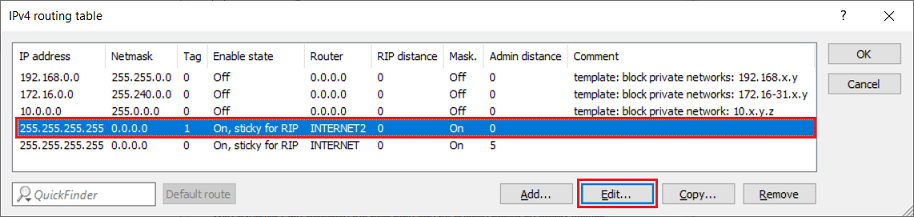
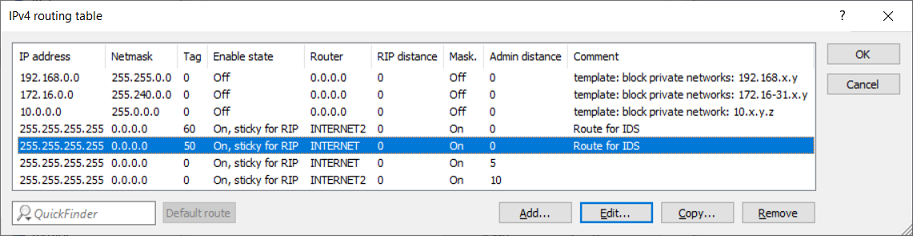
1.1) Open the configuration in LANconfig and switch to the menu item IP router → Routing → IPv4 routing table.
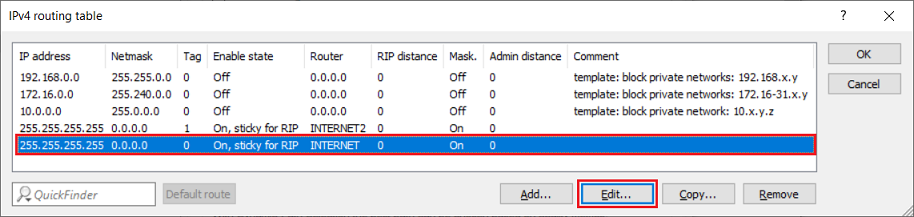
1.2) Select the primary connection (INTERNET) and click on Edit.
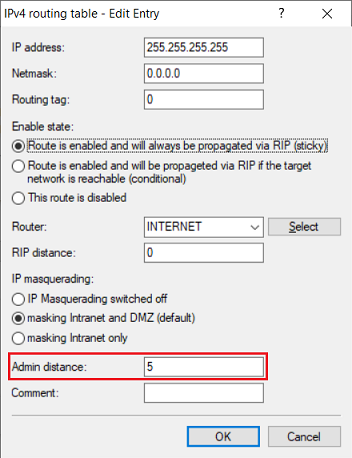
1.3) Enter a value for the Admin distance (in this example 5).
1.4) Select the backup connection (INTERNET2) and click on Edit.
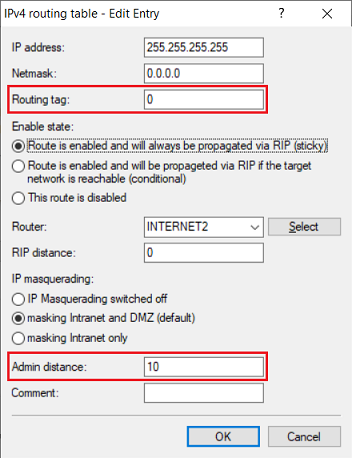
1.5) Change the following parameters:
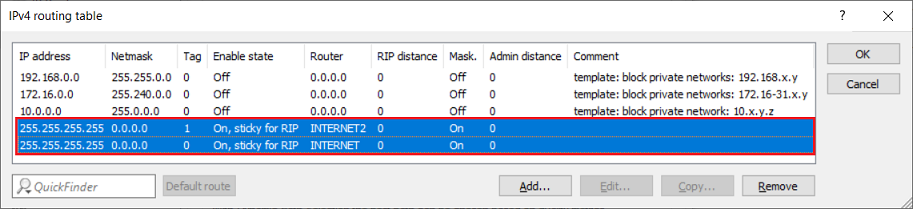
- Routing tag: Set the routing tag to the same value as the primary connection (in this example the tag 0).
- Admin distance: Set the Administrative distance to a value higher than for the primary connection (in this example 10).
1.6) The modified routing entries should then look like this.
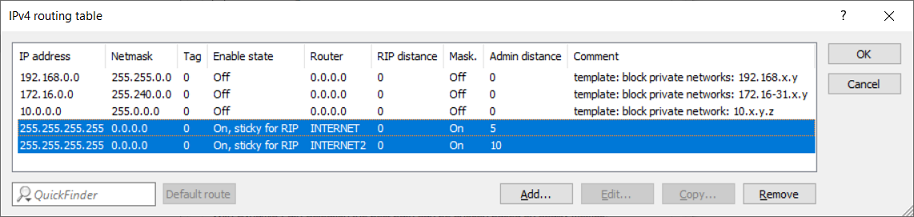
1.7) This concludes the configuration of the backup scenario. Write the configuration back to the router.
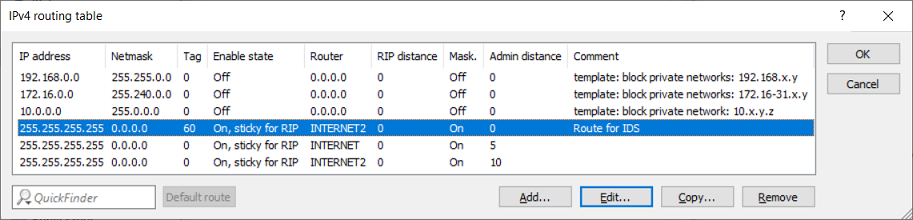
The following workaround only needs to be performed if you are using an LCOS version lower than LCOS 10.70:
If ICMP polling is configured for the backup connection there will be a recurring buildup and breakdown of this connection. This is due to the connection being in the status Interface Down (255) and thus the polling packets can't be transmitted. The packets are therefore discarded by the Intruder detection in the firewall and the message packet received from invalid interface is shown.
In order for the polling to work, a separate default route for the backup connection with an unused routing tag has to be created. In this case the Admin distance does not matter and therefore the value 0 is used.
If ICMP polling is configured for the main connection, a separate default route with an unused routing tag and the Admin distance 0 has to created, as otherwise a switch from the backup connection to the main connection won't be possible due to the Intruder Detection.
2) At a remote location that cannot be accessed, an IKEv1 connection should be changed to an IKEv2 connection:
It is possible to use the Administrative distance to set up an IKEv2 connection in parallel to an existing IKEv1 connection. After the IKEv2 connection has been established, the lower value means it becomes active. If the IKEv2 connection cannot be established, the IKEv1 connection is still there to be used. This guarantees permanent access via VPN without the need for an on-site visit.
This procedure is only useful for migrating from IKEv1 to IKEv2 if there is no access to the remote router (either from the local network or from the Internet).
With connectivity assured, the IKEv1 connection can be deleted using the setup wizard Remove remote site or access and set up again using the setup wizard Connect two local area networks (VPN).
2.1) Preparations on the router at the branch site (BRANCH):
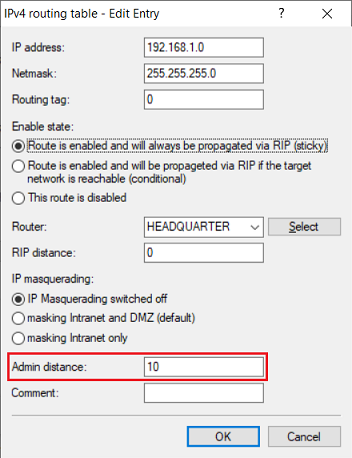
2.1.1) Open the configuration of the branch-site device in LANconfig and switch to the menu item IP router → Routing → IPv4 routing table.
2.1.2) Select the routing entry of the VPN connection (in this example HEADQUARTER) and click on Edit.

2.1.3) Enter a value for the Admin distance (in this example 10).
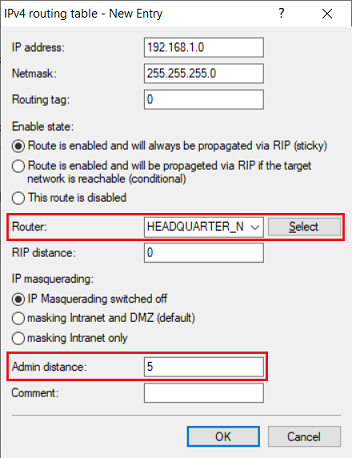
2.2) Configuring the IKEv2 connection:
2.2.1) Manually set up an IKEv2 connection on both routers. The name of the VPN connection must be different from the name of the IKEv1 connection as the names have to be unique.
Do not yet write the configuration back to the branch-site device!
2.2.2) In step 2.10 in the article mentioned above, the option Router requires the IKEv2 connection to be selected and a value must also be set for the Admin distance. This must be lower than the value for the existing IKEv1 connection (in this example the value 5).
2.2.3) This concludes the configuration at the branch site. Write the configuration back to the router.