Description:
This article describes how to configure the basic setup of a WLAN controller.
The enrollment of new access points is described in this Knowedge Base article.
Requirements:
- LCOS as of version 8.50 (download latest version)
- LANtools as of version 8.50 (download latest version)
- WLAN Controller or router with WLC Basic option
Procedure:
1) Assigning the device an IP address in the management network:
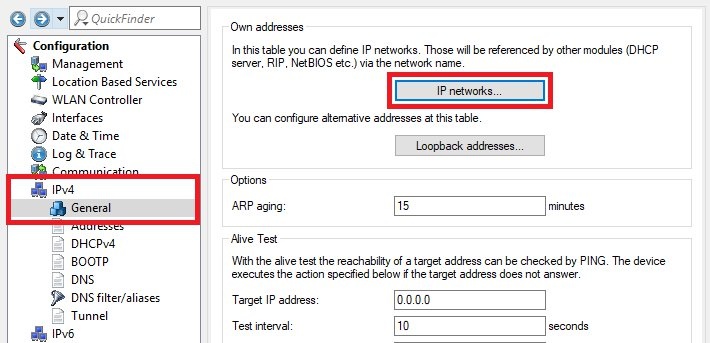
1.1) Open the configuration for the WLAN controller in LANconfig and switch to the menu item IPv4 → General → IP networks.
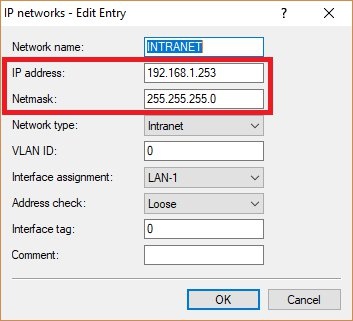
1.2) Edit the entry for the network INTRANET and give the WLAN controller a free IP address in the management network. If necessary, adjust the Netmask too.
2) Activating the CA and the SCEP client:
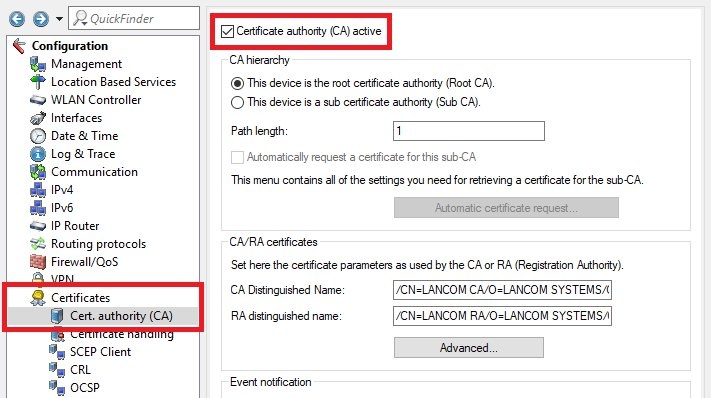
2.1) Switch to the menu Certificates → Cert. authority (CA) and set the checkmark for Certificate authority (CA) active.
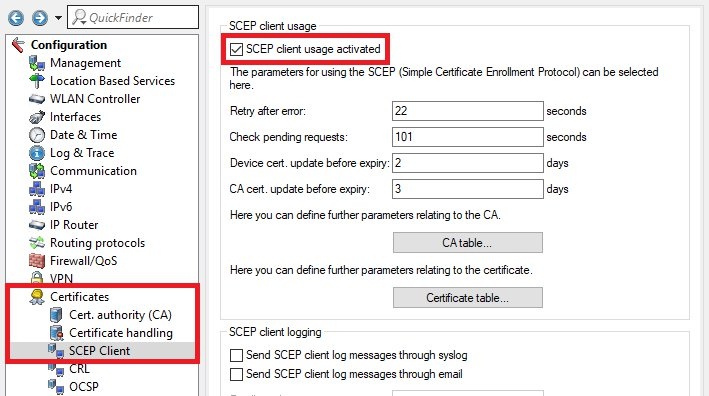
2.2) Go to the menu Certificates → SCEP client and set a checkmark next to SCEP client usage activated.
3) Setting up Internet connectivity (optional):
In some scenarios a WLAN Controller does need to have Internet connectivity. In these scenarios, however, it makes sense to synchronize the time with an NTP server on the Internet.
In scenarios where traffic is routed via the WLAN Controller (e.g. WLC tunnel and Public Spot), the WLAN Controller needs to have a default route to the Internet.
3.1) The WLAN Controller is connected to the Internet via an upstream gateway (unmasked):
In this scenario, the connection is not masked. If communication is required from a separate network and the packets are routed via the WLAN controller, a return route must be configured on the upstream gateway.
The networks set up on the WLAN controller (except for the management network) must not be created on the upstream gateway!
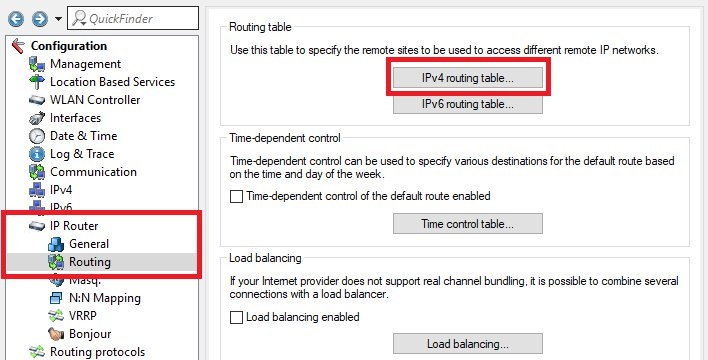
3.1.1) Navigate to the menu IP Router → Routing → IPv4 routing table.
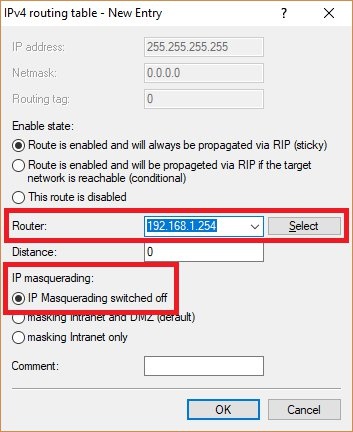
3.1.2) Click on the button Default route to open a template.
3.1.3) Modify the following parameters:
- Router: Enter the IP address of the upstream gateway in the network.
- IP masquerading: Set the radio button to IP masquerading switched off.
This has no effect if masquerading is activated (masking INTRANET and DMZ or masking Intranet only). Masquerading is only possible when using a remote site.
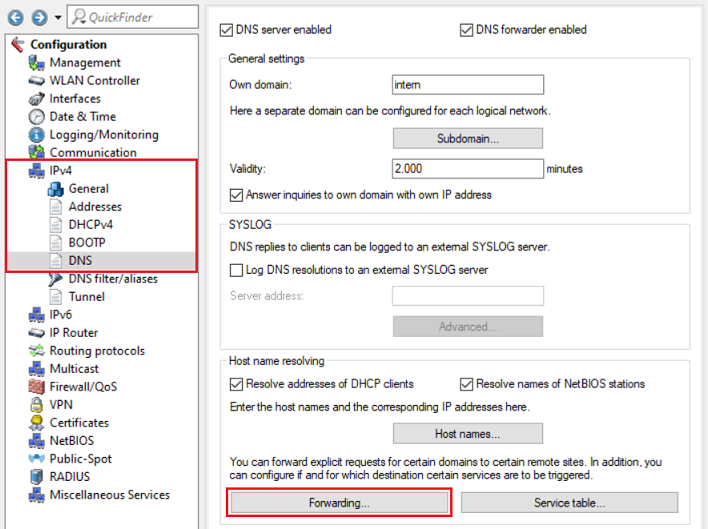
3.1.4) Go to the menu IPv4 → DNS → Forwarding.
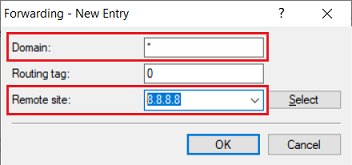
3.1.5) Create a new entry and change the following parameters:
- Domain: Enter the wildcard * (asterisk). It stands for any number of characters.
- Remote site: Enter the IP address of a DNS server (in this example the DNS server 8.8.8.8). It is also possible to enter two DNS servers by using a space character between the two IP addresses.
3.2) The WLAN Controller is connected to the Internet via an upstream gateway (masked):
In this scenario, the connection is not masked. A return route is not required on the upstream gateway.
It is absolutely essential to have a separate intermediate network between the WLAN Controller and the upstream gateway – for example, 192.168.2.0/24 if the management network is 192.168.1.0/24.
3.2.1) Set up a plain Ethernet connection as described in this Knowledge Base article.
3.3) The WLAN Controller establishes a DSL connection via an external DSL modem:
3.3.1) Set up a DSL connection as described in this Knowledge Base article.
4) Setting up time synchronization via an NTP server on the Internet:
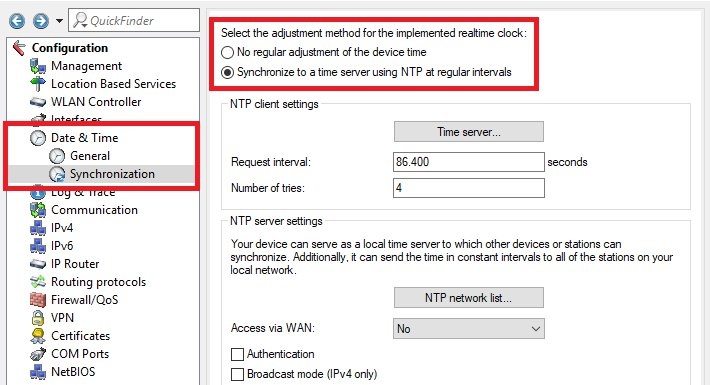
4.1) Switch to the menu Date & Time → Synchronization and select the option Synchronize to a time server using NTP at regular intervals.
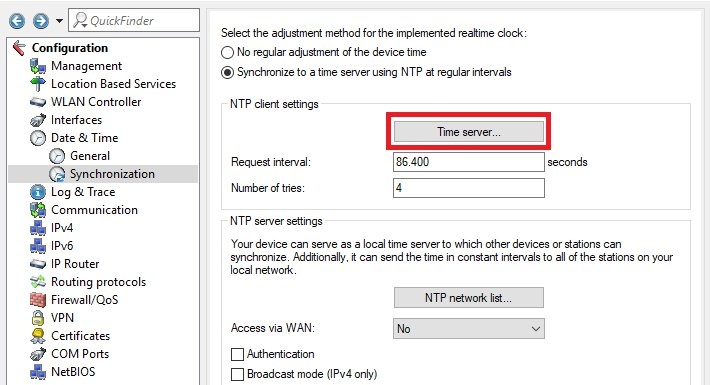
4.2) Go to the menu Time server.
4.3) Enter one or more time servers.
5) Activate the WLAN Controller:
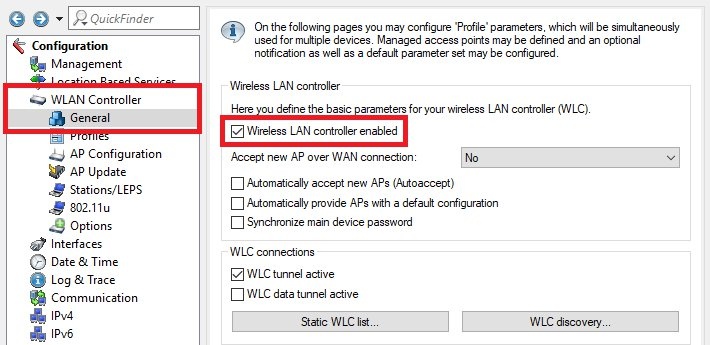
5.1) Go to the menu WLAN Controller → General and set a checkmark for Wireless LAN controller enabled.
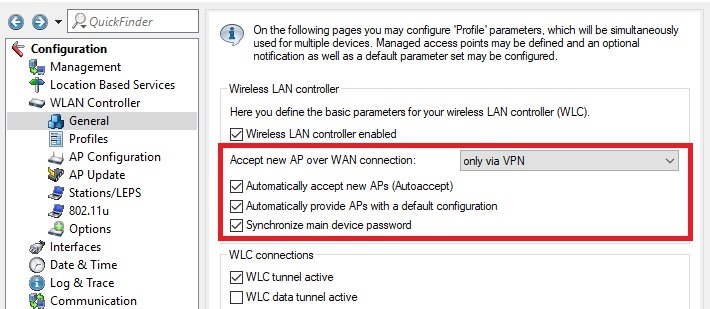
5.2) If necessary, set the following options:
- Accept new AP over WAN connection:
Set this to only via VPN if the WLAN controller is to manage access points at a location connected via VPN. The option Yes is not recommended, as it allows access points to be connected directly via the Internet connection (if available). - Automatically accept new APs (Autoaccept):
Access points without a certificate are automatically assigned a certificate if a WLAN profile is available in the Access point table (WLAN Controller → AP configuration). - Automatically provide APs with a default configuration:
Access points can automatically be assigned a WLAN profile. In this case, the Access point table must contain an entry with the MAC address ff:ff:ff:ff:ff:ff and the relevant WLAN profile. - Synchronize main device password:
The main device password assigned to the WLAN controller is rolled out to the access points.
