
Description:
This document describes how to create time frames in the configuration of LCOS and LCOS LX access points for the automatic and scheduled activation or deactivation of Wi-Fi networks in scenarios managed by a WLC or the LMC.
With the procedures described here, the Wi-Fi modules installed in the access points remain active.
Requirements:
- LCOS as of version 10.50 (download)
- LCOS LX as of version 5.36 (download)
LANtools as of version 10.50 (download)
In order for the scheduling to function properly, it is important for the devices to be set with the current date & time.
Procedure:
1. Standalone access point with LCOS:
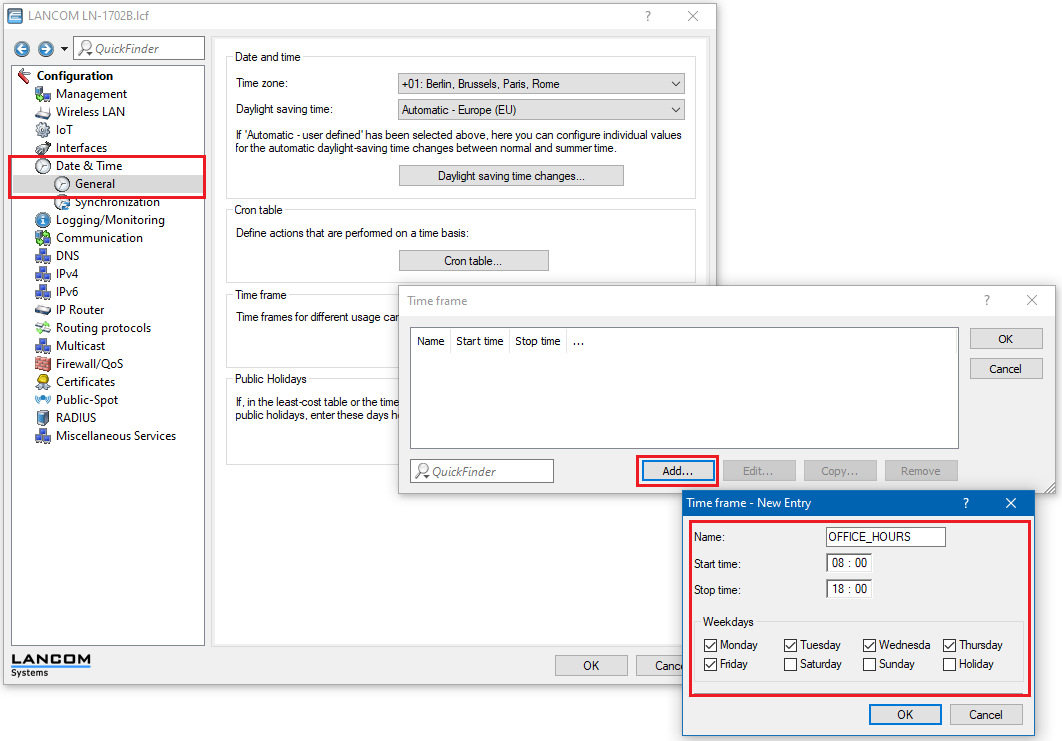
1.1 Open the configuration for the access point in LANconfig and switch to the menu item Date & time → Time frame.
1.2 In this example, an SSID should only be available during working hours from Monday to Friday from 8:00 AM to 6:00 PM.
- Set a unique name for this time frame.
- Set the start time and stop time.
- Set the weekdays.
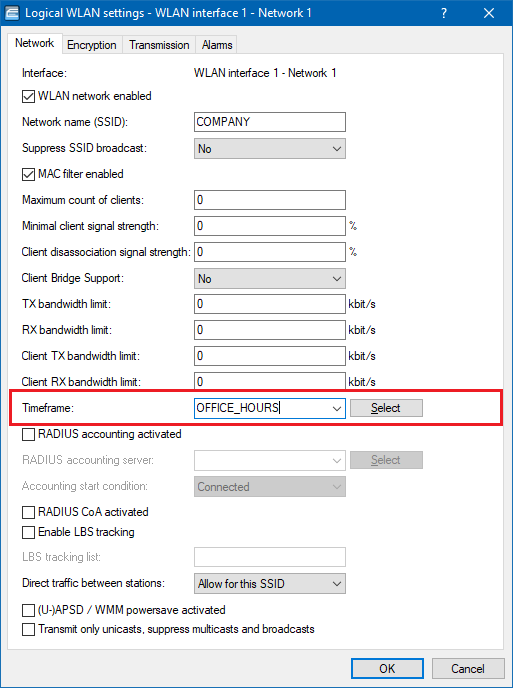
1.3 Go to the menu Wireless LAN → General → Logical WLAN settings →<Name of the SSID>.
1.4 Set the Timeframe for the SSID.
1.5 Write the configuration back to the access point.
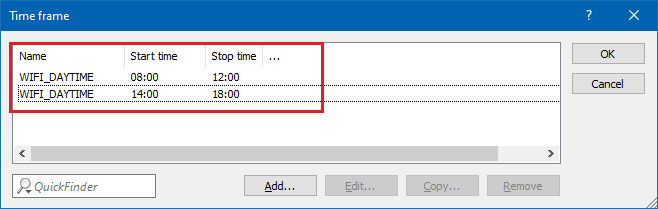
If you wish to activate or deactivate the SSID several times within a time frame, you have to create multiple time frames all with the same name.
The following example shows time frames for an SSID that is active from 8:00 AM to 12:00 PM, is then inactive from 12:00 PM to 2:00 PM, and active again from 2:00 PM to 6:00 PM.
2. Standalone access point with LCOS LX:
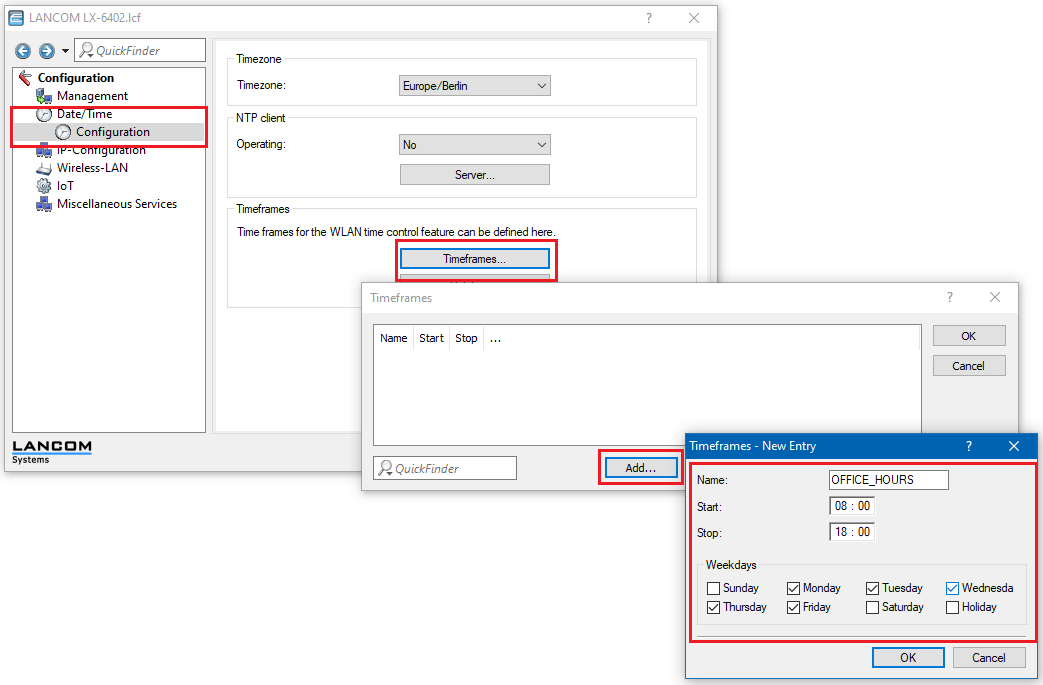
2.1 Open the configuration for the access point in LANconfig and switch to the menu item Date/Time → Configuration → Timeframes.
2.2 In this example, an SSID should only be available during working hours from Monday to Friday from 8:00 AM to 6:00 PM.
- Set a unique name for this time frame.
- Set the start time and stop time.
- Set the weekdays.
2.3 Go to the menu Wireless-LAN → WLAN-Networks → Network →<name of the SSID>.
2.4 Set the Timeframe for the SSID.
2.5 Write the configuration back to the access point.
If you wish to activate or deactivate the SSID several times within a time frame, you have to create multiple time frames all with the same name.
The following example shows time frames for an SSID that is active from 8:00 AM to 12:00 PM, is then inactive from 12:00 PM to 2:00 PM, and active again from 2:00 PM to 6:00 PM.
3. WLC scenario:
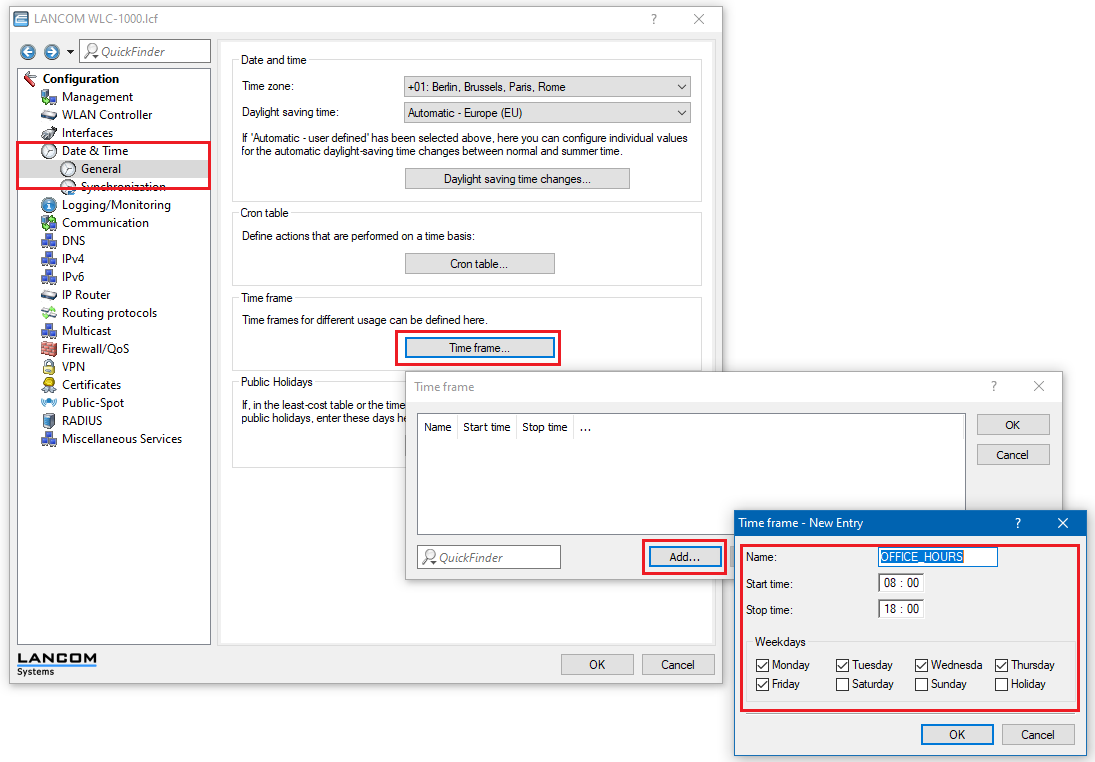
3.1 Open the configuration for the WLAN controller in LANconfig and switch to the menu item Date & Time → Time frame.
3.2 In this example, an SSID should only be available during working hours from Monday to Friday from 8:00 AM to 6:00 PM.
- Set a unique name for this time frame.
- Set the start time and stop time.
- Set the weekdays.
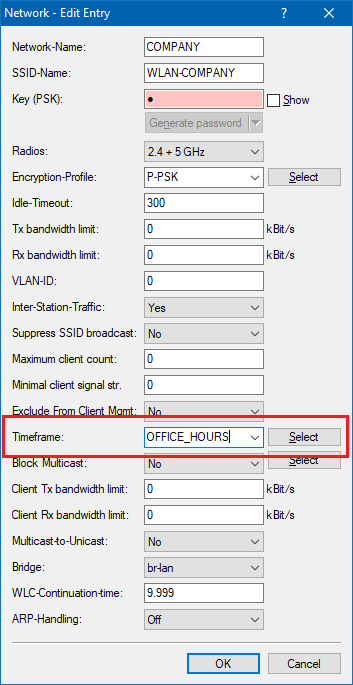
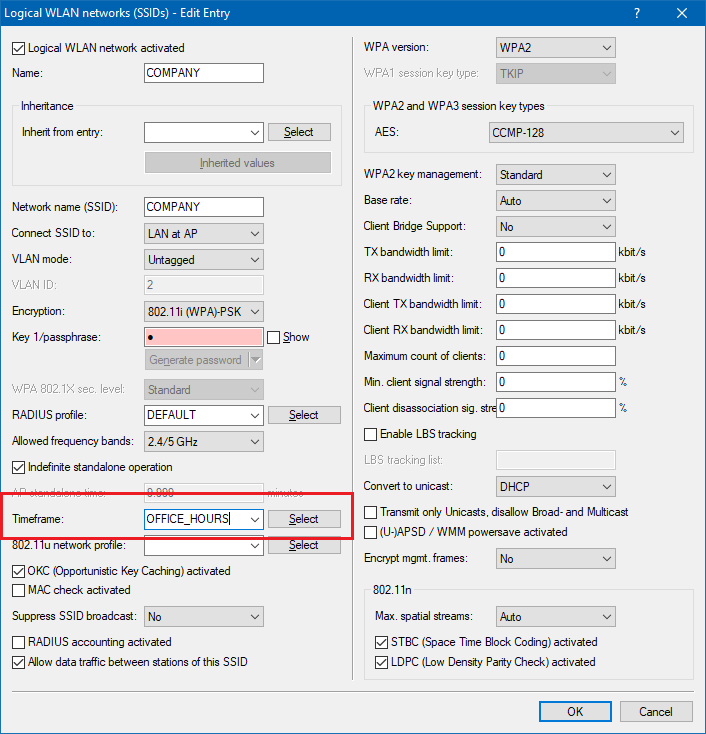
3.3 Go to the menu WLAN-Controller → Profiles → Logical WLAN networks (SSIDs) → <name of the SSID>.
3.4 Set the Timeframe for the SSID.
3.5 Write the configuration back to the WLAN controller.
If you wish to activate or deactivate the SSID several times within a time frame, you have to create multiple time frames all with the same name.
The following example shows time frames for an SSID that is active from 8:00 AM to 12:00 PM, is then inactive from 12:00 PM to 2:00 PM, and active again from 2:00 PM to 6:00 PM.
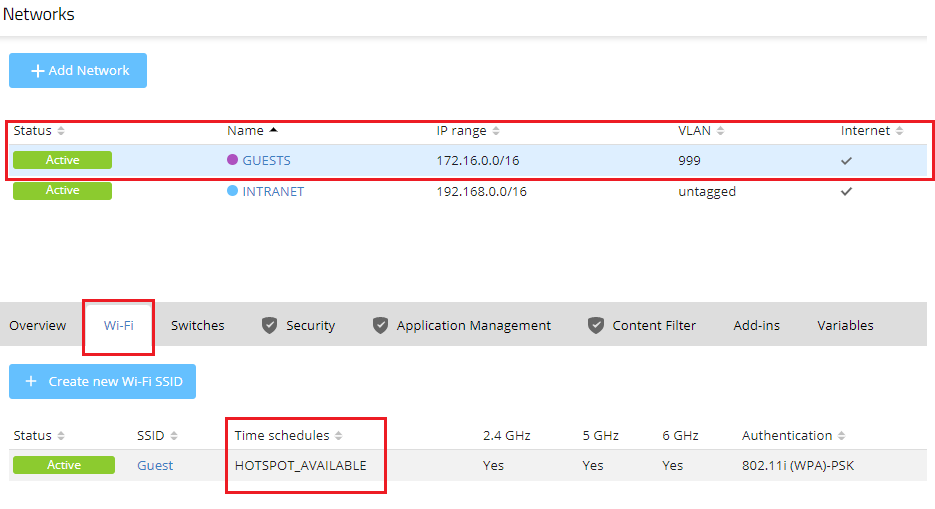
4. LANCOM Management Cloud (LMC):
4.1 Create a schedule in the menu Project specifications → Time schedules. If required, you can configure several individual activation or deactivation times per day.
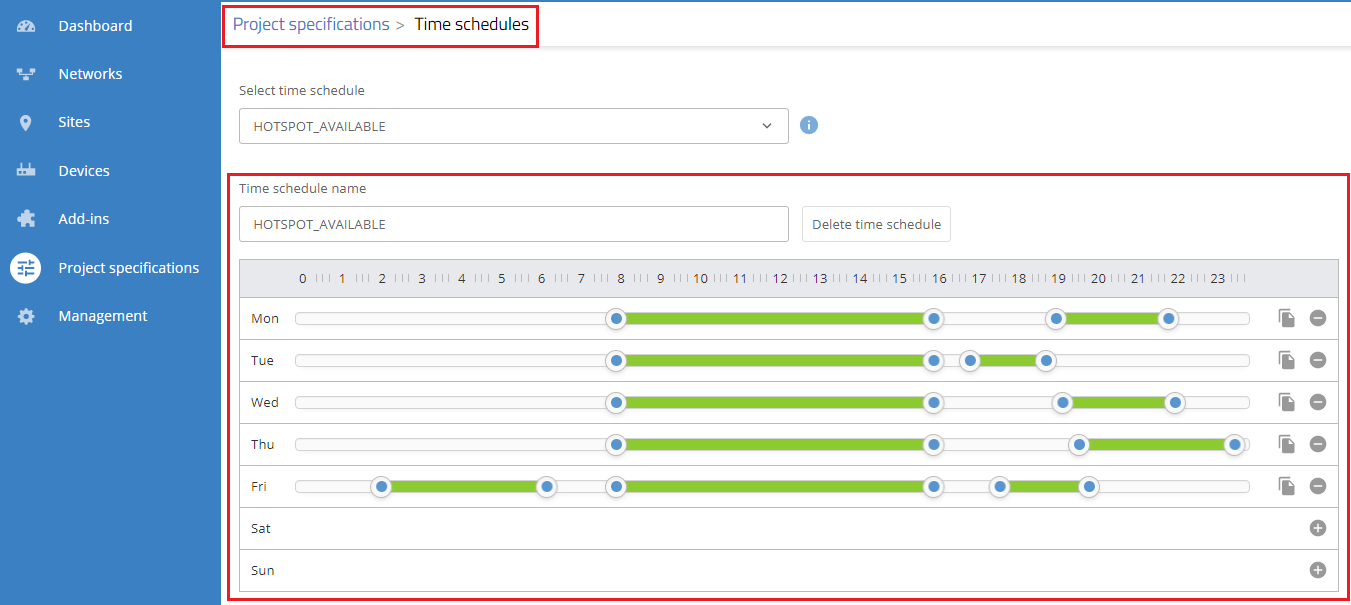
4.2 Switch to the Networks menu and mark the network to which you want to assign a schedule for the Wi-Fi.
4.3 Click the Wi-Fi tab and select the desired SSID.
4.4 Assign the desired schedule to the SSID.
4.5 Save the settings and roll out the configuration to the managed devices.