
Description:
If an access point is installed in a publicly accessible area (e.g. at a school or hotel), we recommend that you use RADIUS authentication to ensure that a client (e.g. a notebook PC) is unable to gain access to the management network even if it is connected by cable to the Ethernet socket that is intended for use by the access point.
This article describes how RADIUS authentication is set up for an access point with LCOS LX so that only this has access to the management network.
Access points that are operated in a WLAN-Controller scenario must each be configured individually. A central configuration of the steps described here via a WLAN-Controller is not possible.
This scenario can also be implemented with LCOS access points.
Requirements:
- LANCOM router as the RADIUS server
- Access point with LCOS LX operating system
- One of the following LANCOM switch models:
- GS-24xx
- GS-3xxx
- XS-3xxx
- LCOS as of version 10.30 on the router which acts as RADIUS server (download latest version)
- LCOS LX as of version 5.20 RU2 (download latest version)
- LCOS SX as of version 4.00 for GS-3xxx (download latest version)
- LCOS SX as of version 4.30 for GS-24xx / XS-3xxx (download latest version)
- LANtools as of version 10.30 (download latest version), 10.40 RU1 when configuring the access point via LANconfig
- Any web browser for accessing the web interface of the GS-3xxx and the access point
Scenario:
- A LANCOM router with the IP address 192.168.1.254 is operating as a RADIUS server.
- A switch of the GS-3xxx series with the IP address 192.168.1.250 is operating as a RADIUS authenticator. The switch therefore forwards the requests from the access point to the RADIUS server.
- An access point with the LCOS LX operating system presents its authorization credentials and logs on to the switch, thus acting as the RADIUS supplicant.
- After a successful login to the RADIUS server, the switch should enable communication on the port that the access point is connected to.

Procedure:
1) Configuring the RADIUS server on the LANCOM router:
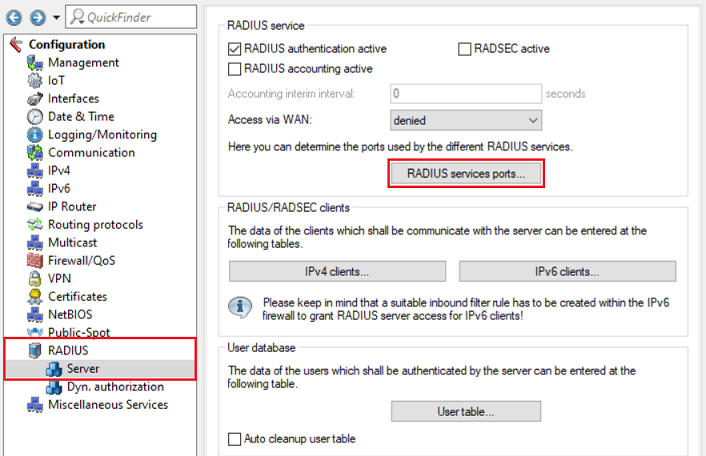
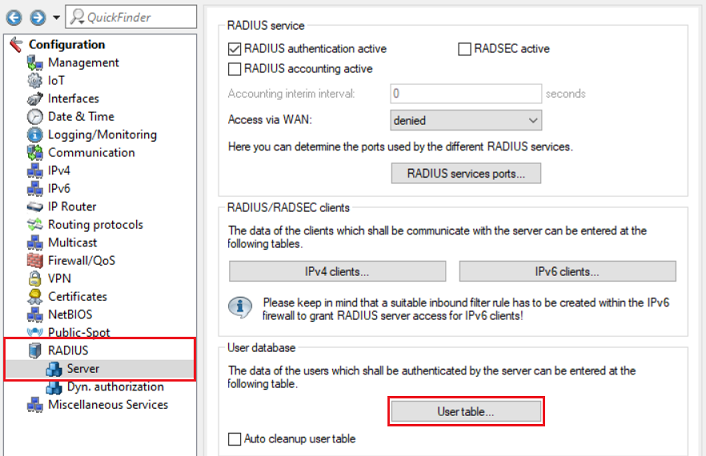
1.1) In LANconfig, open the configuration for the router, navigate to the menu RADIUS → Server and set a checkmark next to RADIUS authentication active.

1.2) Navigate to the menu RADIUS services ports.
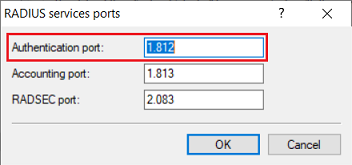
1.3) Check that the authentication port is set to 1812.
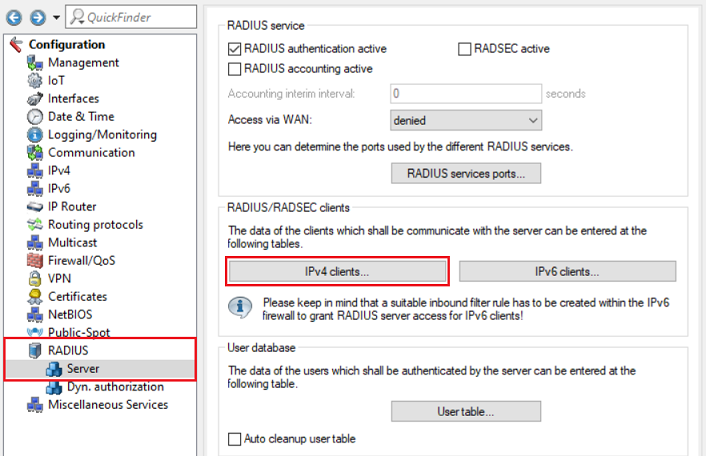
1.4) Go to the menu IPv4 clients.
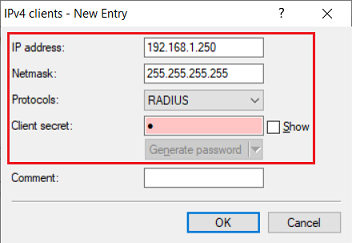
1.5) Create a new entry and enter the following parameters:
- IP address: Enter the switch IP address so that this can authenticate itself as the RADIUS authenticator at the RADIUS server.
- Netmask: Enter the netmask 255.255.255.255. This stands for a single IP address.
- Protocols: Check that the protocol is set to RADIUS.
- Client secret : Enter a password that the switch uses to authenticate itself at the RADIUS server . This is entered on the switch in step 2.1 .
1.6) Go to the menu User table.
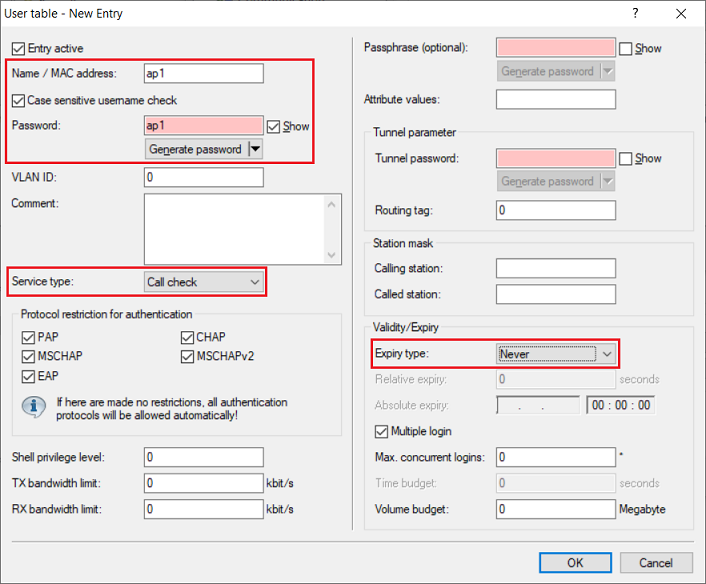
1.7) Create a new entry and adjust the following parameters:
- Name / MAC address: Enter a user name that the access point uses to authenticate itself at the RADIUS server.
- Password: Enter a password that the access point uses to authenticate itself at the RADIUS server.
- Service type: From the drop-down menu, select Call check.
- Expiry type: From the drop-down menu, select Never so that the user account remains permanently valid.
As of SWOS 4.00 RU2 the switch sends RADIUS requests with the Service type Call check. In this case the Service type in this menu als has to be set to Call check. As an alternative the option Any can also be selected.
As of LCOS SX 4.00 RU5 the Service type Framed is used for RADIUS requests and the Service type Call-Check is used for MAC-based requests. In this case the Service type has to be set to Framed. As an alternative the option Any can also be selected.
The Service type Call check is supported as of LCOS 10.30.
1.8) This concludes the configuration of the RADIUS server on the LANCOM router. You can now write the configuration back to the device.
2) Configuring the RADIUS authenticator on the switch:
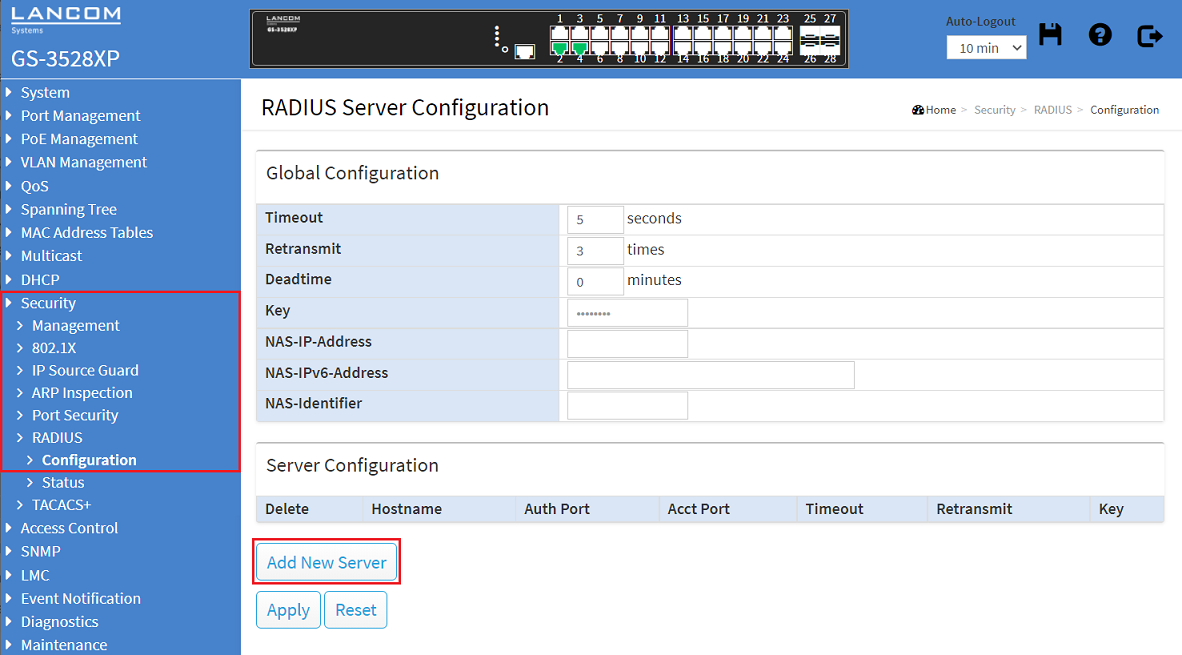
2.1) Open the webinterface of the device, switch to the menu Security → RADIUS → Configuration and click Add New Server.
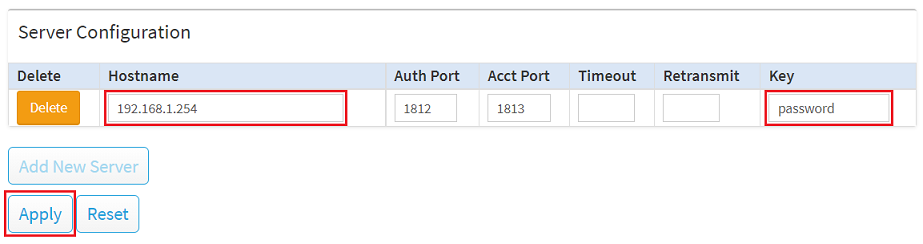
2.2) Modify the following parameters in the Server Configuration and click Apply:
- Hostname: Enter the IP address of the router that was set up as the RADIUS server in step 1.
- Key: Enter the Client secret set in step 1.5. The switch uses this password to authenticate itself at the RADIUS server.
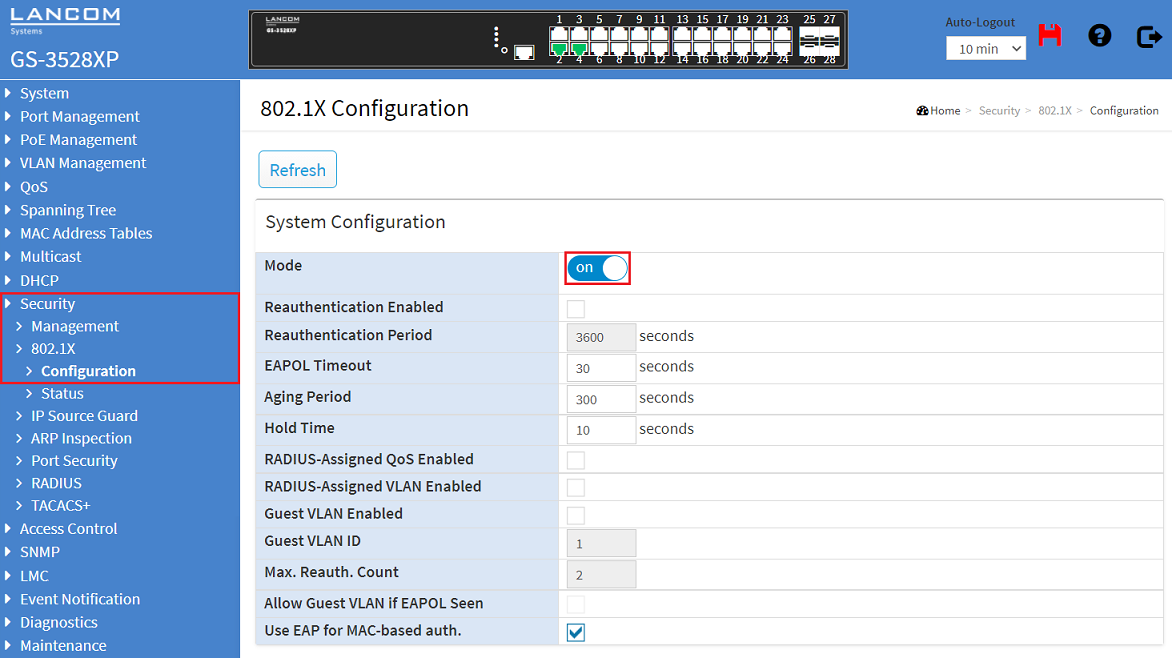
2.3) Go to the menu Security → 802.1X → Configuration and activate the 802.1X authentication by setting the slider Mode to on.
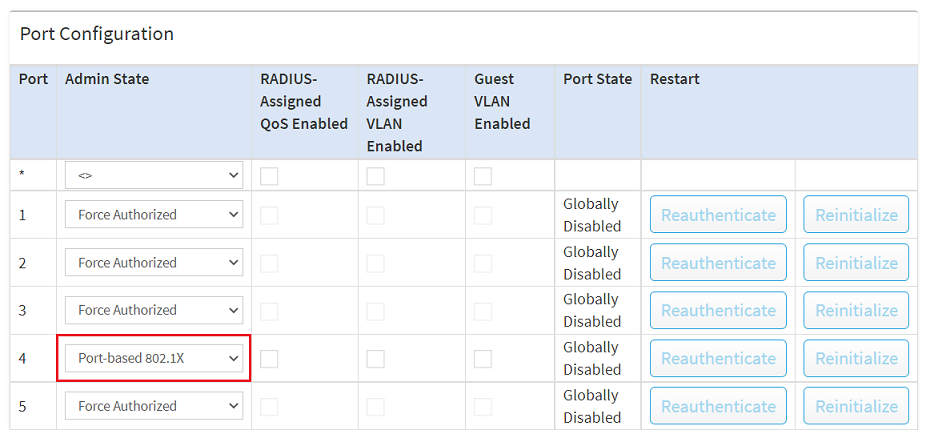
2.4) In the Port Configuration select the Admin State Port-based 802.1X in the dropdown menu for the port that the access point will be connected to. Click Apply afterwards.
With the option Port-based 802.1X, solely the access point should be able to authenticate itself. All other end devices connected via WLAN can communicate via the switch port without authentication. For this reason it is important to provide the WLAN end devices with their own network that is separated from the management network by VLAN. You can use this Knowledge Base article to help you here.

2.5) Click the red disk symbol on the upper right side to save the configuration as Start configuration.
The Start configuration is boot persistent and is therefore available even after a restart or a power failure.

2.6) This concludes the configuration of the switch.
3) Configuring the RADIUS supplicant on the access point:
3.1) Configuring the RADIUS supplicant via LANconfig:
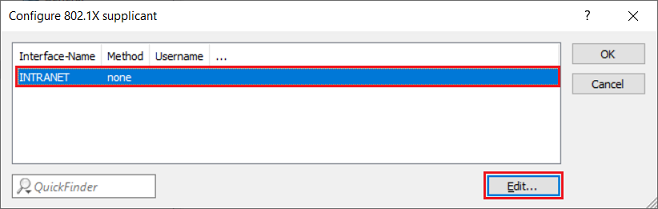
3.1.1) Open the configuration for the access point in LANconfig and switch to the menu item Management → 802.1X-supplicant → Configure 802.1X supplicant.

3.1.2) Edit the entry INTRANET.
3.1.3) Modify the following parameters:
- Method: From the drop-down menu, select MD5. MD5 is used as the standard method in LANCOM routers.
- Username: Enter the Name / MAC address set in step 1.7. The access point uses this to authenticate itself at the RADIUS server.
- Password: Enter the password set in step 1.7. The access point uses this to authenticate itself at the RADIUS server.

3.1.4) The configuration of the access point via LANconfig is now complete. You can now write the configuration back to the device.
3.2) Configuring the RADIUS supplicant via WEBconfig:
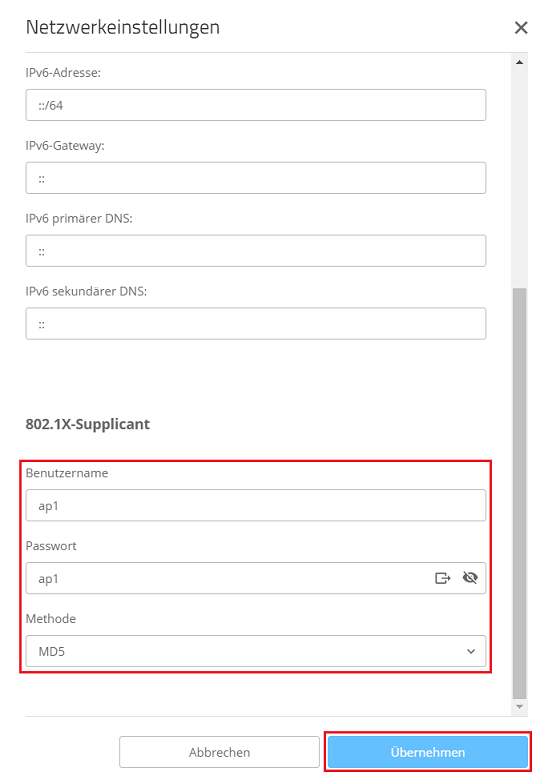
3.2.1) Connect to the access point via WEBconfig and switch to the menu System configuration → Adjust the network settings of this device.
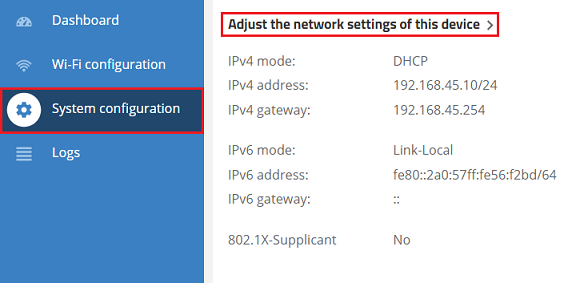
3.2.2) For the 802.1X supplicant, adjust the following parameters and then click on Confirm:
- Username: Enter the Name / MAC address set in step 1.7. The access point uses this to authenticate itself at the RADIUS server.
- Password: Enter the password set in step 1.7. The access point uses this to authenticate itself at the RADIUS server.
- Method: From the drop-down menu, select MD5. MD5 is used as the standard method in LANCOM routers.
3.2.3) The configuration of the access point is now complete.