
Description:
This article describes how you activate and operate the High Scalability VPN function (HSVPN) in the LANCOM Management Cloud (LMC).
What is HSVPN?
LANCOM High Scalability VPN provides maximum extensibility and efficiency for your SD-WAN architectures. Numerous VPN connections are grouped into just one data tunnel without sacrificing the strict separation of routing contexts and the security of a modern IPsec VPN.
The HSVPN protocol scales up large SD-WAN applications with over 50,000 VPN tunnels without causing any additional tunnel overhead or adding any protocols that reduce performance. At the same time, it is a match for MPLS properties such as secure network separation on WAN connections. Further details on HSVPN are available in our tech paper on LANCOM HSVPN .
Requirements:
- LCOS as of version 10.42 (download)
- Access to the LMC including your own project
- You should only activate HSVPN on networks where all of the routers have been updated to a compatible LCOS version.
- Multicast routing is not supported over HSVPN.
- OSPF cannot be used when operating HSVPN.
Procedure:
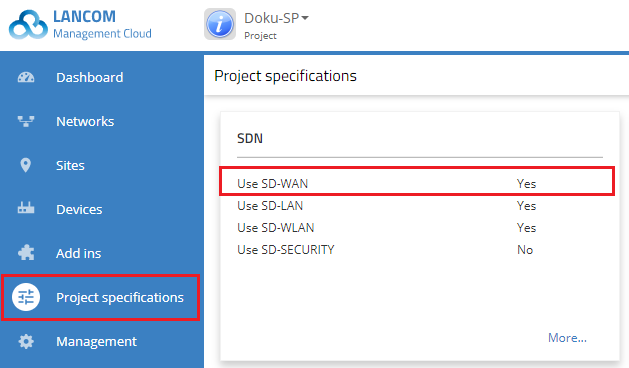
1) To activate HSVPN, you open the Project specifications menu and click the SDN tile.
If you activate HSVPN globally in a project, this initially has no effect on existing VPN connections as the function is deactivated in the network settings by default.
You can subsequently combine existing VPN connections into an HSVPN group in the network configuration (see step 5).
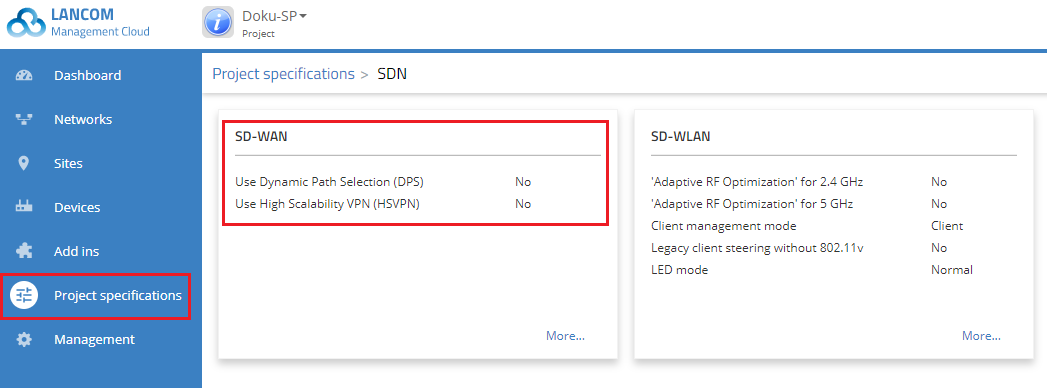
2) In the window that opens, select the SD-WAN tile.
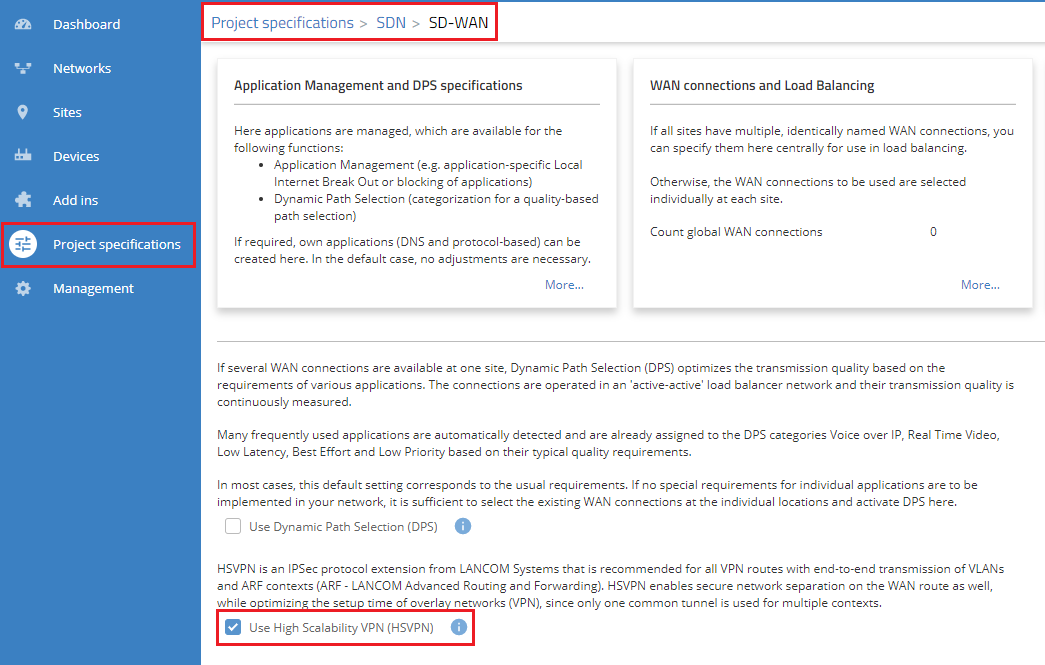
3) Activate the option Use High Scalability VPN (HSVPN) and click on Save.
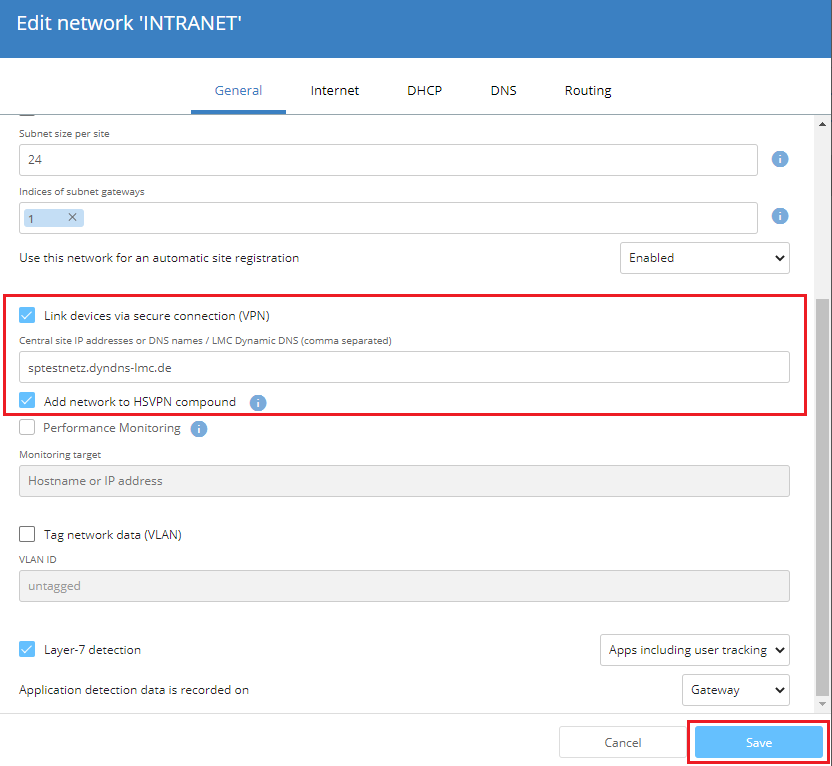
4) To use HSVPN, this has to be activated in the network settings for the respective network.
- Switch to the Networks menu and choose the network in which you wish to use HSVPN.
- You can only select the option Add network to HSVPN compound if the option Link devices via secure connection (VPN) is activated.
5) Click the Save button to accept your changes.
6) Repeat steps 4 and 5 for all further networks that you wish to add to the HSVPN network.
7) Finally, you need the roll out the configuration to the devices again.
- Select all devices for which the configuration is specified as "Outdated" and then click on Configuration roll out.
