
Description:
This article describes how to configure Link Aggregation (LACP) on a LANCOM switch via the LANCOM Management Cloud (LMC).
In contrast to a Static Trunk the feature LACP supports a dynamic negotiation, thus enabling the Trunk to remain active when a line fails. LANCOM Systems therefore recommends to always use LACP when combining switch ports to a trunk.
Requirements:
- LMC access (subject to charge) with an existing LMC project and licenses for all LANCOM devices used
- One of the following LANCOM switch series:
- GS-23xx
- GS-24xx
- GS-3xxx
- XS-3xxx
- XS-51xx / XS-61xx
- GS-45xx / XS-45xx
- CS-8132F
- YS-7154CF
- GS-23xx
- LCOS SX as of version 3.32 RU7 for GS-23xx (download latest version)
- LCOS SX as of version 4.00 RU6 for GS-3xxx (download latest version)
- LCOS SX as of version 4.30 for GS-24xx / XS-3xxx (download latest version)
- LCOS SX as of version 5.20 for XS-51xx / XS-6128QF (download latest version)
- LCOS SX as of version 5.20 for GS-45xx / XS-45xx (download latest version)
- LCOS SX as of version 5.30 for CS-8132F and YS-7154CF (download latest version)
- Any Web browser for accessing the webinterface
- Preconfigured and functional networks in the LMC (already rolled out to the switch)
Procedure:
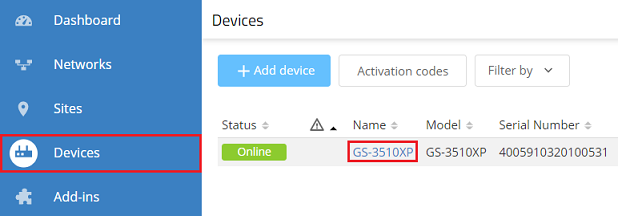
1) Connect to the LMC, go to the menu Devices and click the switch Name (in this example GS-3510XP).
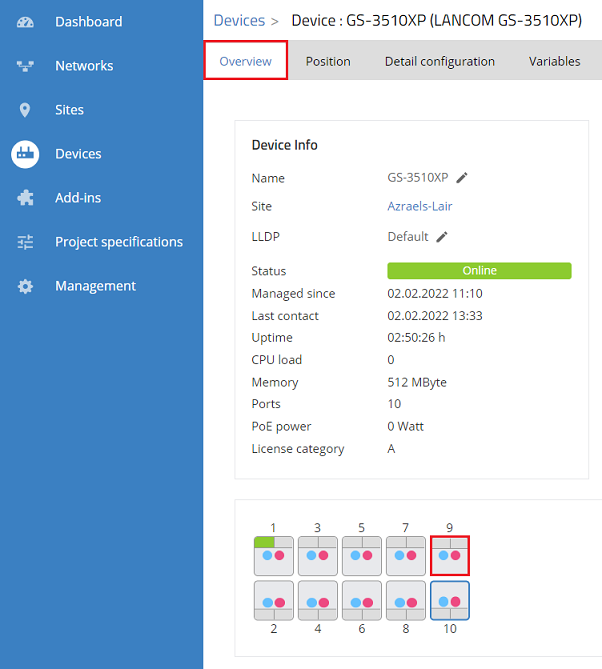
2) In the Overview click on a port, where Link Aggregation is to be configured (in this example port 9).
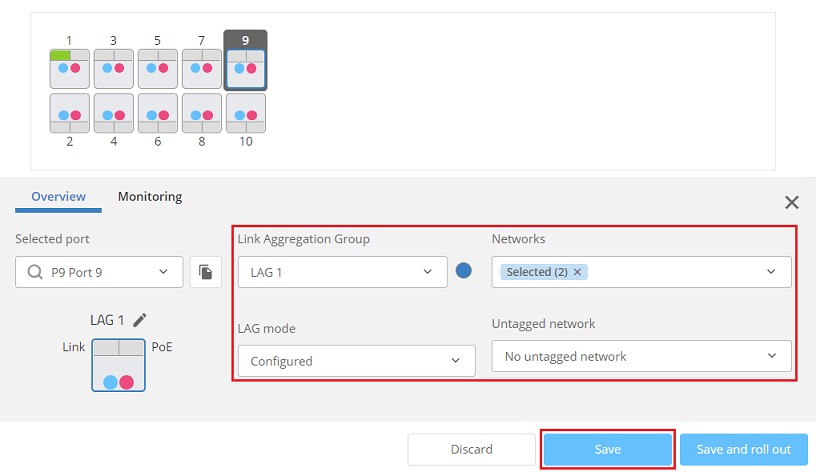
3) Modify the following parameters and click Save:
- Link Aggregation Group: Select a Link Aggregation Group (in this example LAG 1).
- LAG mode: Select the option Configured, in order for Link Aggregation to be activated.
- Networks: Select the Networks to be transmitted via the link.
- Untagged network: Optionally you can specify a network which is transmitted untagged. In this example the default setting No untagged network is used.
The LAG modes No network and Deactivated must not be used, as both deactivate Link Aggregation as well as VLAN.
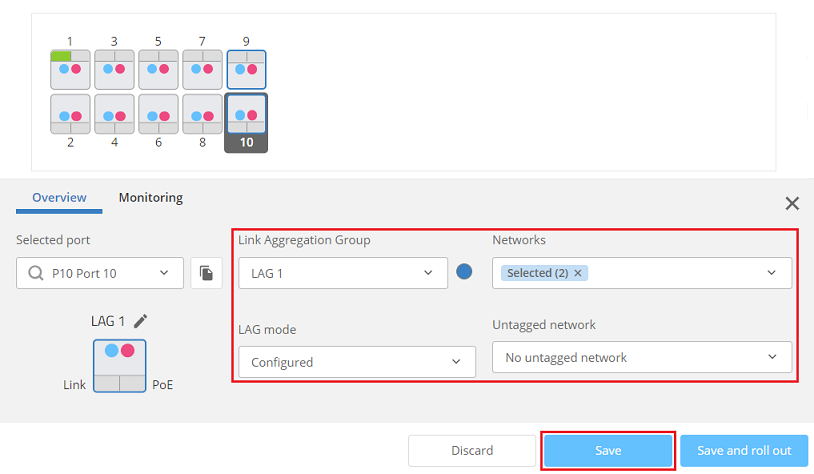
4) Select an additional port (in this example port 10) and select the same Link Aggregation Group as for the first Link Aggregation port (see step 3). The remaining parameters are automatically set analogous to the settings made for the first Aggregation port.
Click Save afterwards.
As an alternative you can also click the button Save and roll out. This skips the steps 5 - 7.
5) Go to the menu Devices, select the switch and click on the "three-dots" menu on the upper right corner.

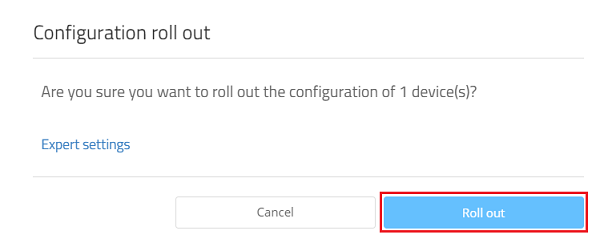
6) Click on Configuration roll out.

7) Acknowledge the prompt by clicking Roll out.
8) If necessary, repeat the steps 1 - 7 for an additional switch, which is to be connected to the first switch via Link Aggregation (if this switch is also managed by the LMC).