Description:
This article describes how an access point with an ePaper radio module (either with an integrated ePaper radio module or with the Wireless ePaper USB) can be connected to an ePaper server.
The ePaper server was discontinued in January 2024 (End of Sale). Therefore LANCOM Systems will not provide support for new installations of the ePaper server. LANCOM Systems will provide support for existing ePaper server installations up to and including January 2026.
Requirements:
- Access point with LCOS LX and an integrated ePaper radio module or the Wireless ePaper USB
- LCOS LX as of version 6.10 (download latest version)
- LANtools from version 10.72 (download latest version)
- Any web browser for accessing the access point via WEBconfig
- SSH client for command-line access to the access point (e.g. PuTTY)
Procedure:
1) Enabling TCP for ePaper communication:
Enable TCP for ePaper communication on the ePaper server. This is necessary because access points with LCOS LX only support communication via TCP.
This is described in the following Knowledge Base article:
LANCOM Wireless ePaper Server: Enabling the TCP-based ePaper communication protocol (ThinAP2.0)
2) Configuration steps on the access point:
The ePaper radio modules of access points with LCOS LX (either with an integrated ePaper radio module or with the Wireless ePaper USB) cannot be managed by a WLAN controller, so the ePaper configuration must be done manually on each access point.
2.1) Configuring with LANconfig:
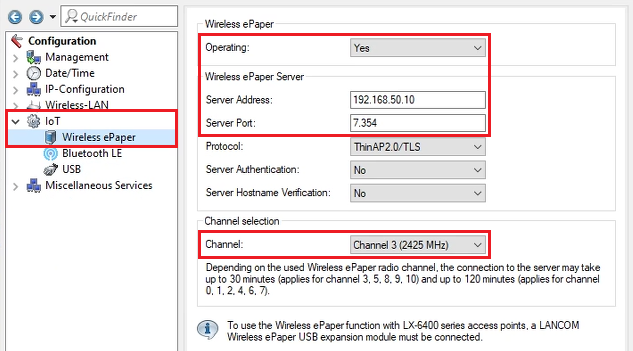
2.1.1) Open the access point configuration in LANconfig and go to the menu item IoT → Wireless ePaper.
Modify the following parameters:
- Operating: From the drop-down menu, select the option Yes.
- Server address: Enter the IP address of the ePaper server (in this example 192.168.50.10).
- Server port: Check that the port is set to 7354.
- Channel: From the drop-down menu, select a channel to be used by the ePaper radio module.
When selecting a channel, the channels 3, 5, 8, 9 and 10 should be preferred, as they allow faster connection establishment to the displays (see description under Channel selection). If several ePaper access points are used, note that neighboring access points should use different channels so that they do not interfere with one another.
2.1.2) This concludes the configuration of the ePaper parameters on the access point. You can now write the configuration back to the device.
2.2) Configuring with WEBconfig:
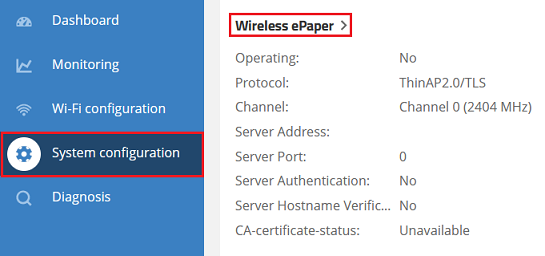
2.2.1) Use WEBconfig to connect to the access point and go to the menu System configuration → Wireless ePaper.
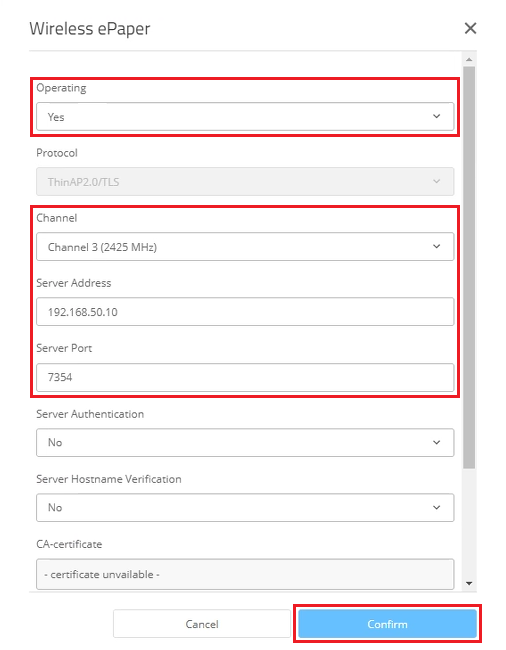
2.2.2) Modify the following parameters and click Confirm:
- Operating: From the drop-down menu, select the option Yes.
- Channel: From the drop-down menu, select a channel to be used by the ePaper radio module.
- Server address: Enter the IP address of the ePaper server (in this example 192.168.50.10).
- Server port: Check that the port is set to 7354.
When selecting a channel, the channels 3, 5, 8, 9 and 10 should be preferred, as they allow faster connection establishment to the displays. If several ePaper access points are used, note that neighboring access points should use different channels so that they do not interfere with one another.
2.2.3) This concludes the configuration of the ePaper parameters on the access point.
3) Connecting the ePaper access point to the ePaper server:
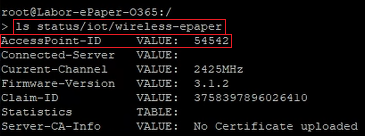
3.1) Use the command line to connect to the ePaper access point by entering the command ls Status/IoT/Wireless-ePaper. Copy the AccessPoint-ID and save it in a text file.
With the Wireless ePaper USB, the AccessPoint-ID is also printed on the stick itself.
For access points with LCOS LX and an integrated ePaper radio module, the AccessPoint-ID (AP-ID) is also noted on a print on the bottom of the device.
3.2) In LANconfig click Tools → Start Wireless ePaper management.
Alternatively, you can also call up the ePaper server directly in the web browser.

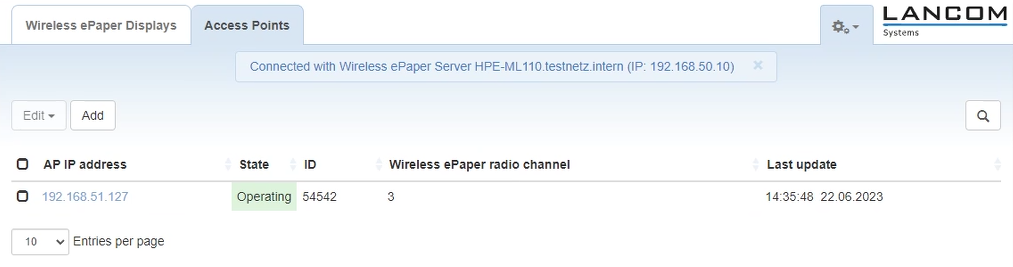
3.3) On the ePaper server, go to the Access Points tab and click Add.

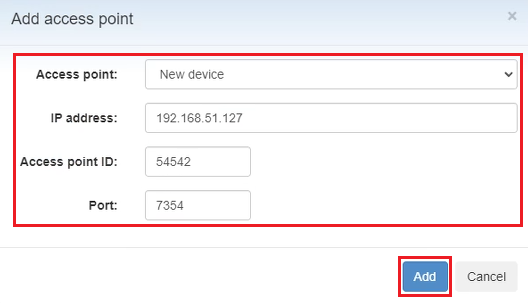
3.4) Modify the following parameters and then click Add:
- Access point: From the drop-down menu, select the option New device.
- IP address: Enter the IP address of the ePaper access point.
- Access point ID: Enter the AccessPoint-ID of the ePaper access point read out in step 3.1.
- Port: Enter port 7354.
3.5) After about one to two minutes (max.) the access point appears in the administration and can then be used.