
Description:
In a WLAN controller scenario, it may be useful for access points (LCOS LX) that operate a P2P link to be managed by the WLAN controller in order for the SSIDs configured there to be broadcast as well. However, there are potential pitfalls that could stop data can being transmitted over the P2P link, or that it stop working altogether.
This article provides recommendations for operating LCOS LX access points configured with a P2P link in a scenario with a WLAN controller.
LANCOM Systems makes the following recommendations. On specific grounds, LANCOM Systems recommends that access points running a P2P link should operate in standalone mode. As a consequence, LANCOM cannot provide any support in installing and analyzing a scenario of this type.
Requirements:
- LCOS LX as of version 6.10 (download latest version)
- LCOS as of version 10.72 on the WLAN controller (download latest version)
- LANtools as of version 10.72 RU1 (download latest version)
- Installed and functional P2P link between two access points with LCOS LX
- Installed and functional WLAN controller scenario
Procedure:
1. Manually enter the VLAN ID(s) of the required SSID(s) into the P2P link configured on the access points:
The P2P link of access points based on LCOS LX cannot be configured on a WLAN controller. If the Wi-Fi parameters are rolled out from the WLAN controller to the corresponding access points, any change to the Wi-Fi profile on the WLAN controller will cause the connection to the P2P link on the Wi-Fi network to be deleted on the access points. The result is that data can no longer be transmitted between the Wi-Fi network and the P2P link.
As a workaround, the VLAN IDs of the Wi-Fi networks can be stored manually in the P2P link on the access points so that the Wi-Fi network and P2P link remain connected.
Carry out the following steps on all access points in the P2P pair.
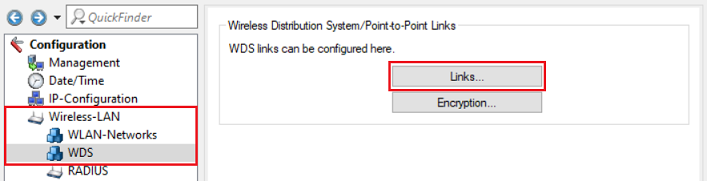
1.1) Open the configuration for the access point in LANconfig and go to the menu item Wireless-LAN → WDS→ Links.
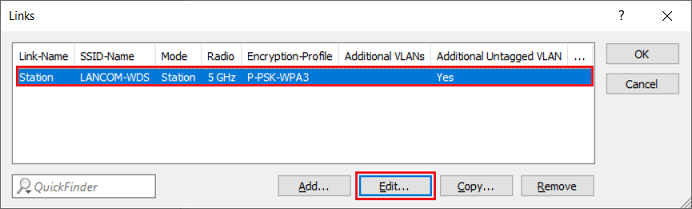
1.2) Select the P2P link (WDS) and click Edit.
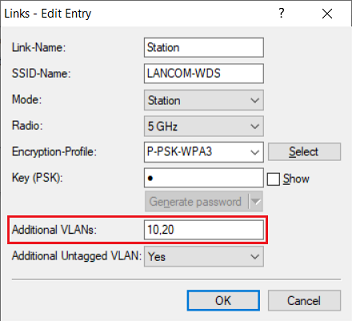
1.3) For the additional VLANs, enter the VLAN IDs of the Wi-Fi networks which are to be transmitted via the P2P link. These are entered as a comma-separated list (e.g 10,20).
If an untagged VLAN is also to be transmitted over the P2P link, enable the option Additional Untagged VLAN. This option is enabled by default, so normally there is no change required here.
1.4) This concludes the configuration of the access point. You can now write the configuration back to the device.
2. On the WLAN controller, set up a dedicated Wi-Fi profile for access points with the P2P link:
When the WLAN controller changes the radio settings, it can occur that the Wi-Fi parameters are rolled out first to an access point that is connected by LAN. This then restarts its Wi-Fi so that the access point that can only be reached via the P2P link is no longer able to receive the Wi-Fi parameters and cannot reconfigure its Wi-Fi. If the Wi-Fi parameters are now incompatible, the P2P link can no longer be established. Unfortunately, it is not possible to influence the order in which the access points receive their Wi-Fi configuration.
If the P2P link operates on the 5-GHz band and the Wi-Fi parameters are rolled out, the Wi-Fi module restarts and the mandatory DFS scan is carried out. The P2P link then remains interrupted until the DFS scan is complete.
To avoid this, it makes sense to create a separate Wi-Fi profile (along with a separate physical profile) for the affected access points so that the P2P link is not interrupted when changes are made to the normal physical profile. Changes to the physical profile for the access points in the P2P pair, on the other hand, should rarely be necessary.
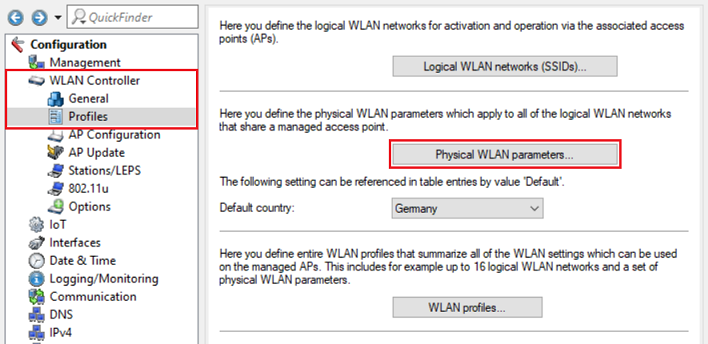
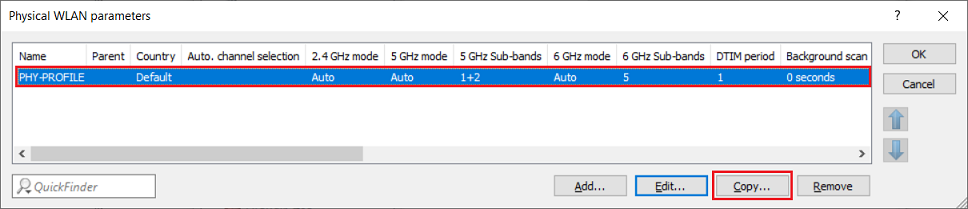
2.1) Using LANconfig, connect to the WLAN controller and navigate to the menu WLAN Controller → Profiles → Physical WLAN parameters.
2.2) Select the existing profile and click Copy to create a profile for those access points in the P2P pair that have the same parameters.
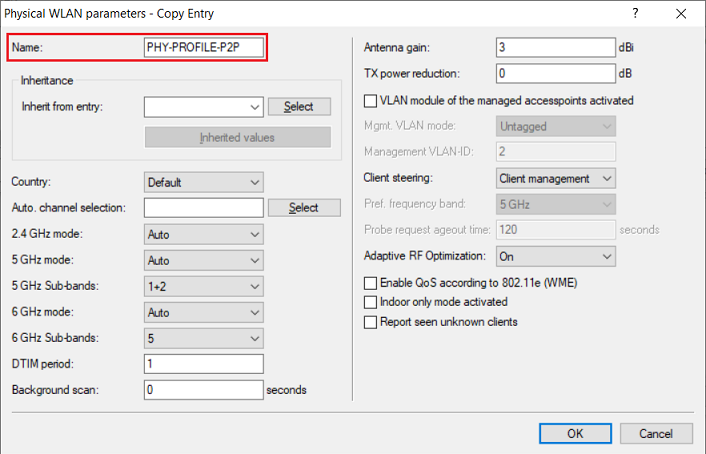
2.3) Adjust the Name of the physical profile.
You can adjust the physical parameters if necessary.
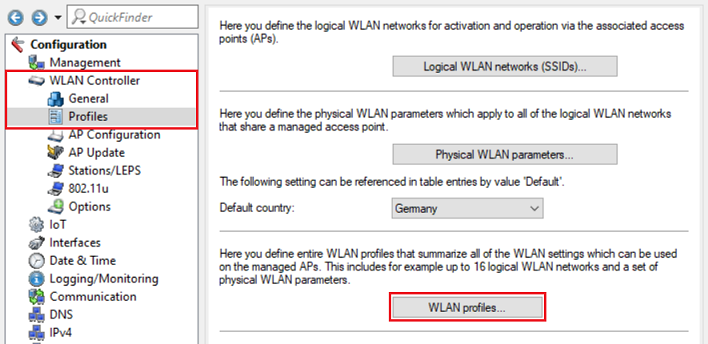
2.4) Navigate to the menu WLAN controller → Profiles → WLAN profiles.
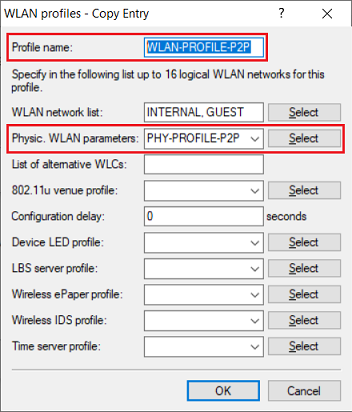
2.5) Select the existing profile and click Copy to create a profile for those access points in the P2P pair that have the same parameters.
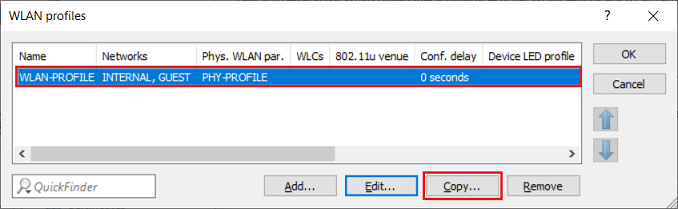
2.6) Adjust the profile name and, under Physic. WLAN parameters, select the physical profile created in step 3.
You can adjust the logical Wi-Fi parameters if necessary.
2.7) This concludes the configuration of the WLAN controller. You can now write the configuration back to the device.