
Description:
This document deals with a number of reasons why data transmission may not be possible even if you have successfully established a VPN connection with the LANCOM Advanced VPN Client.
Requirements:
- LANCOM Advanced VPN Client as of version 3.x (download latest version)
- LCOS as of version 9 (download latest version)
- LANtools as of version 9 (download latest version)
Scenario:
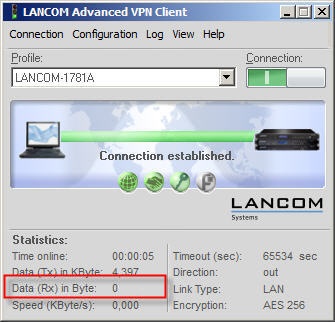
It is impossible to communicate via the VPN tunnel, even though the tunnel has been established. As illustrated in the image below, the VPN connection is established, but we have not received any RX data packets from the remote network.
Procedure:
The following settings should solve the problem:
Step 1:
1.1) Check if NAT-traversal is activated on the remote router you wish to connect to in the menu item VPN → General.

Step 2:
Check the order or the network adapters as found by your operating system.
Windows Vista, Windows 7 & Windows 8:
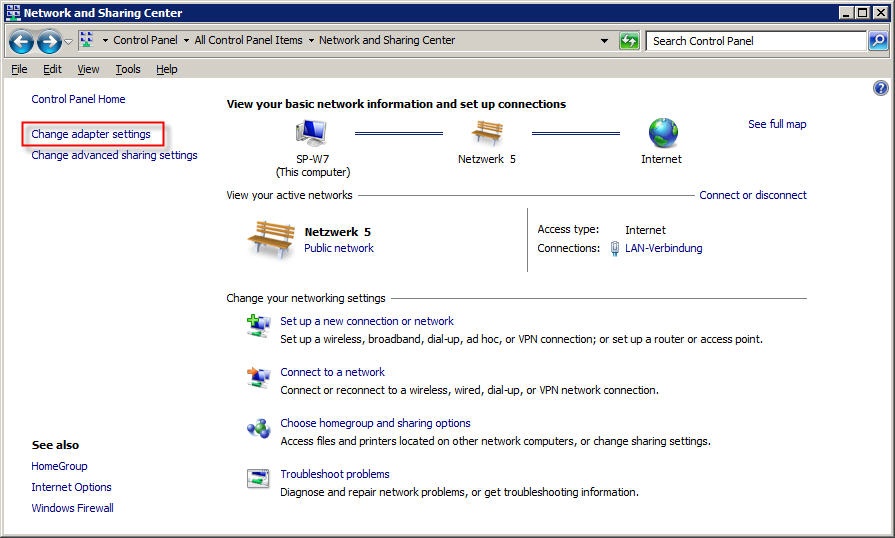
2.1) Open the Network and Sharing Center via Control Panel → Network and Sharing Center.
2.2) Click on the option Change adapter settings.
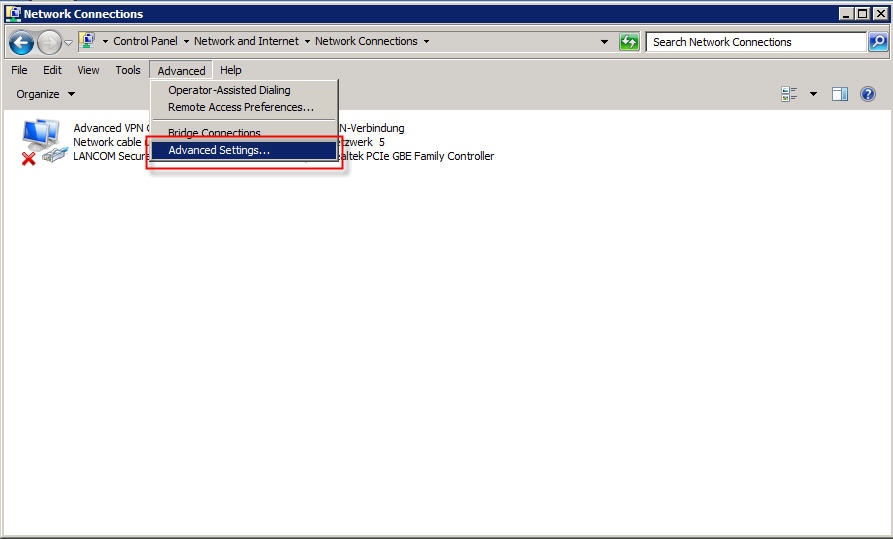
2.3) Open you the menu Advanced → Advanced settings.
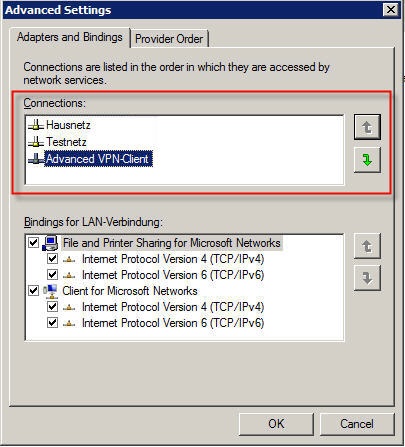
2.4) Re-order your network adapters as follows:
- First position: Physical network adapter
- Middle position: WLAN network adapters, Firewire, UMTS, etc.
- Final position: Virtual network adapter LANCOM Advanced VPN Client
These changes come into effect after the computer's operating system is restarted.
Step 3:
Add the remote local IP network to the VPN configuration of the LANCOM Advanced VPN Client.
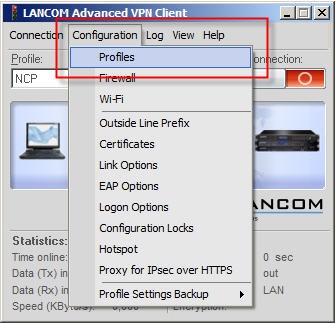
3.1) In the LANCOM Advanced VPN Client, open the menu Configuration → Profiles.
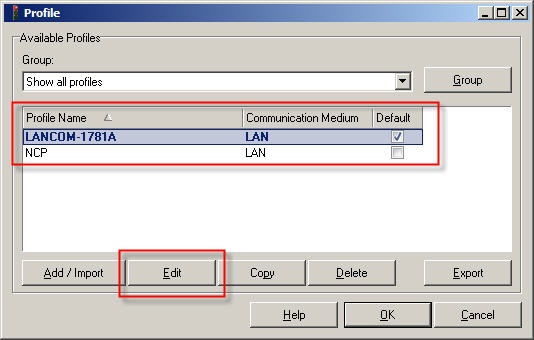
3.2) Select the profile which you wish to edit and click on the Edit button.
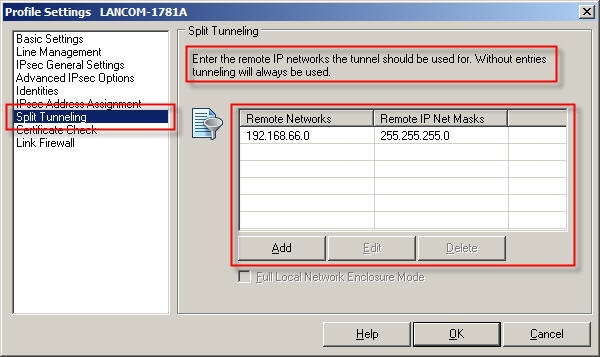
3.3) Navigate to the menu Split tunneling.
3.4) Enter the local IP network(s) which are to be accessed via the VPN tunnel.
If you do not specify an IP network here, your Internet traffic will also be directed via the VPN tunnel!
Step 4:
Check if you require an IPSec pass-through, or whether this has been set up already.
By default an IPSec connection uses the port 500 UDP, the IP protocol ESP (50), or port 4500 UDP. The VPN tunnel may occasionally be directed via routers which do not support IPSec pass-through. In these cases, the IPSec packets may be handled incorrectly, or they may even be dropped.
A result of this is that, even though the tunnel has been established, it cannot be used for communications. This problem can be avoided by activating port forwarding for the UDP ports 500 and 4500 on the client-side of the router.
For a description on how to set up port forwarding on a LANCOM router, see this Knowledge Base article.
Step 5:
If you cannot use IPSec pass-through, you have the option of setting up a VPN connection based on IPSec over HTTPS. All you have to do in this case is to open the HTTPS port 443.
With IPSec over HTTPS, an attempt is first made to transfer data using standard IPSec. If the connection cannot be established (e.g. because IKE port 500 is blocked), then an attempt is then automatically made to establish a connection that encapsulates the IPSec VPN in an additional SSL header (port 443, like HTTPS).
For a guide on setting up a VPN with IPSec over HTTPS, see this Knowledge Base document.
Step 6:
If you are using a computer or a notebook from HP (Hewlett Packard), where the HP Velocity software is installed, deinstalling HP Velocity fixes the issue.
Step 7:
The VPN tunnel does not work using a UMTS/3G or LTE/4G connection. The following reasons may be causing the problem where a LANCOM Advanced VPN Client is operating on a computer which uses 3G/4G for its Internet connection.
7.1) The 3G/4G provider blocks communications on ports 500 and 4500, or the provider blocks the ESP protocol. In this case, contact the provider of your connection.
7.2) There is a conflict between the LANCOM Advanced VPN Client and the 3G/4G management software. If this is the case, you should prevent the 3G/4G management software from starting with the operating system, and you should allow the 3G/4G connection to be established by the LANCOM Advanced VPN Client.
For a description of how to set up a VPN client connection via 3G or 4G, see this Knowledge Base article.
Step 8:
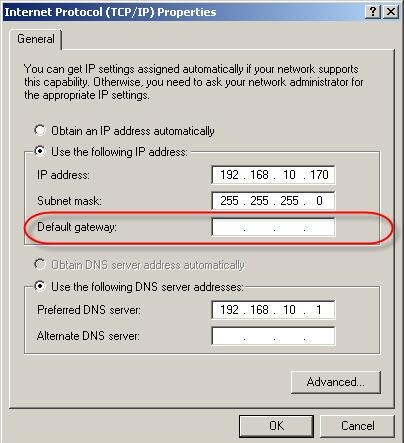
If your workstation has more than one active network adapter, please check the default gateway. Having more than one default gateway on a workstation may cause the packets to be sent in the wrong direction, or not to be sent at all.
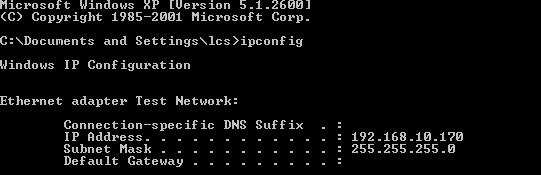
8.1) You can read out your network settings by entering the command ipconfig at the Windows command-line prompt. To run this, click on Start, Run... and enter the command cmd.

8.2) At the command-line prompt you then type the command ipconfig.
In this example the workstation has just one default gateway.

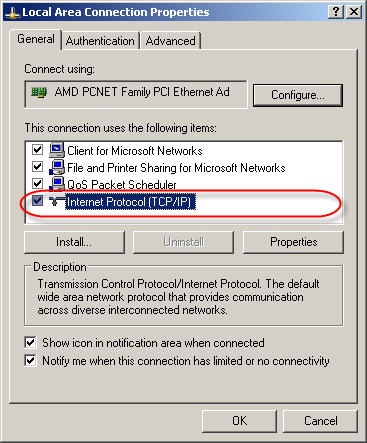
8.3) You can adjust your network settings in the Properties for your network adapter.
Step 9 – other possible error sources:
In most cases security software is installed on the system with the LANCOM Advanced VPN Client to protect it from unauthorized access.
The system may be running a virus scanner, a firewall, and/or a Spy Doctor. These programs often integrate deeply into the system, and thus can cause software conflicts with the Advanced VPN Client. A potential effect of this is that the LANCOM Advanced VPN Client may not be able to communicate over an active VPN tunnel.
In most cases the connection problems cannot be solved simply by deactivating the security program. To find out whether the programs being used are affecting communications, they must first be uninstalled and the operating system then restarted. LANCOM Systems has experienced problems of this nature with the programs listed below. The only way of assisting our customers was for them to uninstall this anti-virus or firewall software:
- Norton Internet Security
- Panda Antivirus
- Trendmicro
- Kaspersky
Generally the security software can be reinstalled after the Advanced VPN Client is installled correctly without negative effects to the Advanced VPN Client.