Description:
This article describes how VLAN can be set up via the LANCOM Management Cloud (LMC).
Requirements:
- Access to the LANCOM Management Cloud including your own project and an LMC license for the switch
- Any web browser for accessing the LANCOM Management Cloud
- The devices are already connected with the LMC
Scenario:
- The network named Management is to be created with the IP address range 10.0.0.0/24. This is operated “untagged” and thereby implicitly uses the VLAN ID 1.
- The network named Production is to be created with the IP address range 172.16.0.0/24. This is assigned the VLAN ID 20.
Procedure:
1) Creating the networks and adjusting the network settings for the switches:
1.1) Creating the networks:
1.11) Connect to the LMC, navigate to the menu Networks and click Add Network → Network.
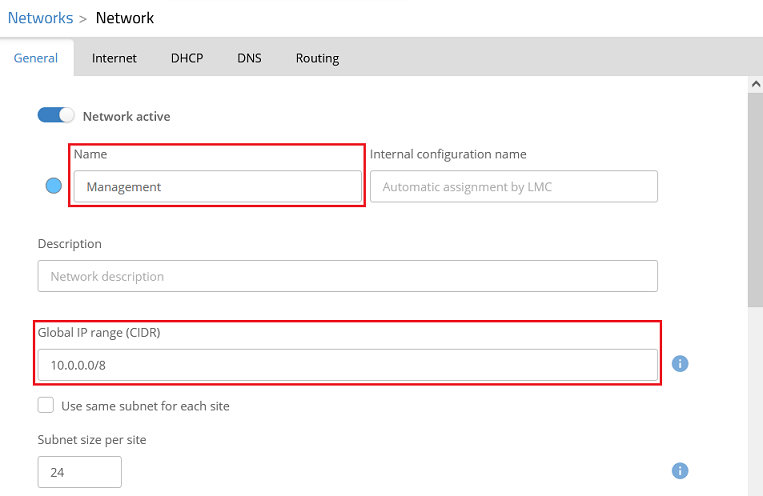
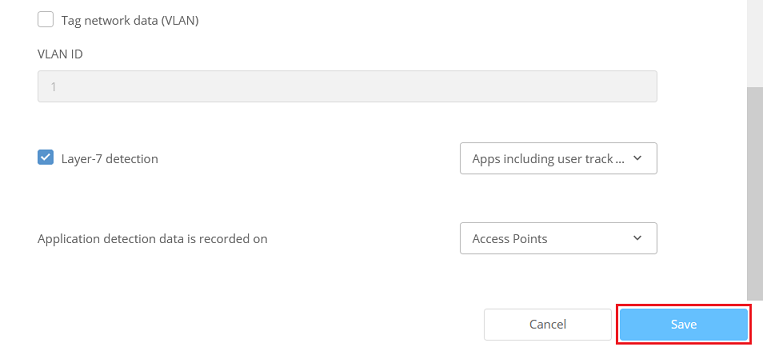
1.1.2) Modify the following parameters and then click Save to create a management network.
- Name : Enter a descriptive name for the management network (in this example Management).
- Global IP range (CIDR) : If necessary, enter the global IP address range for the intermediate network in CIDR notation (Classless Inter Domain Routing).
Since LANCOM switches in the factory state always use the management VLAN 1, they can no longer be managed by the LMC if a different VLAN ID is used. For this reason, the option Tag network data (VLAN) cannot be activated for the management network. In other words the network must operate “untagged”. This can only be changed in the LMC using an add-in script, which is not covered in this article.
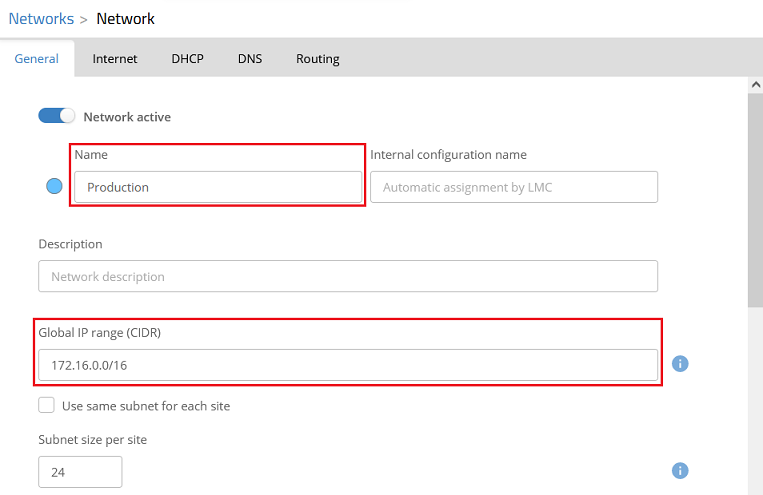
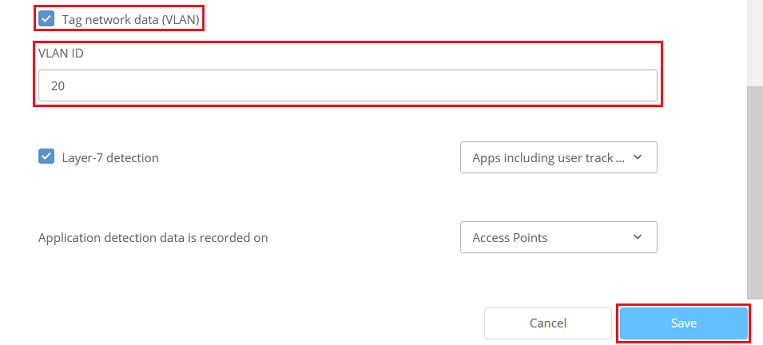
1.1.3) Create another network by clicking Add Network → Network. Modify the following parameters and then click Save to create a productive network.
- Name : Enter a descriptive name for the productive network (in this example Production).
- Global IP range (CIDR) : If necessary, enter the global IP address range for the intermediate network in CIDR notation (Classless Inter Domain Routing).
- Tag network data : Activate this option to enable the VLAN.
- VLAN ID : Enter the VLAN ID that this network should use (in this example, VLAN ID 20).
1.2) Adapting the network specifications for the switches:
The network specifications apply to all switches with the same number of ports.
In the network specifications, the tagging modes Access, Hybrid and Trunk can be set.
- Hybrid is used for the port if the “untagged” network and at least one “tagged” network are assigned to it.
- Access is used for the port if either only an "untagged" or only a "tagged" network is assigned to it.
- Trunk is used for the port if it is assigned more than one "tagged" network.
The tagging modes can also be configured by using the Overview for the respective switch (see step 3). This allows more detailed options to be set for the tagging modes.
If no network is assigned to a port, it is deactivated by the LMC. No communication is then possible via this port.
1.2.1) Click the management network created in step 1.1.2 to go to advanced settings.
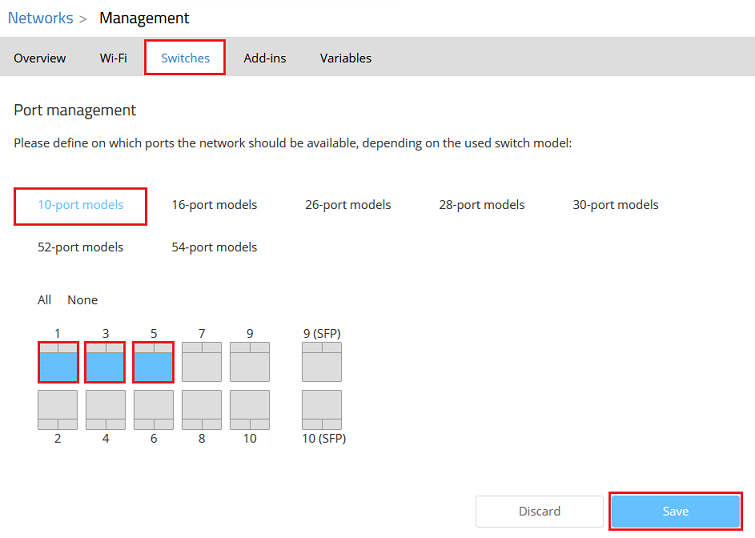
1.2.2) Go to the Switches tab, choose the option with the matching number of ports (in this example the GS-3510XP with 10 ports) and select the ports on which the network is allowed to communicate (in this example the ports 1, 3 and 5).
Then click Save.
If necessary, repeat this step for additional switch models.
1.2.3) Click the production network created in step 1.1.3 to go to advanced settings.
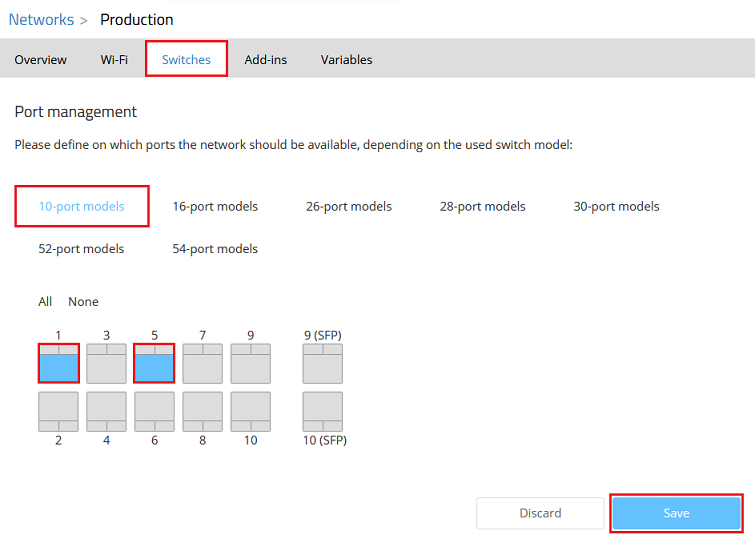
1.2.4) Go to the Switches tab, choose the option with the matching number of ports (in this example the GS-3510XP with 10 ports) and select the ports on which the network is allowed to communicate (in this example the ports 1 and 5).
Then click Save.
If necessary, repeat this step for additional switch models.
2) Creating the site:
2.1) Go to the Sites menu and click Add site.
2.2) Enter a descriptive name for the site and click Add (in this example Headquarter).
2.3) Click the site created in step 2.2 to go to advanced settings.
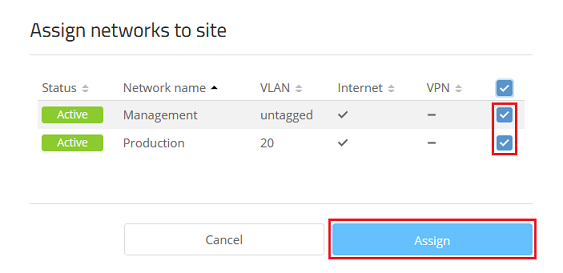
2.4) Go to the Networks tab and click Assign networks.
2.5) Choose the networks created in steps 1.1.2 and 1.1.3 and click Assign.
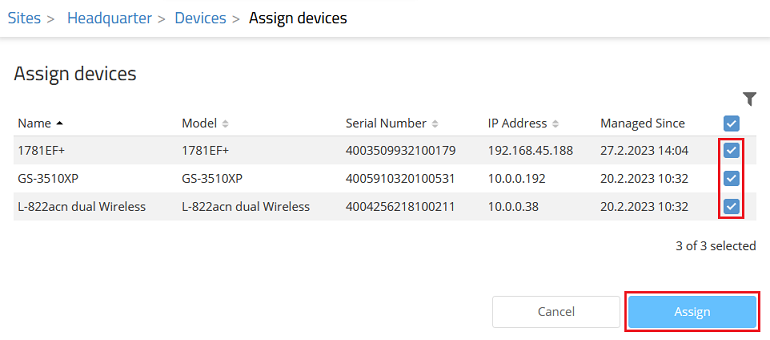
2.6) Go to the Devices tab and click Assign devices.
2.7) Select the devices for this site and click Assign.
3) Configuring the different tagging modes on the switch:
Tagging mode settings made in the Overview overrides any tagging settings previously made in the Port management (see step 1.2). This allows you to make more detailed settings for the tagging modes that are not otherwise possible with the network settings (e.g. operating the "untagged" network on a "tagged" port).
You can find additional information on the different VLAN tagging modes in the following Knowledge Base article:
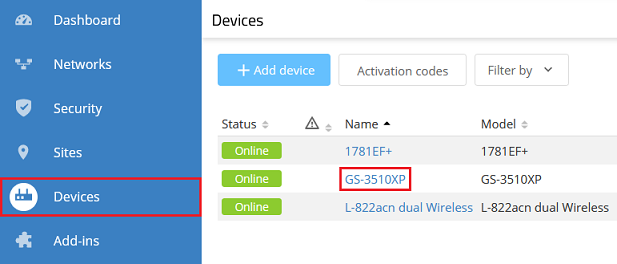
Go to the Devices menu and click on the switch to access the advanced settings.
3.1) Configuring the hybrid tagging mode:
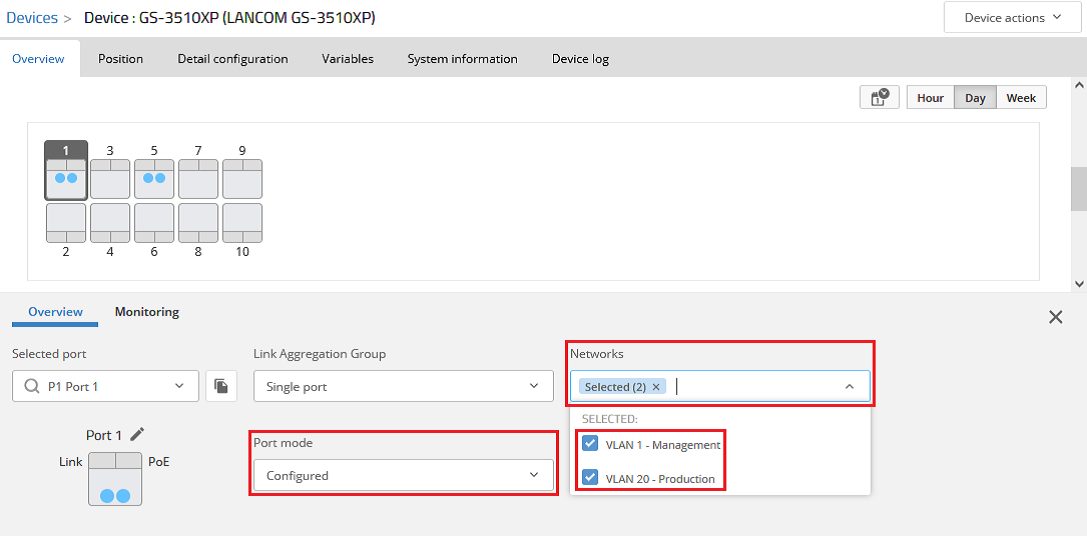
3.1.1) Click on the desired port (in this example port 1) and adjust these parameters in the menu that follows:
- Port mode : From the drop-down menu, select the option Configured.
- Networks : Choose the networks that are to be transmitted via this port (in this example Management and Production).
3.1.2) Set the Untagged network to the network that is to be transmitted untagged (in this example Management) and click Save.
3.2) Configuring the tagging mode Access:
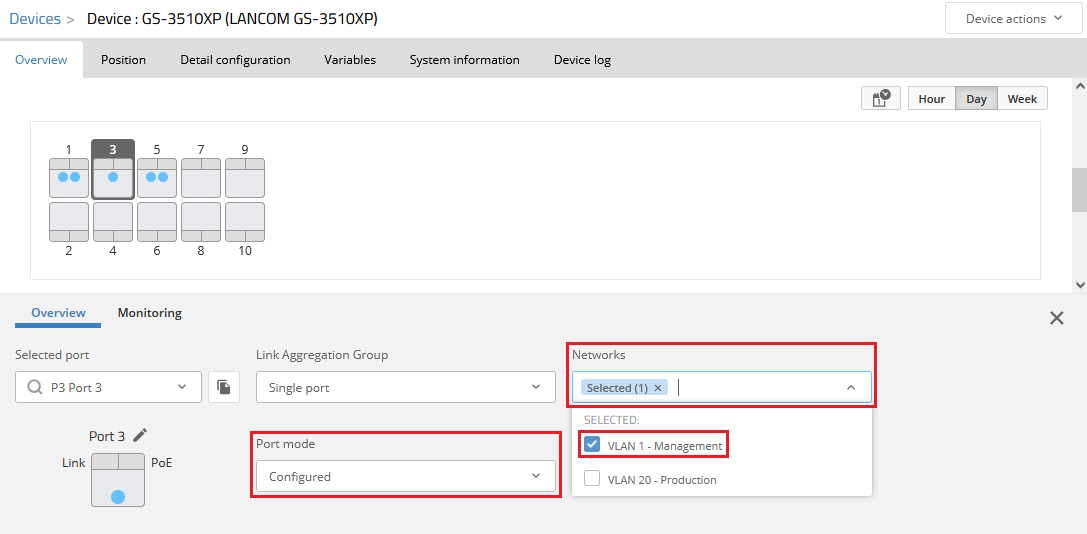
3.2.1) Click on the desired port (in this example port 3) and adjust these parameters in the menu that follows:
- Port mode : From the drop-down menu, select the option Configured.
- Networks : Choose the network that is to be transmitted via this port (in this example Management).
3.2.2) Set the Untagged network to the network that is to be transmitted untagged (in this example Management) and click Save.
3.3) Configuring the tagging mode Trunk:
When using the Trunk tagging mode, make absolutely sure that a device is connected to the port that also uses the Trunk tagging mode (e.g. another switch). Otherwise there will be no communication via this port!
- Access points and routers with LCOS in the LMC always use the Hybrid tagging mode with the PVID 1. This can only be modified by an add-in script.
- Access points with LCOS LX in the LMC always use the Hybrid tagging mode with the PVID 1.
- Unified Firewalls (LCOS FX) do not use classic tagging. In an "untagged" network VLAN is not used and in a "tagged" network VLAN is always used. The Trunk tagging mode can therefore only be operated on the switch port to a Unified Firewall if only “tagged” networks are rolled out.
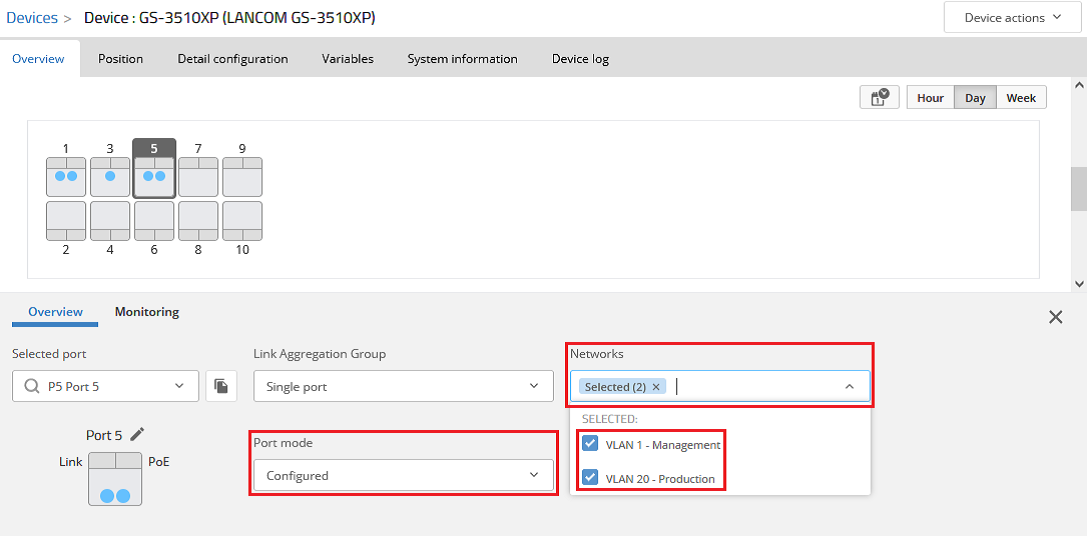
3.3.1) Click on the desired port (in this example port 5) and adjust these parameters in the menu that follows:
- Port mode : From the drop-down menu, select the option Configured.
- Networks : Choose the networks that are to be transmitted via this port (in this example Management and Production).
3.3.2) For the Untagged network, set the option No untagged network and click Save.
4) Rolling out the configuration to the devices:
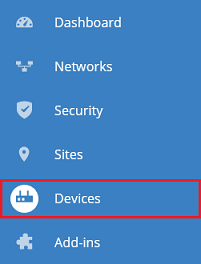
4.1) Go to the menu Devices.
4.2) Select the devices and click on the “dots” icon in the upper right-hand corner to access the additional options.
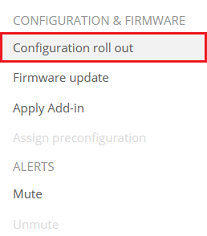
4.3) Click on Configuration roll out.
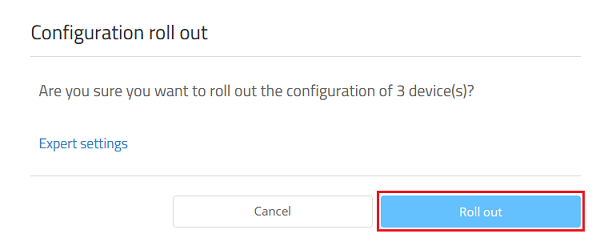
4.4) Confirm the prompt by clicking on Roll out.


