
...
1.7) Go to the menu RADIUS → Server and set a checkmark for RADIUS authentication active.
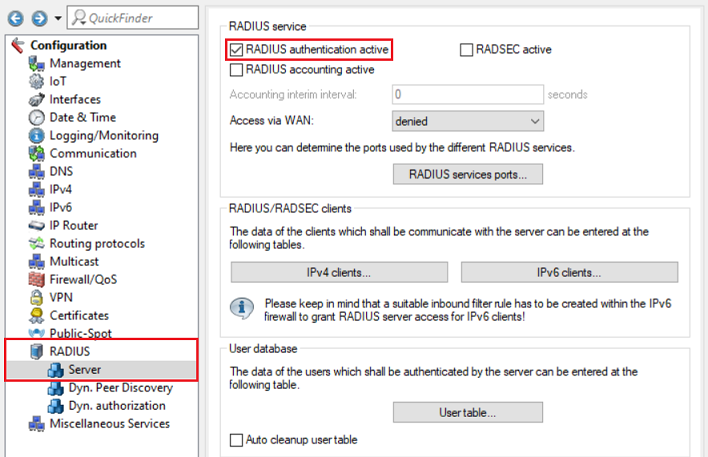
1.8) Navigate to the menu RADIUS services ports.
...
- IP address: Enter the IP address of the switch so that this can authenticate itself as the RADIUS authenticator at the RADIUS server.
- Netmask: Enter the netmask 255.255.255.255. This stands for a single IP address.
- Protocols: Check that the protocol is set to RADIUS.
- Client secret: Enter a password that the switch uses to authenticate itself at the RADIUS server. This is entered on the switch in step 2.4.
...
- Name / MAC address: Enter a user name that the network participant uses to authenticate itself at the RADIUS server.
- Password: Enter a password that the network participant uses to authenticate itself at the RADIUS server.
- Service type: From the drop-down menu, select Call check.
- Expiry type: From the drop-down menu, select Never so that the user account remains valid permanently valid .
| Info |
|---|
The service type “Call check” is only supported as of LCOS 10.30. |
...
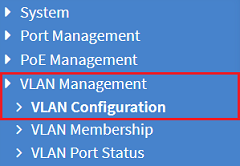
2.1) Open the web interface for the device and switch to the menu item VLAN Management → VLAN Configuration.
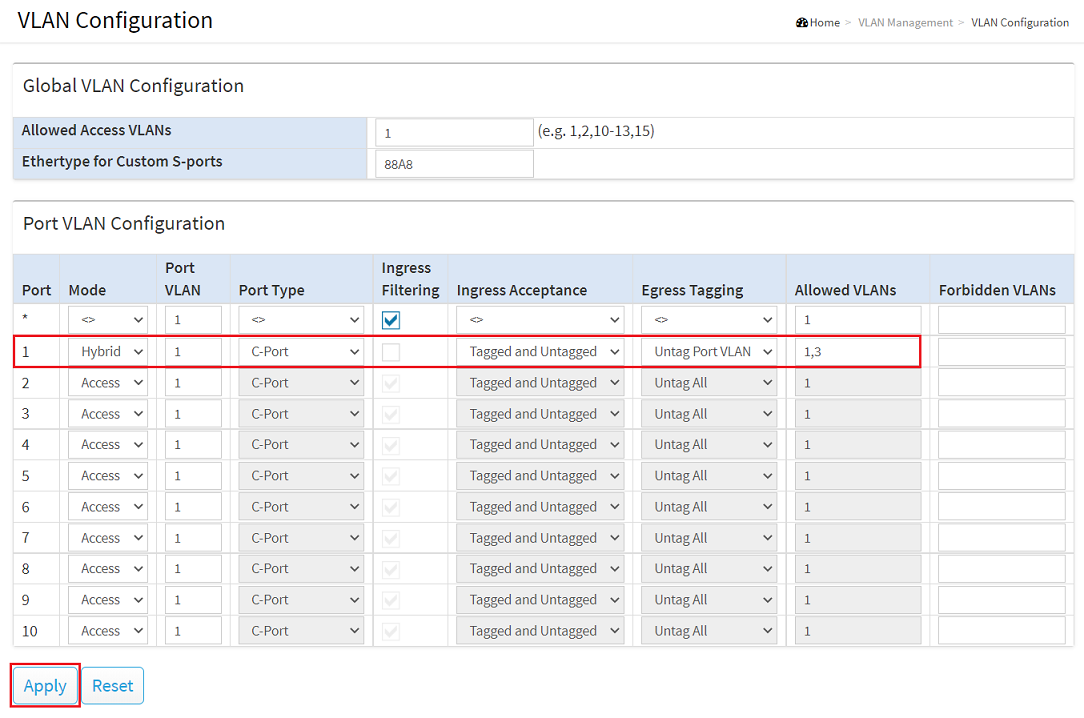
2.2) For the switch port to which the router is connected to, adjust the following parameters and click Apply:
- Mode: Choose the tagging mode Hybrid.
- Port VLAN: Leave the setting as the VLAN - ID 1.
- Ingress Acceptance: Select Tagged and Untagged from the drop-down menu, because when using the Hybrid tagging mode, both tagged and untagged packets are allowed.
- Egress Tagging: Select Untag Port VLAN. When using the Hybrid tagging mode, the VLAN tag is removed from outbound packets that have the port VLAN ID (in this case VLAN - ID 1).
- Allowed VLANs: Enter the VLANs 1 and 3 (in the switch this must be entered as 1,3) since the management network INTRANET (using the VLAN - ID 1 on the switch) as well as that GUEST NETWORK (using the VLAN - ID 3) are to be transferred.
| Info |
|---|
For more information about VLAN configuration on a GS-3xxx switch, see the following Knowledge Base article: |
2.3) Change to the menu menu Security → RADIUS → Configuration and click Add New Server.
...
- Mode: Activate the 802.1X authentication settings by moving the slider button to “on”.
- Guest VLAN Enabled: Activate that the Guest VLAN.
- Guest VLAN ID: Enter the VLAN ID for the guest VLAN (in this example, VLAN ID 3).
...
- Admin State: From the drop-down menu, select the option Single 802.1X.
- Guest VLAN Enabled: Activate that the Guest VLAN on this port.
| Info |
|---|
With the option Single 802.1X only one network participant can authenticate be authenticated at the port and then communicate. If a network participant does not support RADIUS authentication or if this it is deactivated, this participant is transferred by the switch to the Guest VLAN so that it can communicate there and does not have access to the management network. |
...
2.7) Save the configuration as the startup configuration by clicking the red floppy disk icon at in the top-right corner.
| Info |
|---|
The Start configuration is boot persistent and is therefore available even after a restart or a power failure. |
...