
| PageIdMakro |
|---|
| Seiteneigenschaften |
|---|
Description:
In diesem Artikel wird beschrieben, wie statische IP-Parameter einem Acces Point mit LCOS über die This article describes how static IP parameters for can be assigned to an access point via the LANCOM Management Cloud (LMC) zugewiesen werden können.
Requirements:
- LCOS ab Version as of version 10.50 (download aktuelle Versionlatest version)
- Zugang zur LMC samt eigenem Projekt
- Access to the LMC including your own project
- Any web browser for accessing the Beliebiger Web-Browser für den Zugriff auf die LMC
Procedure:
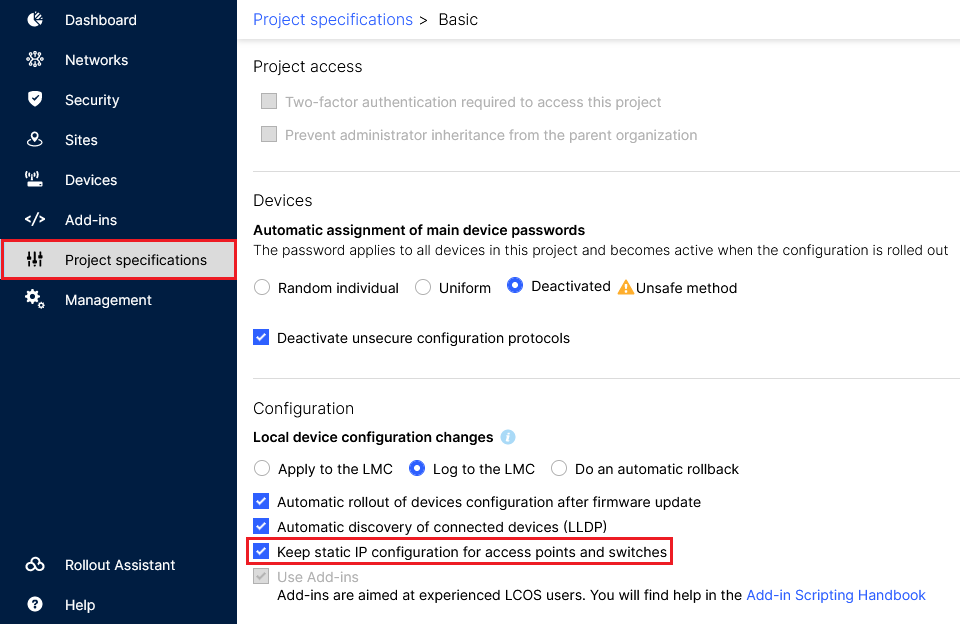
1. Statische IP-Konfiguration für Access Points und Switches erlauben:) Allow static IP configuration for access points and switches:
Wechseln Sie in der LMC in das Menü Project specifications und stellen sicher, dass die Option In the LMC, go to the menu item Project specifications and be sure to activate the option Keep static IP configuration for access points and switches aktiv ist.
2. Konfiguration der statischen IP-Parameter über die Detail-Konfiguration des Access Points) Configuring the static IP parameters via the access point’s “Detail configuration”:
2.1 Wechsel in die Detail-Konfiguration des Access Points) Go to the Detail configuration of the access point:
2.1.1 Wechseln Sie in das Menü Devices und klicken auf den Name des gewünschten Access Points) Go to the Devices menu and click the Name of the relevant access point.

2.1.2 Wechseln Sie in den Reiter ) Go to the tab Detail configuration.

2.2 Setzen der IP-Adresse und der Subnetzmaske) Setting the IP address and subnet mask:
2.2.1 Wechseln Sie in der Detail-Konfiguration in das Menü IPv4 → ) Go to the Detail configuration in the menu IPv4 → General → IP networks.
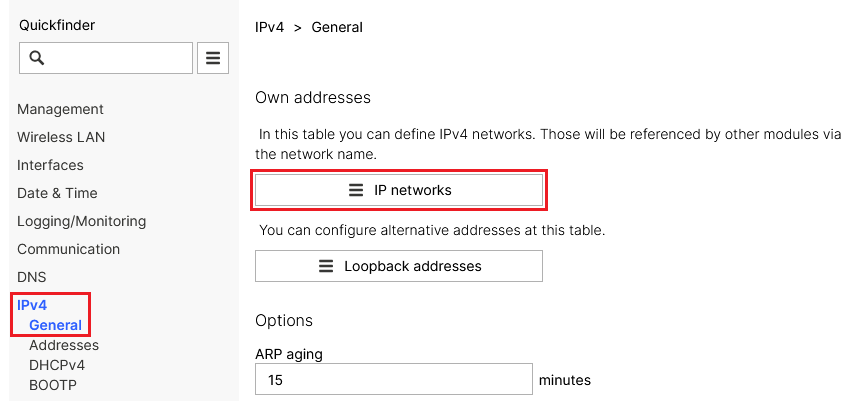
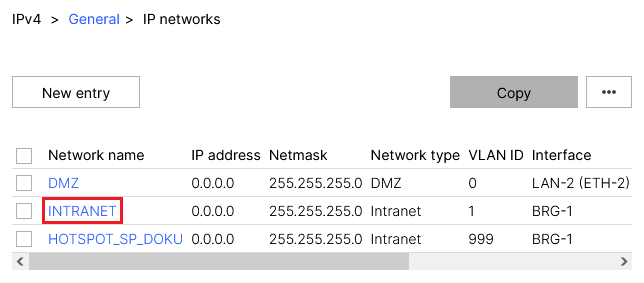
2.2.2 Klicken Sie auf den Network name des gewünschten Netzwerks, um in die weiteren Einstellungen zu gelangen) Click the network name for the relevant network to go to the advanced settings.
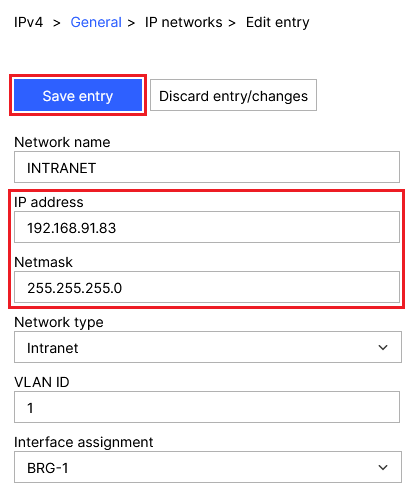
2.2.3 Passen Sie die folgenden Parameter an und klicken auf ) Modify the following parameters and then click Save entry:
- IP address: Tragen Sie die IP-Adresse ein, die der Access Point verwenden soll (in diesem Beispiel Enter the IP address the access point should use (in this example 192.168.91.83).
- Netmask: Tragen Sie die zu dem Netzwerk zugehörige Subnetzmaske ein (in diesem Beispiel Enter the Netmask for the relevant network (in this example 255.255.255.0).
2.3 Deaktivieren des DHCP-Servers) Disabling the DHCP server:
2.3.1 Wechseln Sie in der Detail-Konfiguration in das Menü IPv4 → ) Go to the Detail configuration in the menu IPv4 → DHCPv4 → DHCP networks.
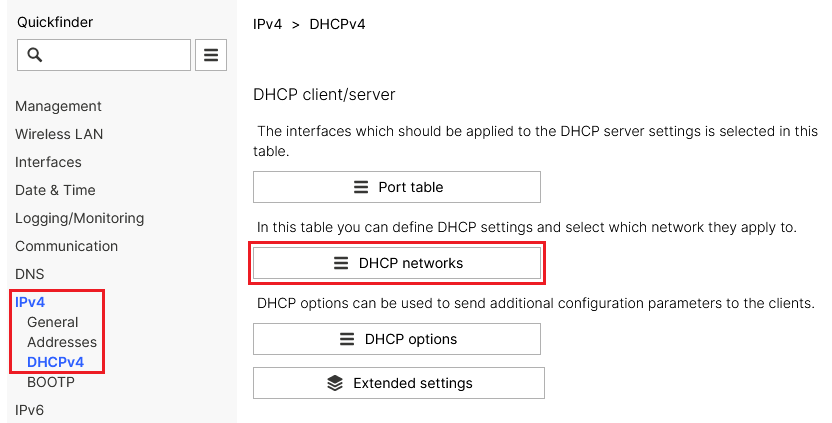
2.3.2 Klicken Sie auf den Network name des in Schritt ) Click the network name for the network selected in step 2.2.2 ausgewählten Netzwerks, um in die erweiterten Einstellungen zu gelangen to go to the advanced settings.
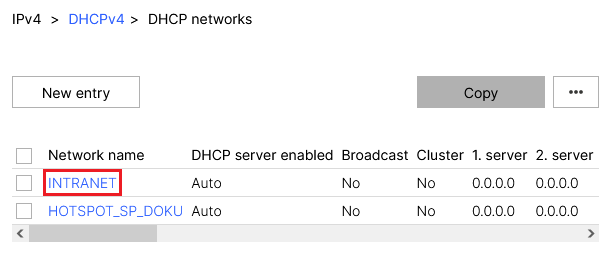
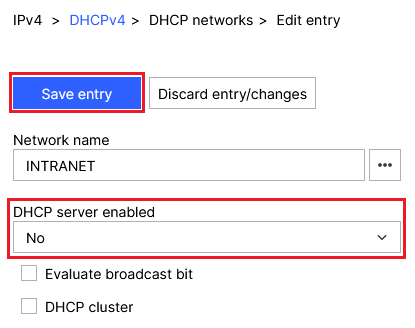
2.3.3 Wählen Sie bei DHCP server enabled die Option No aus und klicken auf ) For DHCP server enabled, set the option No and click Save entry.
2.4 Setzen einer Default-Route) Setting a default route:
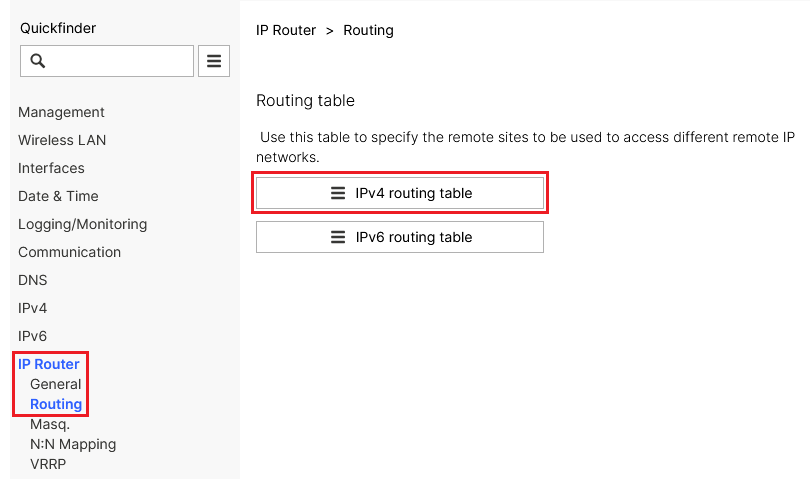
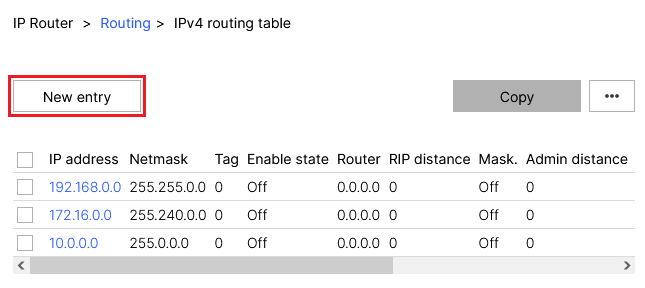
2.4.1 Wechseln Sie in der Detail-Konfiguration in das Menü ) In the Detail configuration, navigate to the menu IP Router → Routing → IPv4 routing table.
2.4.2 Klicken Sie auf die Schaltfläche ) Click the New entry button.
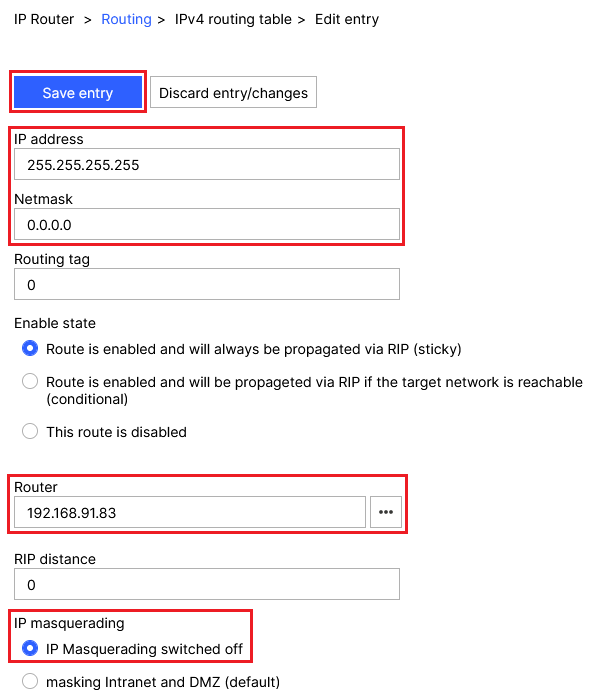
2.4.3 Passen Sie die folgenden Parameter an und klicken auf ) Modify the following parameters and then click Save entry:
- IP address: Tragen Sie die Adresse Enter the IP address 255.255.255.255 ein.
- Netmask: Tragen Sie die Netzmaske Enter the netmask 0.0.0.0 ein.
- Router: Tragen Sie die IP-Adresse des Default-Gateways im Netzwerk des Access Points ein (in diesem Beispiel Enter the IP address of the default gateway in the access point’s network (in this example 192.168.91.254).
- IP masquerading: Wählen Sie die Option IP Masquerading Select the option IP masquerading switched off aus.
2.5 DNS-Weiterleitung einrichten) Setting up DNS forwarding:
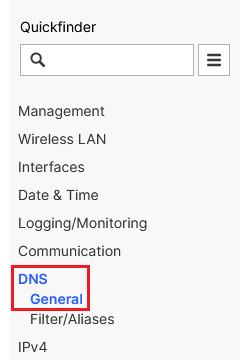
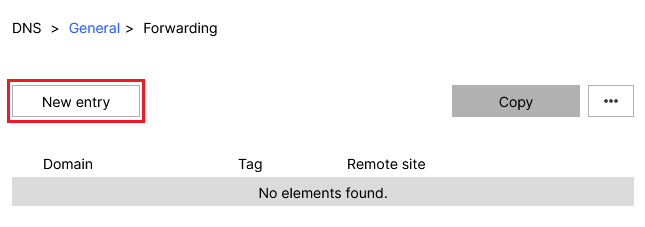
2.5.1 Wechseln Sie in der Detail-Konfiguration in das Menü ) Go to the Detail configuration in the menu DNS → General.
2.5.2 Scrollen Sie zum Abschnitt ) Scroll to the section Host name resolving und wechseln in das Menü and go to the menu Forwarding.
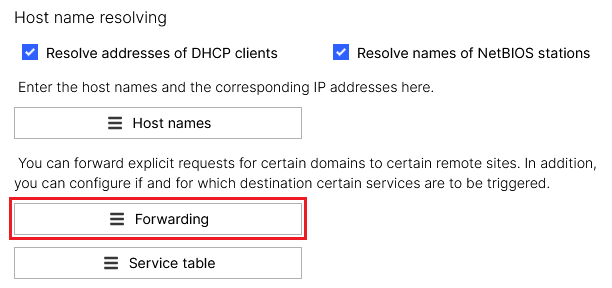
2.5.3 Klicken Sie auf die Schaltfläche New entry.
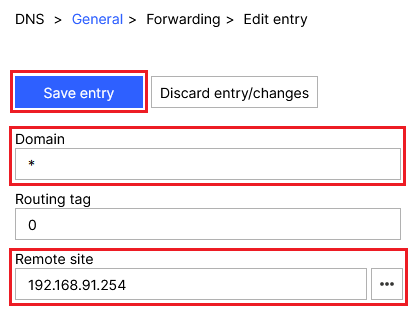
2.5.4 Passen Sie die folgenden Parameter an und klicken auf ) Modify the following parameters and then click Save entry:
- Domain: Tragen Sie die Wildcard * ein. Diese steht für beliebig viele ZeichenEnter the wildcard *. This represents any number of characters.
- Remote site: Tragen Sie die IP-Adresse eines DNS-Servers ein, der DNS-Anfragen des Access Points auflösen soll (in diesem Beispiel das Default Gateway mit der IP-Adresse Enter the IP address of a DNS server that should resolve DNS requests from the access point (in this example the IP address of the default gateway 192.168.91.254).
3. Ausrollen der Konfiguration auf den Access Point) Rolling out the configuration to the access point:
3.1 Wechseln Sie in der LMC in das Menü Devices und klicken bei dem betroffenen Access Point unter Configuration auf Outdatedl) In the LMC, go to the menu Devices and, under Configuration for the relevant access point, click Outdated.

3.2 Klicken Sie abschließend auf Roll out, damit die geänderten Parameter übernommen werden) Finally, implement the changes by clicking Roll out.
