
Description:
This article describes how access management via RADIUS (802.1x) can be implemented on a LANCOM router or access point with LCOS. This makes it possible to centrally manage user access data.
Requirements:
- LANCOM router / access point with LCOS as the RADIUS client
- LANCOM router / access point with LCOS as the RADIUS server
- LCOS as of version 9.24 (download latest version)
- LANtools as of version 9.24 (download latest version)
Procedure:
1) Configuring RADIUS authentication on the router or access point:
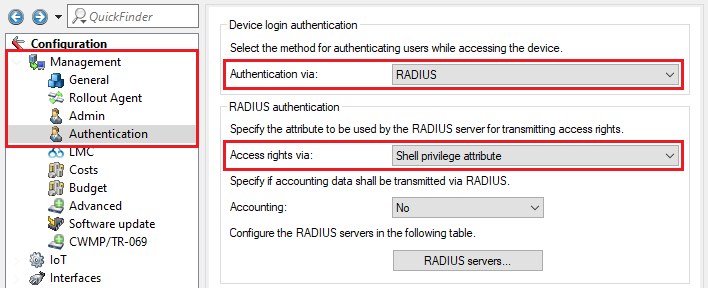
1.1) Use LANconfig to connect to the router / access point that is to use central access management, switch to the menu Management → Authentication and modify the following parameters:
- Authentication via: From the drop-down menu, select the option RADIUS.
- Access rights via: From the drop-down menu, select the option Shell privilege attribute.
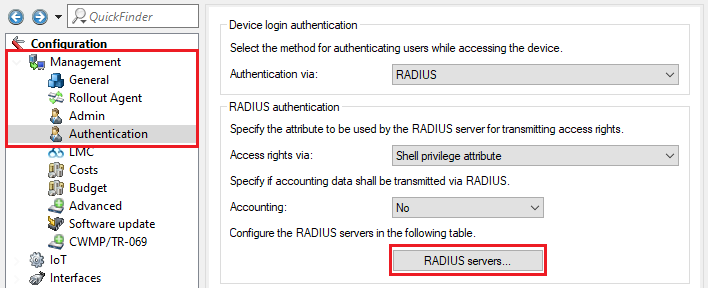
1.2) Go to the menu RADIUS servers.
1.3) Create a new entry and adjust the following parameters:
- Profile name: Enter a descriptive name (in this example RADIUS).
- Server address: Enter the IP address of the RADIUS server (in this example a LANCOM router with the IP address 192.168.1.254).
- Secret: Enter a password that the router / access point uses for authentication with the RADIUS server (see step 2.5).

1.4) This concludes the configuration of the LANCOM router / access point. You can now write the configuration back to the device.
2) Configuring the RADIUS server on a LANCOM router or access point:
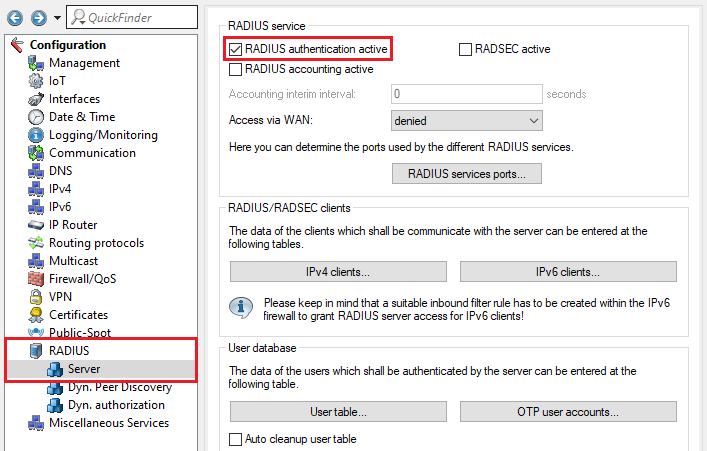
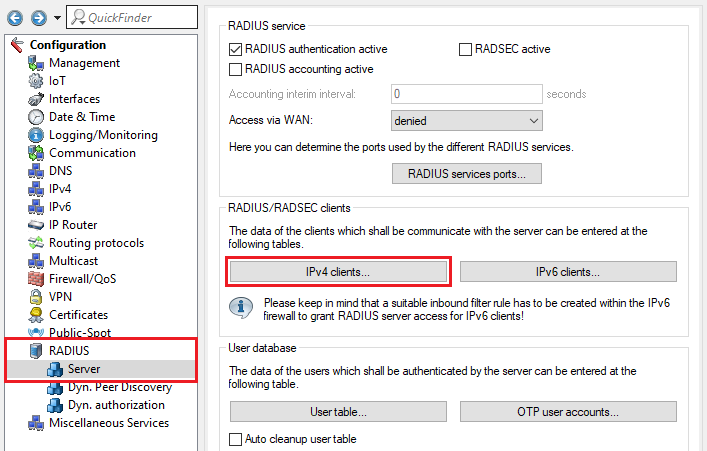
2.1) In LANconfig, open the configuration of the router / access point that acts as a RADIUS server. Go to the menu RADIUS → Server and set a checkmark for RADIUS authentication active.
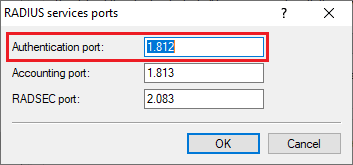
2.2) Navigate to the menu RADIUS services ports.
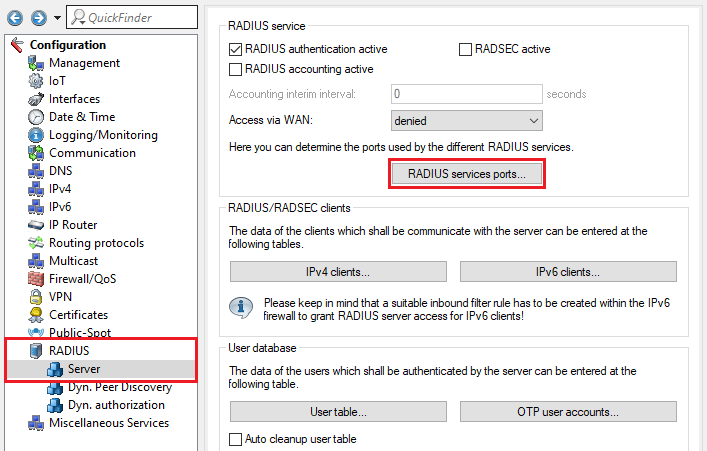
2.3) Make sure that the authentication port is set to the port 1812.
2.4) Go to the menu IPv4 clients.
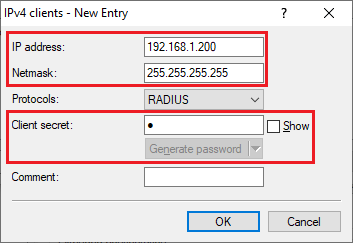
2.5) Create a new entry and adjust the following parameters:
- IP address: Enter the IP address of the authenticating router / access point.
- Netmask: Enter the netmask 255.255.255.255. This stands for a single IP address.
- Client secret: Enter the password specified in step 1.3. This is used for authentication with the RADIUS server on the router / access point.
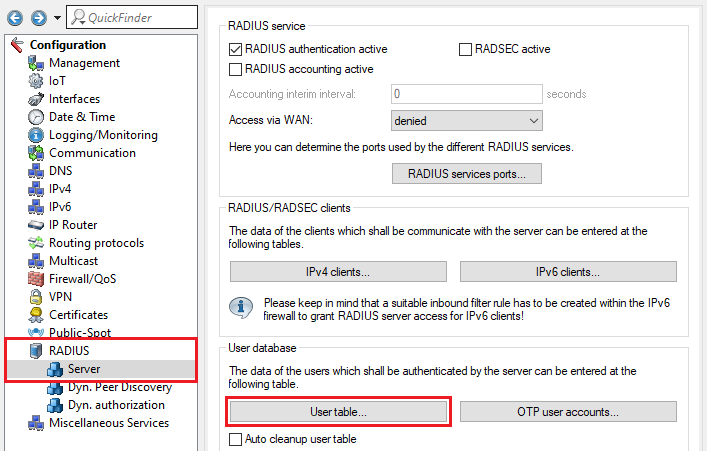
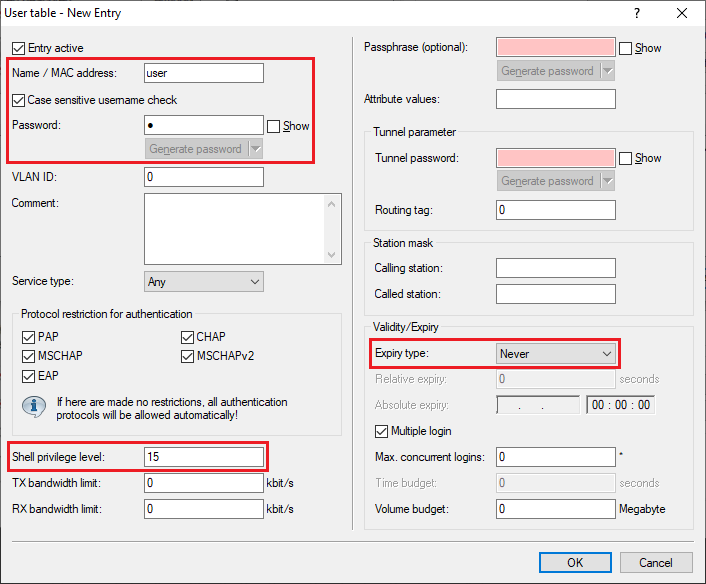
2.6) Go to the menu User table.
2.7) Create a new entry and adjust the following parameters:
- Name / MAC address: Enter a username to be used by the user to access the router / access point.
- Password: Enter a password that the user should use to access the router / access point.
- Shell privilege level: Set the value to 15 so that the user receives write permissions for all function groups.
- Expiry type: From the drop-down menu, select Never so that the entry remains valid permanently.
The LCOS supports 7 different authorizations, which are set as the Shell privilege level.
| Attribute | Access rights | Remarks |
|---|---|---|
| 1 | User, read-only | Access only to the status tree from the command line and WEBconfig |
| 3 | User, write-only | Access only to the status tree from the command line and WEBconfig, and status tables can be reset |
| 5 | Admin, read-only, no trace rights | Read-only access from the command line and WEBconfig (including configuration / setup tree) |
| 7 | Admin, read and write, no trace rights | Read and write access via the command line and WEBconfig (including configuration / setup tree) |
| 9 | Admin, read.only | Read-only access from the command line and WEBconfig (including configuration / setup tree) |
| 11 | Admin, read and write | Read and write access via the command line and WEBconfig (including configuration / setup tree) |
| 15 | Supervisor | All access rights including access via LANconfig |
2.8) This concludes the configuration of the LANCOM router / access point that acts as the RADIUS server. You can now write the configuration back to the device.