
Description:
This article describes how BGP can be set up between two LANCOM R&S®Unified Firewalls.
Support of “next-hop” BGP:
“Next-hop” BGP is supported as of LCOS FX 10.12. For LCOS FX 10.9 up to and including 10.11, routes can be transmitted to the immediate neighbor only (i.e. requiring an intermediate network).
Requirements:
- LCOS FX as of version 10.9 (download latest version)
- Networks that are already set up and functional
- Web browser for configuring the Unified Firewall
The following browsers are supported:- Google Chrome
- Chromium
- Mozilla Firefox
Procedure:
1) Configuring BGP on the Unified Firewalls:
1.1) Configuring BGP on Firewall-1:
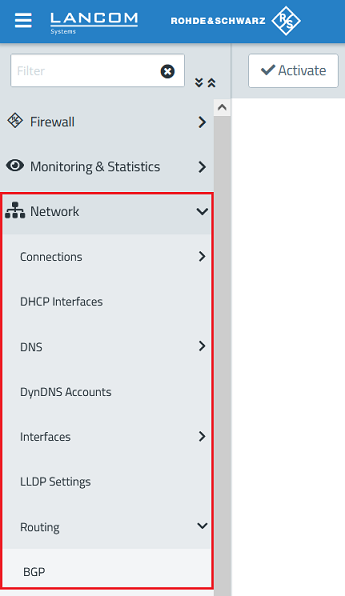
1.1.1) Connect to the Firewall-1 and navigate to the menu Network → Routing → BGP.
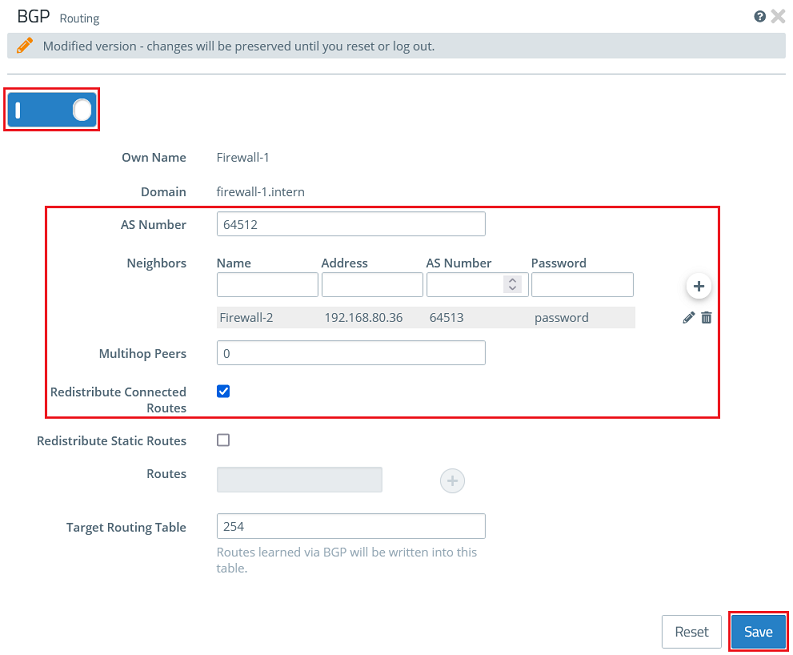
1.1.2) Use the slider to activate BGP, adjust the following parameters, and click Save:
- AS Number: Enter the AS number for the local Unified Firewall (in this example 64512).
- Neighbors:
- Name: Enter the name of the BGP neighbor (in this example Firewall-2).
- Address: Enter the IP address of the BGP neighbor (in this example 192.168.80.36).
- AS Number: Enter the AS address of the BGP neighbor (in this example 64513).
- Password: Enter a password used by BGP neighbors to mutually authenticate themselves (in this example password). This must match the password configured in step 1.2. 2.
- Multihop Peers: This setting controls the number of intermediate stations (hops) through which a route can be learned (values from 0 to 255). In this example, we leave the setting at 0. This means that routes can only be learned from neighboring stations.
- Redistribute Connected Routes: Activate this option so that locally configured routes can be sent to the BGP neighbor.
The AS number can be set to values between 1 and 4294967295. However, LANCOM Systems recommends that you use values reserved for private use.
16-Bit: 64512 to 65534
32-Bit: 4200000000 to 4294967294
The option Redistribute Connected Routes can be enabled instead of or in addition to the option Redistribute Static Routes. Under Routes, enter the static routing entries in CIDR notation (Classless Inter Domain Routing) and add them using the “+” button.
If the received networks match the locally configured networks, the routes for the local networks are maintained.
Optionally you can use the Target Routing Table field to reference your own routing table with custom routing rules (default value is 254).
1.2) Configuring BGP on Firewall-2:
1.2.1) Connect to the Firewall-2 and navigate to the menu Network → Routing → BGP.
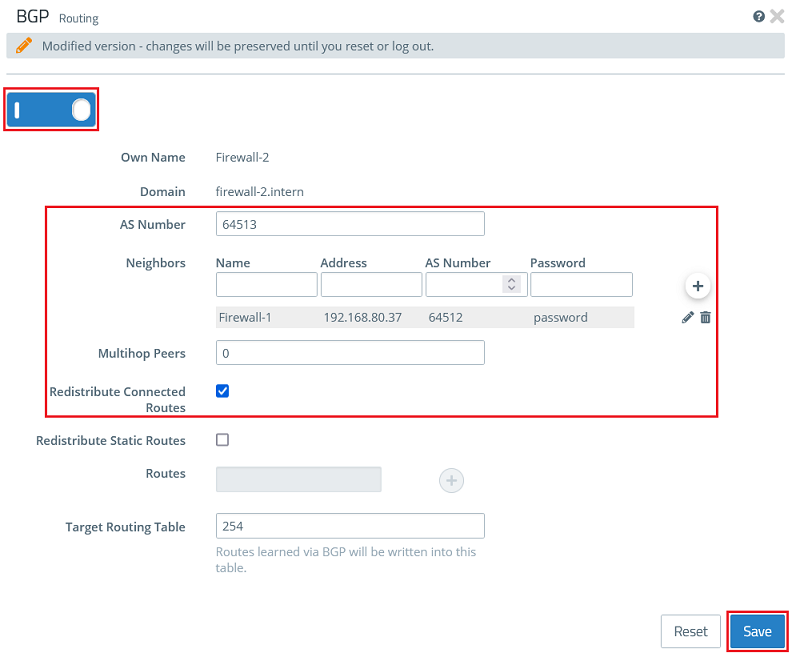
1.2.2) Use the slider to activate BGP, adjust the following parameters, and click Save:
- AS Number: Enter the AS number for the local Unified Firewall (in this example 64513).
- Neighbors:
- Name: Enter the name of the BGP neighbor (in this example Firewall-1).
- Address: Enter the IP address of the BGP neighbor (in this example 192.168.80.37).
- AS Number: Enter the AS address of the BGP neighbor (in this example 64512).
- Password: Enter a password used by BGP neighbors to mutually authenticate themselves (in this example password). This must match the password configured in step 1.1. 2.
- Multihop Peers: This setting controls the number of intermediate stations (hops) through which a route can be learned (values from 0 to 255). In this example, we leave the setting at 0. This means that routes can only be learned from neighboring stations.
- Redistribute Connected Routes: Activate this option so that locally configured routes can be sent to the BGP neighbor.
The AS number can be set to values between 1 and 4294967295. However, LANCOM Systems recommends that you use values reserved for private use.
16-Bit: 64512 to 65534
32-Bit: 4200000000 to 4294967294
The option Redistribute Connected Routes can be enabled instead of or in addition to the option Redistribute Static Routes. Under Routes, enter the static routing entries in CIDR notation (Classless Inter Domain Routing) and add them using the “+” button.
If the received networks match the locally configured networks, the routes for the local networks are maintained.
Optionally you can use the Target Routing Table field to reference your own routing table with custom routing rules (default value is 254).
2) Reading out the BGP status on the Unified Firewalls:
2.1) On each of the Unified Firewalls, go to the menu Monitoring & Statistics → BGP Status.

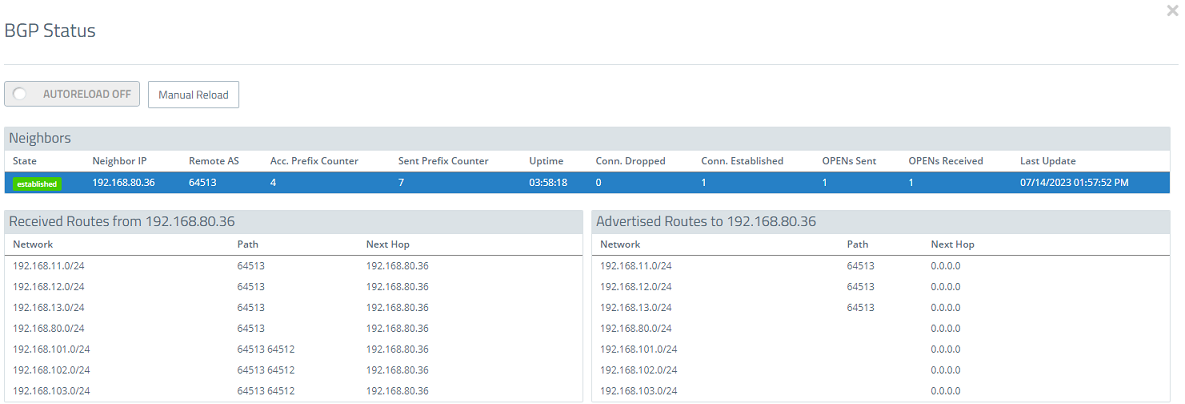
2.2) In the BGP Status menu, information about the BGP neighbor (including the IP address and Remote AS) is displayed as well as the received and sent routes.
- BGP status on Firewall-1:
- BGP status on Firewall-2:
