
Description:
As of LCOS LX 6.14 the antenna mask can be configured on LCOS LX access points with external antennas to control which antennas are active and which are not. In the default configuration all antennas are active.
This article describes how the antenna mask of an LCOS LX access point can be configured.
Restrictions for using PoE with 802.3af (max. 15,4 W) as a power supply:
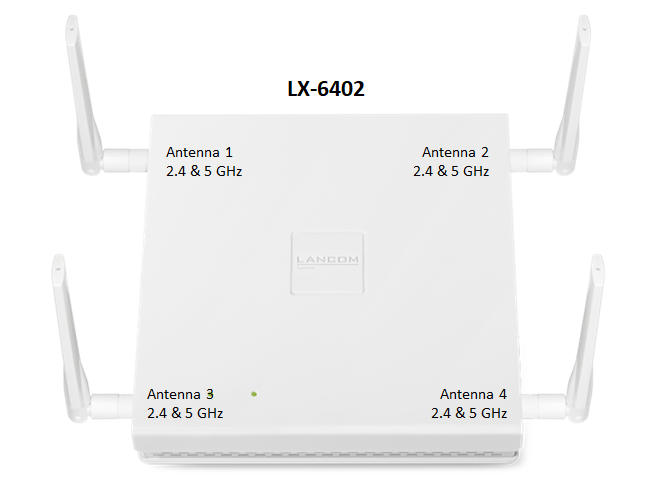
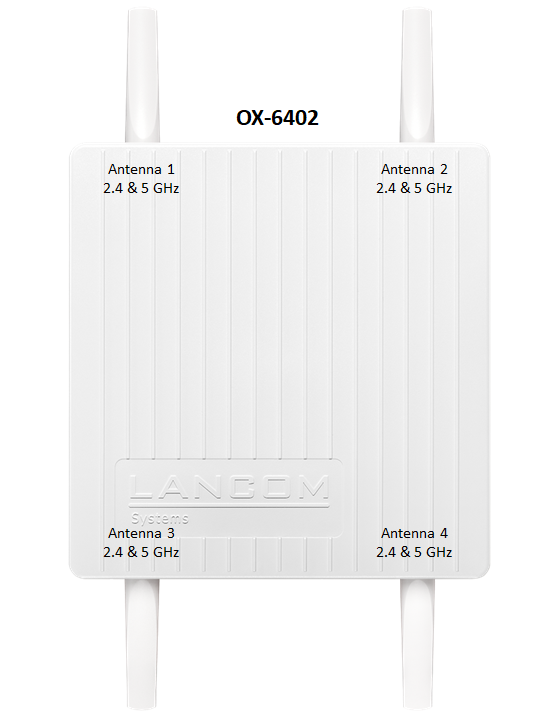
When operated via PoE with 802.3af (max. 15,4 W) instead of 802.3at (max. 30 W), the LX-6402 as well as the OX-6402 can only use two instead of four antennas.
Restrictions for using a channel bandwith of 160 MHz:
On an LX-6402 and the OX-6402 a channel bandwith of 160 MHz can only be used, if all antennas are active.
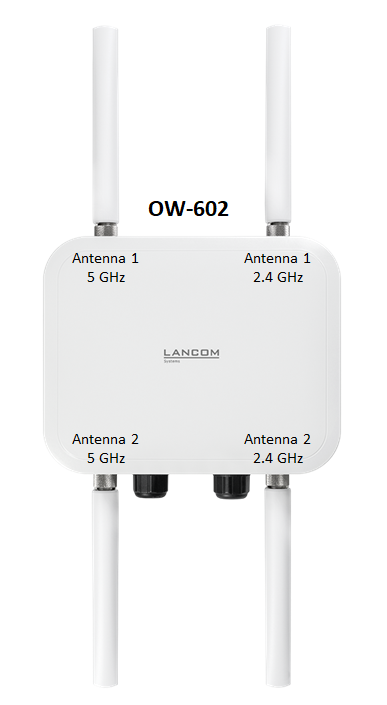
The hardware of the OW-602 only supports a channel bandwith of 80 MHz.
Requirements:
- Access point with LCOS LX and external antennas
- LCOS LX as of Version 6.14 (download latest version)
- LANtools as of version 10.80 RU2 (download latest version)
- Any web browser for accessing the device via WEBconfig
- SSH client for accessing the device via the CLI (e.g. PuTTY)
Overview of the possible antenna layouts:
| Antenna layout for the access points | Possible Antenna configuration |
|---|---|
| 2.4 GHz
5 GHz
|
| 2.4 GHz
5 GHz
|
| 2.4 GHz
5 GHz
|
Procedure:
Configuring the antenna mask via LANconfig:
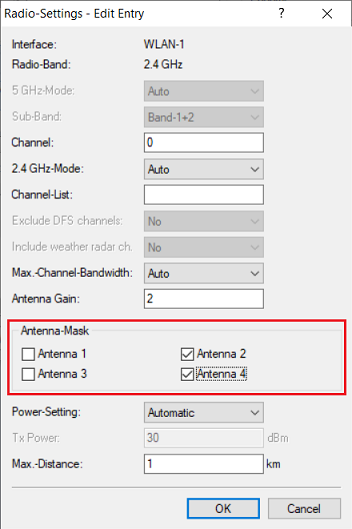
1) Open the configuration of the access point via LANconfig and go to the menu Wireless LAN → WLAN Networks → Radio-Settings.
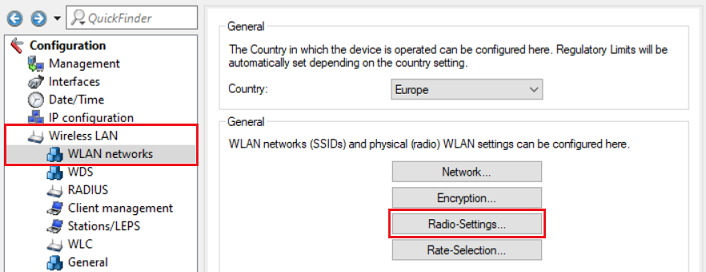
2) Select the desired WLAN interface (and thus the frequency band) and click Edit.

3) Select the desired antennas for the Antenna-Mask (in this example only the antennas 2 and 4 should be active in the 2.4 GHz band on an OX-6402).
If no checkbox is active for the Antenna-Mask, all antennas are active(default configuration). Therefore no antennas have to be activated to use all antennas!
4) Write the configuration back to the device.
Configuring the antenna mask via WEBconfig:
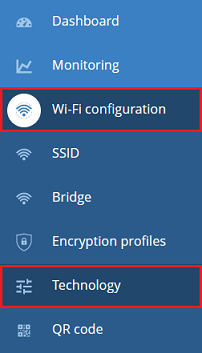
1) Connect to the access point via WEBconfig and go to the menu Wi-Fi configuration → Technology.
2) Select the desired antennas for the respective frequency band in the Antenna Mask dropdown menu (in this example only the antennas 2 and 4 should be active in the 2.4 GHz band on an OX-6402).
If no antenna is selected in the Antenna Mask dropdown menu, all antennas are active (default configuration). Therefore no antennas have to be activated to use all antennas!
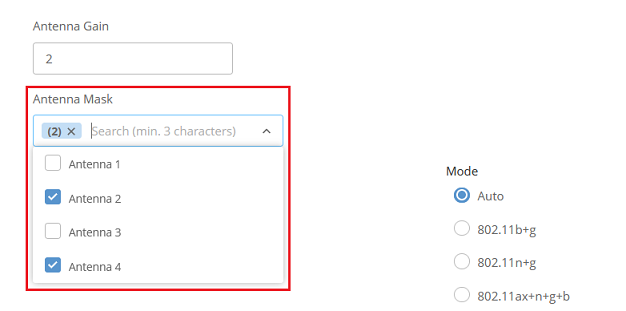
3) Finally click Save.

Configuring the antenna mask via the CLI (SSH):
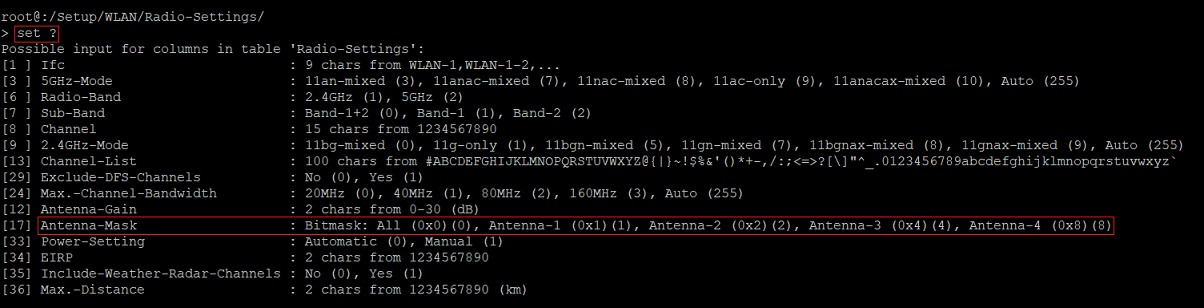
1) Connect to the access point via the CLI and enter the command cd Setup/WLAN/Radio-Settings. Enter the command ls afterwards to show the content of the table.

2) Enter the command set ? to show the configuration options. In this case the different values for the antennas are relevant.
Each antenna has a specific value (e.g. Antenna 2 has the value 2). If multiple antennas should be active, the values must be added up (e.g. Antenna 2 and 4 together result in the value 10).
3) Enter the command to activate specific antenna in the format set <Wi-Fi interface> {Antenna Mask} <Bitmask>.
Example:
On an OX-6402 in the 2.4 GHz band only the antennas 2 and 4 should be active. Therefore the command must be as follows:
set <WLAN-1> {Antenna-Mask} 10

4) Finally enter the command flash to save the configuration changes boot persistent.
