Description:
To improve the availability two Unified Firewalls can be set up in an HA cluster (High Availability). In doing so one Firewall acts as the Master and the other one as a Slave. The configuration as well as status information is synchronized from the Master Firewall to the Slave Firewall.
If an outage of the Master Firewall occurs, the Slave Firewall becomes the new Master and takes over all network communication. To announce the new MAC address a Gratuitous ARP packet is sent for each network.
TCP connections are tracked via Connection Tracking and are synchronized to the Slave Firewall. However UTM functions such as IDS/IPS cannot be synchronized. Thus after a roll change all existing connections, which are scanned by a UTM function, are interrupted.
The IP address range used for the "Cluster Interconnect" must not be used elsewhere (e.g. for the local network). Otherwise this will lead to routing problems!
Requirements:
- LANCOM R&S®Unified Firewall with LCOS FX as of version 10.3
- Two Unified Firewalls of the same model as of UF-200
- The same firmware version has to be installed on both Unified Firewalls
- One Unified Firewall license
- The configuration on the Master Firewall has to be complete
- At least one free Ethernet port on both devices
- The Gratuitous ARP of the Slave Firewall has to be transmitted by the switch in the local network
- Web browser for configuring the Unified Firewall.
The following browsers are supported:- Google Chrome
- Chromium
- Mozilla Firefox
An HA cluster can only be used in a scenario with a series connection or stand-alone operation.
Scenario:
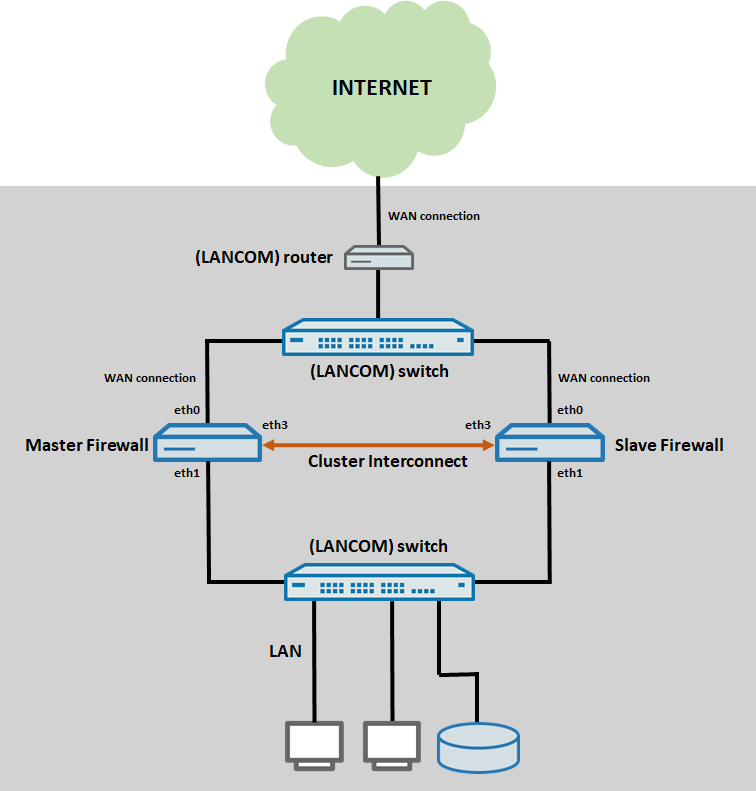
- The configuration and the cabling for the Ethernet ports has to be the same on both Unified Firewalls
- eth0 is used for the internet connection to an upstream router and is connected to an intermediary switch
- eth1 is used for the local network and is connected to a switch
- eth3 is used for the connection between the two Unified Firewalls for the cluster synchronization (Cluster Interconnect)
Procedure:
1) Configuration of the Master Firewall:
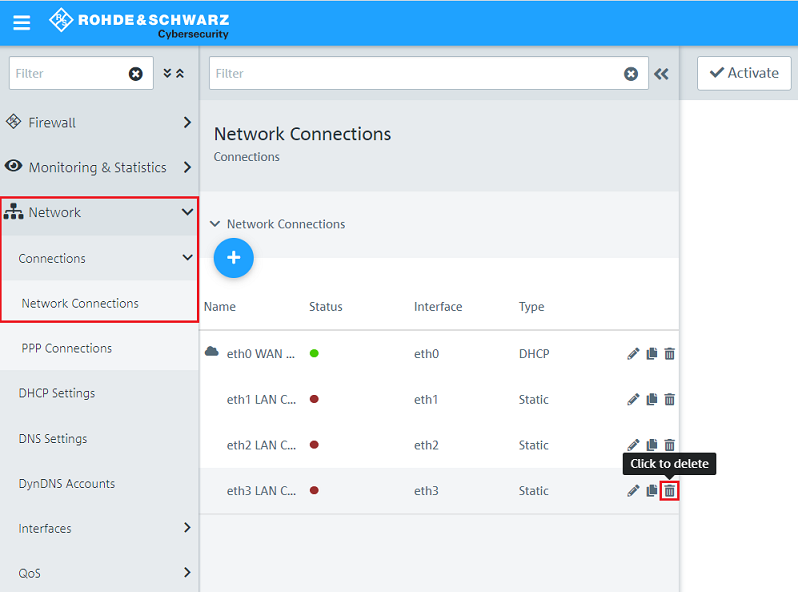
1.1) Open the configuration of the Unified Firewall in a browser and go to the menu Network → Connections → Network Connections.
A dedicated Ethernet port is necessary to set up an HA cluster. Therefore delete an unused Network Connection if the Interface is already in use (in this example the Network Connection which is assigned to the Interface eth3 has to be deleted).
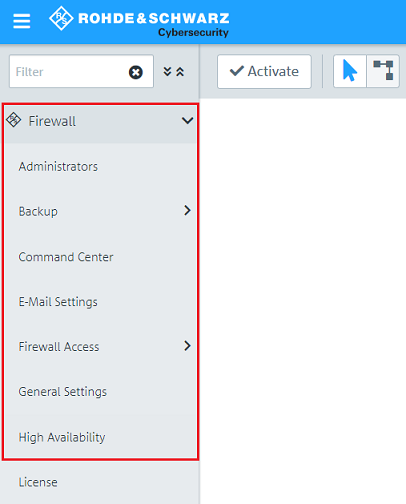
1.2) Go to the menu Firewall → High Availability.
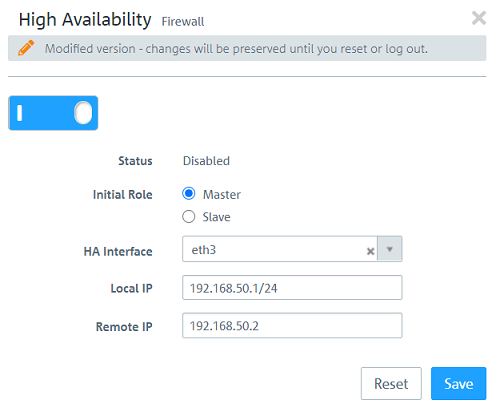
1.3) Activate the function High Availability via the slider and change the following parameters:
- Initial Role: Select the option Master.
- HA Interface: In the dropdown-menu select a free Ethernet port to be used for the synchronization between the two Unified Firewalls (in this example the port eth3).
- Local IP: Assign an IP address in CIDR format (Classless Inter Domain Routing) for the Master Firewall. This IP address / this network must not be used elsewhere in the configuration!
- Remote IP: Assign an IP address from the same network as the Local IP to the Slave Firewall. IP addresses in another network cannot be used.
1.4) The configuration of the Master Firewall is thereby complete.
2) Configuration of the Slave Firewall:
2.1) Make sure, that the same Ethernet port as on the Master Firewall is available for the synchronization. Delete a Network Connection, if necessary (see step 1.1)).
For the function High Availability the use of the same Ethernet ports is mandatory, as the configuration is identical.
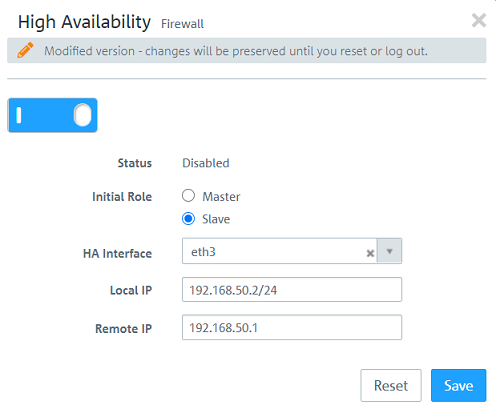
2.2) Activate the function High Availability via the slider and change the following parameters:
- Initial Role: Select the option Slave.
- HA Interface: In the dropdown-menu select a free Ethernet port to be used for the synchronization between the two Unified Firewalls (in this example the port eth3).
- Local IP: Assign the IP address of the Slave Firewall in CIDR format (Classless Inter Domain Routing) you assigned in step 1.3) as the Remote IP.
- Remote IP: Assign the IP address of the Master Firewall you assigned in step 1.3) as the Local IP.
2.3) The configuration of the Slave Firewall is thereby complete. The synchrionization is now initiated.
After synchronizing the configuration the Slave Firewall cannot be reached via its web interface!
