Description: This document describes the steps you need to take to configure the URL/Content Filter in a LANCOM R&S®Unified Firewall. Requirements:- Google Chrome
- Chromium
- Mozilla Firefox
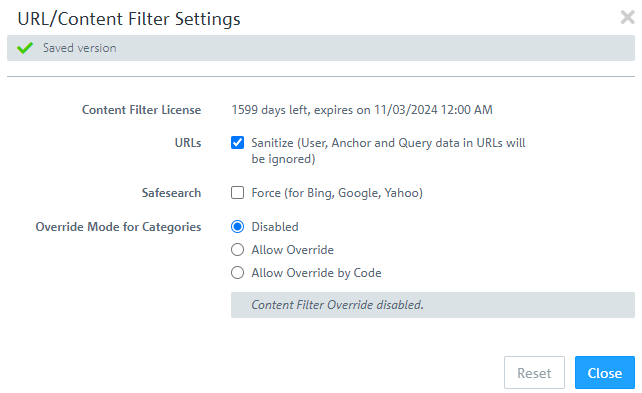
Procedure: 1) General settings: 1.1) Open the configuration interface of the LANCOM R&S®Unified Firewall in your browser and go to the menu UTM → URL/Content Filter → Settings. 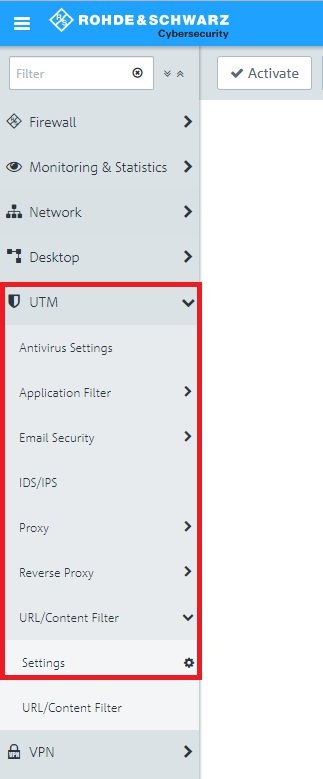 1.2) Enable or customize the features as required: - Sanitize URLs: Set a checkmark here in order for sections following a ? (used to communicate variables in PHP) to be excluded from black and white lists.
- Force Safesearch: Set this checkmark to configure the setting SafeSearch=strict to automatically configure the search engines Google, Bing, and Yahoo to keep adult content out of search results. Users cannot change this setting.
- Override mode for categories (as of LCOS FX 10.5.0): If a website has been blocked, you can control the behavior of your firewall here:
- Deactivated: No exceptions are allowed (default setting).
- Allow override: If a website has been blocked, you can override the content filter locking mechanisms for a selected period of time. Enter the period for the content filter category in minutes to deactivate the corresponding profile. Only the current category of a URL/content filter profile is overwritten as not blocked for a certain period of time.
- Allow override by code: If a website has been blocked, your users can override the locking mechanisms of the content filter by entering a short numerical sequence (code) (see also the following document).
Enter the users who are allowed to manage the corresponding codes here. From the perspective of your LANCOM R&S®Unified firewall, these can be local users, LDAP users or LDAP groups.
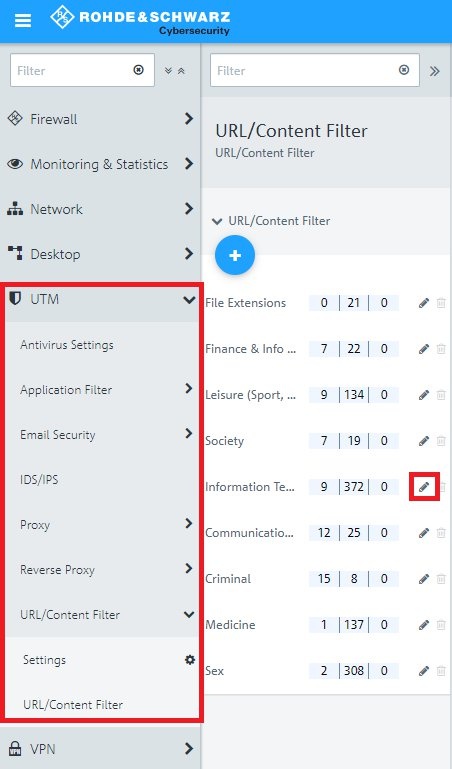
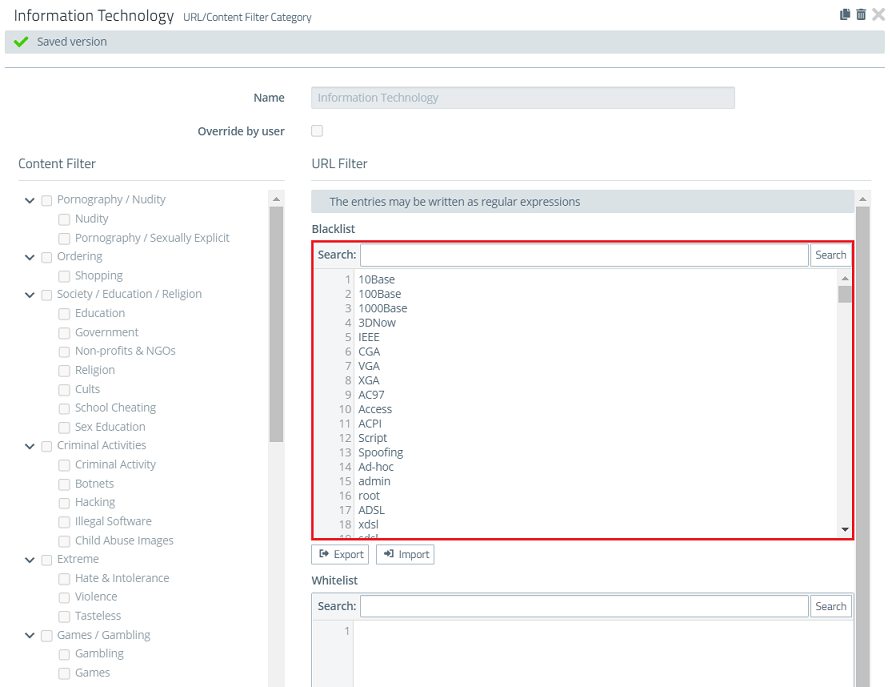
2) Creating and editing URL/Content Filter profiles: 2.1) Using the default profiles (only for existing installations with a source version up to and including LCOS FX 10.10): 2.1.1) Go to the menu UTM → URL/Content Filter → URL/Content Filter and click on the “pen” icon to edit the respective profile. 2.1.2) The profile gives you a view of the categories stored in the Content Filter as well as the keywords in the Content Filter black list and white list. The user overwrite function is deactivated by default. Activate this function if you want to allow (certain) users to be able to view pages blocked by the content filter. 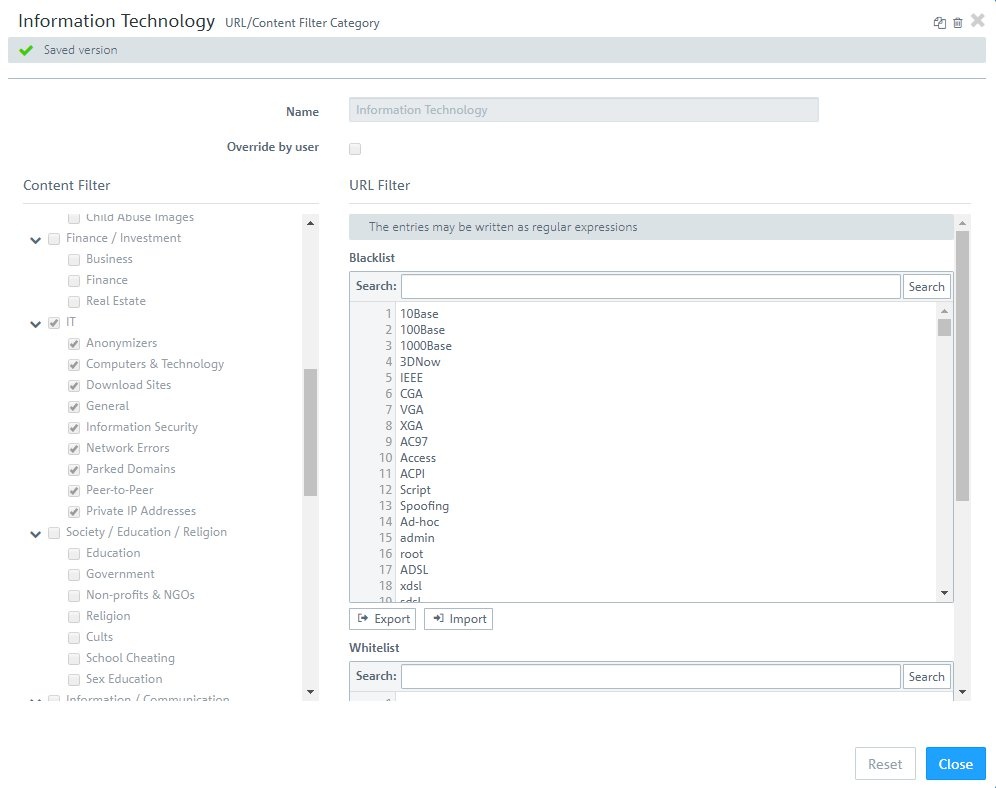
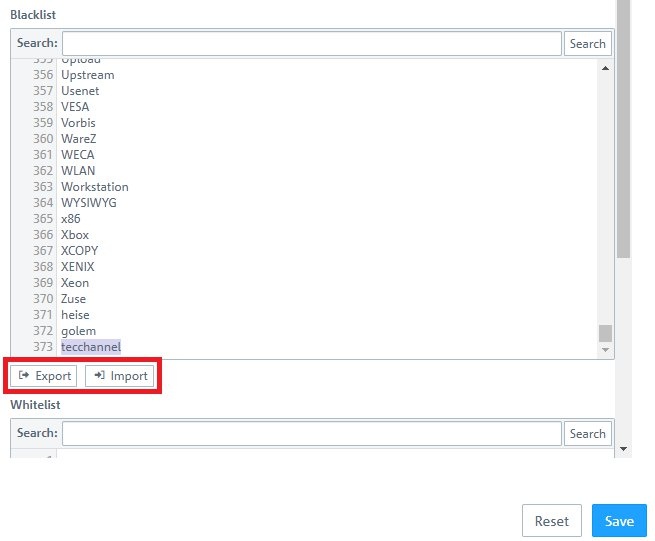
2.1.3) You can add your own entries to the black list and white list. Use a separate line for each entry. With the function Export the blacklist or whitelist can be exported as a text file and with the function Import it can be imported.
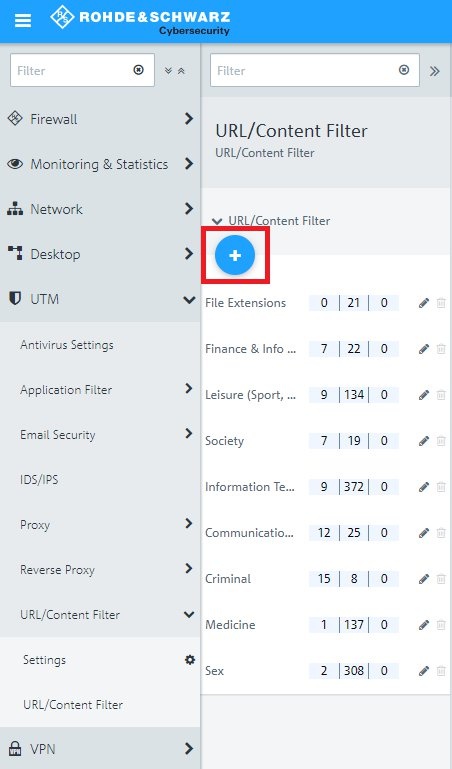
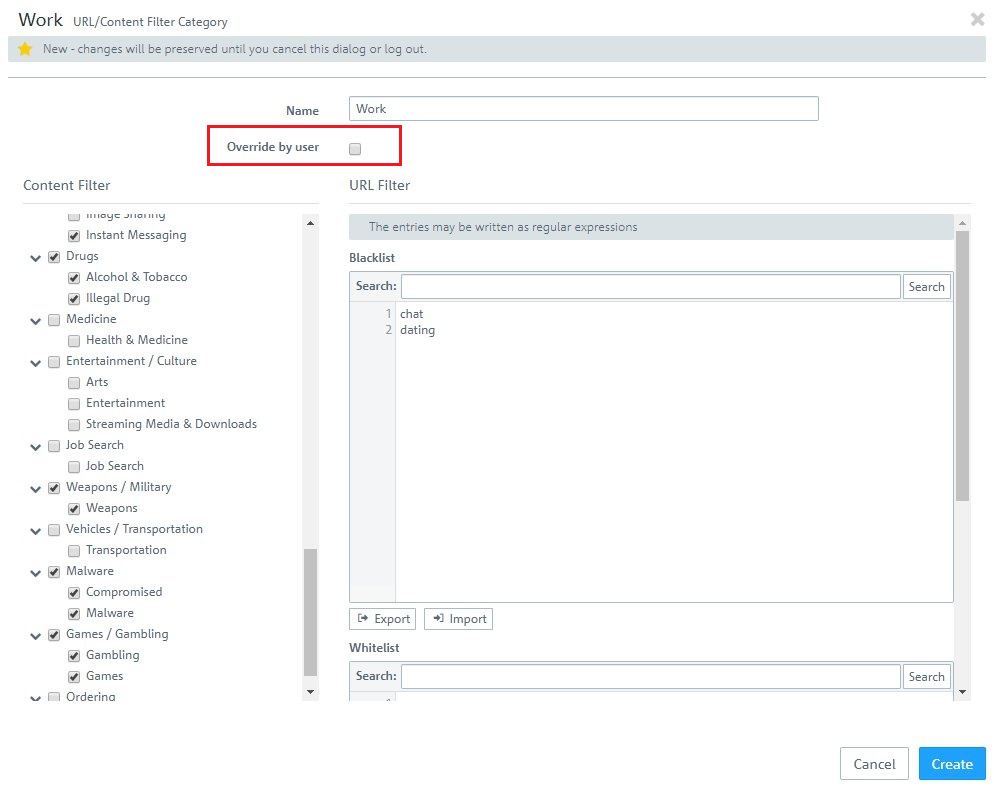
2.2) Creating your own URL/Content Filter profile: 2.2.1) Click on the “plus” icon to create your own URL/Content Filter profile. 2.2.2) Modify the following parameters: - Name: Enter a descriptive name for the profile.
- Override by user: With this option enabled, users can temporarily unblock the category if a website is blocked (also see step 1.2).
- Content Filter: Select the categories to block.
- URL Filter - Blacklist: Enter terms that are contained in undesirable URLs.
- URL Filter - Whitelist: Enter terms that are contained in desired URLs.
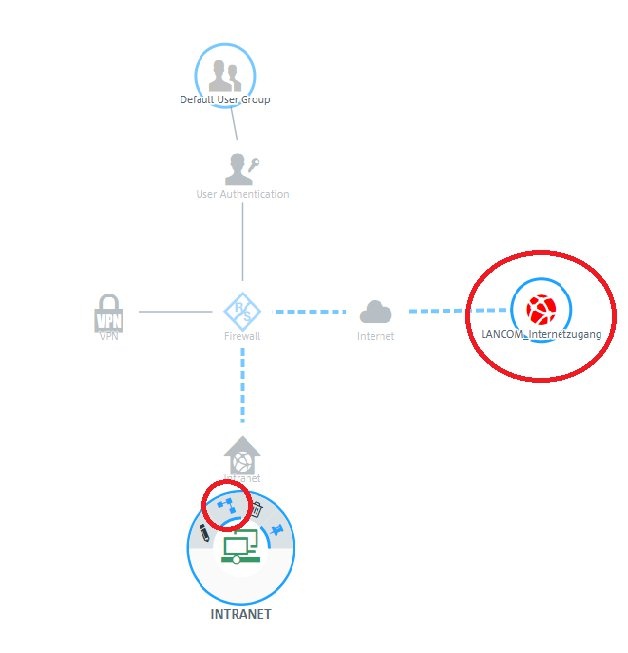
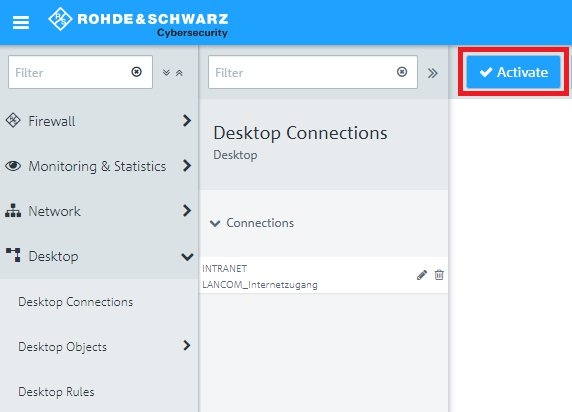
3) Assigning the URL/Content Filter profiles to the connection from the internal network to the Internet: 3.1) On the desktop, click the network object and select the Connection Tool. Link the network object to the Internet object. 3.2) Go to the tab URL/Content Filter and select the desired profiles for the URL Filter and the Content Filter. 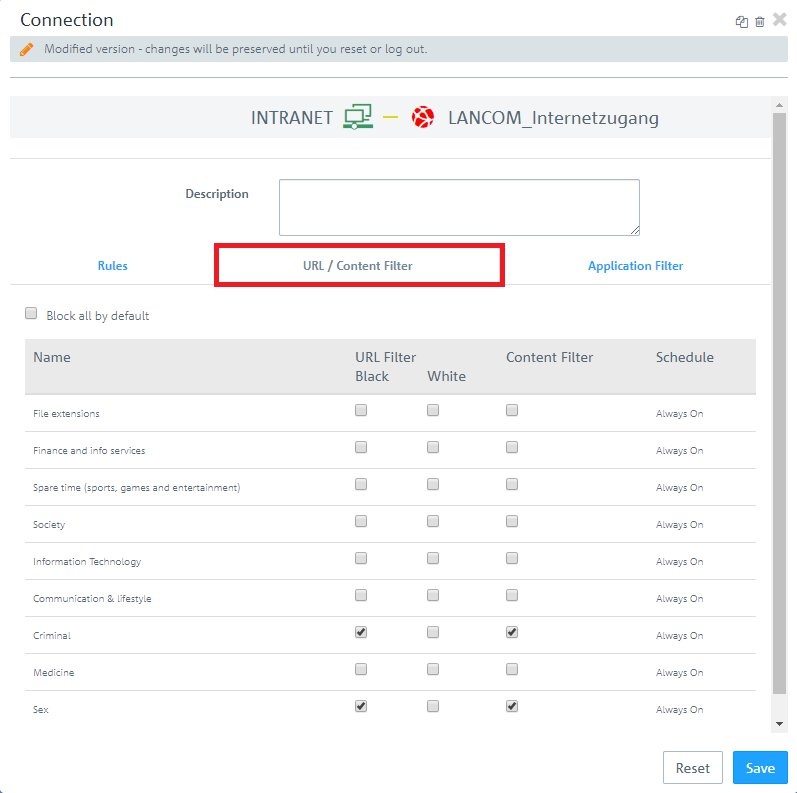
3.3) Click on the Activate button to accept the changes and enable filtering.
4) Additional steps when a desired URL is blocked by the Blacklist: If a desired URL is blocked by the URL / Content Filter of the Unified Firewall, it must be checked why it is blocked. 4.1) In the Unified Firewall go to the menu Monitoring & Statistics → Settings and for the parameters Web Content Allowed und Web Content Blocked select the option Save Raw Data Locally, so that messages regarding the URL / Content Filter are logged to the Alert Log. Click Save afterwards. 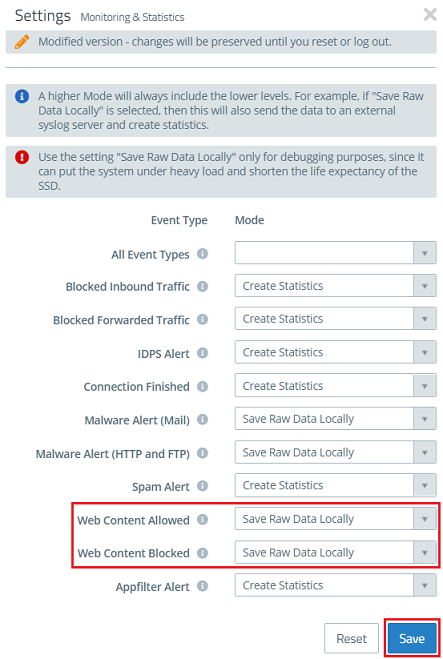
4.2) Change to the menu Monitoring & Statistics → Logs → Alert Log and check, if there is a message matching the blocked URL in the following format: Web Filter: blocked domain '<URL>' from IP address <IP address> as category 'Blacklist' from profile '<Blacklist>' In this case the URL was blocked due to an entry in the corresponding Blacklist. 4.3) Go to the menu UTM → URL/Content Filter → URL/Content Filter (also see step 2.1) and edit the corresponding profile by clicking on its "pencil icon". Search the Blacklist for the desired URL or parts of the URL and delete it so that the URL is not blocked anymore. As an alternative you can also enter the URL in the Whitelist. It has a higher priority than the Blacklist and therefore matches before it. |