
Description:
Soll der Internet-Datenverkehr von mobilen Mitarbeitern durch die Unified Firewall überprüft werden, muss sämtlicher Datenverkehr über diese geroutet werden.
In diesem Artikel wird beschrieben, wie der Internet-Datenverkehr eines Mitarbeiters, der sich mit dem Advanced VPN Client in die Firma einbucht, durch den HTTP-Proxy einer Unified Firewall geprüft werden kann.
Requirements:
- LANCOM R&S® Unified Firewall mit LCOS FX ab Version 10.4
- LANCOM Advanced VPN Client ab Version 4.1
- Bereits eingerichtete und funktionsfähige Internet-Verbindung auf der Unified Firewall
- Bereits eingerichteter und funktionsfähiger HTTP-Proxy auf der Unified Firewall
- Web-Browser zur Konfiguration der Unified Firewall.
Es werden folgende Browser unterstützt:- Google Chrome
- Chromium
- Mozilla Firefox
Scenario:
- Ein mobiler Mitarbeiter baut mit dem Advanced VPN Client eine IKEv2 Verbindung in die Firma auf.
- Damit der Internet-Datenverkehr des mobilen Mitarbeiters verschlüsselt übertragen wird, wird dieser über die Unified Firewall geroutet.
- Der Internet-Datenverkehr des mobilen Mitarbeiters soll durch den HTTP-Proxy der Unified Firewall geprüft werden.
Procedure:
1) Configuring the Advanced VPN Client connection:
1.1) Open the configuration of the Unified Firewall in a browser and set up an IKEv2 connection for the Advanced VPN Client.
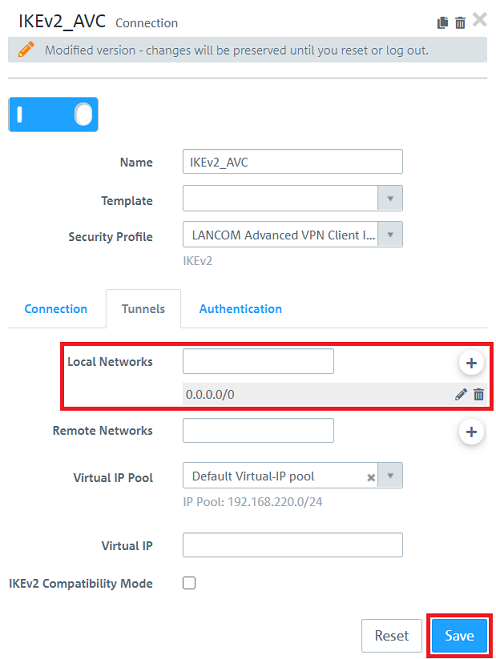
1.2) In step 1.5 for Local Networks enter the address 0.0.0.0/0 instead of the local network. This address represents any network and thus makes it possible for the entire data traffic to be routed via the VPN connection.
In the Advanced VPN Client profile no network must be present in the tab "Split Tunneling"! Otherwise only the traffic destined for this network is routed via the VPN connection.
1.3) The configuration of the Advanced VPN Client connection is now complete.
2) Manual configuration steps:
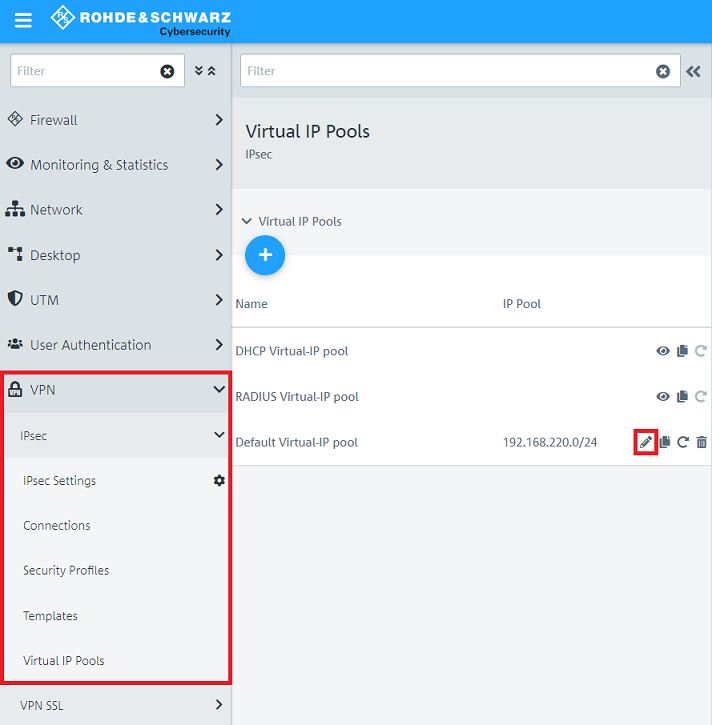
2.1) Go to the menu VPN → IPSec → Virtual IP Pools and edit the IP Pool used for the VPN connection (in this example Default Virtual-IP pool).
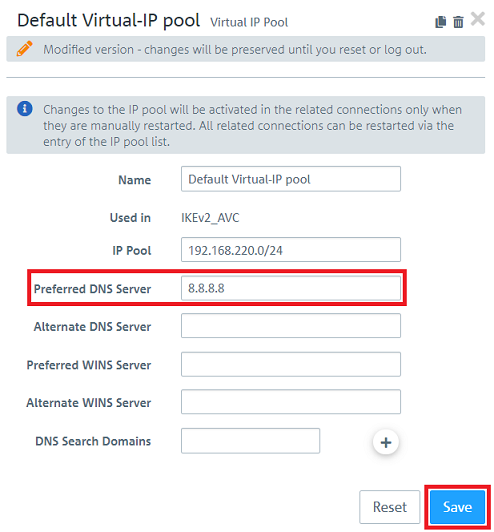
2.2) For Preferred DNS Server enter the IP address of a DNS server and click Save. This server is assigned to the VPN client during the dial-in process and enables resolving DNS names via the VPN connection.
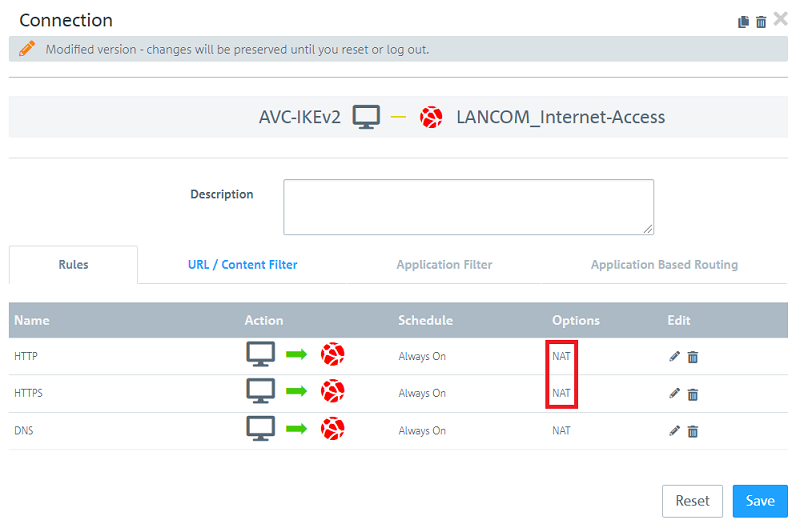
2.3) On the desktop click on the VPN host created in step 1 (in this example AVC-IKEv2), select the Connection Tool and click on the Internet object to set up firewall rules.

2.4) Add the protocols HTTP, HTTPS and DNS.
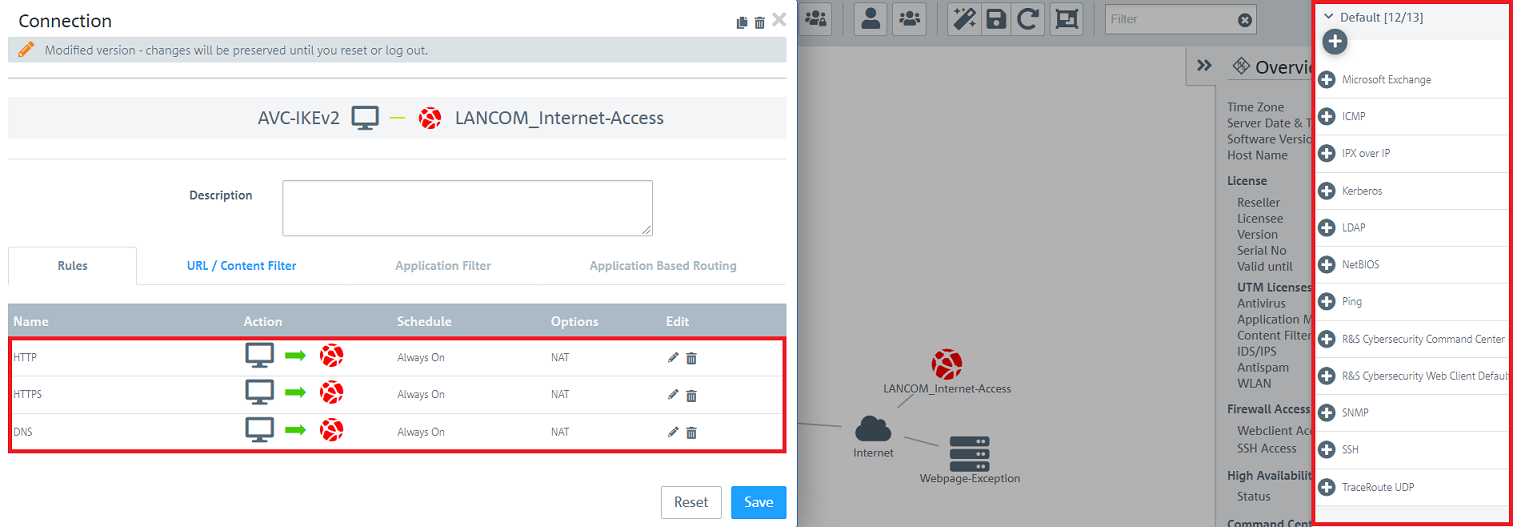
2.5) For the protocols HTTP and HTTPS under Options click on NAT consecutively.
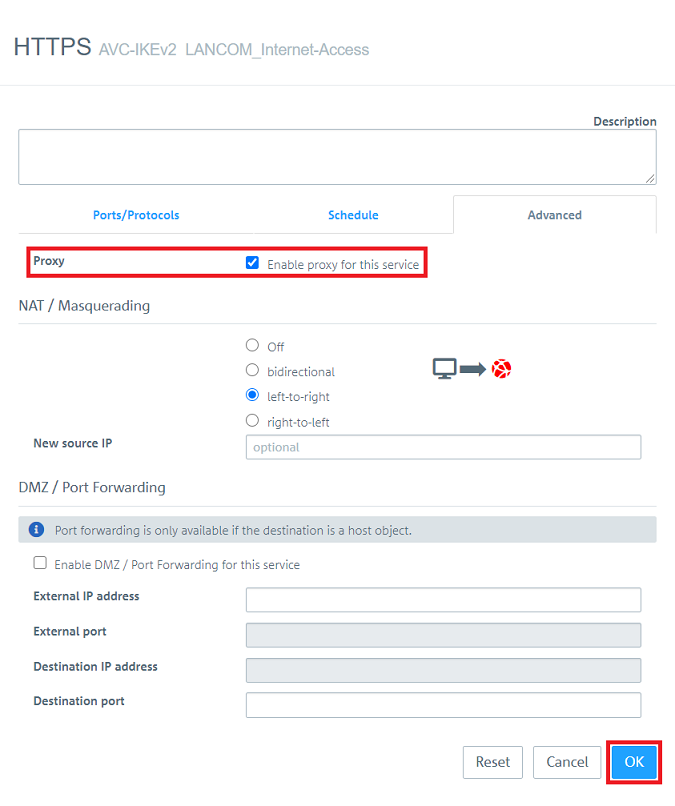
2.6) For HTTP and HTTPS activate the option Enable proxy for this service and click OK.

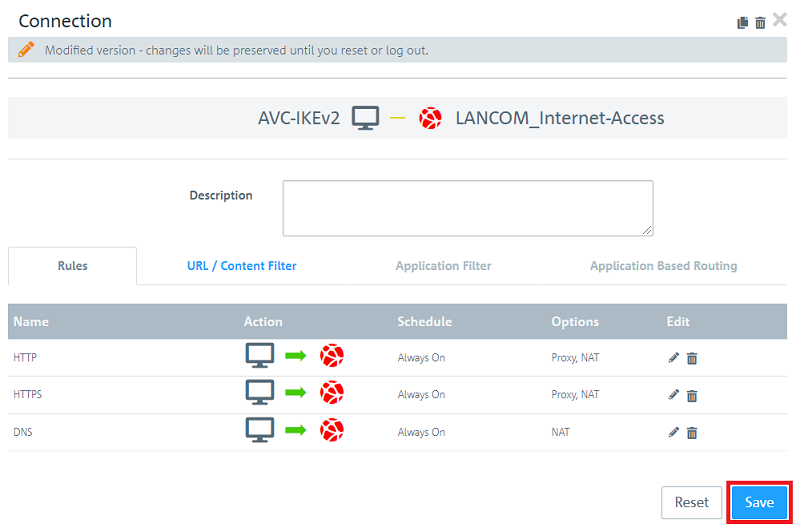
2.7) Click Save for the firewall rules to be created.
2.8) Click Activate in order for the changes to be implemented by the Unified Firewall.

3) Importing the HTTP proxy certificate into the computer with the Advanced VPN Client:
Export the HTTP proxy certificate and import it into the computer with the Advanced VPN client. The procedure is explained in step 3 in this Knowledge Base article.
4) Configuring additional UTM functions (optional):
Additional UTM functions, which require the HTTP proxy can now be configured.
- LANCOM R&S®Unified Firewall: Configuring the antivirus feature
- LANCOM R&S®Unified Firewall: Configuring the URL/Content Filter