Description: This document describes the settings to make on LANCOM GS-23xx series switches and LANCOM routers in order to implement MAC-based authentication at the internal RADIUS server of a LANCOM device. Requirements:Procedure:1) Setting up the RADIUS server on the LANCOM router: 1.1) dxvdf - Open the configuration for the LANCOM router in LANconfig and switch to the menu item RADIUS → Server → RADIUS service.
- In the Authentication port field, enter the value 1812.
1.2) - Then click the button IPv4 clients to specify the switch as a new client.
- IP address: IP address of the switch
- Netmask: 255.255.255.255
- Protocols: RADIUS
- Client secret: The same secret as the one entered into the switch
2.3) Add one or more entries to the User table- In the RADIUS server user table, add one or more new entries with the following settings:
- Name / MAC address MAC address of the client in the format xx-xx-xx-xx-xx-xx
- Case-sensitive user name check: Set the checkmark
- Password: The MAC address of the client
- Service type: Framed
- Expiry type: Never
Write the configuration back to the LANCOM router. This concludes the configuration.
2) Setting up the switch 2.1) Öffnen Sie das Webinterface des Gerätes, wechseln in das Menü Security → AAA → Configuration, passen bei RADIUS Authentication Server Configuration folgende Parameter an und klicken auf Apply: - Setzen Sie den Haken bei Enabled.
- IP Address/Hostname: Tragen Sie die IP-Adresse des Routers ein, auf dem in Schritt 1. der RADIUS-Server eingerichtet wurde.
- Port: Stellen Sie sicher, dass der Port 1812 hinterlegt ist.
- Secret: Hinterlegen Sie das in Schritt 1.5 vergebene Client-Secret. Mit diesem Passwort authentifiziert sich der Switch am RADIUS-Server.
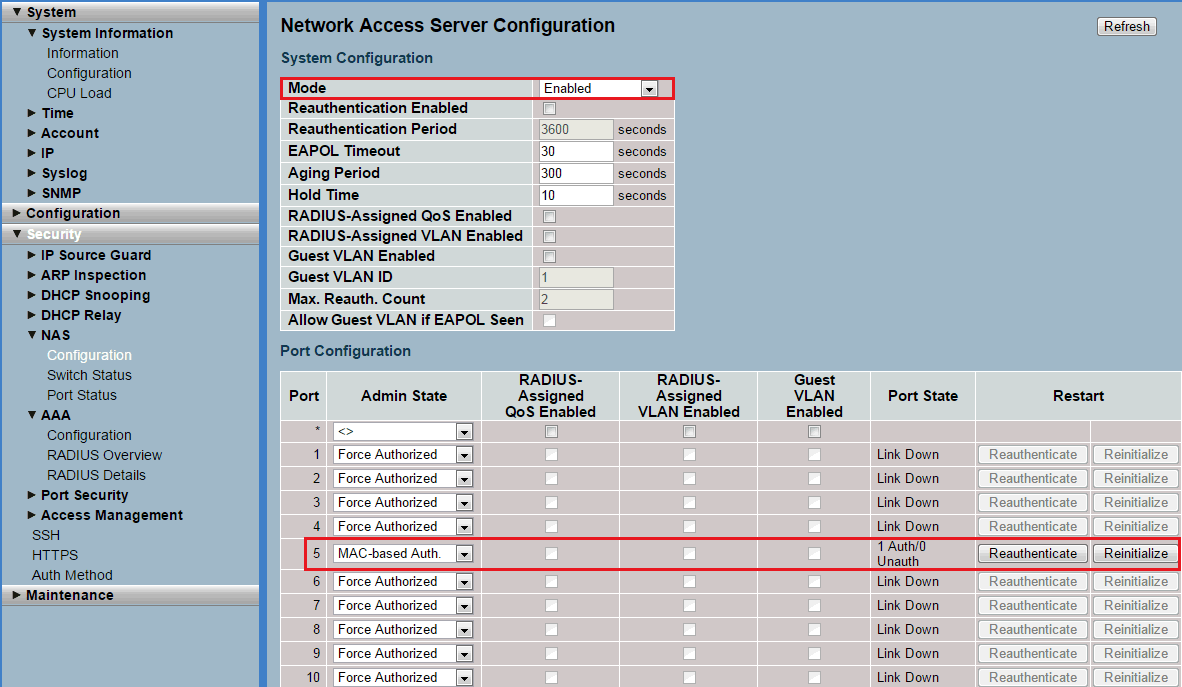
1.2) Set up MAC authentication- Navigate to the menu Security → NAS → Configuration → System configuration and set the Mode to the value Enabled.
- In the Port configuration section, set the Admin state of the necessary ports to the value MAC-based auth.
Then save the configuration of the switch. 2.3 Wechseln Sie in das Menü Maintenance → Save/Restore → Save Start und klicken auf Save, damit die Konfiguration als Start-Konfiguration gespeichert wird.
2.4 Die Konfiguration des Switches ist damit abgeschlossen. |
|