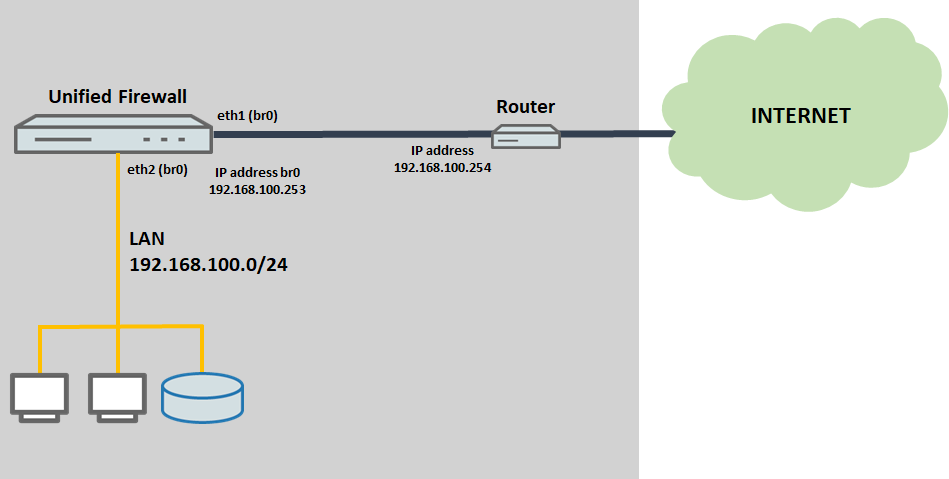
Description:
In highly heterogeneous environments with network devices from different manufacturers, integrating a LANCOM R&S®Unified Firewall with UTM features can be a challenge. The simplest solution is to use the transparent bridge mode. This allows all of the features of existing network devices to remain in use (e.g. existing VPN connections).
This article describes how the UTM features of a LANCOM R&S®Unified Firewall are operated in heterogeneous network environments by means of the transparent bridge mode.
All UTM functions can be operated in this scenario. |
Requirements:
Scenario:

Procedure:
1) Configuring transparent bridge mode on the Unified Firewall:
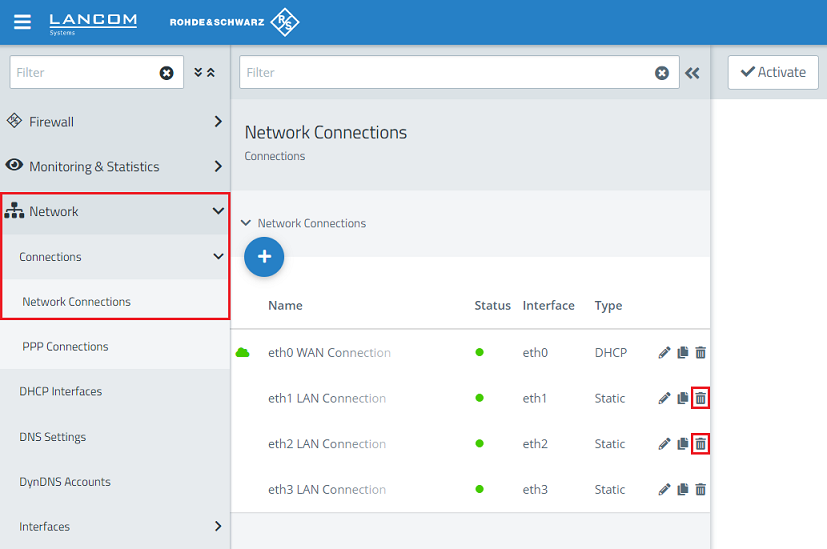
1.1) Connect to the Unified Firewall using a web browser, switch to the menu Network → Connections → Network Connections, and use the “trash can” icons to delete the two unused connections so that the two Ethernet ports are available for the bridge (in this example the interfaces eth1 and eth2).
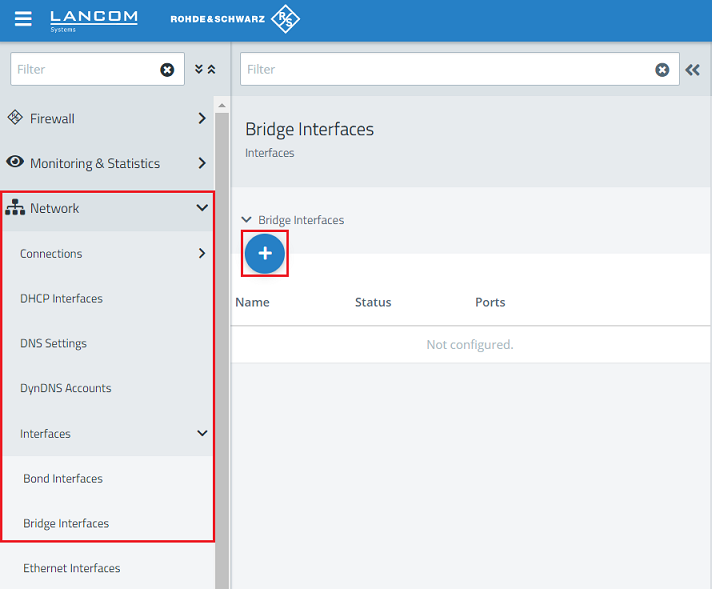
1.2) Navigate to the menu Network → Interfaces → Bridge Interfaces and click on the “+” icon to create a new interface.
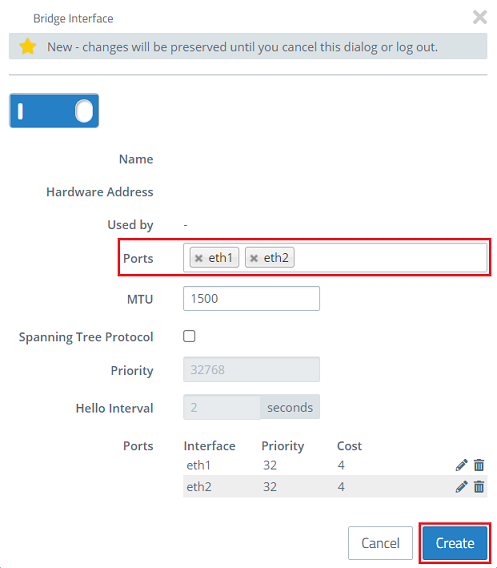
1.3) Enter the ports deleted in step 1.1 (in this example eth1 and eth2) and click Create.
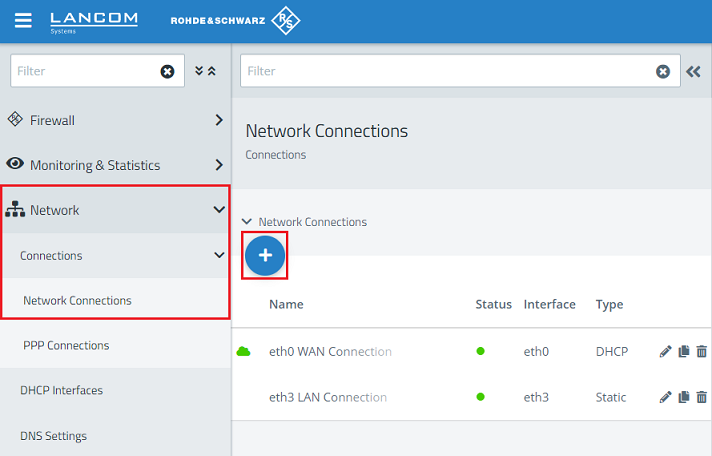
1.4) Change to the menu Network → Connections → Network Connections and click on the “+” icon to create a new interface.
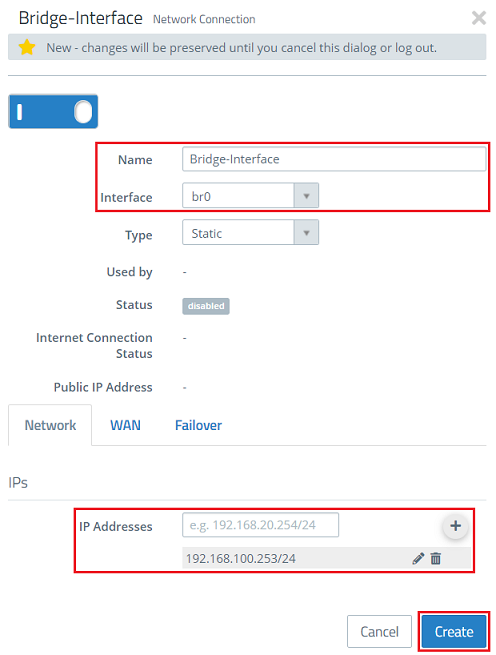
1.5) Modify the following parameters and then click Create:
On the WAN tab, do not set a default gateway! |
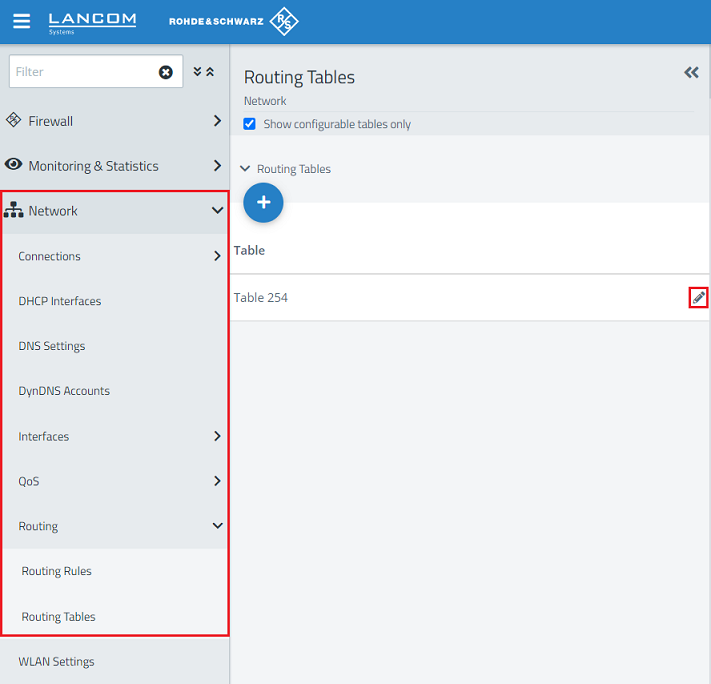
1.6) Change to the menu Network → Routing → Routing Tables and click on the “edit” icon to modify the settings of the Table 254.
1.7) Click on the “+” icon to create an additional routing entry.
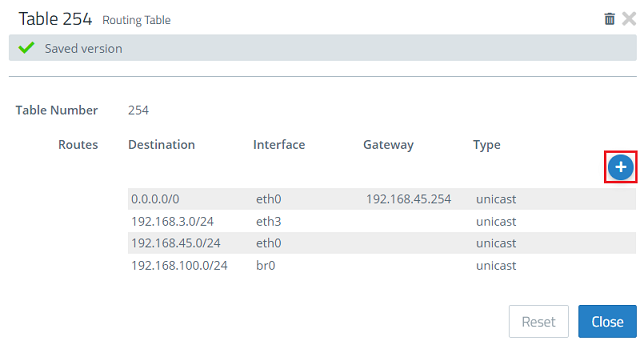
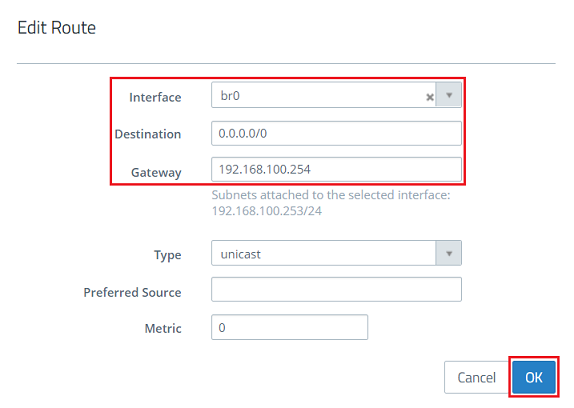
1.8) Modify the following parameters and then click OK:
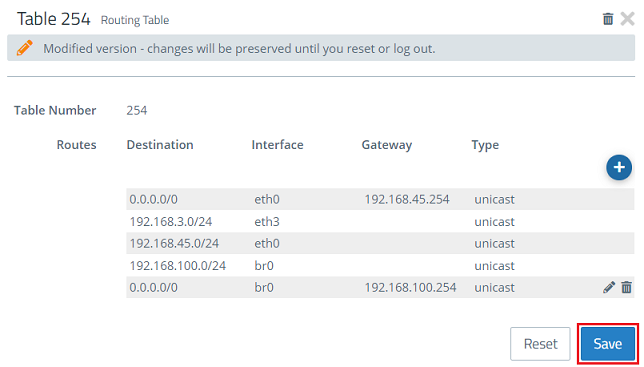
1.9.) Click on Save.
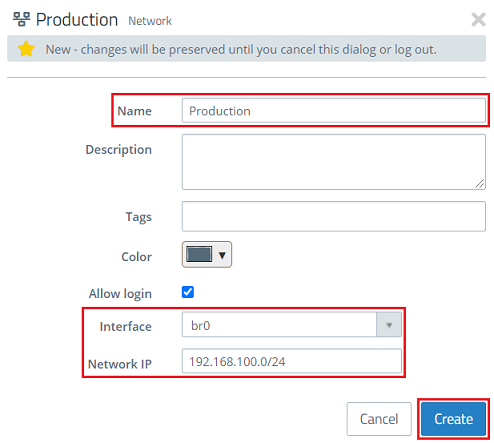
1.10) Click the icon to create a new network to create an object for the local network.

1.11) Modify the following parameters and then click Create:
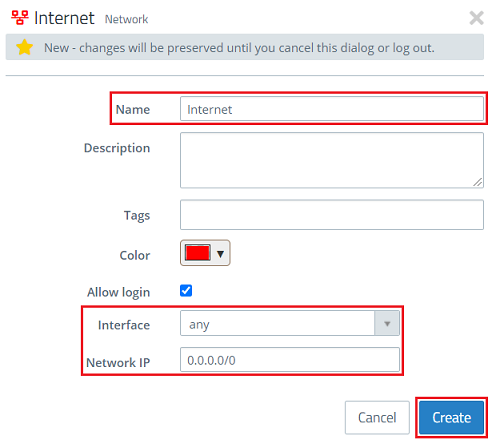
1.12) Click the icon to create a new network once again to create an object for the Internet connection.

1.13) Modify the following parameters and then click Create:
2) Allow DHCP communication:
A firewall rule is required to enable DHCP communication between the end devices and the DHCP server on the router.
If a DHCP server is operated “behind” the Unified Firewall, the DHCP packets do not pass through it. In this case, the following configuration steps are not necessary. |
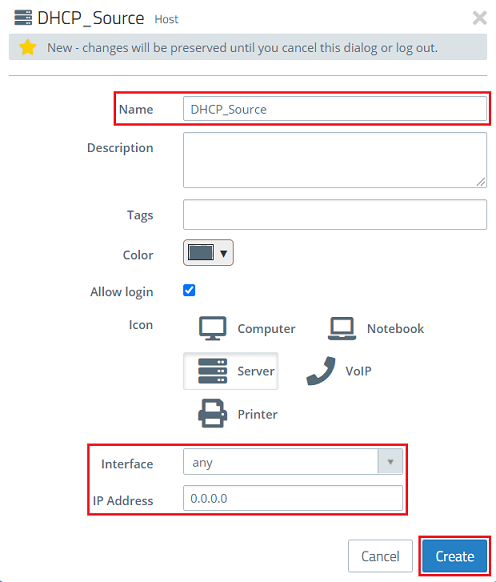
2.1) Click the icon to create a host to create an object for the DHCP source.

2.2) Modify the following parameters and then click Create:
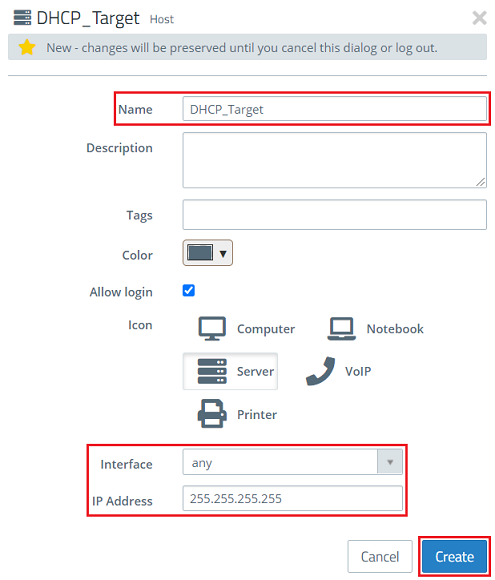
2.3) Click the icon to create a host once again to create an object for the DHCP target.

2.4) Modify the following parameters and then click Create:
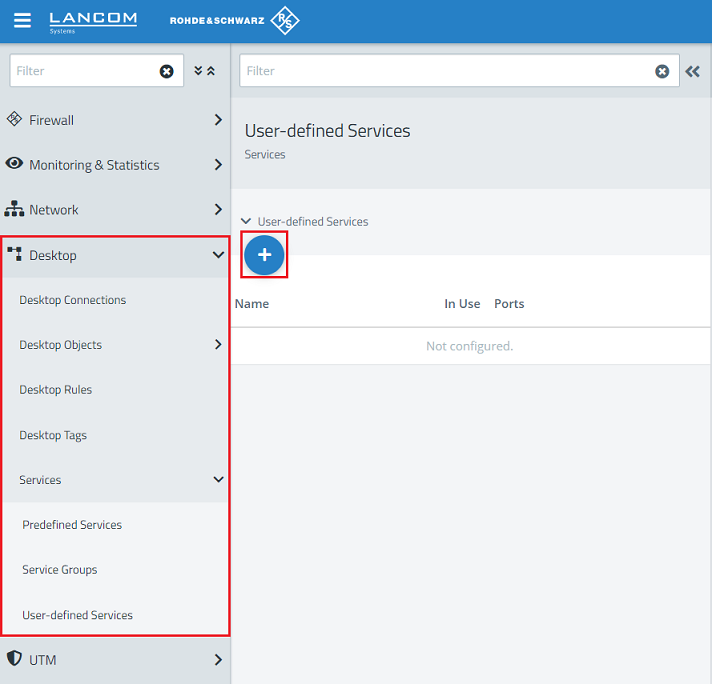
2.5) Change to the menu Desktop → Services → User-defined Services and click on the “+” icon to create a user-defined service.
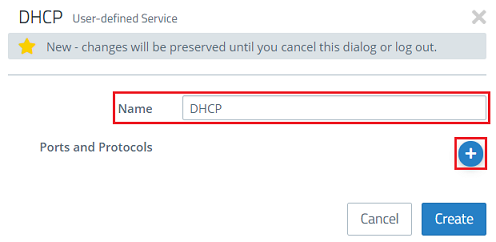
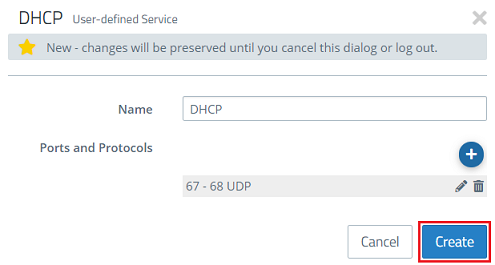
2.6) Give it a descriptive name and click on the “+” icon to add the Ports and Protocols.
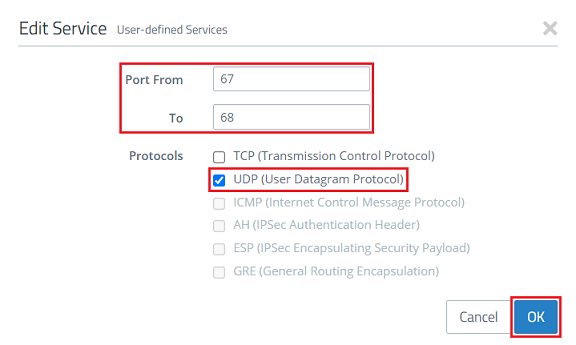
2.7) Enter the ports 67 to 68 and select the UDP protocol. Then click on OK.
2.8) Click on Create.
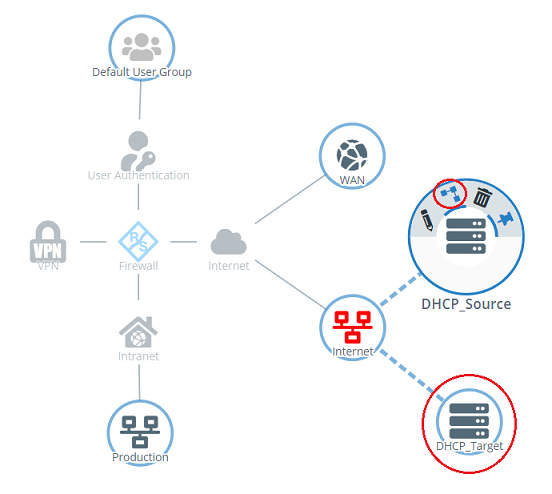
2.9) On the desktop, click the DHCP source object (DHCP_Source) created in step 2.2, select the connection tool and click the DHCP target object (DHCP_Target) created in step 2.4.
2.10) Use the “+” icon to add the user-defined service created for DHCP in step 2.6 - 2.8.
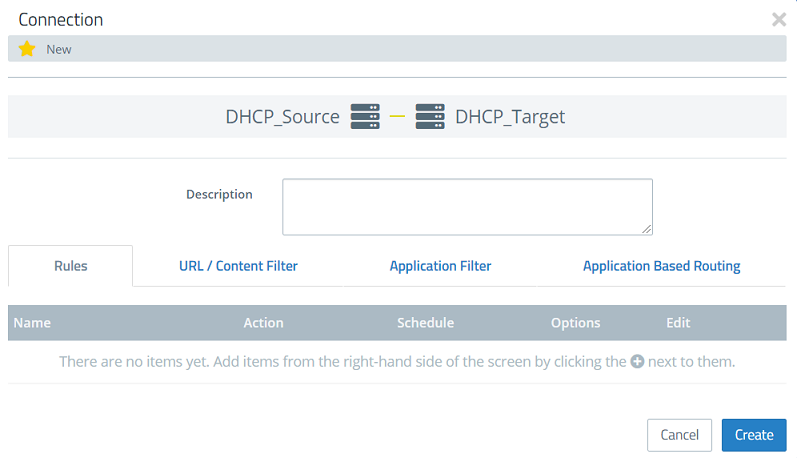
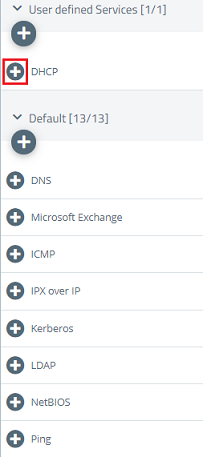
2.11) Click Create to create the firewall rule.
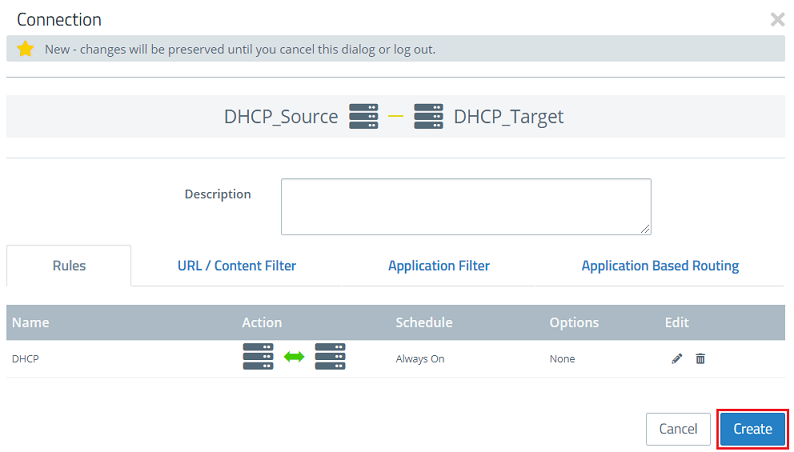
2.12) This concludes the configuration of the transparent bridge. Finally, implement the changes by clicking Activate.

3) Configuring UTM features:
You can now set up the UTM features: