
Description:
This document describes how you can create digital certificates with LANCOM Smart Certificate for authenticating 802.1x based connections.
Requirements:
- LCOS version 9.10 or later (download latest version)
- LANtools version 9.10 or later (download latest version)
- LANCOM central-site gateway, WLAN-Controller, or LANCOM router with an activated VPN 25 Option
Procedure:
By using LANCOM Smart Certificate, the digital certificates can be created directly on the LANCOM router or LANCOM WLAN Controller.
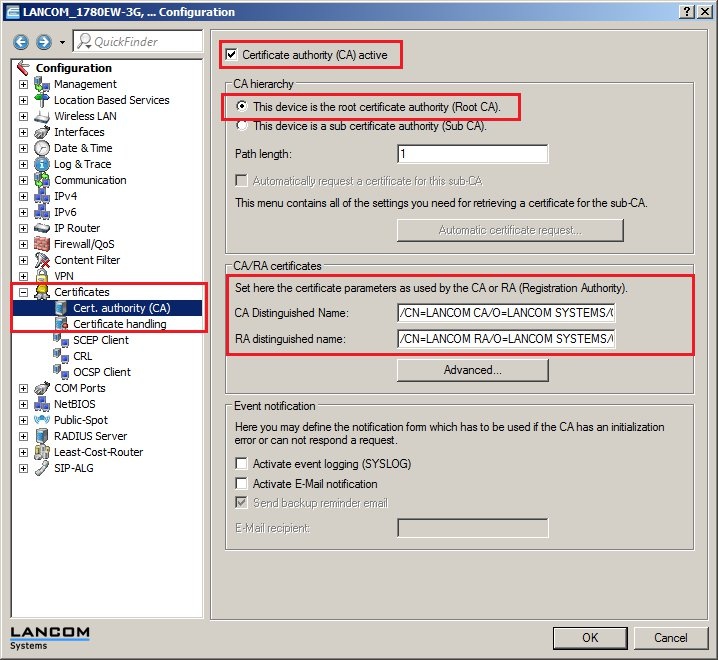
1.1) In LANconfig, open the configuration dialog for the LANCOM router and switch to the menu item Certificates → Cert. authority (CA).
Thus certificates can be created on a LANCOM router or WLAN Controller via Smart Certificate, the unit has to work as a certification authority.
- If you create the certificates on a WLAN Controller, the certification authority has already been activated, as this is required for the WLAN management functionality of the WLAN Controller.
- If you want to create certificates on a LANCOM router, the certification authority function of the device must first be activated.
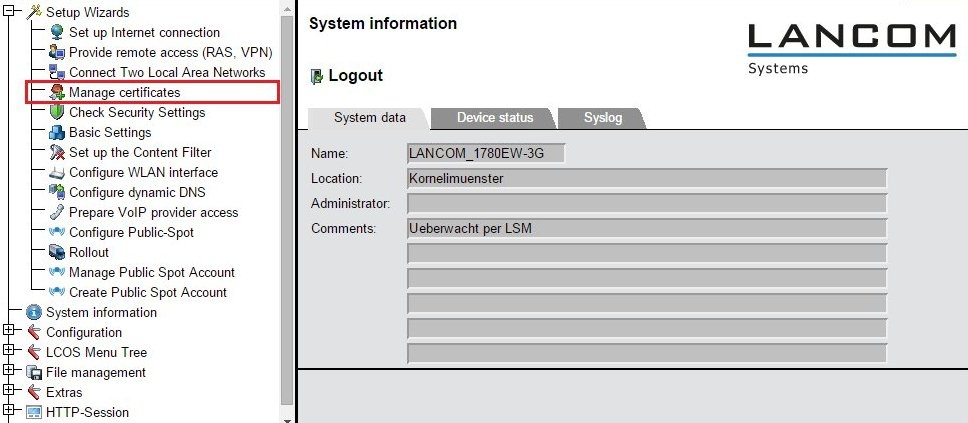
1.2) In WEBconfig, access the configuration for the LANCOM router and switch to the menu item Setup Wizards → Manage certificates.
1.3) First, create the certificate for the LANCOM router. Click the button Create new certificate to do this.

1.4) Set the profile name to TLS-Server.
1.5) In this example, the common name (CN) is set as the company's name. By way of example, the surname (SN) is set to the descriptor Router. The other fields can be filled in as you desire.
1.6) Be sure to password-protect the certificate container.

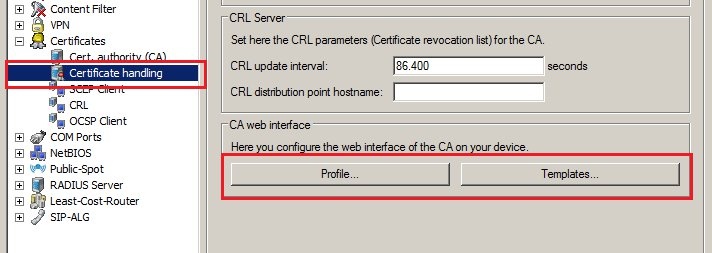
You can specify which profiles and fields should be displayed in this form in the LANCOM router's configuration with the menu items Certificates → Certificate handling → Profiles and Templates .
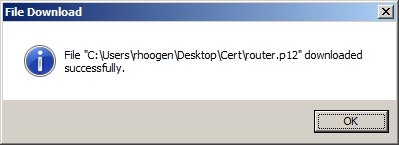
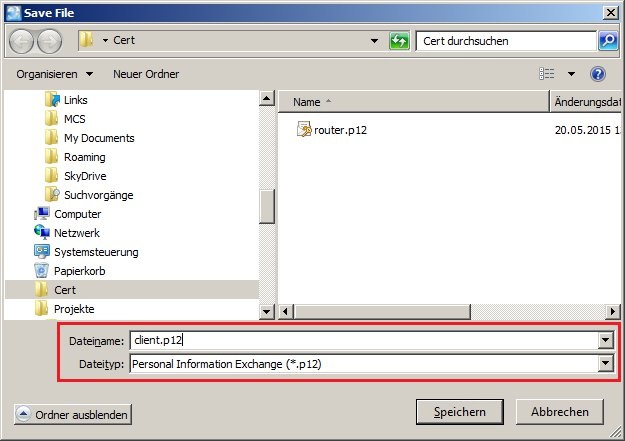
1.7) Click the button Enroll (PKCS#12) and give the certificate file a unique file name, if necessary.
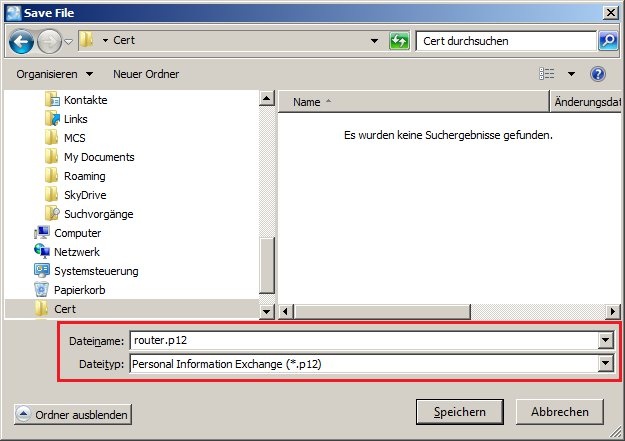
1.8) The successful download of the certificate file is confirmed by a message.
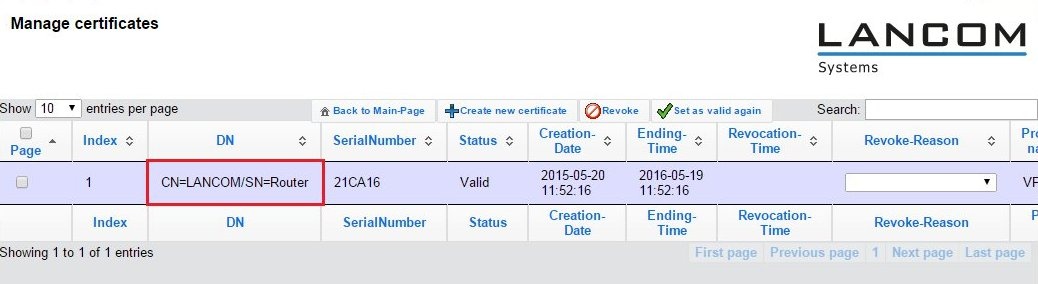
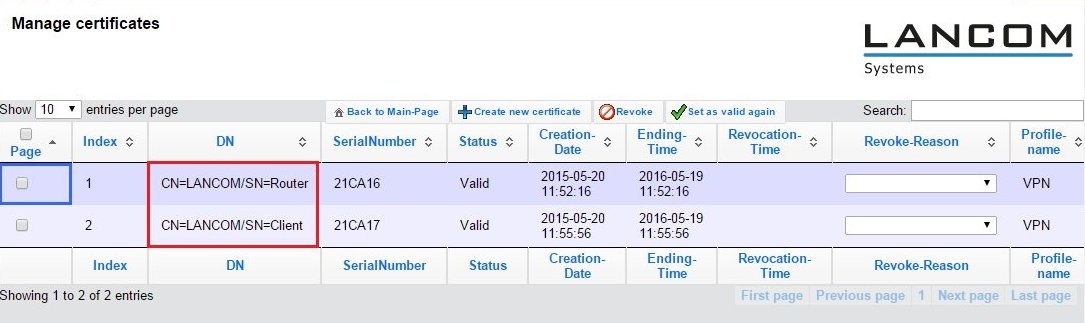
1.9) If you switch back to Manage certificates, you should see the created certificate in the list.
1.10) Create an additional certificate for the wifi client by clicking on the button Create new certificate once again.
1.11) Set the profile name to TLS-Client.
1.12) In this example, the common name (CN) is set as the company's name. By way of example, the surname (SN) is set to the description Client. The other fields can be filled in as you desire.
1.13) You need to password-protect the certificate container.
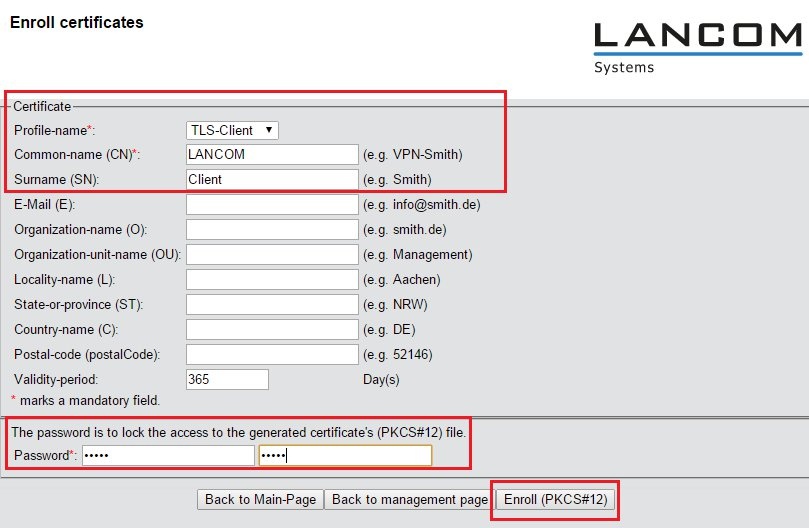
1.14) Click the button Enroll (PKCS#12) and give the certificate file a unique file name, if necessary.
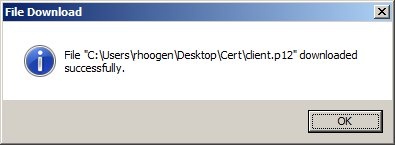
1.15) The successful download of the certificate file is confirmed by a message.
1.16) If you switch back to Manage certificates, you should see the created certificate in the list.
1.17) The certificates should have been created successfully and can now be used for authenticating 802.1x based connections.