
Description:
This document describes how to set up a VPN-SSL connection with the OpenVPN Client from a Windows PC or notebook to a LANCOM R&S®Unified Firewall (referred to here as the United Firewall).
Due to a change in the encryption algorithms in OpenVPN as of version 2.6.0 a VPN-SSL connection can only be established to a Unified Firewall with LCOS FX as of version 10.13 Rel. Please use OpenVPN in a version older than 2.6.0 (e.g. version 2.5.8) when using an older LCOS FX version.
Requirements:
- Existing installation on a LANCOM R&S®Unified Firewall
- OpenVPN Client
- Windows as of version 7
- A configured and functional Internet connection on the Unified Firewall
- Web browser for configuring the Unified Firewall.
The following browsers are supported:- Google Chrome
- Chromium
- Mozilla Firefox
Scenario:
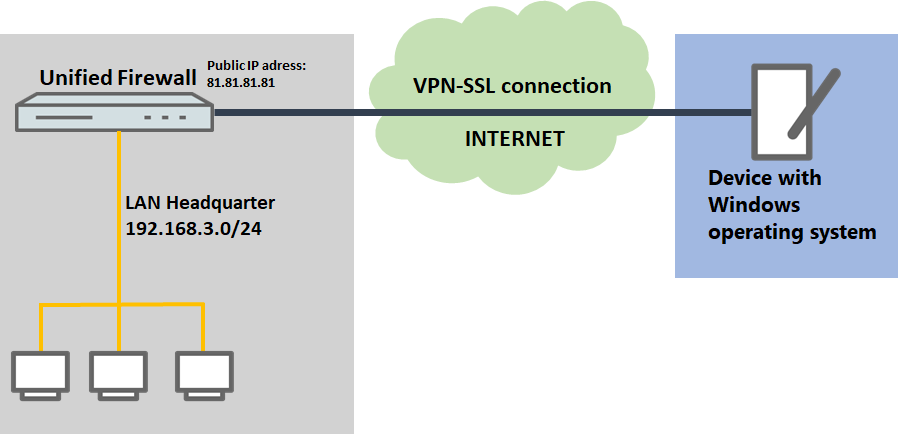
1) The Unified Firewall is connected directly to the Internet and has a public IPv4 address:
- A company wants its sales representatives to have access to the corporate network via an VPN-SSL client-to-site connection.
- The notebooks used by the sales representatives have the Open VPN Client installed on them.
- The company headquarters has a Unified Firewall as a gateway with an Internet connection with the fixed public IP address 81.81.81.1.
- The local network at the headquarters has the IP address range 192.168.3.0/24.
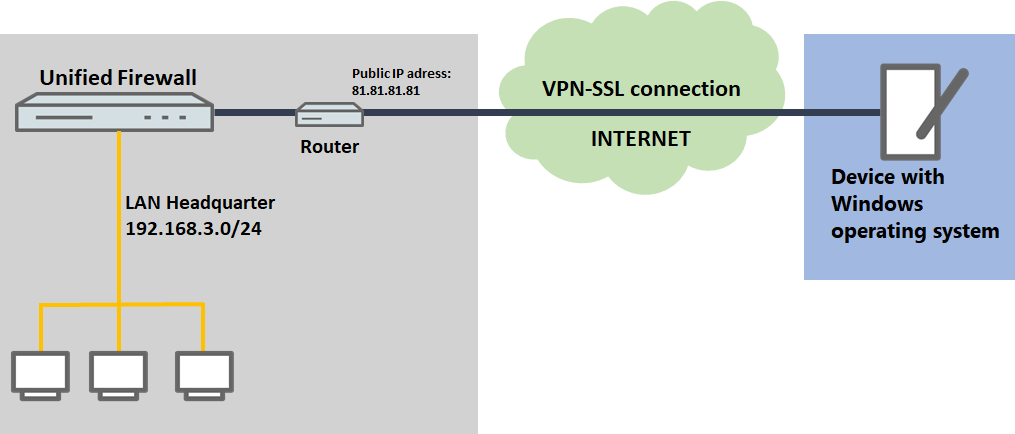
2) The Unified Firewall is connected to the Internet via an upstream router:
- A company wants its sales representatives to have access to the corporate network via an VPN-SSL client-to-site connection.
- The notebooks used by the sales representatives have the Open VPN Client installed on them.
- The company headquarters has a Unified Firewall as the gateway and an upstream router for the Internet connection. The router has the fixed public IP address 81.81.81.1.
- The local network at the headquarters has the IP address range 192.168.3.0/24.
Procedure:
The setup for scenarios 1 and 2 are basically the same. Scenario 2 additionally requires port forwarding to be set up on the upstream router (see section 3).
1) Configuration steps on the Unified Firewall:
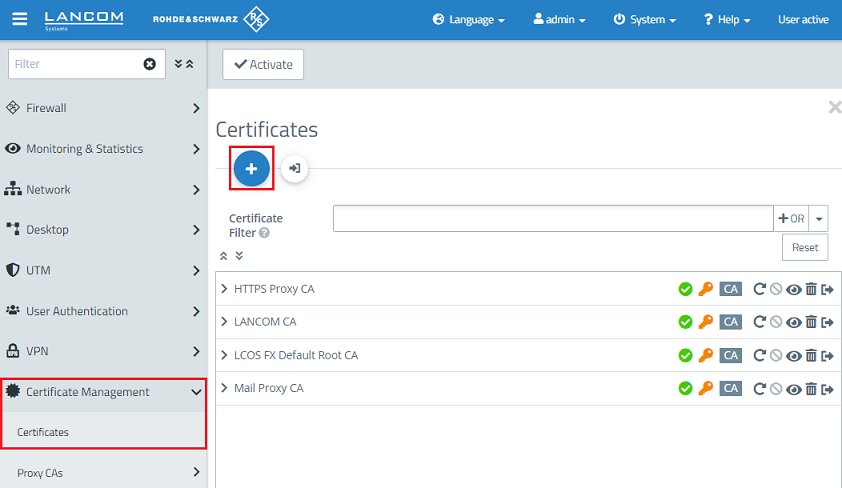
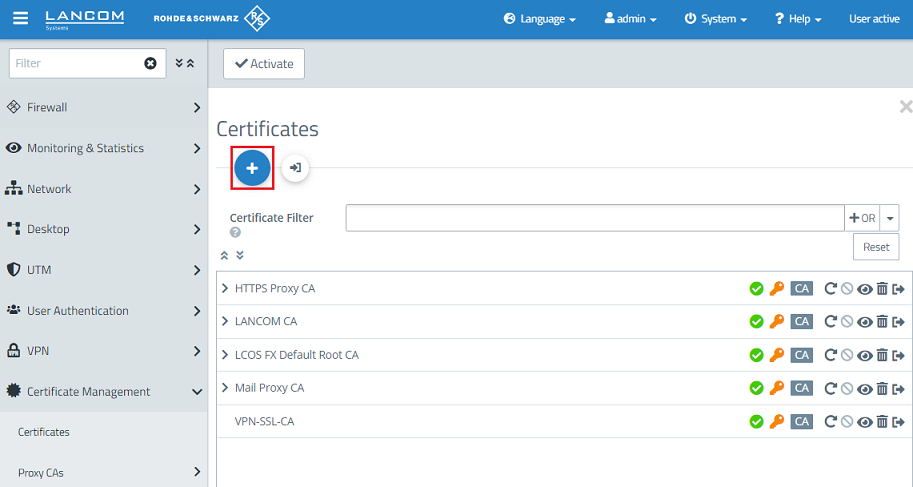
1.1) Connect to the Unified Firewall, switch to the menu Certificate Management → Certificates and click on the "+” icon to create a new CA.
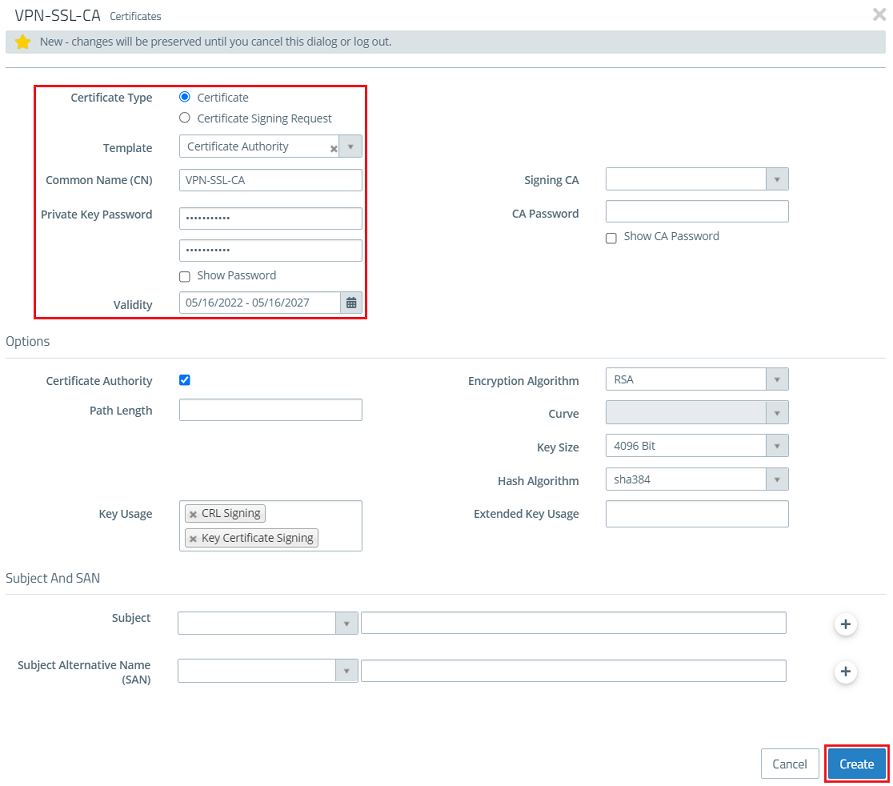
1.2) Modify the following parameters and click Create:
- Certificate type: Leave the setting on Certificate.
- Template: In the drop-down menu select the option Certificate Authority.
- Common name (CN): Enter a descriptive common name (in this example VPN-SSL-CA).
- Private key password: Set a password. This is used to encrypt the private key.
- Validity: Specify how long the certificate should remain valid. For a CA, the period of validity is usually set to be very high. The default setting for a CA is a validity of 5 years.
The rest of the parameters (e.g. the encryption settings) can be left at the default values.
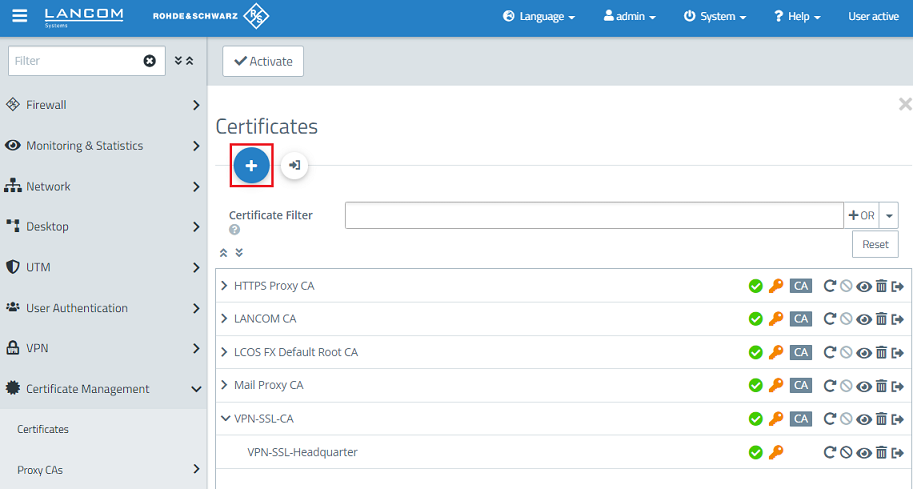
1.3) Create another certificate by clicking on the "+” icon. This is used for authenticating VPN SSL connections on the Unified Firewall.
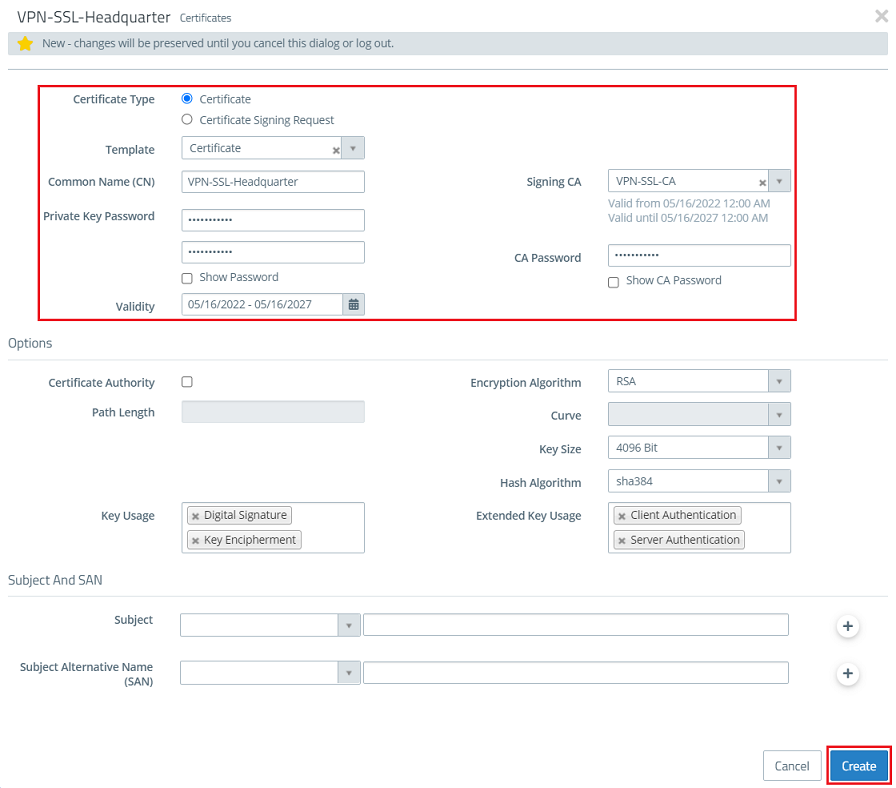
1.4) Modify the following parameters and click Create :
- Certificate type : Leave the setting on Certificate .
- Template: In the drop-down menu select the option Certificate.
- Common Name (CN): Enter a descriptive common name (in this example VPN-SSL-Headquarter).
- Private key password: Set a password. This is used to encrypt the private key.
- Validity: Specify how long the certificate should remain valid. For a VPN certificate used to accept VPN clients, the period of validity is usually set to be very high (in this example 5 years).
- Signing CA: From the drop-down menu, select the CA created in step 1.2.
- CA password: Enter the private key password set in step 1.2.
The rest of the parameters (e.g. the encryption settings) can be left at the default values.
1.5) Create another certificate by clicking on the "+” icon. This is used for authenticating an individual VPN SSL user.
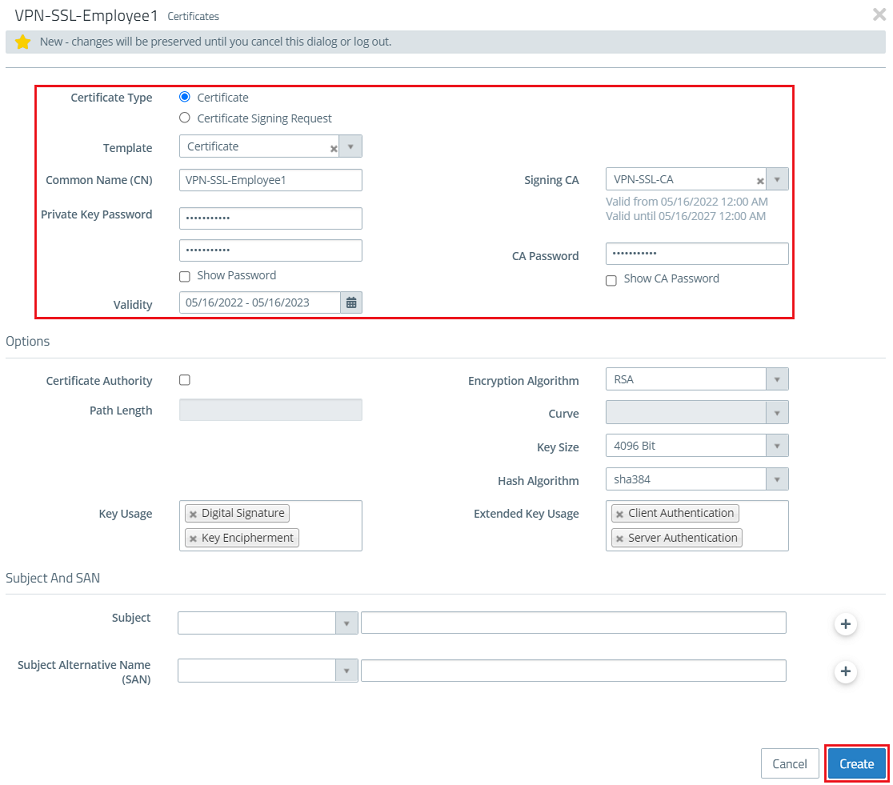
1.6) Modify the following parameters and click Create:
- Certificate type: Leave the setting on Certificate .
- Template: In the drop-down menu select the option Certificate.
- Common Name (CN): Enter a descriptive common name that characterizes the employees (in this example VPN-SSL-Employee1).
- Private key password: Set a password. This is used to encrypt the private key.
- Validity: Specify how long the certificate should remain valid. With VPN certificates for individual users, the period of validity is usually set quite low (in this example 1 year).
- Signing CA: From the drop-down menu, select the CA created in step 1.2.
- CA password: Enter the private key password set in step 1.2.
The field Subject Alternative Name can be used for easier identification of each employee, such as entering their e-mail address.
The rest of the parameters (e.g. the encryption settings) can be left at the default values.
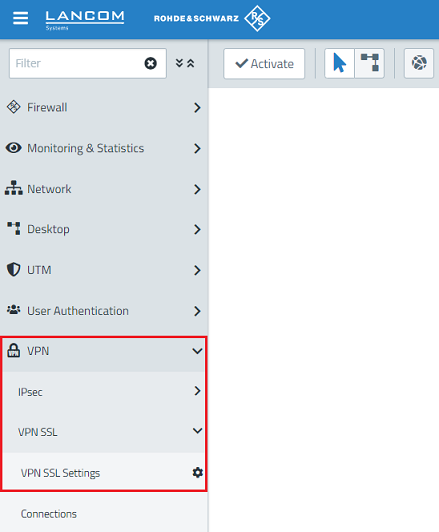
1.7) Switch to the menu VPN → VPN SSL → VPN SSL Settings.
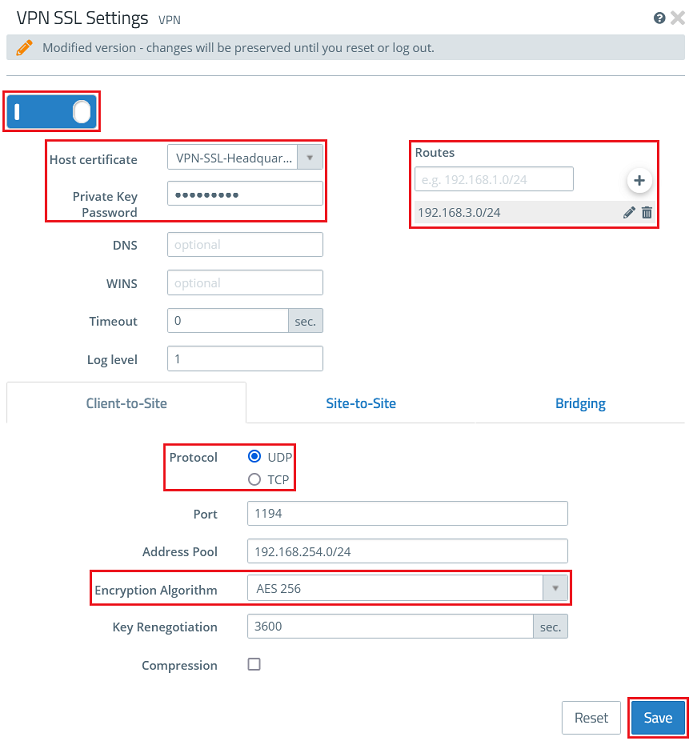
1.8) Enable the VPN SSL service via the slider, modify the following parameters and click Save:
- Host certificate: From the drop-down menu, select the VPN certificate created in step 1.4
- Private Key Password: Enter the private key password of the VPN certificate entered in step 1.4.
- Routes: The networks that the VPN client should communicate with should be entered in CIDR notation (Classless Inter-Domain Routing). These are shared with all of the VPN SSL clients.
- Protocol: Make sure, that the option UDP is selected. If TCP is used for the VPN SSL tunnel and data is transferred via TCP within the tunnel, this could lead to a "TCP meltdown".
- Encryption algorithm: From the drop-down menu, select AES256.
Optionally you can enter a DNS and/or WINS server, which are assigned to all VPN SSL clients.
If necessary, you can change the Port.
The Address Pool is the range of IP addresses that are assigned to the dial-in VPN SSL clients. This address range must not already be in use as an internal network in the Unified Firewall.
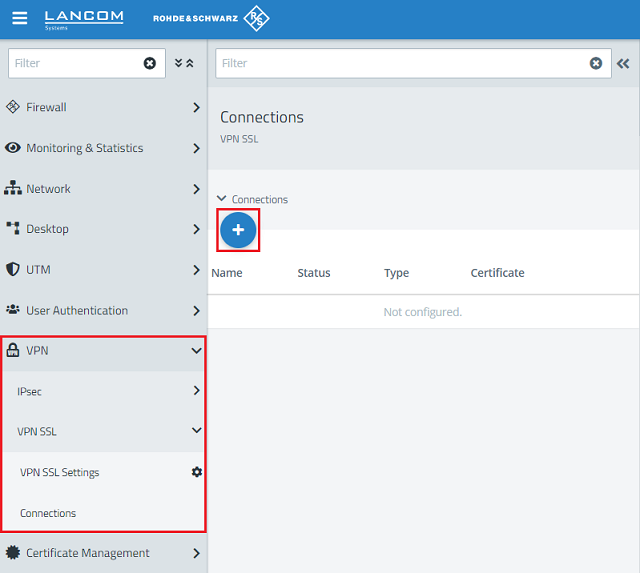
1.9) Change to the menu VPN → VPN SSL → Connections and click on the “+” icon to create a new VPN SSL connection.
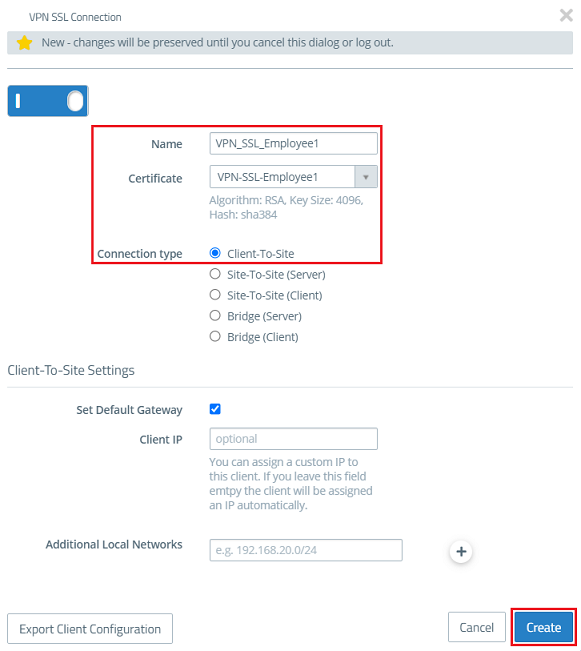
1.10) Modify the following parameters and click Create:
- Name: Enter a descriptive name (in this example VPN_SSL_Employee1).
- Certificate: From the drop-down menu, select the VPN certificate for the employee created in step 1.6.
- Connection type: Choose Client-to-Site.
With the function Set Default Gateway activated, the VPN client can communicate with the Internet via the Internet connection of the Unified Firewall.
The item Client IP allows a fixed IP address to be assigned to the VPN client. If this entry is left empty, the VPN client is given an IP address from the Address Pool (see step 1.8).
Additional Local Networks optionally allows the VPN client to access other local networks. In this way, individual employees can be given access to different local networks.
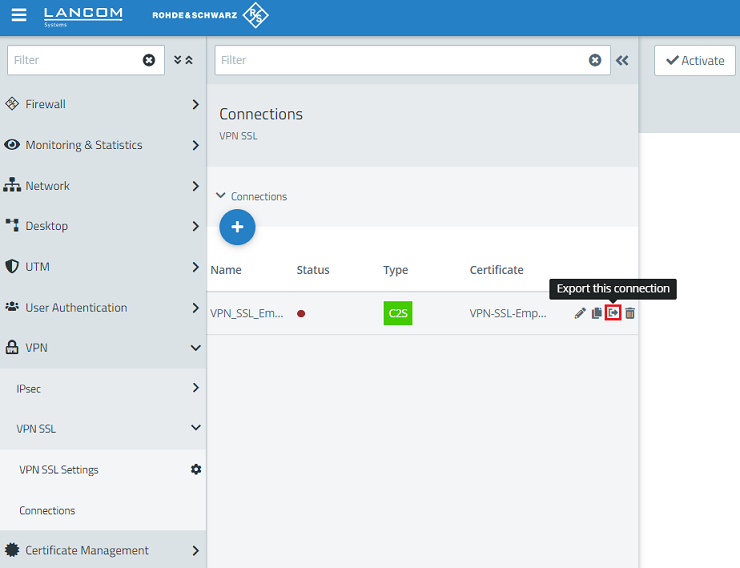
1.11) For the VPN SSL connection click on the Export this connection button to export the connection parameters including the certificate.
It is possible that you have to click on the double arrow symbol first (right next to the field Filter) to expand the menu, so that the symbol for the profile export is visible.
As an alternative you can also click on the "pencil" button to edit the configuration and click on Export Client Configuration afterwards.
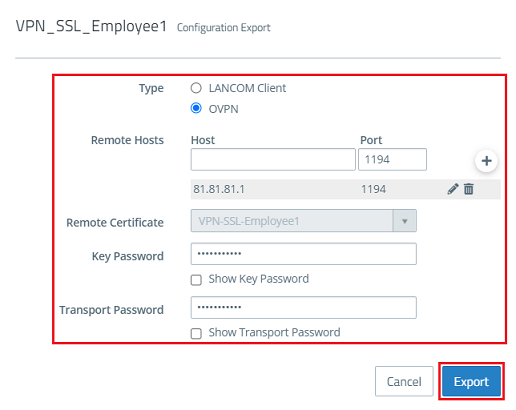
1.12) Modify the following parameters and then click on Export.
- Type: Select OVPN to generate a profile for the OpenVPN client.
- Remote Hosts: Enter the public IPv4 address or the DynDNS name of the Unified Firewall along with the VPN SSL port (see step 1.8).
- Key Password: Enter the private key password set in step 1.6.
- Transport Password: Set a password. This has to be entered when the user starts the VPN connection with the OpenVPN client.
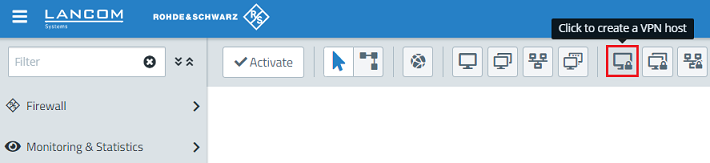
1.13) Click the button to create a new VPN host.
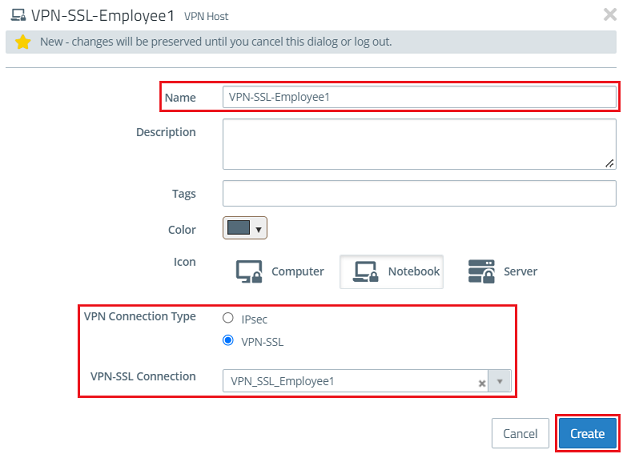
1.14) Modify the following parameters and click Create:
- Name: Enter a descriptive name (in this example VPN-SSL-Employee1).
- VPN connection type: Select VPN-SSL.
- VPN-SSL Connection: From the drop-down menu, select the VPN SSL connection created in step 1.10.
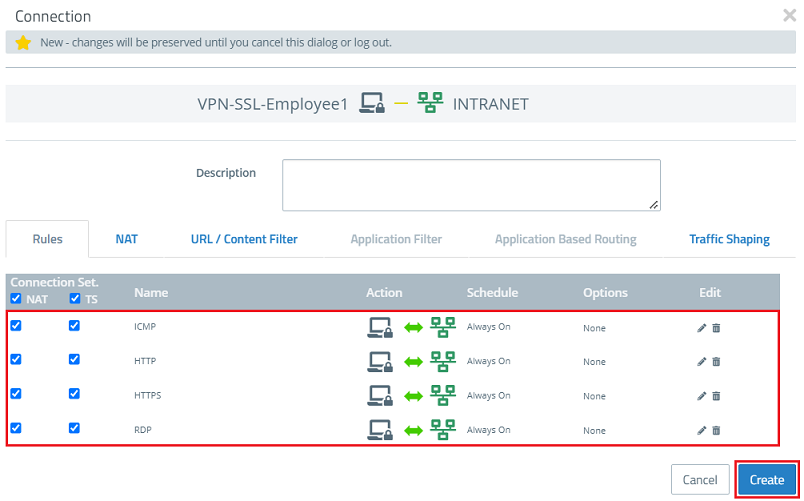
1.15) In the VPN host click on the "connection" icon and, to open the firewall objects, click on the network object that the OpenVPN client should access.
Repeat this step for every network that the OpenVPN client should be able to access.
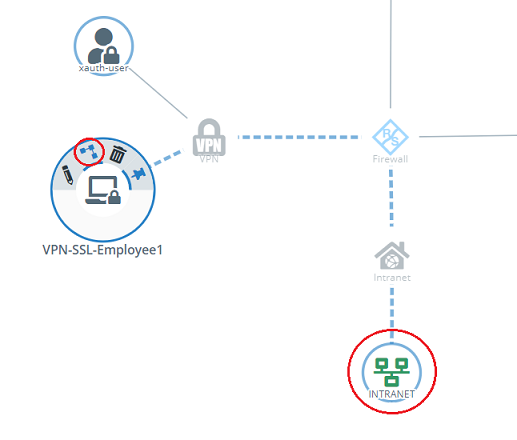
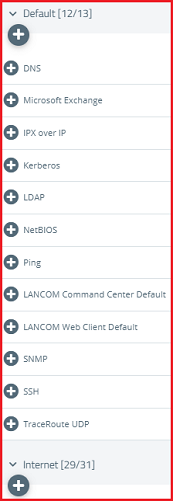
1.16) Use the “+” signs to assign the required protocols to the VPN host.
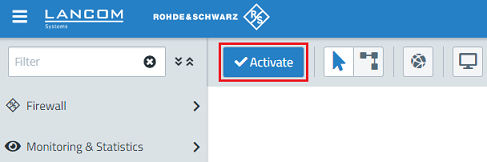
1.17) Finally, implement the configuration changes by clicking Activate in the Unified Firewall.
1.18) This concludes the configuration steps on the Unified Firewall.
2) Configuration steps in the OpenVPN client:
2.1) Right click on the OpenVPN icon in the task bar.
2.2) Click Import file to import the VPN profile.
2.3) A message is displayed to indicate that the profile was successfully imported.
2.4) This concludes the configuration steps in the OpenVPN client.
3) Setting up port and protocol forwarding on a LANCOM router (scenario 2 only):
By default VPN SSL uses the UDP port 1194 . This must be forwarded to the Unified Firewall.
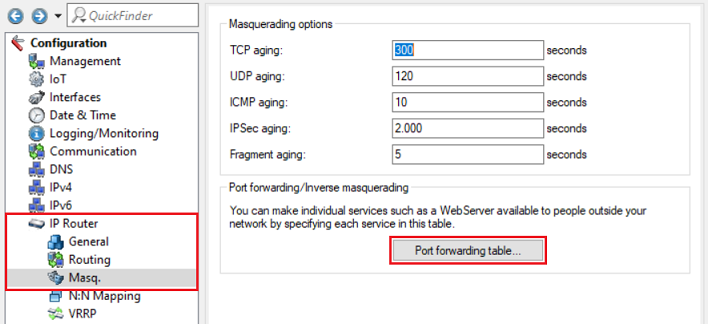
3.1) Open the configuration for the router in LANconfig and switch to the menu item IP-Router → Masq . → Port forwarding table .
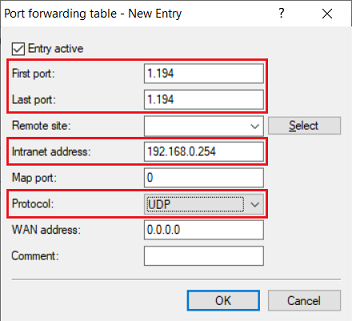
3.2) Save the following parameters:
- First port : Specify the Port 1194.
- Last port : Specify the Port 1194.
- Intranet address : Specify the IP address of the Unified Firewall in the transfer network between the Unified Firewall and the LANCOM router.
- Protocol: From the drop-down menu, select UDP.
3.3) Write the configuration back to the router.